SpringBoot学习6.0-安全框架SpringSecurity
目录
1.maven依赖
2.spring配置
3.安全程序开发
3.0.继承WebSecurityConfigurerAdapter
3.1.用户认证配置
3.2.请求认证配置
3.3.权限访问过滤器
4.前台页面及控制器开发
5.测试-受权限控制的访问
5.测试-匿名访问
1.maven依赖
主要依赖starter-security。
		org.springframework.boot
		spring-boot-starter-web


		org.springframework.boot
		spring-boot-starter-security


		org.springframework.boot
		spring-boot-starter-thymeleaf
2.spring配置
主要是页面的配置。
#定义视图解析器的规则
#文件前缀
spring.mvc.view.prefix=classpath:/templates/
#文件后缀
spring.mvc.view.suffix=.html
3.安全程序开发
开发要点是继承WebSecurityConfigurerAdapter,重写其中configure方法。用户角色和访问权限所需角色交叉对比在权限访问过滤器中完成。
- configure(AuthenticationManagerBuilder auth):配置用户认证
- configure(HttpSecurity http):配置请求认证(访问权限认证)
- configure(WebSecurity web):配置filter链,此文未配置
- 继承AbstractSecurityInterceptor,实现Filter:开发权限访问过滤器
3.1.继承WebSecurityConfigurerAdapter
重写configure(AuthenticationManagerBuilder auth)、configure(HttpSecurity http)。
/** security配置:用户认证、权限认证 */
@Configuration
public class CustomWebSecurityConfigurerAdapter extends WebSecurityConfigurerAdapter {
	@Autowired
	private UserDetailsService userDetailsService;
	@Autowired
	private CustomLogoutSuccessHandler customLogoutSuccessHandler;
	@Autowired
	private CustomAuthenticationSuccessHandler customAuthenticationSuccessHandler;
	// 用户认证配置,使用user-detail机制
	@Override
	protected void configure(AuthenticationManagerBuilder auth) throws Exception {
		// 认证服务注册userDetailsService;spring5的security必须使用密码编码器,否则抛出异常
		auth.userDetailsService(userDetailsService).passwordEncoder(EncryptUtil.getEncoder());
	}

	// 请求认证配置,权限访问策略由FilterSecurityInterceptor处理
	@Override
	protected void configure(HttpSecurity http) throws Exception {
		http.authorizeRequests()
			//.anyRequest().authenticated()//所有请求都要验证(不能匿名访问,如果希望允许匿名访问,则要注释该代码且配合自定义路径拦截处理类来处理)
			.and().formLogin()// 使用默认from登录
			.loginPage("/login") //自定义登录页(请求/login会返回视图,即自定义登录页面)
			.permitAll() //登录页面用户任意访问
			.loginProcessingUrl("/login/form")// 拦截url=/login/form的表单提交,取表单内username和password进行验证
			.failureUrl("/login?error=true")//登录页获取后台错误消息【error=true重要】
			.successHandler(customAuthenticationSuccessHandler)

			.and().logout()
			.logoutUrl("/logout")//登出请求url
			.logoutSuccessHandler(customLogoutSuccessHandler)
			.and().httpBasic();// 启动http基础验证

		 http.csrf().disable();// 禁用csrf,否则无法登录。如果不禁用,则要在form中提交防csrf的参数。
	}
}
注意:
1.自定义登录页:添加代码.loginPage("/login"),请求/login返回视图的视图作为登录页面。无改代码就会使用springboot提供的默认登录页面。
2.登录表单提交:代码.loginProcessingUrl("/login/form"),拦截url=/login/form的表单提交,security会取表单内username和password进行验证,故自定义登录页面内的用户名和密码的输入控件的name必须是username和password。
3.登出请求:代码.logoutUrl("/logout")定义登出的请求,其实security默认的登出请求就是/logout。只要发起这个请求,用户就从security退出登录。
4.登录成功处理类:代码.successHandler()绑定了登录成功处理类,就是在登录成功后进入改类的方法,可以进行一系列处理,比如把用户的相关信息(部门、姓名等)加入到session中。然后可以重定向到登录成功页或欢迎页等等。
5.登出成功处理类:代码.logoutSuccessHandlerr()绑定登出成功处理类,作用同登录成功处理类。
6.csrf:跨站点请求伪造的简称。恶意网站可以通过cookie仿造用户请求,对我们建设的网站进行攻击。为避免这样的伪请求,在表单中加入csrf参数(见后文login/login.html中的以_csrf开头的参数)。在我们正常打开网页时security将该参数传递到页面,从页面发出新请求时都带上该参数,security会再次识别该参数,从而确认是正常访问。因为cdrf参数只是存在页面内而不是浏览器内,故不能被仿造。security的csrf功能默认是打开的,要想正常访问,每个页面都需要添加csrf参数,http.csrf().disable()则是关闭该功能,则可以不添加csrf参数。
密码工具类:
/** 密码工具类 */
public class EncryptUtil {
	private static String SITE_WIDE_SECRET = "uvwxyz";
	private static PasswordEncoder encoder;
	public static String encrypt(String rawPassword) {
		if (null == encoder) {
			setEncoder();
		}
		return encoder.encode(rawPassword);
	}
	public static void setEncoder() {
		encoder = new Pbkdf2PasswordEncoder(SITE_WIDE_SECRET);
	}
	public static PasswordEncoder getEncoder() {
		if (null == encoder) {
			setEncoder();
		}
		return encoder;
	}
}
注意:
阴钥对密码加密:上述代码中的SITE_WIDE_SECRET 就是阴钥,可以自定义,可以写在配置文件或数据库中,这样密码不容易破解。没有阴钥加密的简单密码是可能被破解的。
3.2.用户认证配置
- 重写configure(AuthenticationManagerBuilder auth),见3.0.的代码。
- 用户认证使用user-detail机制。实现UserDetailsService接口,实现获取用户信息的方法loadUserByUsername。在configure(AuthenticationManagerBuilder auth)方法中配置UserDetailsService。
- loadUserByUsername的参数即输入的用户名。通过该用户名去数据库查询(此处省略该步骤)密码和角色信息,组装UserDetails对象,security获取该对象,框架进行校验。
/** 用户详情实现类 */
@Service
public class CustomUserDetailsService implements UserDetailsService {
	@Autowired
	private  HttpServletRequest request;
	/**
	 * 构建用户详情(用户名、密码、角色)
	 * @param username 登录用户名
	 */
	public UserDetails loadUserByUsername(String username) throws UsernameNotFoundException {
		String password = request.getParameter("password");
		if (StringUtils.isEmpty(password)) {
			throw new BadCredentialsException("密码不能为空!");
		}
		if (!"1".equals(password)) {
			throw new BadCredentialsException("密码不正确,请重新输入");
		}
		if (!"z".equals(username)) {
			throw new BadCredentialsException("账号不存在,请重新输入!");
		}
		// 角色集合
		List authList = new ArrayList<>();
		List roles = getRolesByUsername(username);
		GrantedAuthority grantedAuthority;
		for (String role : roles) {
			grantedAuthority = new SimpleGrantedAuthority(role);
			authList.add(grantedAuthority);
		}
		// 数据库密码:根据用户名查询,此处省略该步骤
		String dbPassword = "1";
		// 明文密码需要加密
		UserDetails userDetails = new User(username, EncryptUtil.encrypt(dbPassword), authList);
		return userDetails;
	}
	//springsecurity角色前缀
	private static String ROLE_PREFIX = "ROLE_";

	// 获取用户角色集合
	private List getRolesByUsername(String username){
		List roles = new ArrayList();
		roles.add(ROLE_PREFIX+"TEST");
//		roles.add(ROLE_PREFIX+"USER");
		roles.add(ROLE_PREFIX+"ADMIN");
		return roles;
	}
}
3.3.请求认证配置
- 重写configure(HttpSecurity http),见3.0.的代码。
- configure中配置登录成功处理类和登出成功处理类。
- 实际的请求判断在3.4.中由权限过滤器完成。
登录成功处理类:
/** 登录成功处理类 */
@Component
public class CustomAuthenticationSuccessHandler implements AuthenticationSuccessHandler {
	@Override
	public void onAuthenticationSuccess(HttpServletRequest request, HttpServletResponse response,
			Authentication authentication) throws IOException, ServletException {
		System.out.println("用户[" + authentication.getName() + "]已登录!");
		// 重定向到登录成功页
		response.sendRedirect("/login/welcome");
	}
}
登出成功处理类:
/** 登出成功处理类 */
@Component
public class CustomLogoutSuccessHandler implements LogoutSuccessHandler {
	@Override
	public void onLogoutSuccess(HttpServletRequest request, HttpServletResponse response, Authentication authentication)
			throws IOException, ServletException {
		System.out.println("用户[" + authentication.getName() + "]已登出!");
		// 重定向到登录页
		response.sendRedirect("/login");
	}
}
3.4.权限访问过滤器
过滤请求,将用户拥有的角色和请求路径所需要的角色进行交叉对比,如果有匹配则放行。需要开发三个类:
- 权限访问过滤器(利用下面两个处理类)
- 路径拦截处理类(作用:拦截url,从数据库查询当前请求url所需角色集合)
- 权限决策处理类(作用:交叉对比用户角色集合和请求允许访问的角色集合,判断是否放行)
3.4.1.权限访问过滤器
该类不需要配置到WebSecurityConfigurerAdapter中,只要继承AbstractSecurityInterceptor且实现Filter接口,就会进行校验。
/** 自定义过滤器(即权限访问策略) */
@Component
public class CustomFilterSecurityInterceptor extends AbstractSecurityInterceptor implements Filter {
	// 路径拦截处理类
	@Autowired
	private FilterInvocationSecurityMetadataSource securityMetadataSource;
	// 权限决策处理类
	@Autowired
	public void setMyAccessDecisionManager(AccessDecisionManager accessDecisionManager) {
		super.setAccessDecisionManager(accessDecisionManager);
	}
	@Override
	public void init(FilterConfig filterConfig) throws ServletException {}
	@Override
	public void destroy() {}
	@Override
	public Class getSecureObjectClass() {
		return FilterInvocation.class;
	}
	@Override
	public SecurityMetadataSource obtainSecurityMetadataSource() {
		return this.securityMetadataSource;
	}
	@Override
	public void doFilter(ServletRequest request, ServletResponse response, FilterChain chain)
			throws IOException, ServletException {
		FilterInvocation fi = new FilterInvocation(request, response, chain);
		// fi里面有一个被拦截的url,里面调用InvocationSecurityMetadataSource的getAttributes(Object
		// object)这个方法获取fi对应的所有权限
		// 再调用AccessDecisionManager的decide方法来校验用户的权限是否足够
		InterceptorStatusToken token = super.beforeInvocation(fi);
		try {
			// 执行下一个拦截器
			fi.getChain().doFilter(fi.getRequest(), fi.getResponse());
		} finally {
			super.afterInvocation(token, null);
		}
	}
}
3.4.2.路径拦截处理类
@Component
public class CustomFilterInvocationSecurityMetadataSource implements FilterInvocationSecurityMetadataSource {
	/** 获取当前请求url所需角色集合 */
	@Override
	public Collection getAttributes(Object object) throws IllegalArgumentException {
		// 当前请求对象
		FilterInvocation fi = (FilterInvocation) object;
		System.out.println("当前请求路径=" + fi.getRequestUrl());
		// 获取当前路径所需要的角色(从数据查询,此处省略)
		List roles = new ArrayList();
		SecurityConfig role = new SecurityConfig("ROLE_TEST");
		roles.add(role);
		if (fi.getRequestUrl().contains("anonymous") || fi.getRequestUrl().contains("/login")) {
			role = new SecurityConfig("ROLE_ANONYMOUS");// 匿名角色可访问(security匿名访问时的角色默认为ROLE_ANONYMOUS)
			roles.add(role);
		}
		return roles;
	}
	@Override
	public Collection getAllConfigAttributes() {
		return null;
	}
	@Override
	public boolean supports(Class aClass) {
		return FilterInvocation.class.isAssignableFrom(aClass);
	}
}
可匿名访问控制:
上述代码getAttributes方法控制请求包含"anonymous"和"/login"允许角色"ROLE_ANONYMOUS"访问(security匿名访问时的角色默认为ROLE_ANONYMOUS)。
但是3.0.代码中configure(HttpSecurity http)的代码.anyRequest().authenticated()设置所有请求都要验证,故需要注释,否则任何请求都要认证。这样就可以实现让部分请求允许匿名访问,不需要登录!
3.4.3.权限决策处理类
@Component
public class CustomAccessDecisionManager implements AccessDecisionManager {
	/**
	 * 判断当前用户角色是否可以访问请求路径
	 */
	@Override
	public void decide(Authentication authentication, Object object, Collection configAttributes)
			throws AccessDeniedException, InsufficientAuthenticationException {
		if (authentication == null) {
			throw new AccessDeniedException("permission denied");
		}
		// 当前用户拥有的角色集合
		List roleCodes = authentication.getAuthorities().stream().map(GrantedAuthority::getAuthority)
				.collect(Collectors.toList());
		// 访问路径所需要的角色集合(数据已经由FilterInvocationSecurityMetadataSource获得)
		List configRoleCodes = configAttributes.stream().map(ConfigAttribute::getAttribute)
				.collect(Collectors.toList());
		// 交叉比较,判断是否可以访问
		for (String roleCode : roleCodes) {
			if (configRoleCodes.contains(roleCode)) {
				return;
			}
		}
		throw new AccessDeniedException("permission denied");
	}
	@Override
	public boolean supports(ConfigAttribute attribute) {
		return true;
	}
	@Override
	public boolean supports(Class clazz) {
		return true;
	}
}
4.前台页面及控制器开发
登录登出控制器:
@Controller
public class LoginController {
	/** 登录页 */
	@RequestMapping("/login")
	public String page() {
		return "login/login";
	}
	/** 登录成功页 */
	@RequestMapping("/login/welcome")
	public String welcome() {
		return "login/welcome";
	}
}
登录页login/login.html:
登录
请登录
登录成功欢迎页login/welcome.html:
欢迎页


	登录成功,欢迎您,
	退出登录
5.测试-受权限控制的访问
控制器:
@Controller
@RequestMapping("/securityhello")
public class SecurityHelloContrioller {
	// http://localhost:8080/securityhello/sh1
	@RequestMapping("/sh1")
	public String sh1() {
		return "securityhello/sh1";
	}
}
securityhello/sh1.html
Insert title here
hello security
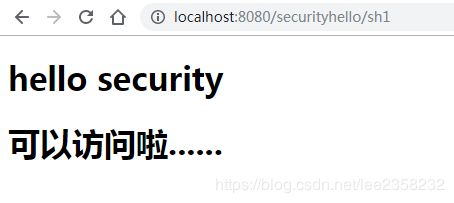
可以访问啦......
访问:http://localhost:8080/securityhello/sh1
进入了登录页面。代码中是允许用户名z和密码1可以通过,现在来个错误密码试试:
正确输入,成功进入欢迎页:
退出会进入登录页:
在登录成功后,访问http://localhost:8080/securityhello/sh1:
5.测试-匿名访问
注释掉3.0.代码中configure(HttpSecurity http)的代码.anyRequest().authenticated(),包含"anonymous"的请求允许匿名访问。
控制器:
/** 可匿名访问的请求 */
@Controller
@RequestMapping("/securityanonymous")
public class SecurityAnonymousController {
	@RequestMapping("/sa1")
	public String sa1() {
		return "securityanonymous/sa1";
	}
}
securityanonymous/sa1.html:
Insert title here


	可以匿名访问
访问http://localhost:8080/securityanonymous/sa1:
不需要登录,可直接访问。
【END】
参考文章:Spring Security基于数据库配置权限(角色,路径)
github:https://github.com/zhangyangfei/SpringBootLearn.git中的springSecurity工程。


