Android 自定义View步骤
自定义View的相关文章:
- Android 实现一个简单的自定义View
- Android 自定义View步骤
- Android Paint详解
- Android 自定义View之Canvas相关方法说明
- Android 自定义View实例之 “京东跑”
- Android 自定义View实例之进度圆环
- Android 源码分析(TextView)
- Android 自定义View分发流程
- Android 自定义View 需要注意的事项
自定义View步骤
1. 创建View并继承View
public class MyView extends View {

    public MyView(Context context) {
        super(context);
    }

    public MyView(Context context, @Nullable AttributeSet attrs) {
        this(context,attrs,0);
    }

    public MyView(Context context, @Nullable AttributeSet attrs, int defStyleAttr) {
        this(context,attrs,defStyleAttr,0);
    }

    public MyView(Context context, @Nullable AttributeSet attrs, int defStyleAttr, int defStyleRes) {
        super(context, attrs, defStyleAttr, defStyleRes);

    }
}
创建MyView类并继承View,注意构造函数写法,现在里面没有任何实现。
2. 设置View属性
我们的View肯定是需要属性的,就像TextView 的text属性一样,在layout文件中直接设置,而要想设置属性需要在res/values下新建attrs.xml文件(已存在不必创建)
<resources>
    <declare-styleable name="MyView">
        <attr name="radius" format="dimension">attr>
        <attr name="android:color"/>
    declare-styleable>
resources>
创建一个declare-styleable节点,name是可以随便命名的,不过我们最好命名为View的名字,这个可读性更高,而且也好维护,attr节点就是一个属性,name代表属性名称,如radius代表半径,format代表当前属性的类型,
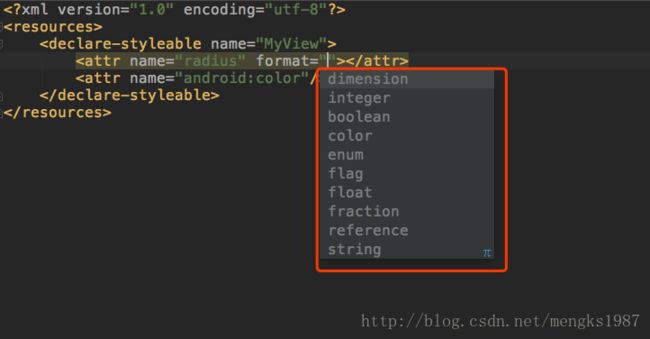
dimension:尺寸值
integer:整形,和dimension的区别是integer不带单位(dp)
boolean:布尔值
color:颜色值
enum:枚举
flag:位或运算,gravity属性就是如此,使用时可以设置多个属性:
使用:
定义:
…
float:浮点型
fraction:百分数
reference:引用
string:字符串
类型介绍完了,我们看
这个其实是我们定义一个系统存在的属性color,我们也可以这样写:
建议使用第一种。
3. 获取View属性值
public MyView(Context context, @Nullable AttributeSet attrs, int defStyleAttr, int defStyleRes) {
        super(context, attrs, defStyleAttr, defStyleRes);
        //获取设置的属性值
        TypedArray typedArray = context.obtainStyledAttributes(attrs, R.styleable.MyView);
        radius = typedArray.getDimension(R.styleable.MyView_radius, 0);
        color = typedArray.getColor(R.styleable.MyView_android_color, Color.RED);
        typedArray.recycle();
    }
注意最后要调用:typedArray.recycle()
4. 初始化Paint(Paint用于绘制)
Paint可以理解为画笔,就像我们画东西一样,不管我们画什么都需要一支笔,Paint就是这只笔。
我们的例子中只设置了颜色,后面我们会详细介绍Paint的使用。
5. 重写onMesure方法,不是必须的,此View未写,后面会详细介绍
6. 重写onDraw方法
@Override
    protected void onDraw(Canvas canvas) {
        super.onDraw(canvas);
        //计算半径,如果属性中设置了半径则使用设置的值,否则是宽和高一半的较小值
        float mRadius = radius == 0 ? Math.min(getWidth() / 2, getHeight() / 2) : radius;
        //绘制圆
        canvas.drawCircle(getWidth() / 2, getHeight() / 2, mRadius, mPaint);
    }
onDraw 方法是我们绘制的重点,后面我们会详解介绍关于canvas、path等和绘制相关的方法。
好了,自定义View的基本步骤就是这样,后面我们会详细介绍涉及到各个类。