Eigen入门 使用eigen库实现图像旋转变换
Eigen是一个基础的矩阵运算库,支持的矩阵运算操作十分便捷。相比opencv简洁许多,值得一试。
https://blog.csdn.net/u012541187/article/details/53420432 这篇博客介绍了eigen的基本函数用法。
/*
旋转变换的实现并不难,难的地方在于如何减少循环,加快计算速度
opencv的仿射变换是一个现成的实现。
这份代码的速度与opencv大致相当,而且还有许多值得优化的点
*/

#include "stdafx.h"
#include
#include
#include

using namespace Eigen;
using namespace std;


#define MAT Matrix
#define VEC Matrix
#define MAT2d Matrix
#define MATONES(m,n) MAT::Ones(m,n)
#define MATZEROS(m,n) MAT::Zero(m,n)
#define VECONES(n) VEC::Ones(n)
#define VECZEROS(n) VEC::Zero(n)
#define PI 3.141592653589793238462643;   // pi 的精度会影响结果的精度
const double border = 1e-2;     // 由于数值误差,输出图上有些点经过反向变换可能刚刚好在边界上,但是算出来的坐标却在边界外
								// 旋转到边界上的点会被旋转到边界外,使用这个值来允许有一定的误差

#define printMat(M) cout << #M <<"= "<(section_index_l.data(), ROWS, COLS));
	printMat(Eigen::Map(section_index_r.data(), ROWS, COLS));
	printMat(Eigen::Map(section_index_t.data(), ROWS, COLS));
	printMat(Eigen::Map(yi.data(), ROWS, COLS));
	printMat(Eigen::Map(section_index_b.data(), ROWS, COLS));
	VEC A(SZ), B(SZ), C(SZ), D(SZ);     //A B C D 表示四个格点(上左 上右 左下 右下)的值
	for (int i = 0; i < SZ; i++) {       //唯一的一个for循环,因为eigen3.3 还不支持向量索引,据说3.4会支持了。
		xi_in_section(i) = xi(i) - section_index_l(i);
		yi_in_section(i) = yi(i) - section_index_t(i);
		if (xi(i) < 0-border || xi(i) > (COLS - 1)+ border || yi(i) < 0- border || yi(i) > (ROWS - 1)+ border) { //越界点 将其四角设置为0
			A(i) = 0;
			B(i) = 0;
			C(i) = 0;
			D(i) = 0;
		}
		else {  // 非越界的点 正常给其四角赋值  //空间换时间的做法
			if (xi(i) < 0)section_index_l(i) = 0;
			if (xi(i) > COLS-1)section_index_r(i) = COLS-1;
			if (yi(i) < 0)section_index_t(i) = 0;
			if (yi(i) > ROWS -1)section_index_b(i) = ROWS -1;
			A(i) = Z(section_index_t(i), section_index_l(i));
			B(i) = Z(section_index_t(i), section_index_r(i));
			C(i) = Z(section_index_b(i), section_index_l(i));
			D(i) = Z(section_index_b(i), section_index_r(i));
		}
	}
	VEC c_d = C.cwiseProduct(VECONES(SZ) - xi_in_section) + D.cwiseProduct(xi_in_section);   // 这三行就是双线性插值了
	VEC a_b = A.cwiseProduct(VECONES(SZ) - xi_in_section) + B.cwiseProduct(xi_in_section);
	zi = a_b.cwiseProduct(VECONES(SZ) - yi_in_section) + c_d.cwiseProduct(yi_in_section);
}

MAT2d getRotationMatrix2d(double angle) {   //逆时针旋转矩阵
	MAT2d rotation_matrix;
	angle = (angle /180.0)*PI; // angle in degree -> angle in radian
	rotation_matrix << cos(angle), -sin(angle), sin(angle), cos(angle);
	return rotation_matrix;
}

MAT2d getRotationMatrix2d_inv(double angle) {  //顺时针旋转矩阵
	MAT2d rotation_matrix;
	angle = (angle / 180.0)*PI; // angle in degree -> angle in radian
	rotation_matrix << cos(angle), sin(angle), -sin(angle), cos(angle);
	return rotation_matrix;
}

void imrotate(MAT &image, MAT &dst_image, Vector2d center,double angle) {
	int ROWS = image.rows();
	int COLS = image.cols();
	int SZ = image.size();
	MAT X, Y;
	VEC x_in_row, y_in_row, image_in_row;
	VEC x_r = VEC::LinSpaced(COLS, 0, COLS-1) - VECONES(COLS)*center(0);   //使用角标当点的坐标
	VEC y_r = VEC::LinSpaced(ROWS, 0, ROWS-1) - VECONES(ROWS)*center(1);
	meshgrid(X, Y, x_r, y_r); // 得到矩阵坐标
	printMat(X);
	printMat(Y);
	printMat(x_r);
	printMat(y_r);
	x_in_row = Eigen::Map(X.data(), X.size()); // 坐标矩阵压缩成行向量
	y_in_row = Eigen::Map(Y.data(), Y.size());
	MAT coords_in_row(2, SZ), coords_in_row_mapped_to_src(2, SZ);
	coords_in_row.row(0) = x_in_row;   // x y 两个行向量拼接起来便于使用矩阵乘法
	coords_in_row.row(1) = y_in_row;
	coords_in_row_mapped_to_src = getRotationMatrix2d_inv(angle)*coords_in_row;   //逆变换 将输出空间中点的坐标反向旋转到输入空间
	VEC dst_image_in_row(SZ),x_mapped_to_src(SZ), y_mapped_to_src(SZ);
	x_mapped_to_src = coords_in_row_mapped_to_src.row(0);   // 从中将两行取出来
	y_mapped_to_src = coords_in_row_mapped_to_src.row(1);
	printMat(Eigen::Map(x_mapped_to_src.data(), ROWS, COLS));
	printMat(Eigen::Map(y_mapped_to_src.data(), ROWS, COLS));
	interp2d(X, Y, image, x_mapped_to_src, y_mapped_to_src, dst_image_in_row);  // 将输出点在输入空间中的坐标传入插值函数,计算每个点的值
	dst_image = Eigen::Map(dst_image_in_row.data(), ROWS, COLS);   //将输出向量转型成矩阵
}


// 下面都是测试函数
void test_meshgrid() {
	MAT X, Y;
	VEC X_r, Y_r;
	int C = 12;
	X_r.setLinSpaced(12, 1, 3);
	Y_r.setLinSpaced(12, 1, 3);
	meshgrid(X, Y, X_r, Y_r);
	printMat(X);
	printMat(Y);
}

void test_interp() {
	MAT X(3,3), Y(3,3),Z(3,3);
	X << 1, 3,5, 1, 3,5,1,3,5;
	Y << 1, 1,1, 3, 3,3,5,5,5;
	Z << 0, 0, 0, 0, 1,0,0,0,2;
	printMat(X);
	printMat(Y);
	printMat(Z);
	MAT xi, yi, zi;
	VEC xi_row, yi_row, zi_row;
	VEC x_r = VEC::LinSpaced(12, 1, 5);
	VEC y_r = VEC::LinSpaced(12, 1, 5);
	meshgrid(xi, yi, x_r, y_r);
	xi_row = Eigen::Map(xi.data(),xi.size());
	yi_row = Eigen::Map(yi.data(), yi.size());
	printMat(xi);
	printMat(yi);
	interp2d(X, Y, Z, xi_row, yi_row, zi_row);
	zi = Eigen::Map(zi_row.data(), xi.rows(), xi.cols());
	printMat(zi);
}


void test_basic() {
	MAT x = MATONES(2, 2);
	printMat(x);
	x = MATZEROS(3, 4);
	printMat(x);
}

void test_rot() {
	MAT r = getRotationMatrix2d(30);
	printMat(r);
	Vector2d x(1, 0);
	printMat(x);
	printMat(r*x);
	printMat(r*r*x);
	printMat(r*r*r*x);
}

void test_imrotate() {
	int C = 128;
	MAT r = MATZEROS(C,C);
	for (int i = 20; i < 70; i++) {
		for (int j = 20; j < 70; j++) {
			r(i, j) = 1;
		}
	}
	printMat(r);
	MAT x;
	for (int i = 0; i < 360; i+=10) {
		cout << "angle " << i << endl;
		imrotate(r, x, Vector2d(float(C - 1) / 2.0, float(C - 1) / 2.0), i);
		printMat(r);
		printMat(x);
		dumpEigenMat(x, "F:\\matlabCodes\\testInterp\\imrotate_dump"+to_string(int(i)));
	}


}


void test() {
	//test_meshgrid();
	//test_interp();
	//test_rot();
	test_imrotate();
}
与matlab的imrotate做比较
close all
clear all
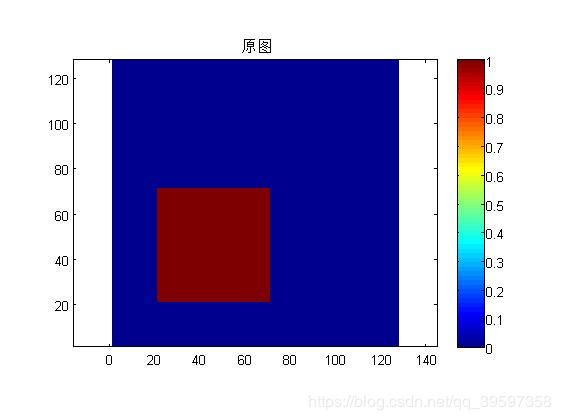
file = 'F:\matlabCodes\testInterp\imrotate_dump0';
fid = fopen(file,'rb');
data = fread(fid,128*128,'double');
fclose(fid);
data = transpose(reshape(data,128,128));
figure(1)
h = pcolor(data);
axis equal
set(h, 'LineStyle','none');
title('原图')
colorbar

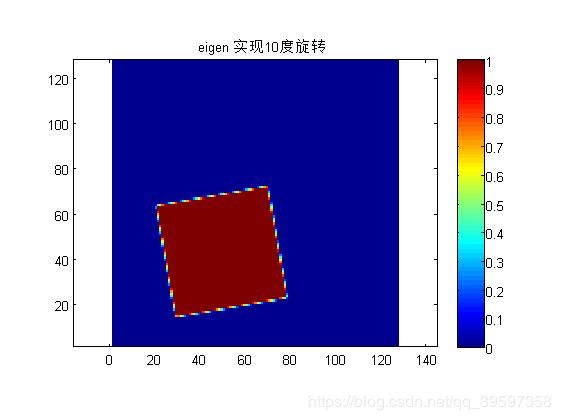
file = 'F:\matlabCodes\testInterp\imrotate_dump10';
fid = fopen(file,'rb');
data = fread(fid,128*128,'double');
fclose(fid);
data = transpose(reshape(data,128,128));
figure(2)
h = pcolor(data);
axis equal
set(h, 'LineStyle','none');
title('eigen 实现10度旋转')
colorbar

d = zeros(128,128);
d(21:70,21:70) = 1;
[x,y] = meshgrid(1:128,1:128);
d_t = imrotate(d,-10,'bilinear','crop');
figure(3)
h = pcolor(d_t);
axis equal
set(h, 'LineStyle','none');
title('matlab 实现10度旋转')
colorbar


figure(4)
for i=0:10:30%350
    file = ['F:\matlabCodes\testInterp\imrotate_dump' num2str(i)];
    fid = fopen(file,'rb');
    data = fread(fid,128*128,'double');
    fclose(fid);
    data = transpose(reshape(data,128,128));

    d_t = imrotate(d,-i,'bilinear','crop');
    h = surf(x,y,data-d_t);
    set(h, 'LineStyle','none');
    title('残差 eigen-matlab')
    colorbar
    drawnow;
end

figure(5)
for i=0:10:30%350
    file = ['F:\matlabCodes\testInterp\imrotate_dump' num2str(i)];
    fid = fopen(file,'rb');
    data = fread(fid,128*128,'double');
    fclose(fid);
    data = transpose(reshape(data,128,128));

    d_t = imrotate(d,-i,'bilinear','crop');
    h = pcolor(x,y,data-d_t);
    set(h, 'LineStyle','none');
    title('残差 eigen-matlab')
    colorbar
    drawnow;
end
结果:
误差在1e-14量级,这已经快到双精度浮点数的极限了。


