Spring Boot(二):快速搭建web项目或微服务
上一篇博客对spring boot的来世今生进行了介绍,这篇就带领大家快速的创建一个spring boot的web项目或者微服务。
一、.新建项目
1.方法一
(1)自己创建java工程
(2)新建spring boot的application
(3)新建pom并引入starter
二、方法二
1.通过官网自动生成微服务项目
这种方法简便,省去了我们创建文件所需的时间。会生成一个压缩包
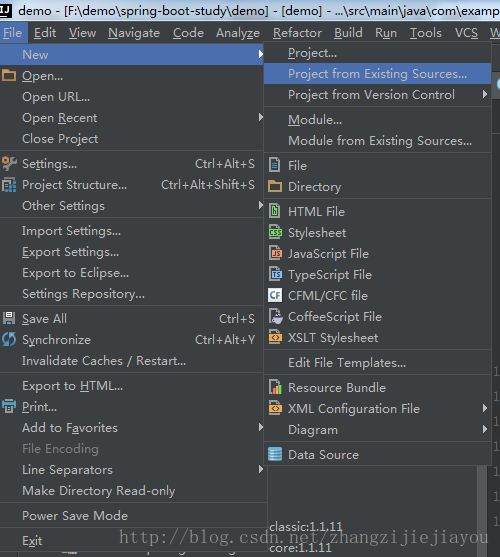
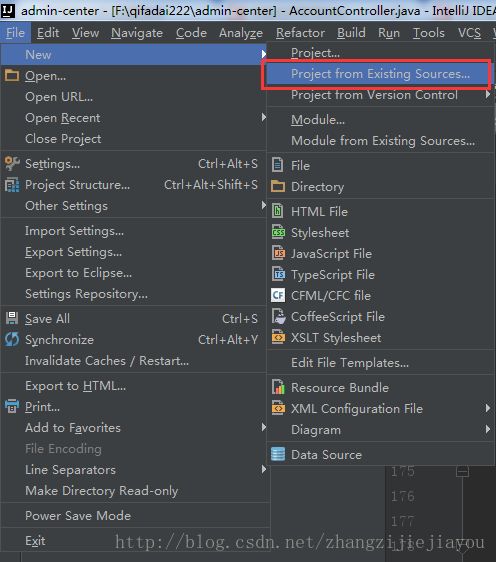
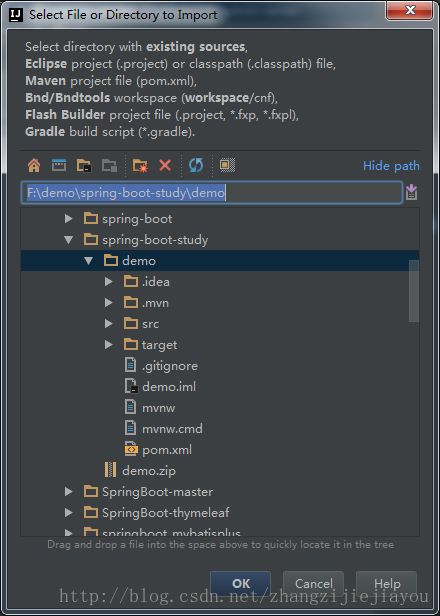
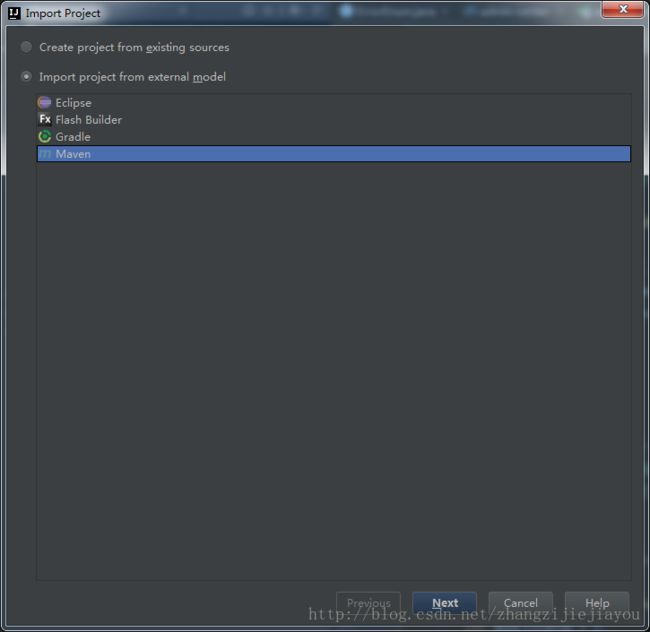
2.由于刚生成的项目没有更新jar包等初始化的文件。不能采用import的形式导入,下面是导入方法
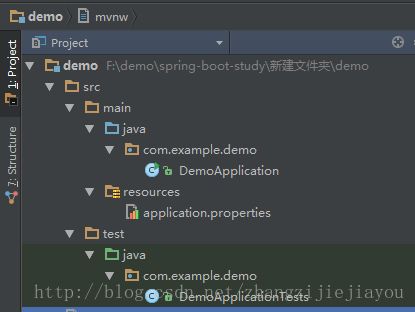
3.官网生成的项目目录如下
(1)一个application文件(项目启动的入口)
(2)一个property文件,用来进行配置(自己可以换成yml文件,使用起来更方便一些)
(3)单元测试
4.pom文件,注释进行了说明
    <parent>
        <groupId>org.springframework.bootgroupId>
        <artifactId>spring-boot-starter-parentartifactId>
        <version>1.5.8.RELEASEversion>
        <relativePath/>
    parent>


    <properties>
        <project.build.sourceEncoding>UTF-8project.build.sourceEncoding>
        <project.reporting.outputEncoding>UTF-8project.reporting.outputEncoding>
        <java.version>1.8java.version>
    properties>

    <dependencies>

        <dependency>
            <groupId>org.springframework.bootgroupId>
            <artifactId>spring-boot-starterartifactId>
        dependency>


        <dependency>
            <groupId>org.springframework.bootgroupId>
            <artifactId>spring-boot-starter-testartifactId>
            <scope>testscope>
        dependency>
    dependencies>


    <build>
        <plugins>
            <plugin>
                <groupId>org.springframework.bootgroupId>
                <artifactId>spring-boot-maven-pluginartifactId>
            plugin>
        plugins>
    build>
注意:
1)Spring Boot依赖的groupId为 org.springframework.boot 。 通常你的Maven POM文件需要继承 spring-boot-starter-parent ,
然后声明一个或多个“Starter POMs”依赖。 Spring Boot也提供了一个用于创建可执行jars的Maven插件。
2)spring-boot-starter-web 添加了Tomcat和Spring MVC
5.创建一个可访问的API
(1)新建一个controller
package com.example.demo.controller;

import org.springframework.web.bind.annotation.RequestMapping;
import org.springframework.web.bind.annotation.RequestMethod;
import org.springframework.web.bind.annotation.RestController;


@RestController
public class UserController {

    @RequestMapping(value="/login",method= RequestMethod.GET)
    public String assetsSummary(){
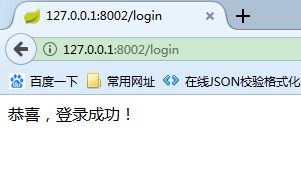
       return "恭喜,登录成功!";
    }
}
@RestController注解相当于@ResponseBody + @Controller合在一起的作用。
1)如果只是使用@RestController注解Controller,则Controller中的方法无法返回jsp页面,配置的视图解析器InternalResourceViewResolver不起作用,返回的内容就是Return 里的内容。
例如:本来应该到success.jsp页面的,则其显示success.返回json格式的数据
2)如果需要返回到指定页面,则需要用 @Controller配合视图解析器InternalResourceViewResolver才行。
3)如果需要返回JSON,XML或自定义mediaType内容到页面,则需要在对应的方法上加上@ResponseBody注解。
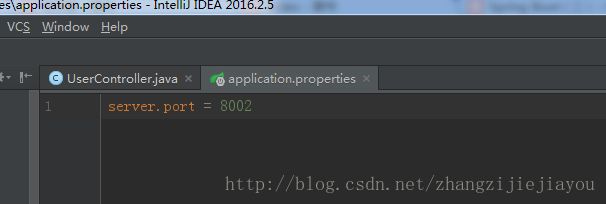
(2)配置端口
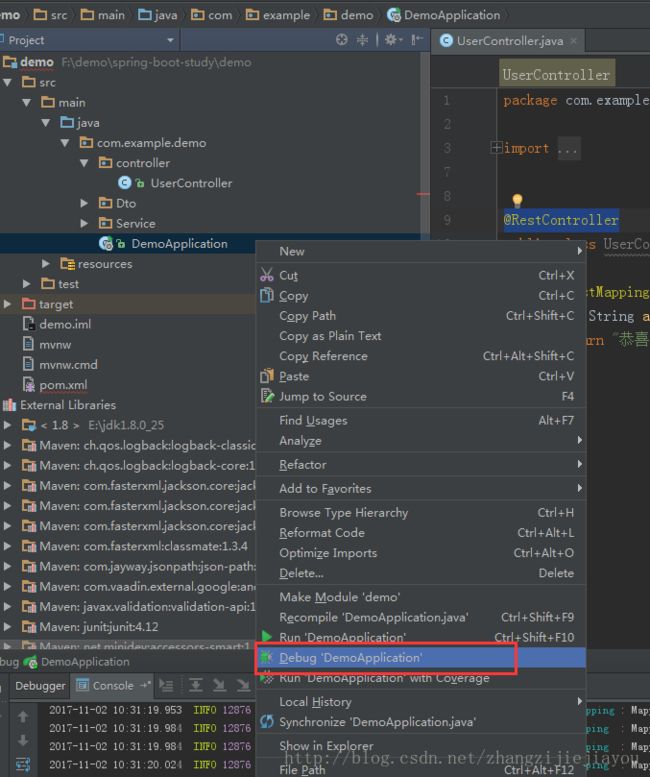
(3)启动项目
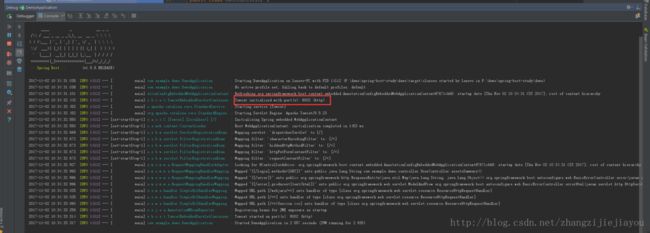
启动成功
默认使用tomcat启动
(4)访问接口
至此,一个简单spring boot项目搭建成功。
