JetPack之Navigation基本用法
01_JetPack之Navigation基本用法
一.Navigation组件基本组成
导航组件由以下三个关键部分组成:
- 导航图: 包含所有与Navigation相关信息的 XML 资源文件
- NavHost: 显示导航图中目标的空白容器。导航组件包含一个默认 NavHost 实现 (NavHostFragment),可显示 Fragment 目标
- NavController: 在 NavHost 中管理应用导航的对象。当用户在整个应用中移动时,NavController 会安排 NavHost 中目标内容的交换
二.Navigation依赖添加
    dependencies {
      // Java language implementation
      implementation "androidx.navigation:navigation-fragment:2.3.0"
      implementation "androidx.navigation:navigation-ui:2.3.0"
    }
三.创建导航图
可通过一下步骤创建导航图:
-
右键点击 res 目录,然后依次选择 New > Android Resource File。此时系统会显示 New Resource File 对话框
-
在 File name 字段中输入名称,例如“nav_graph”
-
从 Resource type 下拉列表中选择 Navigation,然后点击 OK
<navigation xmlns:android="http://schemas.android.com/apk/res/android" xmlns:app="http://schemas.android.com/apk/res-auto" android:id="@+id/nav_graph"> navigation> -
元素是导航图的根元素。当您向图表添加目的地和连接操作时,可以看到相应的 和 元素在此处显示为子元素
四.Navigation Editor
添加导航图后,Android Studio 会在 Navigation Editor 中打开该图表。在 Navigation Editor 中,您可以直观地修改导航图,或直接修改nav_graph.xml
- Destinations panel: 列出了NavHost和目前位于 Graph Editor 中的所有Destination
- Graph Editor: 包含导航图的视觉表示形式
- Attributes: 显示导航图中当前所选项的属性
五.向 Activity 添加 NavHost
-
Navigation 组件旨在用于具有一个主 Activity 和多个 FragmentDestination 的应用
-
主 Activity 与导航图相关联,且包含一个负责根据需要交换Destination的 NavHostFragment
-
NavHost是 Navigation 组件的核心部分之一。NavHost是一个空容器,用户在您的应用中导航时,目的地会在该容器中交换进出
<LinearLayout xmlns:android="http://schemas.android.com/apk/res/android" xmlns:app="http://schemas.android.com/apk/res-auto" xmlns:tools="http://schemas.android.com/tools" android:layout_width="match_parent" android:layout_height="match_parent" tools:context=".MainActivity"> <fragment android:id="@+id/nav_host_fragment" android:name="androidx.navigation.fragment.NavHostFragment" android:layout_width="match_parent" android:layout_height="match_parent" app:defaultNavHost="true" app:navGraph="@navigation/nav_graph" /> LinearLayout> -
android:name 属性值为 NavHost 实现类的全类名
-
app:navGraph 属性将 NavHostFragment 与导航图相关联。导航图会在此 NavHostFragment 中指定用户可以导航到的所有Destination
-
app:defaultNavHost=“true” 属性确保 NavHostFragment 会拦截系统返回按钮.如果同一布局(例如,双窗格布局)中有多个NavHost,则必须并且只能指定一个默认的NavHost
-
从上图中可以看到,当在activity_main.xml中添加了NavHost后,Navigation Editor中已经列出了NavHost所在的布局文件
六.向导航图添加FragmentDestination
-
创建Fragment,例如IndexDestinationFragment
-
将Fragment作为一个Destination添加到nav_graph中
<navigation xmlns:android="http://schemas.android.com/apk/res/android" xmlns:app="http://schemas.android.com/apk/res-auto" xmlns:tools="http://schemas.android.com/tools" android:id="@+id/nav_graph"> <fragment android:id="@+id/index_fragment" android:name="com.gale.navigation_01.fragments.IndexDestinationFragment" android:label="Index" tools:layout="@layout/fragment_index_destination"/> navigation> -
设置起始Destination:将navigation的startDestination属性的值指定为FragmentDestination的id即可
<navigation xmlns:android="http://schemas.android.com/apk/res/android" xmlns:app="http://schemas.android.com/apk/res-auto" xmlns:tools="http://schemas.android.com/tools" android:id="@+id/nav_graph" app:startDestination="@id/index_fragment"> <fragment android:id="@+id/index_fragment" android:name="com.gale.navigation_01.fragments.IndexDestinationFragment" android:label="Index" tools:layout="@layout/fragment_index_destination"/> navigation> -
此时打开Navigation Editor后,如图所示,Graph Editor多了一个Destination,并且在其上方多了一个小房子,表示该Destination为起始Destination
七.向导航图添加ActivityDestination
-
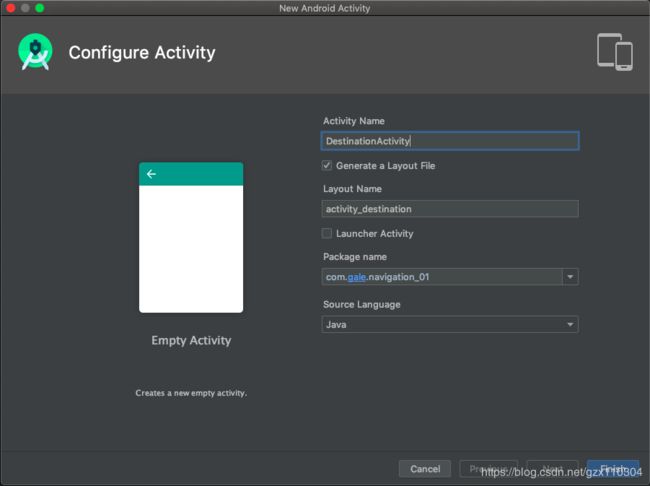
创建Activity,例如DestinationActivity
-
将Activity作为一个Destination添加到nav_graph中
<navigation xmlns:android="http://schemas.android.com/apk/res/android" xmlns:app="http://schemas.android.com/apk/res-auto" xmlns:tools="http://schemas.android.com/tools" android:id="@+id/nav_graph" app:startDestination="@id/index_fragment"> <fragment android:id="@+id/index_fragment" android:name="com.gale.navigation_01.fragments.IndexDestinationFragment" android:label="IndexDestinationFragment" tools:layout="@layout/fragment_index_destination"/> <activity android:id="@+id/destination_activity" android:name="com.gale.navigation_01.DestinationActivity" android:label="DestinationActivity" tools:layout="@layout/activity_destination"/> navigation> -
此时打开Navigation Editor后,如图所示,Graph Editor多了一个ActivityDestination
八.两个Destination建立连接
-
在源Destination中添加action元素即可,action元素有一个id和一个destination属性(其值为下一个目的Destination的id)
<navigation xmlns:android="http://schemas.android.com/apk/res/android" xmlns:app="http://schemas.android.com/apk/res-auto" xmlns:tools="http://schemas.android.com/tools" android:id="@+id/nav_graph" app:startDestination="@id/index_fragment"> <fragment android:id="@+id/index_fragment" android:name="com.gale.navigation_01.fragments.IndexDestinationFragment" android:label="IndexDestinationFragment" tools:layout="@layout/fragment_index_destination"> <action android:id="@+id/to_destination_activity" app:destination="@id/destination_activity"/> fragment> <activity android:id="@+id/destination_activity" android:name="com.gale.navigation_01.DestinationActivity" android:label="DestinationActivity" tools:layout="@layout/activity_destination"/> navigation> -
此时打开Navigation Editor后,如图所示,Graph Editor中的两个Destination已经建立了连接
九.在Activity中导航到Destination
-
导航到Destination是使用 NavController 完成的
-
在Activity中获取 NavController ,必须保证该Activity中有NavHost
-
获取NavController
//navHostView:要求其必须包含NavHost的实现类 View navHostView = findViewById(R.id.nav_host_fragment); NavController navController = Navigation.findNavController(navHostView); //或者 //R.id.nav_host_fragment:要求其指向的控件必须包含NavHost的实现类 NavController navController = Navigation.findNavController(this, R.id.nav_host_fragment); -
通过NavController的navigate方法导航到Destination
//navigate方法的形参为nav_graph.xml中指定的action的id
navController.navigate(R.id.to_destination_activity);
十.在Fragment中导航到Destination
-
在Fragment中获取 NavController
NavController navController = NavHostFragment.findNavController(this); -
通过NavController的navigate方法导航到Destination
//navigate方法的形参为nav_graph.xml中指定的action的id
navController.navigate(R.id.to_destination_activity);
十一.使用 URI 进行导航
-
为要跳转的Destination添加DeepLink
<navigation xmlns:android="http://schemas.android.com/apk/res/android" xmlns:app="http://schemas.android.com/apk/res-auto" xmlns:tools="http://schemas.android.com/tools" android:id="@+id/nav_graph" app:startDestination="@id/index_fragment"> <fragment android:id="@+id/index_fragment" android:name="com.gale.navigation_01.fragments.IndexDestinationFragment" android:label="IndexDestinationFragment" tools:layout="@layout/fragment_index_destination"> <action android:id="@+id/to_destination_activity" app:destination="@id/destination_activity" /> fragment> <activity android:id="@+id/destination_activity" android:name="com.gale.navigation_01.DestinationActivity" android:label="DestinationActivity" tools:layout="@layout/activity_destination"> <deepLink app:uri="http://activity/destination_activity" /> activity> navigation> -
通过Destination指定的DeepLink的uri进行跳转
navController.navigate(Uri.parse("http://activity/destination_activity"));


