SSM框架整合(2020基础版)
文章目录
- 一、SSM框架简介
- 1.1、基本概念
- 1.2、环境准备
- 1.3、SSM整合思路
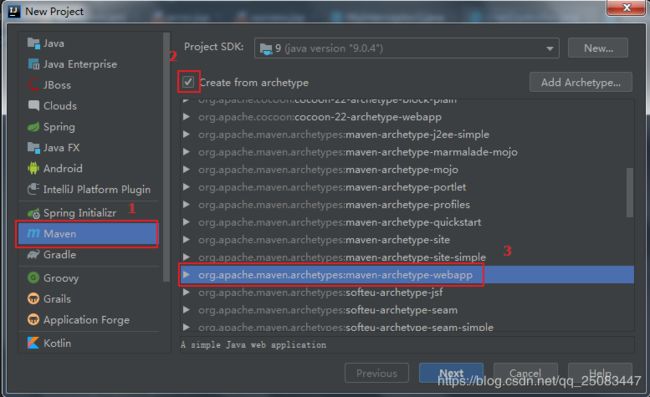
- 1.4、基本环境搭建
- 二、搭建三层架构与测试
- 2.1、搭建Spring框架与测试
- 三、搭建与整合SpringMVC
- 3.1、搭建SpringMVC
- 3.2、Spring整合SpringMVC框架
- 三、搭建与整合MyBatis
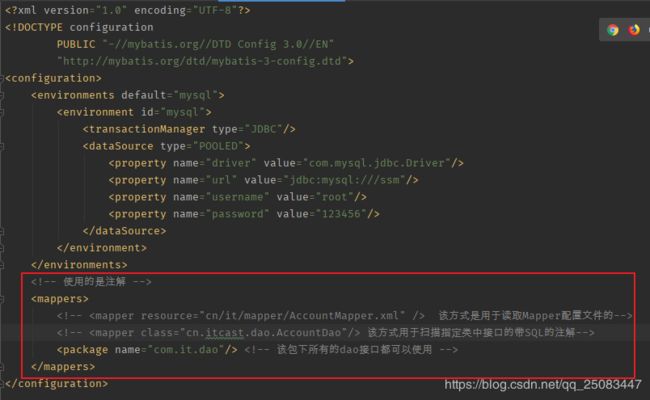
- 3.1、搭建MyBatis环境
- 3.2、Spring整合MyBatis
一、SSM框架简介
1.1、基本概念
三层架构:
开发架构一般都是基于两种形式:一种是C/S架构,也就是客户端/服务器,另一种是B/S架构,也就是浏览器服务器。
在JavaEE开发中,几乎全都是基于B/S架构的开发。那么在B/S架构中,系统标准的三层架构包括:表现层、业务层、持久层。其中每一层都分工明确:
表现层:负责接收客户端请求,向客户端响应结果,负责与用户进行交互。表现层的设计一般都使用MVC模型
业务层:主要是针对不同请求业务逻辑的处理,也可理解为对数据业务逻辑处理。
持久层:主要是对非原始数据(数据库或者文本文件等存放数据的形式)的操作层,也就是说是对数据库,而不是对数据的操作,具体为业务逻辑层或用户界面层提供数据服务。
Spring:
**(业务层)**
Spring是一个轻量级的开源框架,以IOC(反转控制)和AOP(面向切面编程)两个核心。控制反转即将对象的创建和销毁控制权交给Spring容器来管理,从而减少最大程度减少new关键字的出现,使代码低耦合,高复用。面向切面编程即将核心业务逻辑代码与日志记录,权限验证,效率检查,事务管理等模块必要存在且非业务逻辑代码分开,达到与主业务逻辑解耦的目的。
想详细了解Spring请参考我发布的原文:
SpringIOC框架详解(一)
SpringIOC框架详解(二)
SpringAOP详解(三)
动态代理(SpringAOP核心原理)
SpringMVC:
**(表现层)**
MVC是
Model模型:
完成业务逻辑:由javaBean构成,在MVC的三个部件中,模型拥有最多的处理任务。
View视图:
负责跟用户交互的界面。一般就是由HTML,css元素组成的界面。 在视图层里没有真正的处理发生,只负责数据输出。MVC能为应用程序处理很多不同的视图。
Controller控制器:
接收请求—>调用模型—>根据结果派发页面并经过模型处理返回相应数据
注:所有的表现层框架都是基于MVC开发的。例如SpringMVC和Strtus(Strtus、Strtus2)
SpringMVC又是基于mvc模式开发,在SpringMVC模块中,将MVC的分工划分为多个组件来完成,以此来提高MVC的执行效率。
想详细了解SpringMV请参考我发布的原文:
SpringMVC详解(一)
SpringMVC详解二(响应篇)
MyBatis:
**(持久层)**
MyBatis 是是支持定制化 SQL、存储过程以及高级映射的优秀的持久层框架,其主要就完成3件事情:
1、更加完善的封装JDBC操作
2、利用反射打通Java类与SQL语句之间的相互转换
3、采用ORM思想解决实体与数据映射的问题
想详细了解MyBatis请参考我发布的原文:
MyBati潜入深出(一)
MyBatis动态SQL语法详解(二)
MyBatis缓存机制详解(三)
1.2、环境准备
1、开发工具:IntelliJ IDEA 2019.2.3
2、apache-maven-3.6.3
3、jdk 1.9
4、tomcat 9.0.31
5、mysql 5.7.21
1.3、SSM整合思路
整合说明:SSM整合可以使用多种方式,咱们会选择XML + 注解的方式
整合的思路:
- 先搭建整合的环境
- 先把Spring的配置搭建完成
- 搭建SpringMVC框架,通过测试搭建无误
- 再使用Spring整合SpringMVC框架
- 搭建MyBatis框架,单元测试通过。
- 最后使用Spring整合MyBatis框架
1.4、基本环境搭建
1、创建数据库和表结构
create database ssm;
use ssm;
create table account(
id int primary key auto_increment,
name varchar(20),
money double
);
<properties>
   <project.build.sourceEncoding>UTF-8</project.build.sourceEncoding>
   <maven.compiler.source>1.9</maven.compiler.source>
   <maven.compiler.target>1.9</maven.compiler.target>
   <spring.version>5.0.2.RELEASE</spring.version>
   <slf4j.version>1.6.6</slf4j.version>
   <log4j.version>1.2.12</log4j.version>
   <mysql.version>5.1.6</mysql.version>
   <mybatis.version>3.4.5</mybatis.version>
 </properties>

<dependencies>
    <dependency>
      <groupId>junit</groupId>
      <artifactId>junit</artifactId>
      <version>4.11</version>
      <scope>test</scope>
    </dependency>

    <!-- spring -->
    <dependency>
      <groupId>org.aspectj</groupId>
      <artifactId>aspectjweaver</artifactId>
      <version>1.6.8</version>
    </dependency>
    <dependency>
      <groupId>org.springframework</groupId>
      <artifactId>spring-aop</artifactId>
      <version>${spring.version}</version>
    </dependency>
    <dependency>
      <groupId>org.springframework</groupId>
      <artifactId>spring-context</artifactId>
      <version>${spring.version}</version>
    </dependency>
    <dependency>
      <groupId>org.springframework</groupId>
      <artifactId>spring-web</artifactId>
      <version>${spring.version}</version>
    </dependency>
    <dependency>
      <groupId>org.springframework</groupId>
      <artifactId>spring-webmvc</artifactId>
      <version>${spring.version}</version>
    </dependency>
    <dependency>
      <groupId>org.springframework</groupId>
      <artifactId>spring-test</artifactId>
      <version>${spring.version}</version>
    </dependency>
    <dependency>
      <groupId>org.springframework</groupId>
      <artifactId>spring-tx</artifactId>
      <version>${spring.version}</version>
    </dependency>
    <dependency>
      <groupId>org.springframework</groupId>
      <artifactId>spring-jdbc</artifactId>
      <version>${spring.version}</version>
    </dependency>

    <dependency>
      <groupId>mysql</groupId>
      <artifactId>mysql-connector-java</artifactId>
      <version>${mysql.version}</version>
    </dependency>

    <dependency>
      <groupId>javax.servlet</groupId>
      <artifactId>servlet-api</artifactId>
      <version>2.5</version>
      <scope>provided</scope>
    </dependency>
    <dependency>
      <groupId>javax.servlet.jsp</groupId>
      <artifactId>jsp-api</artifactId>
      <version>2.0</version>
      <scope>provided</scope>
    </dependency>
    <dependency>
      <groupId>jstl</groupId>
      <artifactId>jstl</artifactId>
      <version>1.2</version>
    </dependency>

    <!-- log start -->
    <dependency>
      <groupId>log4j</groupId>
      <artifactId>log4j</artifactId>
      <version>${log4j.version}</version>
    </dependency>
    <dependency>
      <groupId>org.slf4j</groupId>
      <artifactId>slf4j-api</artifactId>
      <version>${slf4j.version}</version>
    </dependency>
    <dependency>
      <groupId>org.slf4j</groupId>
      <artifactId>slf4j-log4j12</artifactId>
      <version>${slf4j.version}</version>
    </dependency>
    <!-- log end -->

    <dependency>
      <groupId>org.mybatis</groupId>
      <artifactId>mybatis</artifactId>
      <version>${mybatis.version}</version>
    </dependency>
    <dependency>
      <groupId>org.mybatis</groupId>
      <artifactId>mybatis-spring</artifactId>
      <version>1.3.0</version>
    </dependency>
    <dependency>
      <groupId>c3p0</groupId>
      <artifactId>c3p0</artifactId>
      <version>0.9.1.2</version>
      <type>jar</type>
      <scope>compile</scope>
    </dependency>
  </dependencies>
4、创建目录和java文件


domain:

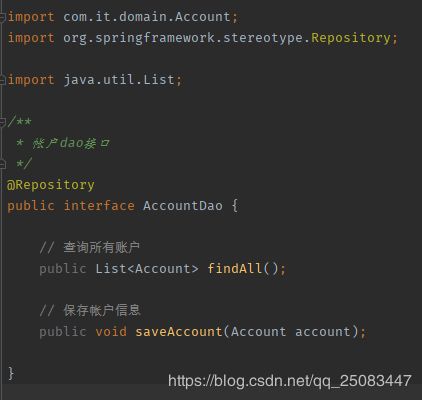
dao:
service:

serviceImpl:

controller:
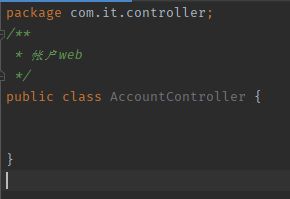
至此,环境准备工作完毕。
二、搭建三层架构与测试
2.1、搭建Spring框架与测试
搭建Spring容器,将常用对象的创建和销毁交给Spring容器来管理。
1、项目中新建一个Spring配置文件ApplicationContext.xml:

<?xml version="1.0" encoding="UTF-8"?>
<beans xmlns="http://www.springframework.org/schema/beans"
       xmlns:xsi="http://www.w3.org/2001/XMLSchema-instance"
       xmlns:context="http://www.springframework.org/schema/context"
       xmlns:aop="http://www.springframework.org/schema/aop"
       xmlns:tx="http://www.springframework.org/schema/tx"
       xsi:schemaLocation="http://www.springframework.org/schema/beans
	http://www.springframework.org/schema/beans/spring-beans.xsd
	http://www.springframework.org/schema/context
	http://www.springframework.org/schema/context/spring-context.xsd
	http://www.springframework.org/schema/aop
	http://www.springframework.org/schema/aop/spring-aop.xsd
	http://www.springframework.org/schema/tx
	http://www.springframework.org/schema/tx/spring-tx.xsd">

    <!--开启注解的扫描,希望处理service和dao,controller不需要Spring框架去处理-->
    <context:component-scan base-package="com.it" >
        <!--配置哪些注解不扫描-->
        <context:exclude-filter type="annotation" expression="org.springframework.stereotype.Controller" />
    </context:component-scan>

</beans>
2、在service层中的实现类AccountServiceImpl.java注入到容器:

3、写测试类进行测试:
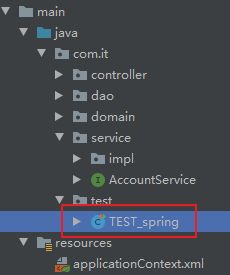

测试中报错:

引入log4J.properties:

# Set root category priority to INFO and its only appender to CONSOLE.
#log4j.rootCategory=INFO, CONSOLE            debug   info   warn error fatal
log4j.rootCategory=info, CONSOLE, LOGFILE

# Set the enterprise logger category to FATAL and its only appender to CONSOLE.
log4j.logger.org.apache.axis.enterprise=FATAL, CONSOLE

# CONSOLE is set to be a ConsoleAppender using a PatternLayout.
log4j.appender.CONSOLE=org.apache.log4j.ConsoleAppender
log4j.appender.CONSOLE.layout=org.apache.log4j.PatternLayout
log4j.appender.CONSOLE.layout.ConversionPattern=%d{ISO8601} %-6r [%15.15t] %-5p %30.30c %x - %m\n

# LOGFILE is set to be a File appender using a PatternLayout.
log4j.appender.LOGFILE=org.apache.log4j.FileAppender
log4j.appender.LOGFILE.File=d:\axis.log
log4j.appender.LOGFILE.Append=true
log4j.appender.LOGFILE.layout=org.apache.log4j.PatternLayout
log4j.appender.LOGFILE.layout.ConversionPattern=%d{ISO8601} %-6r [%15.15t] %-5p %30.30c %x - %m\n
再次测试即可。
三、搭建与整合SpringMVC
搭建SpringMVC,测试通过以后,再整合Spring框架。
3.1、搭建SpringMVC
1、在web.xml中配置DispatcherServlet前端控制器。

2. 在web.xml中配置DispatcherServlet过滤器解决中文乱码

<?xml version="1.0" encoding="UTF-8"?>
<beans xmlns="http://www.springframework.org/schema/beans"
       xmlns:mvc="http://www.springframework.org/schema/mvc" xmlns:context="http://www.springframework.org/schema/context"
       xmlns:xsi="http://www.w3.org/2001/XMLSchema-instance"
       xsi:schemaLocation="
        http://www.springframework.org/schema/beans
        http://www.springframework.org/schema/beans/spring-beans.xsd
        http://www.springframework.org/schema/mvc
        http://www.springframework.org/schema/mvc/spring-mvc.xsd
        http://www.springframework.org/schema/context
        http://www.springframework.org/schema/context/spring-context.xsd">

    <!--开启注解扫描,只扫描Controller注解-->
    <context:component-scan base-package="com.it">
        <!--只扫描 @Controller注解-->
        <context:include-filter type="annotation" expression="org.springframework.stereotype.Controller" />
    </context:component-scan>

    <!--配置的视图解析器对象-->
    <bean id="internalResourceViewResolver" class="org.springframework.web.servlet.view.InternalResourceViewResolver">
        <property name="prefix" value="/WEB-INF/pages/"/>
        <property name="suffix" value=".jsp"/>
    </bean>

    <!--过滤静态资源-->
    <mvc:resources location="/css/" mapping="/css/**" />
    <mvc:resources location="/images/" mapping="/images/**" />
    <mvc:resources location="/js/" mapping="/js/**" />

    <!--开启SpringMVC注解的支持-->
    <mvc:annotation-driven/>

</beans>
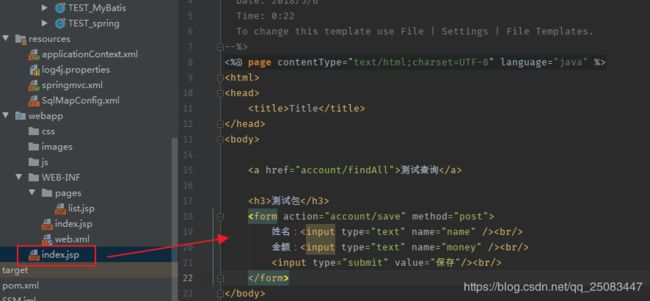
4、写一个请求页面和跳转页面作为测试:
请求页面:

跳转页面:
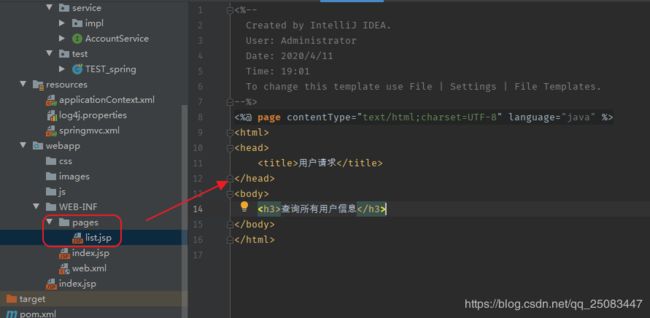
5、启动服务进行测试:

结果:

3.2、Spring整合SpringMVC框架
目的:在controller中能成功的调用service对象中的方法。
问题:目前在web.xml中配置了前端控制器,当服务启动的时候,自动会去读SpringMVC的配置文件springmvc.xml,但是不会去自动加载Spring的配置文件applicationContent.xml,所以就无法将bean注入到Spring容器中,无法调用到service层中的方法。那么我们该如何在服务启动的时候就读Spring的配置文件呢?
解决方法:
ContextLoaderListener监听器是用于监听ServlerContext域对象的创建和销毁。
在项目启动的时候,就去加载applicationContext.xml的配置文件。在web.xml中配置
ContextLoaderListener监听器(该监听器只能加载WEB-INF目录下的applicationContext.xml的配置文 件)。
所以想要加载到Spring的配置文件有两种方法:
1、将applicationContext.xml放到WEB-INFO目录下。(不方便文件管理)
2、在监听器中配置变量,重新指定路径。(推荐使用)
接在Controller层使用注解
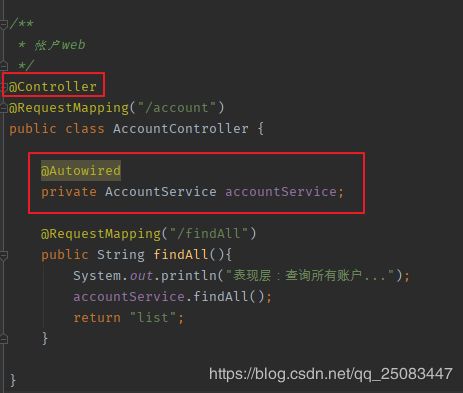
最后启动服务进行测试,查看能否执行到service层的方法。
三、搭建与整合MyBatis
3.1、搭建MyBatis环境
目前我们先使用在Dao接口编写SQL的方式来搭建MyBatis框架。
1、在Dao层使用MyBatis注解在对应的方法头编写SQL:

将保存的方法也写入测试中:

在库里面插入两条数据:

启动服务测试即可。
3.2、Spring整合MyBatis
现在查询方法是可以正常使用了,但是保存方法由于涉及到事务管理,所以需要进一步进行整合。

