数据集少?那就来数据增强吧?
这几天老师给了我一个任务,让我识别螺栓和法兰盘,但是老师也是够高冷的,就给我了6张图片,让我训练?让我目标检测?6张图片检测个屁啊…
不过我自己也想到了数据集增强,用opencv进行图片的翻转,平移,调节亮度啊,调节对比度等等。
有两个思路
第一个思路是,先直接增强图片,把图片弄很多张,然后再一个个的去用labelimg去标注,其实想想,这个工程量也蛮大的吧,确实很大,我在傻傻的自己标注了30张图片之后,心很累。就想有没有一种方法,我这六张图片标注好了,也生成对应的.xml文件了,直接图片和对应的标注文件一起数据集的增强,在我一番百度之后,找到了一个方法,最后经过验证,数据集正确,也可以正常的训练,这也就是我说的第二个方法。唉,心真累。两个方法都写上吧,自己也好复习。
数据集少?那就来数据增强吧?
- 方法一:图片增强
- 方法二:图片和对应的标注同时增强
- 读取原影像bounding boxes坐标
- 生成变换序列
- bounding box 变化后坐标计算
- 设置文件路径
- 设置增强次数
- 设置增强参数
方法一:图片增强
直接贴代码:
# ###
# 本代码共采用了四种数据增强,如采用其他数据增强方式,可以参考本代码,随意替换。
# imageDir 为原数据集的存放位置
# saveDir  为数据增强后数据的存放位置
# ###

def flip(root_path,img_name):   #翻转图像
    img = Image.open(os.path.join(root_path, img_name))
    filp_img = img.transpose(Image.FLIP_LEFT_RIGHT)
    # filp_img.save(os.path.join(root_path,img_name.split('.')[0] + '_flip.jpg'))
    return filp_img

def rotation(root_path, img_name):
    img = Image.open(os.path.join(root_path, img_name))
    rotation_img = img.rotate(45) #旋转角度 # 可改变
    # rotation_img.save(os.path.join(root_path,img_name.split('.')[0] + '_rotation.jpg'))
    return rotation_img

def randomColor(root_path, img_name): #随机颜色
    """
    对图像进行颜色抖动
    :param image: PIL的图像image
    :return: 有颜色色差的图像image
    """
    image = Image.open(os.path.join(root_path, img_name))
    random_factor = np.random.randint(0, 31) / 10.  # 随机因子
    color_image = ImageEnhance.Color(image).enhance(random_factor)  # 调整图像的饱和度
    random_factor = np.random.randint(10, 21) / 10.  # 随机因子
    brightness_image = ImageEnhance.Brightness(color_image).enhance(random_factor)  # 调整图像的亮度
    random_factor = np.random.randint(10, 21) / 10.  # 随机因子
    contrast_image = ImageEnhance.Contrast(brightness_image).enhance(random_factor)  # 调整图像对比度
    random_factor = np.random.randint(0, 31) / 10.  # 随机因子
    return ImageEnhance.Sharpness(contrast_image).enhance(random_factor)  # 调整图像锐度


def contrastEnhancement(root_path, img_name):  # 对比度增强
    image = Image.open(os.path.join(root_path, img_name))
    enh_con = ImageEnhance.Contrast(image)
    contrast = 3 # 可改变
    image_contrasted = enh_con.enhance(contrast)
    return image_contrasted

def brightnessEnhancement(root_path,img_name):#亮度增强
    image = Image.open(os.path.join(root_path, img_name))
    enh_bri = ImageEnhance.Brightness(image)
    brightness = 0.5 # 可改变
    image_brightened = enh_bri.enhance(brightness)
    return image_brightened

def colorEnhancement(root_path,img_name):#颜色增强
    image = Image.open(os.path.join(root_path, img_name))
    enh_col = ImageEnhance.Color(image)
    color = 2 # 可改变
    image_colored = enh_col.enhance(color)
    return image_colored

from PIL import Image
from PIL import ImageEnhance
import os
import cv2
import numpy as np
imageDir="E:\\Data_study\\bolt"     #要改变的图片的路径文件夹
saveDir="E:\\Data_study\\bolt"   #要保存的图片的路径文件夹

for name in os.listdir(imageDir):

    saveName= name[:-4]+"id.jpg"
    image = Image.open(os.path.join(imageDir, name))
    image.save(os.path.join(saveDir,saveName))

    saveName= name[:-4]+"be.jpg"
    saveImage=brightnessEnhancement(imageDir,name)
    saveImage.save(os.path.join(saveDir,saveName))

    saveName= name[:-4]+"fl.jpg"
    saveImage=flip(imageDir,name)
    saveImage.save(os.path.join(saveDir,saveName))

    saveName= name[:-4]+"ro.jpg"
    saveImage=rotation(imageDir,name)
    saveImage.save(os.path.join(saveDir,saveName))
方法二:图片和对应的标注同时增强
相较于Augmentor,imgaug具有更多的功能,比如对影像增强的同时,对keypoint, bounding box进行相应的变换。
例如在目标检测的过程中,训练集包括影像及其对应的bounding box文件,在对影像增强的时候,同时解算出bounding box 相应变换的坐标生成对应的bounding box文件。
1、安装一些依赖的库:(推荐豆瓣源安装)
豆瓣源:-i https://pypi.douban.com/simple/
pip install six numpy scipy matplotlib scikit-image opencv-python imageio -i https://pypi.douban.com/simple/
2、、安装imgaug:(推荐豆瓣源安装)
安装pypi版本:(我是安装的这个)
pip install imgaug -i https://pypi.douban.com/simple/
或者还有一种方法,那就是安装github的最新版本(我没试过,你们也可以尝试)
pip install git+https://github.com/aleju/imgaug -i https://pypi.douban.com/simple/
首先看一下整体的代码:
import xml.etree.ElementTree as ET
import pickle
import os
from os import getcwd
import numpy as np
from PIL import Image

import imgaug as ia
from imgaug import augmenters as iaa

ia.seed(1)

def read_xml_annotation(root, image_id):
    in_file = open(os.path.join(root, image_id))
    tree = ET.parse(in_file)
    root = tree.getroot()
    bndboxlist = []

    for object in root.findall('object'):  # 找到root节点下的所有country节点
        bndbox = object.find('bndbox')  # 子节点下节点rank的值

        xmin = int(bndbox.find('xmin').text)
        xmax = int(bndbox.find('xmax').text)
        ymin = int(bndbox.find('ymin').text)
        ymax = int(bndbox.find('ymax').text)
        # print(xmin,ymin,xmax,ymax)
        bndboxlist.append([xmin,ymin,xmax,ymax])
        # print(bndboxlist)

    bndbox = root.find('object').find('bndbox')
    return bndboxlist
# (506.0000, 330.0000, 528.0000, 348.0000) -> (520.4747, 381.5080, 540.5596, 398.6603)
def change_xml_annotation(root, image_id, new_target):
    new_xmin = new_target[0]
    new_ymin = new_target[1]
    new_xmax = new_target[2]
    new_ymax = new_target[3]

    in_file = open(os.path.join(root, str(image_id) + '.xml'))  # 这里root分别由两个意思
    tree = ET.parse(in_file)
    xmlroot = tree.getroot()
    object = xmlroot.find('object')
    bndbox = object.find('bndbox')
    xmin = bndbox.find('xmin')
    xmin.text = str(new_xmin)
    ymin = bndbox.find('ymin')
    ymin.text = str(new_ymin)
    xmax = bndbox.find('xmax')
    xmax.text = str(new_xmax)
    ymax = bndbox.find('ymax')
    ymax.text = str(new_ymax)
    tree.write(os.path.join(root, str(image_id) + "_aug" + '.xml'))

def change_xml_list_annotation(root, image_id, new_target,saveroot,id):

    in_file = open(os.path.join(root, str(image_id) + '.xml'))  # 这里root分别由两个意思
    tree = ET.parse(in_file)
    xmlroot = tree.getroot()
    index = 0

    for object in xmlroot.findall('object'):  # 找到root节点下的所有country节点
        bndbox = object.find('bndbox')  # 子节点下节点rank的值

        # xmin = int(bndbox.find('xmin').text)
        # xmax = int(bndbox.find('xmax').text)
        # ymin = int(bndbox.find('ymin').text)
        # ymax = int(bndbox.find('ymax').text)

        new_xmin = new_target[index][0]
        new_ymin = new_target[index][1]
        new_xmax = new_target[index][2]
        new_ymax = new_target[index][3]

        xmin = bndbox.find('xmin')
        xmin.text = str(new_xmin)
        ymin = bndbox.find('ymin')
        ymin.text = str(new_ymin)
        xmax = bndbox.find('xmax')
        xmax.text = str(new_xmax)
        ymax = bndbox.find('ymax')
        ymax.text = str(new_ymax)

        index = index + 1

    tree.write(os.path.join(saveroot, str(image_id) + "_aug_" + str(id) + '.xml'))


def mkdir(path):

    # 去除首位空格
    path = path.strip()
    # 去除尾部 \ 符号
    path = path.rstrip("\\")
    # 判断路径是否存在
    # 存在     True
    # 不存在   False
    isExists = os.path.exists(path)
    # 判断结果
    if not isExists:
        # 如果不存在则创建目录
         # 创建目录操作函数
        os.makedirs(path)
        print(path + ' 创建成功')
        return True
    else:
        # 如果目录存在则不创建,并提示目录已存在
        print(path + ' 目录已存在')
        return False

if __name__ == "__main__":

    IMG_DIR = "./VOCdevkit/VOCdevkit/VOC2007/JPEGImages"
    XML_DIR = "./VOCdevkit/VOCdevkit/VOC2007/Annotations"

    AUG_XML_DIR = "./VOCdevkit/VOCdevkit/Annotations"  # 存储增强后的XML文件夹路径
    mkdir(AUG_XML_DIR)

    AUG_IMG_DIR = "./VOCdevkit/VOCdevkit/JPEGImages"  # 存储增强后的影像文件夹路径
    mkdir(AUG_IMG_DIR)

    AUGLOOP = 20 # 每张影像增强的数量

    boxes_img_aug_list = []
    new_bndbox = []
    new_bndbox_list = []


    # 影像增强
    seq = iaa.Sequential([
        iaa.Flipud(0.5),  # vertically flip 20% of all images
        iaa.Fliplr(0.5),  # 镜像
        iaa.Multiply((1.2, 1.5)),  # change brightness, doesn't affect BBs
        iaa.GaussianBlur(sigma=(0, 3.0)), # iaa.GaussianBlur(0.5),
        iaa.Affine(
            translate_px={"x": 15, "y": 15},
            scale=(0.8, 0.95),
            rotate=(-30, 30)
        )  # translate by 40/60px on x/y axis, and scale to 50-70%, affects BBs
    ])

    for root, sub_folders, files in os.walk(XML_DIR):

        for name in files:

            bndbox = read_xml_annotation(XML_DIR, name)

            for epoch in range(AUGLOOP):
                seq_det = seq.to_deterministic()  # 保持坐标和图像同步改变,而不是随机

                # 读取图片
                img = Image.open(os.path.join(IMG_DIR, name[:-4] + '.jpg'))
                img = np.array(img)

                # bndbox 坐标增强
                for i in range(len(bndbox)):
                    bbs = ia.BoundingBoxesOnImage([
                        ia.BoundingBox(x1=bndbox[i][0], y1=bndbox[i][1], x2=bndbox[i][2], y2=bndbox[i][3]),
                    ], shape=img.shape)

                    bbs_aug = seq_det.augment_bounding_boxes([bbs])[0]
                    boxes_img_aug_list.append(bbs_aug)

                    # new_bndbox_list:[[x1,y1,x2,y2],...[],[]]
                    new_bndbox_list.append([int(bbs_aug.bounding_boxes[0].x1),
                                            int(bbs_aug.bounding_boxes[0].y1),
                                            int(bbs_aug.bounding_boxes[0].x2),
                                            int(bbs_aug.bounding_boxes[0].y2)])
                # 存储变化后的图片
                image_aug = seq_det.augment_images([img])[0]
                path = os.path.join(AUG_IMG_DIR, str(name[:-4]) + "_aug_" + str(epoch) + '.jpg')
                # image_auged = bbs.draw_on_image(image_aug, thickness=0)
                Image.fromarray(image_aug).save(path)

                # 存储变化后的XML
                change_xml_list_annotation(XML_DIR, name[:-4], new_bndbox_list,AUG_XML_DIR,epoch)
                print(str(name[:-4]) + "_aug_" + str(epoch) + '.jpg')
                new_bndbox_list = []
下面来看看代码的详细过程:(具体分析)
读取原影像bounding boxes坐标
读取xml文件并使用ElementTree对xml文件进行解析,找到每个object的坐标值。
def change_xml_annotation(root, image_id, new_target):
    new_xmin = new_target[0]
    new_ymin = new_target[1]
    new_xmax = new_target[2]
    new_ymax = new_target[3]

    in_file = open(os.path.join(root, str(image_id) + '.xml'))  # 这里root分别由两个意思
    tree = ET.parse(in_file)
    xmlroot = tree.getroot()
    object = xmlroot.find('object')
    bndbox = object.find('bndbox')
    xmin = bndbox.find('xmin')
    xmin.text = str(new_xmin)
    ymin = bndbox.find('ymin')
    ymin.text = str(new_ymin)
    xmax = bndbox.find('xmax')
    xmax.text = str(new_xmax)
    ymax = bndbox.find('ymax')
    ymax.text = str(new_ymax)
    tree.write(os.path.join(root, str("%06d" % (str(id) + '.xml'))))
生成变换序列
产生一个处理图片的Sequential。
# 影像增强
seq = iaa.Sequential([
    iaa.Flipud(0.5),  # vertically flip 20% of all images
    iaa.Fliplr(0.5),  # 镜像
    iaa.Multiply((1.2, 1.5)),  # change brightness, doesn't affect BBs
    iaa.GaussianBlur(sigma=(0, 3.0)),  # iaa.GaussianBlur(0.5),
    iaa.Affine(
        translate_px={"x": 15, "y": 15},
        scale=(0.8, 0.95),
        rotate=(-30, 30)
    )  # translate by 40/60px on x/y axis, and scale to 50-70%, affects BBs
])
bounding box 变化后坐标计算
先读取该影像对应xml文件,获取所有目标的bounding boxes,然后依次计算每个box变化后的坐标。
seq_det = seq.to_deterministic()  # 保持坐标和图像同步改变,而不是随机
# 读取图片
img = Image.open(os.path.join(IMG_DIR, name[:-4] + '.jpg'))
# sp = img.size
img = np.asarray(img)
# bndbox 坐标增强
for i in range(len(bndbox)):
    bbs = ia.BoundingBoxesOnImage([
        ia.BoundingBox(x1=bndbox[i][0], y1=bndbox[i][1], x2=bndbox[i][2], y2=bndbox[i][3]),
    ], shape=img.shape)

    bbs_aug = seq_det.augment_bounding_boxes([bbs])[0]
    boxes_img_aug_list.append(bbs_aug)

    # 此处运用了一个max,一个min (max是为了方式变化后的box小于1,min是为了防止变化后的box的坐标超出图片,在做faster r-cnn训练的时候,box的坐标会减1,若坐标小于1,就会报错,当然超出图像范围也会报错)
    n_x1 = int(max(1, min(img.shape[1], bbs_aug.bounding_boxes[0].x1)))
    n_y1 = int(max(1, min(img.shape[0], bbs_aug.bounding_boxes[0].y1)))
    n_x2 = int(max(1, min(img.shape[1], bbs_aug.bounding_boxes[0].x2)))
    n_y2 = int(max(1, min(img.shape[0], bbs_aug.bounding_boxes[0].y2)))
    if n_x1 == 1 and n_x1 == n_x2:
        n_x2 += 1
    if n_y1 == 1 and n_y2 == n_y1:
        n_y2 += 1
    if n_x1 >= n_x2 or n_y1 >= n_y2:
        print('error', name)
    new_bndbox_list.append([n_x1, n_y1, n_x2, n_y2])
# 存储变化后的图片
image_aug = seq_det.augment_images([img])[0]
path = os.path.join(AUG_IMG_DIR,
                    str("%06d" % (len(files) + int(name[:-4]) + epoch * 250)) + '.jpg')
image_auged = bbs.draw_on_image(image_aug, thickness=0)
Image.fromarray(image_auged).save(path)

# 存储变化后的XML--此处可根据需要更改文件具体的名称
change_xml_list_annotation(XML_DIR, name[:-4], new_bndbox_list, AUG_XML_DIR,
                           len(files) + int(name[:-4]) + epoch * 250)
print(str("%06d" % (len(files) + int(name[:-4]) + epoch * 250)) + '.jpg')
new_bndbox_list = []
怎么使用呢?
输入数据为两个文件夹一个是需要增强的影像数据(JPEGImages),一个是对应的xml文件(Annotations)。注意:影像文件名需和xml文件名相对应!
设置文件路径
IMG_DIR = "../create-pascal-voc-dataset/examples/VOC2007/JPEGImages"
XML_DIR = "../create-pascal-voc-dataset/examples/VOC2007/Annotations"

AUG_XML_DIR = "./Annotations"  # 存储增强后的XML文件夹路径
try:
    shutil.rmtree(AUG_XML_DIR)
except FileNotFoundError as e:
    a = 1
mkdir(AUG_XML_DIR)

AUG_IMG_DIR = "./JPEGImages"  # 存储增强后的影像文件夹路径
try:
    shutil.rmtree(AUG_IMG_DIR)
except FileNotFoundError as e:
    a = 1
mkdir(AUG_IMG_DIR)
设置增强次数
AUGLOOP = 10 # 每张影像增强的数量
设置增强参数
通过修改Sequential函数参数进行设置
seq = iaa.Sequential([
    iaa.Flipud(0.5),  # v翻转
    iaa.Fliplr(0.5),  # 镜像
    iaa.Multiply((1.2, 1.5)),  # 改变明亮度
    iaa.GaussianBlur(sigma=(0, 3.0)),  # 高斯噪声
    iaa.Affine(
        translate_px={"x": 15, "y": 15},
        scale=(0.8, 0.95),
        rotate=(-30, 30)
    )  # translate by 40/60px on x/y axis, and scale to 50-70%, affects BBs
])
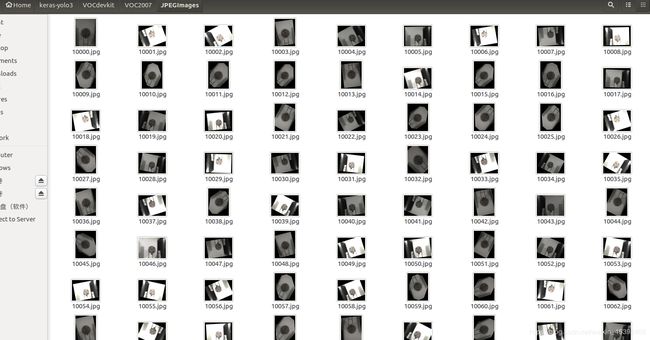
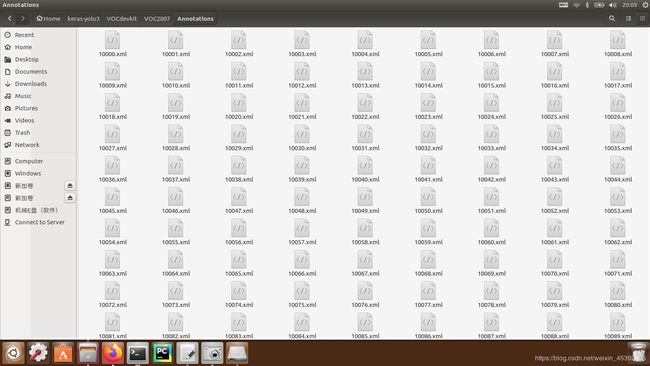
最后再使用了一个小脚本,对图片和.xml文件进行统一的命名。
import os
path = '/home/albert/aug_xml'  #图片或者是.xml文件的路径
count =10000
for file in os.listdir(path): #遍历文件夹的所有图片 file 代表的是每个图片的全名
    os.rename(os.path.join(path,file),os.path.join(path,str(count)+".xml"))
    count+=1
print("转换成顺序图片结束")

#os.path.join(path,file) ——> 'D:\\Data_study\\kkgznzz\\99.jpg'  路径拼接

