SpringBoot + MyBatis + MySql利用 aop 实现读写分离
前几个月做了一个项目,但是目前只部署到了一台服务器上面,所以我总感觉会出点问题,特别是数据库那一块,后期数据量大起来了以后,这一块应该是一个比较大的瓶颈,所以未雨绸缪,先把AOP实现读写分离那一块实现了,以后需要的时候再加上去就行了。
本人菜鸡,本科还没毕业,希望各位大佬嘴下留情。
SpringBoot 版本:
		org.springframework.boot
		spring-boot-starter-parent
		1.5.19.RELEASE
数据库配置:
spring:
    datasource:
        master:
            driver-class-name: com.mysql.jdbc.Driver
            password: 123456
            url: jdbc:mysql://127.0.0.1:3306/telcomksh?serverTimezone=GMT&useUnicode=true&characterEncoding=utf-8&useSSL=false
            username: root
        slave1:
            driver-class-name: com.mysql.jdbc.Driver
            password: 123456
            url: jdbc:mysql://127.0.0.1:3306/telcomksh2?serverTimezone=GMT&useUnicode=true&characterEncoding=utf-8&useSSL=false
            username: root
        slave2:
            driver-class-name: com.mysql.jdbc.Driver
            password: 123456
            url: jdbc:mysql://127.0.0.1:3306/telcomksh3?serverTimezone=GMT&useUnicode=true&characterEncoding=utf-8&useSSL=false
            username: root
可以看到有一个主库以及两个从库,数据库并没有配置主从复制,以便后面通过数据的差异来验证读写分离的实现。
配置:
DBTypeEnum ,枚举类型,代表各个数据库,其实不写也行,但是为了代码的可读性还是写一下吧,也没多少东西
public enum DBTypeEnum {

    MASTER,SLAVE1,SLAVE2;

}
DBContextHolder ,里面有两个成员变量,第一个是 ThreadLocal 类型的 contextHolder ,ThreadLocal 的可以大致的理解为以当前线程为键的一个 Map ,在这里把当前需要操作的数据库,也就是在上面配置的那个 DBTypeEnum 放进来,另一个是 AtomicInteger 类型的 counter ,目的是统计访问所有从库的操作数量,并根据从库的数量取模,达到一个从库负载均衡的目的。因为这里有两个从库,所以就是模 2 ,当然也可以根据自己的实际情况调整。
public class DBContextHolder {

    private static final ThreadLocal contextHolder = new ThreadLocal<>();

    private static final AtomicInteger counter = new AtomicInteger(-1);

    public static void set(DBTypeEnum type) {
        contextHolder.set(type);
    }

    public static DBTypeEnum get() {
        return contextHolder.get();
    }

    public static void master() {
        set(DBTypeEnum.MASTER);
    }

    public static void slave() {

        int index = counter.incrementAndGet() % 2;
        if (counter.get() > 999999) {
            counter.set(-1);
        }
        if (index == 0) {
            contextHolder.set(DBTypeEnum.SLAVE1);
        } else if (index == 1) {
            contextHolder.set(DBTypeEnum.SLAVE2);
        }

    }

}
MyRoutingDataSource ,继承自 AbstractRoutingDataSource ,然后重写 determineCurrentLookupKey 方法,该方法可以通过一个 Key 来定位到需要访问的数据库,具体的配置在下面 DataSourceConfig 里面。
public class MyRoutingDataSource extends AbstractRoutingDataSource {

    @Override
    protected Object determineCurrentLookupKey() {
        return DBContextHolder.get();
    }
}
DataSourceConfig,这里的前面几个类就是把之前配置文件里面配置的三个数据库注入 Spring 的 IOC 容器。
关键在于最后一个 myRoutingDataSource 的配置,首先把之前配置的三个数据源对象传进来,并把他们放入一个Map 里面。之后 new 一个我们之前创建的 MyRoutingDataSource 类的对象,并把之前创建的 Map 设置为他的 TargetDataSources ,同时设置 DefaultTargetDataSource 为 Master 数据库,在从库访问不到的时候,会访问这个默认的数据库,最后注入 Spring 。
@Configuration
public class DataSourceConfig {

    @Primary
    @Bean
    @ConfigurationProperties("spring.datasource.master")
    public DataSource masterDataSource() {
        return DataSourceBuilder.create().build();
    }

    @Bean
    @ConfigurationProperties("spring.datasource.slave1")
    public DataSource slave1DataSource() {
        return DataSourceBuilder.create().build();
    }

    @Bean
    @ConfigurationProperties("spring.datasource.slave2")
    public DataSource slave2DataSource() {
        return DataSourceBuilder.create().build();
    }

    @Bean
    public DataSource myRoutingDataSource(@Qualifier("masterDataSource") DataSource masterDataSource,
                                          @Qualifier("slave1DataSource") DataSource slave1DataSource,
                                          @Qualifier("slave2DataSource") DataSource slave2DataSource) {
        Map targetDataSources = new HashMap<>();
        targetDataSources.put(DBTypeEnum.MASTER, masterDataSource);
        targetDataSources.put(DBTypeEnum.SLAVE1, slave1DataSource);
        targetDataSources.put(DBTypeEnum.SLAVE2, slave2DataSource);
        MyRoutingDataSource myRoutingDataSource = new MyRoutingDataSource();
        myRoutingDataSource.setDefaultTargetDataSource(masterDataSource);
        myRoutingDataSource.setTargetDataSources(targetDataSources);
        return myRoutingDataSource;
    }

}
最后是关于 MyBatis 的一些配置。
@Configuration
public class MyBatisConfig {

    @Autowired
    @Qualifier("myRoutingDataSource")
    DataSource myRoutingDataSource;

    @Bean
    public SqlSessionFactory sqlSessionFactory() throws Exception {
        SqlSessionFactoryBean sqlSessionFactoryBean = new SqlSessionFactoryBean();
        sqlSessionFactoryBean.setDataSource(myRoutingDataSource);
        sqlSessionFactoryBean.setMapperLocations(new PathMatchingResourcePatternResolver()
                .getResources("classpath:mapper/**/*.xml"));
        return sqlSessionFactoryBean.getObject();
    }

    @Bean
    public PlatformTransactionManager platformTransactionManager() {
        return new DataSourceTransactionManager(myRoutingDataSource);
    }

}
AOP 代码,可以看到在里面设置的切点是所有的 mapper 文件,并将以 “select” 或者 “get” 开头的所有操作定位到从库,其余操作定位到主库。
@Aspect
@Component
public class DBAspect {

    @Pointcut("execution(public * com.telecom.mapper.*.*(..))")
    public void test() {
    }

    @Before("test()")
    public void before(JoinPoint joinPoint) {
        String methodName = joinPoint.getSignature().getName();
        if (methodName.startsWith("select")
                || methodName.startsWith("get")) {
            DBContextHolder.slave();
        } else {
            DBContextHolder.master();
        }
    }

}
测试:
测试我们选用三个数据库中均存在的 allot 表,以模拟在真实的主从复制的环境中的情况。
master:
slave1:
slave2:
可以看到在 master 数据库中一条数据也没有,slave1 中有一条 id 为 1 的数据,slave2 中有一条 id 为 2 的数据。
测试类:
public class TestServiceImplTest extends TelecomkshApplicationTests {

    @Autowired
    AllotMapper allotMapper;

    @Test
    public void testMaster() {
        Allot allot = new Allot();
        allot.setAllotDate(new Date());
        allot.setApplyCode("测试");
        allot.setApplyOper("测试");
        allot.setAllotOper("测试");
        allot.setApplyDate(new Date());
        allot.setDepId(1);
        allot.setSourceWarehouseId((long) 1);
        allot.setTargetWarehouseId((long) 2);
        allot.setBillStatusId(1);
        allot.setApplyCause("测试");
        allotMapper.insert(allot);
    }

    @Test
    public void testSlave1() {
        AllotExample allotExample = new AllotExample();
        List allotList = allotMapper.selectByExample(allotExample);
        System.out.println(JSONObject.toJSONString(allotList));
    }

    @Test
    public void testSlave2() {
        AllotExample allotExample = new AllotExample();
        List allotList = allotMapper.selectByExample(allotExample);
        System.out.println(JSONObject.toJSONString(allotList));
    }
}
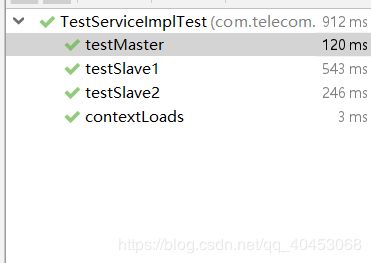
在 testSlave 中,我们将尝试往数据库里面插入一条数据,因为调用的方法并不是以 “get” “select” 开头,所以他应该被插入到 master 数据库中 ,紧接着是两个测试从库的测试用例,根据我们的配置,在执行到 testSlave1 的时候,在 DBContextHolder 中,counter 的值还为 0 ,此时将被路由到 slave1 ,他将获取到一条 id 为 1 的数据,在执行到 testSlave2 的时候,counter 值为 1,此时他将被路由到 slave2 中,获得一条 id 为 2 的数据。当然测试用例执行顺序可能和我们想的不太一样,但在这里这并不是重点。
在 master 数据库中,我们新插入的一条数据
testSlave1 执行结果:
[{"allotDate":1560182400000,"allotOper":"dfg","allotType":"省调拨","applyCause":"gfdgd","applyCode":"AL1906040031","applyDate":1559577600000,"applyOper":"gfdg","billStatusId":1,"createOper":2,"createTime":1559631056000,"depId":1,"id":1,"materialSumAmount":0.000000,"sourceWarehouseId":2,"targetWarehouseId":1}]
testSlave2 执行结果:
[{"allotDate":1559318400000,"allotOper":"测试调拨用户","allotType":"市县调拨","applyCause":"测试原因","applyCode":"AL1906010030","applyDate":1559318400000,"applyOper":"XFour","billStatusId":8,"createOper":1,"createTime":1559375113000,"depId":1,"examId":1,"id":2,"materialSumAmount":52500.000000,"procInstId":"80001","sourceWarehouseId":2,"targetWarehouseId":3}]


