vue整合vue-quill-editor富文本插件并上传图片至服务器
文章目录
- 1.安装
- 2.使用
- 3.配置上传到服务器
- 4.测试
1.安装
npm install vue-quill-editor --save
在main.js里面去引用
import Vue from 'vue'
import VueQuillEditor from 'vue-quill-editor'

// require styles
import 'quill/dist/quill.core.css'
import 'quill/dist/quill.snow.css'
import 'quill/dist/quill.bubble.css'

Vue.use(VueQuillEditor, /* { default global options } */)
2.使用
import { quillEditor } from "vue-quill-editor"; //调用编辑器
<quill-editor
 v-model="data.content" ref="myQuillEditor"
 @blur="onEditorBlur($event)"
 @focus="onEditorFocus($event)"
 @change="onEditorChange($event)">
quill-editor>
事件
//富文本
onEditorBlur() {}, // 失去焦点事件
onEditorFocus() {}, // 获得焦点事件
onEditorChange() {}, // 内容改变事件
3.配置上传到服务器
默认是转base64
需要一个config
quill-config.js
//这个是自己封装的ajax
import btwApiUtil from '@/utils/btwApiUtil.js'

/*富文本编辑图片上传配置*/
const uploadConfig = {
	action: 'common.uploadfile.single', // 必填参数 图片上传地址
	methods: 'POST', // 必填参数 图片上传方式
	token: '', // 可选参数 如果需要token验证,假设你的token有存放在sessionStorage
	name: 'img', // 必填参数 文件的参数名
	size: 1024, // 可选参数   图片大小,单位为Kb, 1M = 1024Kb
	accept: 'image/png, image/gif, image/jpeg, image/bmp, image/x-icon' // 可选 可上传的图片格式
};

// toolbar工具栏的工具选项(默认展示全部)
const toolOptions = [
	['bold', 'italic', 'underline', 'strike'],
	['blockquote', 'code-block'],
	[{
		'header': 1
	}, {
		'header': 2
	}],
	[{
		'list': 'ordered'
	}, {
		'list': 'bullet'
	}],
	[{
		'script': 'sub'
	}, {
		'script': 'super'
	}],
	[{
		'indent': '-1'
	}, {
		'indent': '+1'
	}],
	[{
		'direction': 'rtl'
	}],
	[{
		'size': ['small', false, 'large', 'huge']
	}],
	[{
		'header': [1, 2, 3, 4, 5, 6, false]
	}],
	[{
		'color': []
	}, {
		'background': []
	}],
	[{
		'font': []
	}],
	[{
		'align': []
	}],
	['clean'],
	['link', 'image', 'video']
];
const handlers = {
	image: function image() {
		var self = this;

		var fileInput = this.container.querySelector('input.ql-image[type=file]');
		if(fileInput === null) {
			fileInput = document.createElement('input');
			fileInput.setAttribute('type', 'file');
			// 设置图片参数名
			if(uploadConfig.name) {
				fileInput.setAttribute('name', uploadConfig.name);
			}
			// 可设置上传图片的格式
			fileInput.setAttribute('accept', uploadConfig.accept);
			fileInput.classList.add('ql-image');
			// 监听选择文件
			fileInput.addEventListener('change', function() {
				// 创建formData
				let formData = new FormData();
				formData.append('file', fileInput.files[0]);
				fileInput.value = '';
				//这里 请求
				btwApiUtil.post('common.uploadfile.single', {}, function(resp) {
					var path = resp.data.ftpPath;
					var picPath = process.env.FTP_URL + path;
					let length = self.quill.getSelection(true).index;
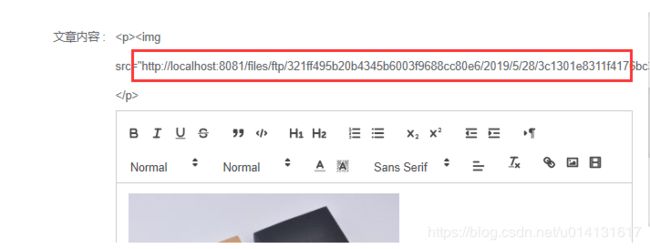
					//这里很重要,你图片上传成功后,img的src需要在这里添加,res.path就是你服务器返回的图片链接。
					self.quill.insertEmbed(length, 'image', picPath);
					self.quill.setSelection(length + 1)
					fileInput.value = ''
				}, formData);
			});
			this.container.appendChild(fileInput);
		}
		fileInput.click();
	}
};

export default {
	placeholder: '',
	theme: 'snow', // 主题
	modules: {
		toolbar: {
			container: toolOptions, // 工具栏选项
			handlers: handlers // 事件重写
		}
	}
};
配置参数
import quillConfig from "@/utils/editor/quill-config.js";
data() {
		return {
			quillOption: quillConfig
		}
},
指向参数
<quill-editor :options="quillOption"
v-model="data.content" ref="myQuillEditor"
@blur="onEditorBlur($event)"
@focus="onEditorFocus($event)"
@change="onEditorChange($event)">
quill-editor>
关键:options="quillOption"
