用Python/Keras/Flask/Docker在Kubernetes上部署深度学习模型
简单到老板也可以亲自部署
![]()
这个模型并不是强壮到可供生产的模型,而是给Kubernetes新手一个尝试的机会。我在Google Cloud上部署了这个模型,而且工作的很好。另外用户可以用同样的步骤重现以上功能。如果用户担心成本,Google提供了大量免费机会,这个演示基本没有花钱。
为什么用Kubernetes来做机器学习和数据科学
![]()
但是如果从数据科学角度看并没有使用Kubernetes的特殊原因。但是从部署,扩展和管理REST API方面来看,Kubernetes正在实现简易化的特性。
步骤预览:
在Google Cloud上创建用户
使用Keras/Flask/Docker搭建一个REST API的机器学习模型服务
用Kubernetes部署上述模型
enjoy it
我在Google Compute Engine上创建了一个对外提供服务的容器化深度学习模型,当然Google平台并不是必须的,只要能够安装Docker,随便选择平台模式。

进入Google云平台,点击左侧屏幕选择Compute Engine,启动Google Cloud VM。然后选择“Create Instance”,可以看到已经运行的实例。
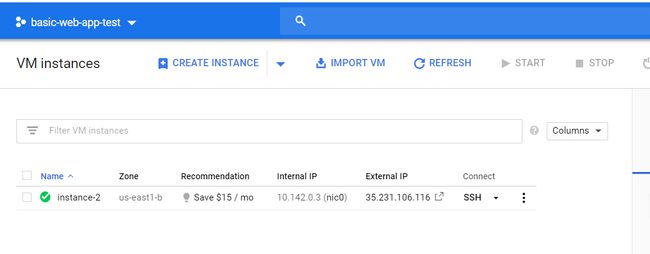
下一步选择计算资源。默认设置就足够,因为只是演示,我选择了4vCPUs和15G内存。

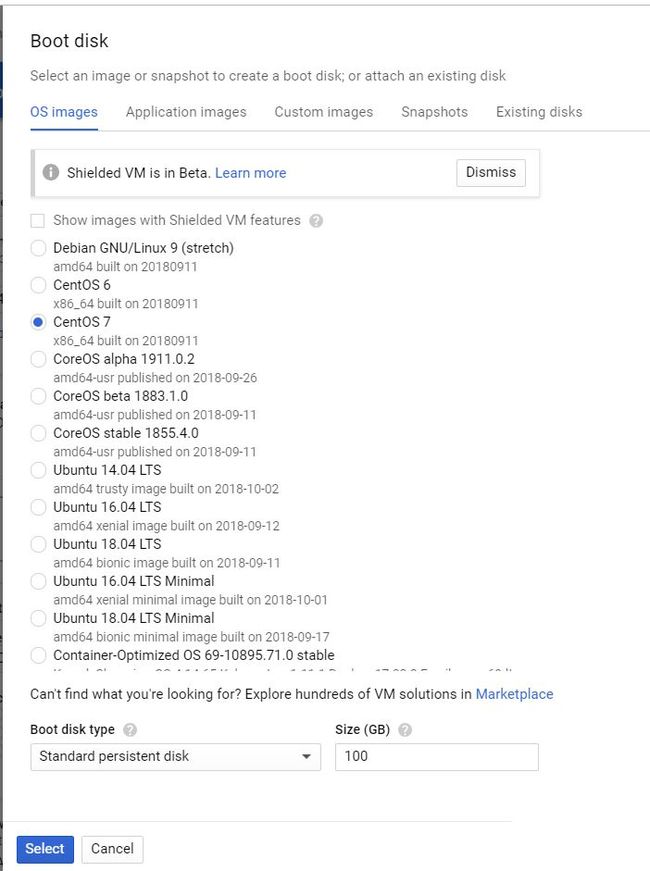
选择操作系统和磁盘大小。我选择了CentOS 7,100G硬盘。建议磁盘大于10G,因为每个Docker容器有1G大小。
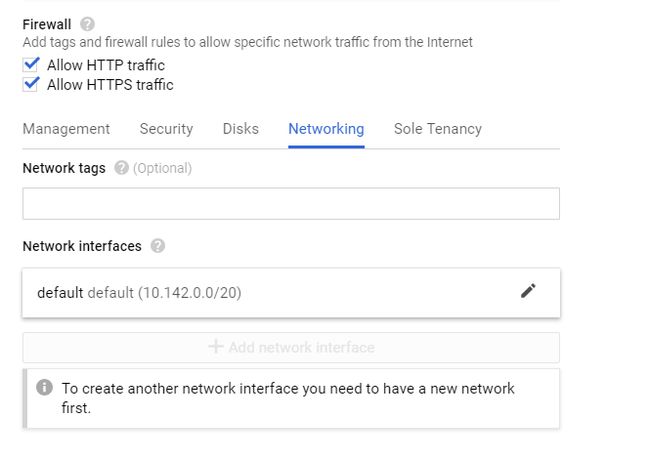
最后一步是配置允许HTTP/S工作的防火墙策略。建议选择全部透明,以便减少麻烦。
选择“Create”,一切进展顺利。

步骤二:用Keras创建深度学习模型
SSH登录到虚机开始建立模型。最简单方式就是点击虚机下方的SSH图标,会在浏览器中打开一个终端。

1、删除预装Docker
sudo yum remove docker docker-client docker-client-latest docker-common docker-latest docker-latest-logrotate docker-logrotate docker-selinux docker-engine-selinux docker-engine
2、安装最新Docker版本
sudo yum install -y yum-utils device-mapper-persistent-data lvm2sudo yum-config-manager — add-repo https://download.docker.com/linux/centos/docker-ce.reposudo yum install docker-ce
3、启动容器运行测试脚本
sudo systemctl start dockersudo docker run hello-world
以下是正确输出:
Hello from Docker!This message shows that your installation appears to be working correctly.To generate this message, Docker took the following steps: 1. The Docker client contacted the Docker daemon. 2. The Docker daemon pulled the "hello-world" image from the Docker Hub. (amd64) 3. The Docker daemon created a new container from that image which runs the executable that produces the output you are currently reading. 4. The Docker daemon streamed that output to the Docker client, which sent it to your terminal
4、创建深度学习模型 这里会借用Adrian Rosebrock的一个脚本,他提供了使用Keras的深度学习模型并通过Flask提供服务的教程,可以从这里[1]访问。
这个模型可以直接执行。但是我修改了两个配置信息:
首先,改变了容器配置,默认flask使用127.0.0....作为默认服务地址,这会在容器内部运行时出现问题。我将它修改成0.0.0.0,这样就可以实现对外和对内都可以工作的IP地址。
第二是关于Tensorflow的配置,可以从GitHub中找到这个问题描述[2]。
global graphgraph = tf.get_default_graph()...with graph.as_default():preds = model.predict(image)
运行脚本,首先创建专用目录:
mkdir keras-appcd keras-app
创建app.py文件: vim app.py
# USAGE# Start the server:# python app.py# Submit a request via cURL:# curl -X POST -F image=@dog.jpg 'http://localhost:5000/predict'# import the necessary packagesfrom keras.applications import ResNet50from keras.preprocessing.image import img_to_arrayfrom keras.applications import imagenet_utilsfrom PIL import Imageimport numpy as npimport flaskimport ioimport tensorflow as tf# initialize our Flask application and the Keras modelapp = flask.Flask(__name__)model = Nonedef load_model():# load the pre-trained Keras model (here we are using a model# pre-trained on ImageNet and provided by Keras, but you can# substitute in your own networks just as easily)global modelmodel = ResNet50(weights="imagenet")global graphgraph = tf.get_default_graph()def prepare_image(image, target):# if the image mode is not RGB, convert itif image.mode != "RGB":image = image.convert("RGB")# resize the input image and preprocess itimage = image.resize(target)image = img_to_array(image)image = np.expand_dims(image, axis=0)image = imagenet_utils.preprocess_input(image)# return the processed imagereturn image@app.route("/predict", methods=["POST"])def predict():# initialize the data dictionary that will be returned from the# viewdata = {"success": False}# ensure an image was properly uploaded to our endpointif flask.request.method == "POST":if flask.request.files.get("image"):# read the image in PIL formatimage = flask.request.files["image"].read()image = Image.open(io.BytesIO(image))# preprocess the image and prepare it for classificationimage = prepare_image(image, target=(224, 224))# classify the input image and then initialize the list# of predictions to return to the clientwith graph.as_default():preds = model.predict(image)results = imagenet_utils.decode_predictions(preds)data["predictions"] = []# loop over the results and add them to the list of# returned predictionsfor (imagenetID, label, prob) in results[0]:r = {"label": label, "probability": float(prob)}data["predictions"].append(r)# indicate that the request was a successdata["success"] = True# return the data dictionary as a JSON responsereturn flask.jsonify(data)# if this is the main thread of execution first load the model and# then start the serverif __name__ == "__main__":print(("* Loading Keras model and Flask starting server...""please wait until server has fully started"))load_model()app.run(host='0.0.0.0')
5、创建requirements.txt文件
为了在容器内运行代码,需要创建requirements.txt文件,其中包括需要运行的包,例如keras、flask、一起其它相关包。这样无论在哪里运行代码,依赖包都保持一致。
kerastensorflowflaskgeventpillowrequests
6、创建Dockerfile
FROM python:3.6WORKDIR /appCOPY requirements.txt /appRUN pip install -r ./requirements.txtCOPY app.py /appCMD ["python", "app.py"]~
首先让容器自行下载Python 3安装image,然后让Python调用pip安装requirements.txt中的依赖包,最后运行python app.py。
7、创建容器
sudo docker build -t keras-app:latest .
在keras-app目录下创建容器,后台开始安装Python 3 image等在步骤6中定义的操作。
8、运行容器
sudo docker run -d -p 5000:5000 keras-app
用 sudo docker ps-a检查容器状态,应该看到如下输出:
[gustafcavanaugh@instance-3 ~]$ sudo docker ps -aCONTAINER ID IMAGE COMMAND CREATED STATUS PORTS NAMESd82f65802166 keras-app "python app.py" About an hour ago Up About an hour 0.0.0.0:5000->5000/tcp nervous_northcutt
9、测试模型
现在可以测试此模型。用狗的照片作为输入,可以返回狗的品种。在Adrian的示例中都有该图片,我们也使用它们,并保存自工作目录下,命名为dog.jpg。

执行命令:
curl -X POST -F image=@dog.jpg 'http://localhost:5000/predict'
应该得到如下输出:
{"predictions":[{"label":"beagle","probability":0.987775444984436},{"label":"pot","probability":0.0020967808086425066},{"label":"Cardigan","probability":0.001351703773252666},{"label":"Walker_hound","probability":0.0012711131712421775},{"label":"Brittany_spaniel","probability":0.0010085132671520114}],"success":true}
可以看到此模型成功将狗归类为比格犬。下一步,我们用Kubernetes部署容器模型。
第三步:用Kubernetes部署模型
1、创建Docker Hub账号
第一步需要在Docker hub上传模型,以便使用Kubernetes集中管理。
2、登录到Docker Hub
sudo docker login, 登录到Docker Hub,应该看到如下输出:
Login Succeeded
3、给容器打标签
给模型容器命名,上传前先给它打标签。
sudo docker images,应该得到容器的id,输出如下:
REPOSITORY TAG IMAGE ID CREATED SIZE keras-app latest ddb507b8a017 About an hour ago 1.61GB
打标签命令如下:
#Formatsudo docker tag <your image id> <your docker hub id>/<app name>#My Exact Command - Make Sure To Use Your Inputssudo docker tag ddb507b8a017 gcav66/keras-app
4、将模型容器上传到Docker Hub
运行命令如下:
#Formatsudo docker push <your docker hub name>/<app-name>#My exact commandsudo docker push gcav66/keras-app
5、创建Kubernetes集群
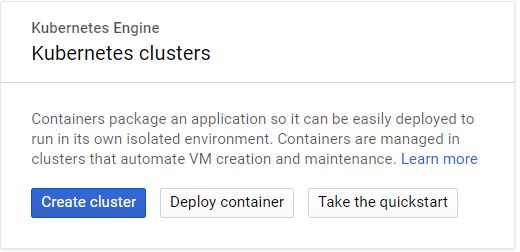
在Google Cloud Home界面,选择Kubernetes Engine。
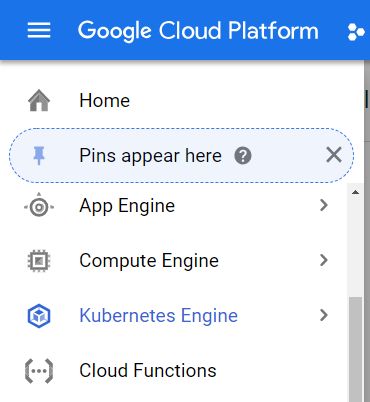
创建新集群:
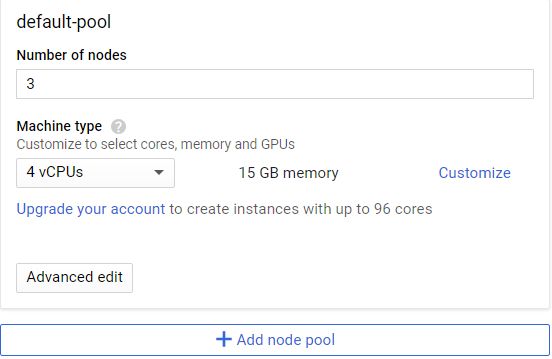
选择集群内节点资源,因为要启动三个节点(每个节点4vCPU和15G内存),至少需要12vCPU和45G内存。
连接集群,Google’s Kubernetes自动会在VM上安装Kubernetes。

在Kubernetes中运行容器:
kubectl run keras-app --image=gcav66/keras-app --port 5000
确认是否Pod正确运行 kubectlgetpods,输出如下:
gustafcavanaugh@cloudshell:~ (basic-web-app-test)$ kubectl get podsNAME READY STATUS RESTARTS AGEkeras-app-79568b5f57-5qxqk 1/1 Running 0 1m
为了安全起见,将服务端口暴露与80端口:
kubectl expose deployment keras-app --type=LoadBalancer --port 80 --target-port 5000
确认服务正常启动: kubectlgetservice,正常输出如下:
gustafcavanaugh@cloudshell:~ (basic-web-app-test)$ kubectl get serviceNAME TYPE CLUSTER-IP EXTERNAL-IP PORT(S) AGEkeras-app LoadBalancer 10.11.250.71 35.225.226.94 80:30271/TCP 4mkubernetes ClusterIP 10.11.240.1443/TCP 18m
提取cluster-IP,并将其合并于服务提交命令: curl-X POST-F image=@dog.jpg'http://
$ curl -X POST -F image=@dog.jpg 'http://35.225.226.94/predict'{"predictions":[{"label":"beagle","probability":0.987775444984436},{"label":"pot","probability":0.0020967808086425066},{"label":"Cardigan","probability":0.001351703773252666},{"label":"Walker_hound","probability":0.0012711131712421775},{"label":"Brittany_spaniel","probability":0.0010085132671520114}],"success":true}
第四步:总结
本文提供了一个使用Keras和Flask提供REST API服务的深度学习模型,并把它集成到容器内部,上传到Docker Hub,并用Kubernetes部署,非常容易地实现了对外提供服务和访问。
现在,我们可以对这个项目进行很多改进。对于初学者,可以改变本地Python服务到更加强壮的gunicorn;可以横向扩展Kubernetes,实现服务扩容;也可以从头搭建一套Kubernetes环境。
相关链接:
https://blog.keras.io/building-a-simple-keras-deep-learning-rest-api.html
https://github.com/tensorflow/tensorflow/issues/14356
原文链接:https://medium.com/analytics-vidhya/deploy-your-first-deep-learning-model-on-kubernetes-with-python-keras-flask-and-docker-575dc07d9e76
![]()
![]()
