VsCode C/C++ 开发环境配置最全详细教程 Windows / Linux 均适用
整体步骤:
1.安装VSCode
2.在VSCode内安装c++插件
3.安装编译、调试环境
4.修改VSCode调试配置文件
1.安装VSCode
下载地址:https://code.visualstudio.com/
如下图选择适合自己系统的下载之后安装就行
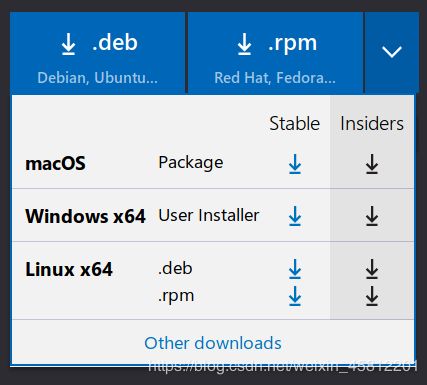
注意:建议直接安装在C盘,方便配置,软件大小本身不大!!!
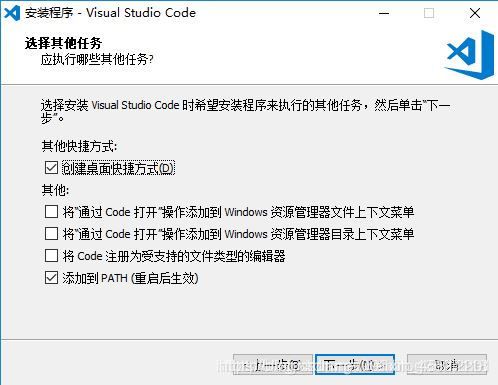
注意:一定要将 添加到PATH 这项打钩!!!
2.VSCode内安装c++插件
打开VScode,在左侧一栏,最下面一个图标是扩展商店,或者快捷键ctrl+shift+x直接切换到商店界面,然后输入C++,然后点击安装,安装之后重启生效,安装其他插件也是在这里搜索安装
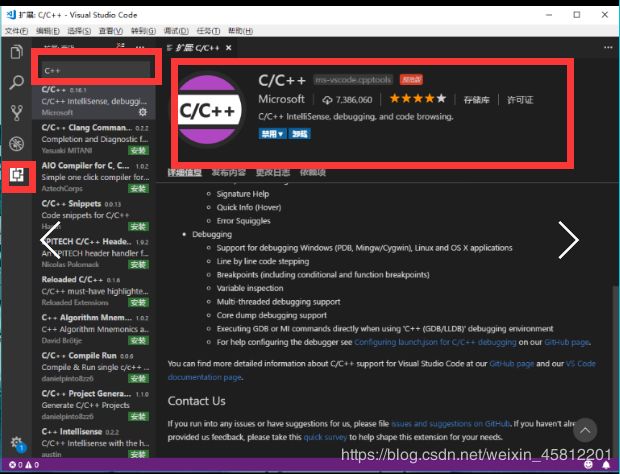
这里我推荐几个我学习码代码常用的插件:
- 名称: Chinese (Simplified) Language 中文界面配置插件,英语大神请忽略

- 名称: vscode-icons 图标插件可以使得文件结构更加清晰

- 名称: Bracket Pair Colorizer 括号高亮,彩虹括号

- 名称: One Dark Pro 一个非常好看的黑色界面主题插件

- 名称: GBKtoUTF8 不推荐(如出现注释乱码,可以试着安装)

- 名称: Code Runner 代码运行插件,右键即可编译运行单文件,很方便


3.安装编译、调试环境
3.1 windows系统:
3.1.1 安装 mingw-w64
目前windows下调试仅支持 Cygwin 和 MinGW,mingw-w64 ,本文这里使用mingw-w64.
mingw-w64下载地址:https://sourceforge.net/projects/mingw-w64/files/
选择图中红色标记,点击会自动跳转下载页面下载
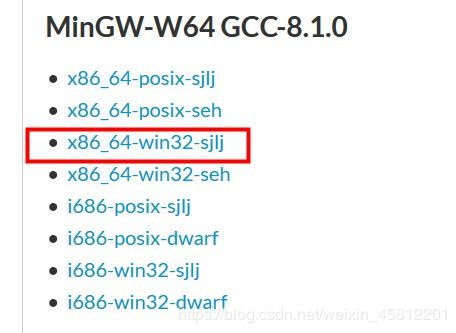
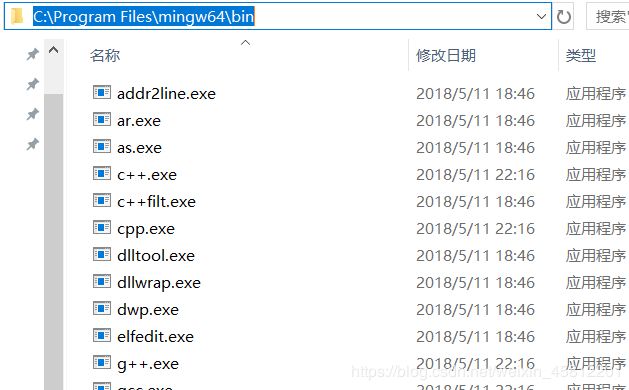
下载完后,直接将 mingw-w64 解压到一个合适的目录,比如我解压C:\Program Files下。推荐放C盘,路径好找,只有600M左右,不影响。
3.1.2 配置环境变量
- 找到解压的目录,复制解压出来的bin目录的地址
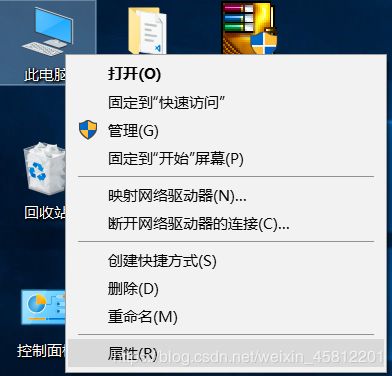
- 右击此电脑选择属性
- 依次点击 高级系统设置 – 环境变量
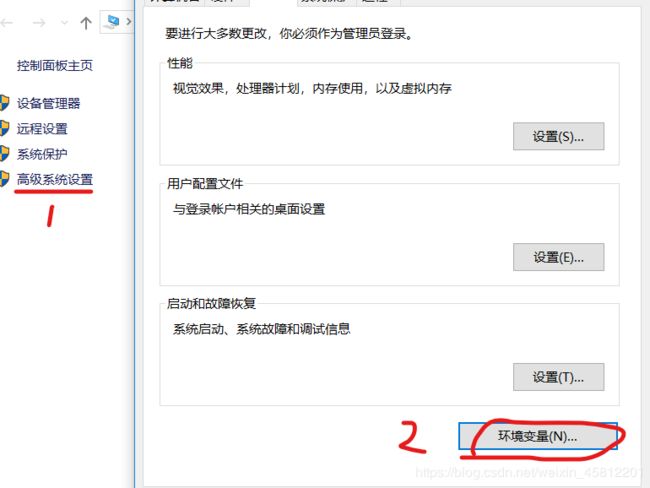
- 点击Path,选择编辑,用户变量和系统变量两个Path都要改哦
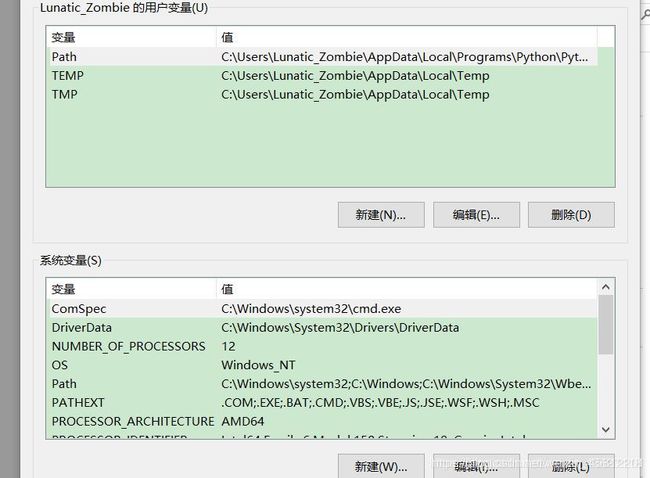
- 新建,将复制的目录位置粘贴到此,确定

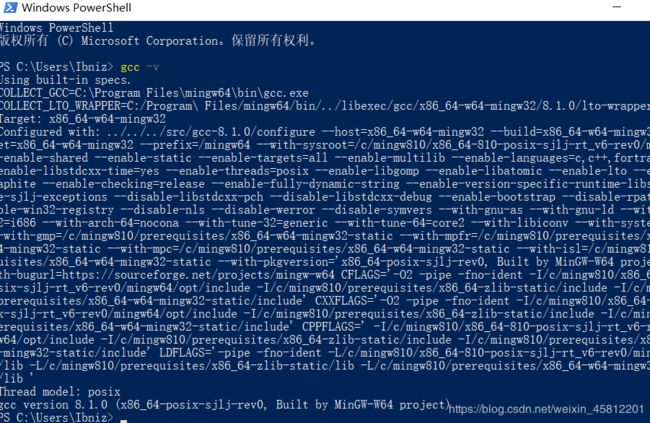
- 在桌面上按住shift点击鼠标右键-在此处打开powershell, 输入gcc -v,看到如下界面说明环境变量配置成功
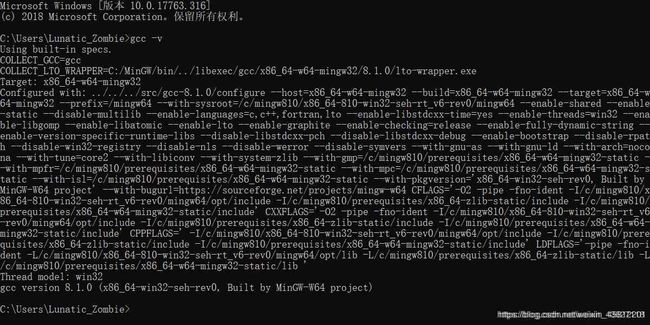
或者检查 win+R cmd 输入 gcc -v,看到如下界面说明环境变量配置成功
3.1.3 配置VS Code调试环境
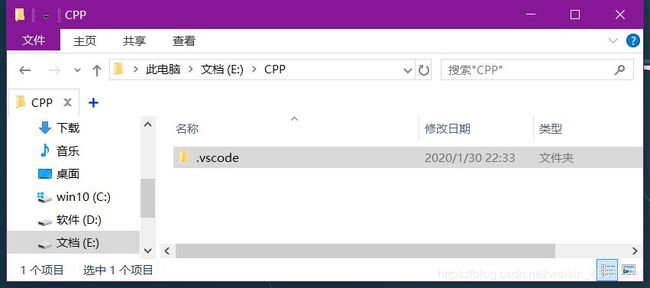
- 建议配置之前新建一个目录专门用来存储C/CPP文件,因为配置设置VS Code会默认保存到配置时文件的目录下。我这里创建有一个 **CPP **文件夹
- 打开CPP文件夹,新建 .vscode文件夹并打开
- 在 .vscode 文件夹中,依次新建3个文件,名称如下:
c_cpp_properties.json
launch.json
tasks.json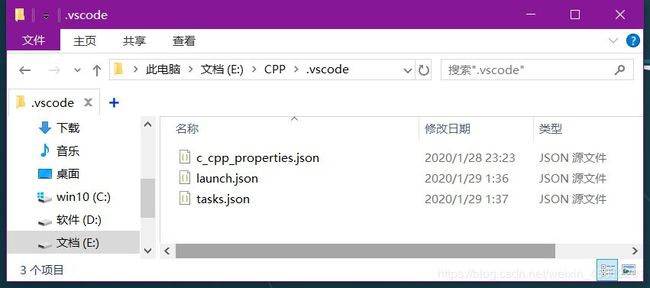
- 配置这3个文件
launch.json 文件如下图配置
"miDebuggerPath":后面修改为你的 mingw64 路径
"preLaunchTask": “task g++” 和 tasks.json 中的 “label”: “task g++” 引号中的名字要一致,本代码中为 task g++
{
    // Use IntelliSense to learn about possible attributes.
    // Hover to view descriptions of existing attributes.
    // For more information, visit: https://go.microsoft.com/fwlink/?linkid=830387
    "version": "0.2.0",
    "configurations": [

        {
            "name": "(gdb) Launch",
            "type": "cppdbg",//配置类型,只能为cppdbg
            "request": "launch",//请求配置类型,可以为launch(启动)或attach(附加)
            "program": "${fileDirname}/${fileBasenameNoExtension}.exe",//调试程序的路径名称
            "args": [],//调试传递参数
            "stopAtEntry": false,
            "cwd": "${workspaceFolder}",
            "environment": [],
            "externalConsole": true,//true显示外置的控制台窗口,false显示内置终端
            "MIMode": "gdb",
            "miDebuggerPath": "C:\\mingw64\\bin\\gdb.exe",
            "setupCommands": [
                {
                    "description": "Enable pretty-printing for gdb",
                    "text": "-enable-pretty-printing",
                    "ignoreFailures": true
                }
            ],
            "preLaunchTask": "task g++",//调试前执行的任务,就是之前配置的tasks.json中的label字段
        }
    ]
}
tasks.json 文件如下图配置
{
    // See https://go.microsoft.com/fwlink/?LinkId=733558
    // for the documentation about the tasks.json format
    "version": "2.0.0",
    "tasks": [
        {
            "type": "shell",
            "label": "task g++",//任务的名字,就是刚才在命令面板中选择的时候所看到的,可以自己设置
            "command": "g++",
            "args": [//编译时候的参数
                "-g",//添加gdb调试选项
                "${file}",
                "-o",//指定生成可执行文件的名称
                "${fileDirname}/${fileBasenameNoExtension}.exe"
            ],
            "problemMatcher": {
                "owner": "cpp",
                "fileLocation": [
                    "relative",
                    "${workspaceRoot}"
                ],
                "pattern": {
                    "regexp": "^(.*):(\\d+):(\\d+):\\s+(warning|error):\\s+(.*)$",
                    "file": 1,
                    "line": 2,
                    "column": 3,
                    "severity": 4,
                    "message": 5
                }
            },
            "group": {
                "kind": "build",
                "isDefault": true//表示快捷键Ctrl+Shift+B可以运行该任务
            }
        }
    ]
}
c_cpp_properties.json 文件如下图配置
{
    "configurations": [
        {
            "name": "Win32",
            "includePath": [
                "${workspaceFolder}/**"
            ],
            "defines": [
                "_DEBUG",
                "UNICODE",
                "_UNICODE"
            ],
            "compilerPath": "C:/mingw64/bin/g++.exe",
            "cStandard": "c11",
            "cppStandard": "c++17",
            "intelliSenseMode": "gcc-x64"
        }
    ],
    "version": 4
}
- 配置完上面3项,你的vscode应该就可以正常调试了

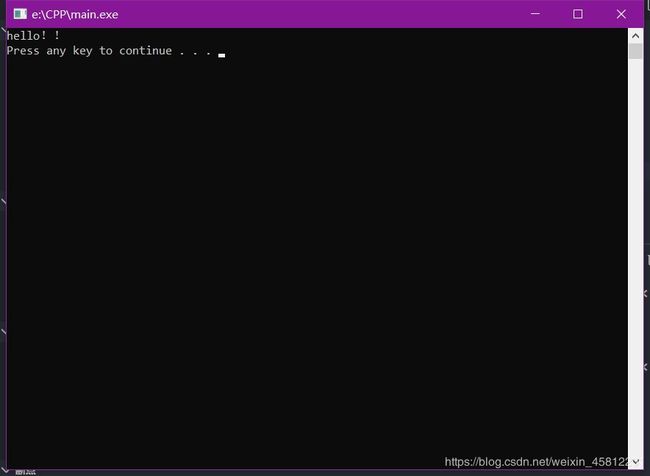
- 最后几点注意:
【1】程序文件路径不要有中文,否则会导致调试失败
【2】vscode设置保留在单文件夹中,你如果要更换文件夹,请把 .vscode 文件夹也复制到你要更改的文件夹中
3.2 linux系统:
3.1.1 安装 gdb 调试环境
-
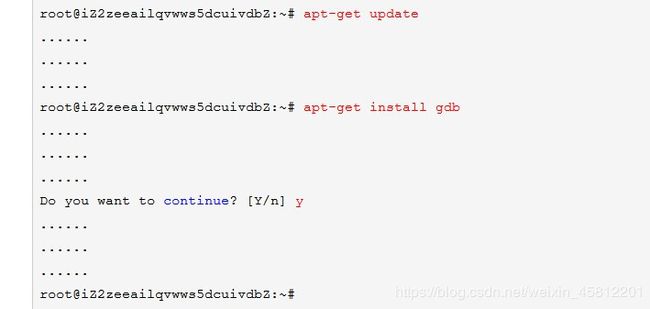
打开终端,在root用户权限下:输入以下命令
apt-get update
apt-get install gdb
如图,按提示操作即可,等待程序执行完成就安装好gdb了
-
参考上面windows教程,安装 vscode,安装拓展插件,新建文件夹和4个配置文件。
参考命令:
deb包安装方式步骤:
1、找到相应的软件包,比如soft.version.deb,下载到本机某个目录;
2、打开一个终端,su -成root用户;
3、cd soft.version.deb所在的目录;
4、输入dpkg -i soft.version.deb -
配置这4个文件
launch.json 文件如下图配置"miDebuggerPath":后面修改为你的 gdb 路径
"preLaunchTask": “build” 和 tasks.json 中的 “label”: “build” 引号中的名字要一致,本代码中为 build
{
    "version": "0.2.0",
    "configurations": [

        {
            "name": "debug",
            "type": "cppdbg",
            "request": "launch",
            "program": "${fileDirname}/${fileBasenameNoExtension}.out",
            "args": [],
            "stopAtEntry": false,
            "cwd": "${workspaceFolder}",
            "environment": [],
            "externalConsole": true,
            "MIMode": "gdb",
            "setupCommands": [
                {
                    "description": "Enable pretty-printing for gdb",
                    "text": "-enable-pretty-printing",
                    "ignoreFailures": true
                }
            ],
            "preLaunchTask": "build",
            "miDebuggerPath": "/usr/bin/gdb"
        }
    ]
}
tasks.json 文件如下图配置
{
// 有关 tasks.json 格式的文档,请参见
// https://go.microsoft.com/fwlink/?LinkId=733558
"version": "2.0.0",
"tasks": [
{
"label": "build",
"type": "shell",
"command": "g++",
"args": [
"-g",
"${file}",
"-o",
"${fileDirname}/${fileBasenameNoExtension}.out",
"-l",
"pthread"
],
"presentation": {
"reveal": "never"
},
"problemMatcher": [
"$gcc"
]
}
]
}
c_cpp_properties.json 文件如下图配置
 {
    "configurations": [
        {
            "name": "Linux",
            "includePath": [
                "${workspaceFolder}/**",
                "/usr/include/**"
            ],
            "defines": [],
            "compilerPath": "/usr/bin/gcc",
            "cStandard": "c11",
            "cppStandard": "c++17",
            "intelliSenseMode": "gcc-x64"
        }
    ],
    "version": 4
}
settings.json文件如下图配置
{
    "files.associations": {
        "iostream": "cpp",
        "stdio.h": "c",
        "ostream": "cpp",
        "array": "cpp"
    }
}
- 配置完上面4项,你的vscode应该就可以正常调试了
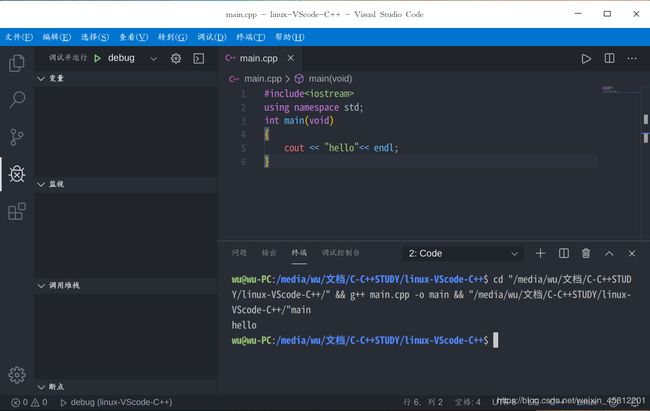
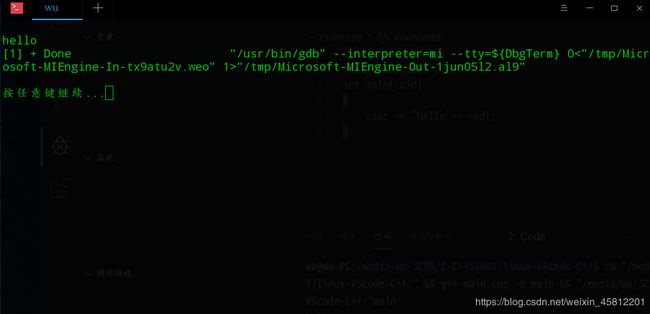
- 最后几点注意:
【1】程序文件路径不要有中文,否则会导致调试失败
【2】vscode设置保留在单文件夹中,你如果要更换文件夹,请把 .vscode 文件夹也复制到你要更改的文件夹中
【3】中文显示乱码问题 VS code 编码设置/文件乱码
点击文件->首选项->设置,然后在右边用户设置输入:
“files.autoGuessEncoding”: true,
插入这一行内用并保存。
或者如下图打钩:
 加入这个设置后,VSCode会在打开文件时尝试猜测字符集编码。
【4】VSCode内部终端运行代码
设置在终端运行 : 首选项 -> 设置 -> 扩展 -> Run Code ,勾选”Run In Terminal“和”Save File Before Run
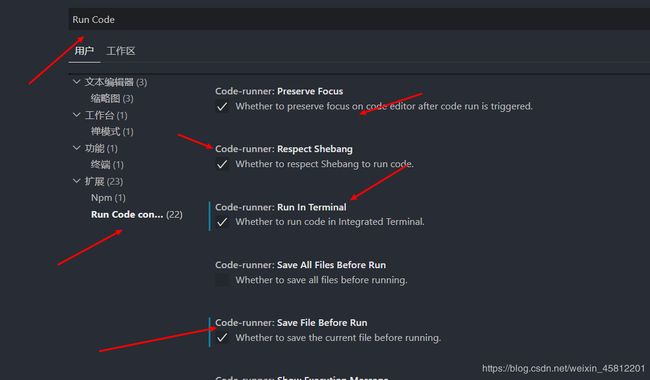
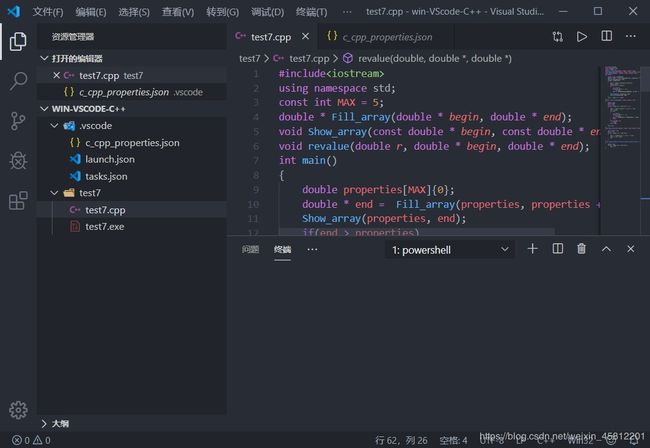
这样的话 写个demo运行一下吧(这里是右击运行的,也可以用快捷键,不过这里的快捷键已经被我修改过了)