win10基于自带插件功能WSL安装/卸载ubuntu子系统及桌面
文章目录
- 1 安装
- 1.1 ubuntu server端安装
- 方法一:(推荐)
- 方法二:
- 1.2 Windows10访问Ubuntu子系统(WSL)的桌面环境
- 1.2.1 ubuntu远程桌面安装
- 2 卸载
- 2.1 卸载桌面
- 卸载xfce
- 卸载xubuntu-desktop
- 2.2 卸载ubuntu server
- 3 遇到问题
- xfce桌面启用终端报错
- xfce4下快捷键截屏功能
- WSL的 ubuntu终端滚动条消失
- windows与Linux子系统文件传递
- 关于ubuntu镜像源
- github提速
- 关于限制WSL的内存占用
- WSL服务重启
win10提供安装虚拟机得功能插件。不需要通过虚拟机软件如VMware等。
1 安装
1.1 ubuntu server端安装
方法一:(推荐)
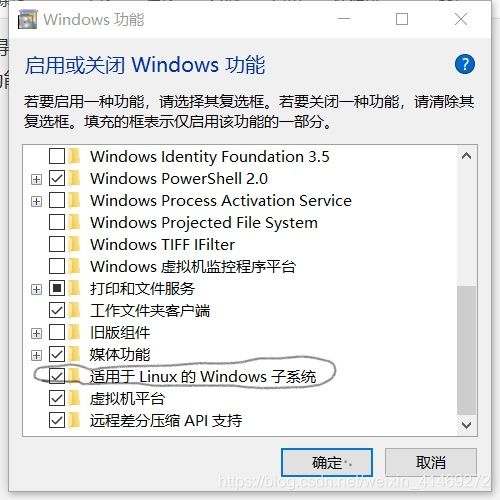
- 在左下搜索栏中输入“功能”,打开启用或关闭windows功能。打开适用于Linux的windows子系统。如下,然后重启生效。
- 在左下搜索栏中输入“cmd”,打开命令终端,输入“bash”,提示未安装子系统,及给出Microsoft store得安装链接地址,使用浏览器访问,会自动重定向到应用商店,然后可以获取需要的Linux子系统,比如Ubuntu。

3.选择需要得系统版本,获取安装。
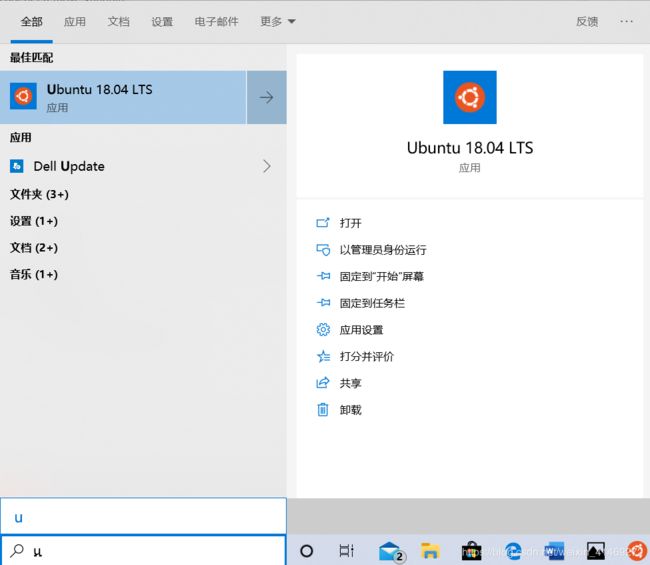
安装成功后,可以使用windows得cmd中直接使用bash。同时在左下搜索栏里搜索安装得子系统如“ubuntu”,对应打开,子系统终端。
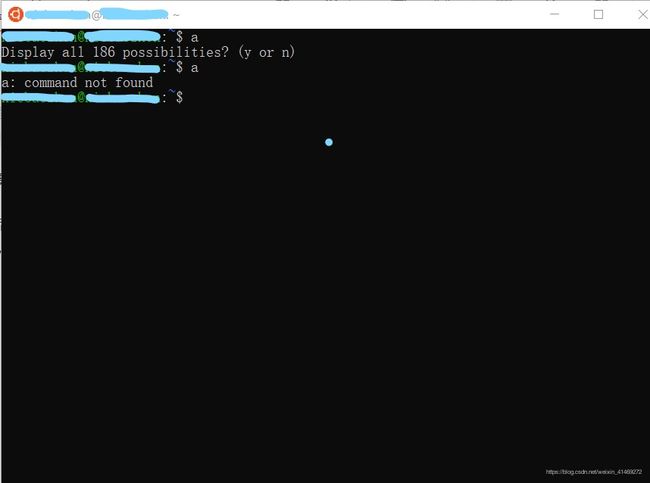
在操作终端,使用tab会一直响,如下操作:参考
在 shell 的 tab 补全、vi 里操作时,经常响起嘟嘟声,真烦人。
你只要在 /etc/inputrc,找到
#set bell style none
去掉前面的注释符号。
方法二:
另外:可以使用windows自带得hyper-v功能来安装带界面或者服务端得虚拟机。
ubuntu镜像地址
使用hyper-v参考安装链接:基于win10自带虚拟机安装UbuntuServer
ubuntu server版本:去掉了交互界面,只有终端操作,但是简化了系统结构,运行速度快。
ubuntu destop版本:有UI交互图形界面。
1.2 Windows10访问Ubuntu子系统(WSL)的桌面环境
1.2.1 ubuntu远程桌面安装
参考1:安装xfce4 推荐
WSL使用图形界面ubuntu
打开已安装好的WSL的ubuntu终端,依次输入以下命令:
注意:
需要更改以下镜像源,换成国内的,更改方法:关于ubuntu镜像源
sudo apt install xfce4
sudo apt install xrdp
sudo sed -i 's/port=3389/port=3390/g' /etc/xrdp/xrdp.ini
sudo echo xfce4-session >~/.xsession
sudo service xrdp restart
远程连接
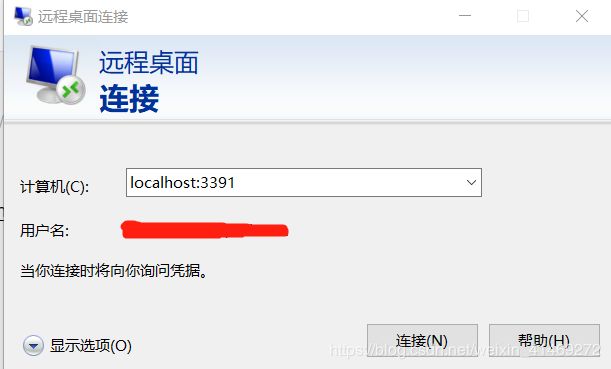
在 win10 开始菜单中搜远程桌面,或按win+r 后输入mstsc
在计算机后面输入 localhost:3390 点击连接,用户名这里用root。首次连接可能需要较长时间。
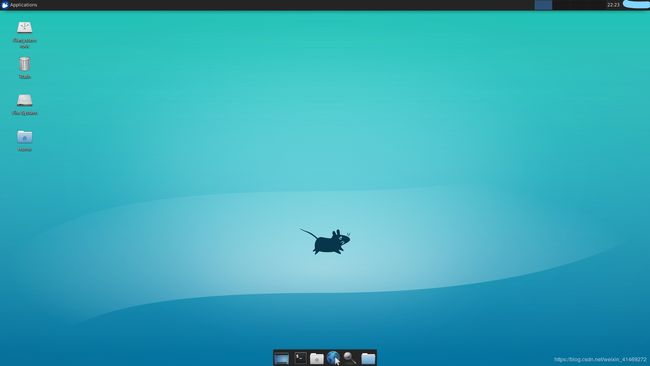
登录界面后:
参考2:安装xubuntu,xubuntu是基于xfce的。
Windows10访问Ubuntu子系统(WSL)的桌面环境
sudo apt install xubuntu-desktop
安装远程桌面服务xrdp
sudo apt install xrdp
设置占用端口号
sudo sed -i 's/port=3389/port=3390/g' /etc/xrdp/xrdp.ini
指定开启桌面环境
sudo echo xfce4-session >~/.xsession
sudo service xrdp restart
汉化
sudo dpkg-reconfigure locales
后一直按键盘上的↓找到zh_CN UTF-8,然后按空格勾选,再tab切换到ok上回车,接下来的界面选zh再回车。
远程连接
在windows开始菜单中搜远程桌面打开后在计算机后面输入localhost:3390点击连接。首次连接可能需要较长时间。
用户名密码可以先写,也可以不写,网上有教程还勾选了保存凭据的,这个看个人习惯吧,我用软件从来不勾选记住密码的。
2 卸载
如何卸载xfce桌面或者xubuntu-desktop
2.1 卸载桌面
卸载xfce
(可以使用purge来清理软件的注册表)
sudo apt-get remove xfce4
卸载相关软件
sudo apt-get purge xfce*
sudo apt-get purge xfconf xfce4-utils xfwm4 xfce4-session thunar xfdesktop4 exo-utils xfce4-panel xfce4-terminal libxfce4util-common scim xscreensaver
自动卸载不必要的软件
sudo apt-get autoremove
系统清理
sudo apt-get clean
重启
sudo reboot
卸载xubuntu-desktop
sudo apt-get remove xubuntu*
同样需要卸载不必要的软件
sudo apt-get autoremove
注意事项
xubutnu附带的应用也会删除,就是xfce或xubuntu下常用的软件也会被卸载
2.2 卸载ubuntu server
搜索栏输入ubuntu,点击右侧卸载,按照提示进行server端的卸载。
3 遇到问题
xfce桌面启用终端报错
Q1:
服务器xfce中,启动终端,报错:
Failed to execute default Terminal Emulator : input/output error
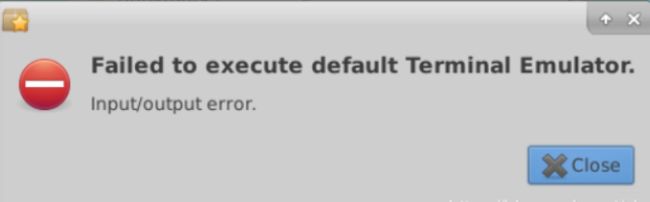
R1:
解决参考
服务器终端:
sudo update-alternatives --config x-terminal-emulator
查看是否含有 xfce4-terminal,如果有直接通过相应的数字选择;没有则输入以下命令下载后再选择
sudo apt-get install xfce4-terminal
创建打开新终端快捷键:与下边讲述的截屏创建过程相同。
cmd:x-terminal-emulator
xfce4下快捷键截屏功能
Q2: xfce4下快捷键截屏功能。
终端命令:
xfce4-screenshooter -f
创建截屏快捷键。
- Alt+F3组合键(有fn键得需Alt+fn+F3),打开Application finder,如下,输入key,找到keyboard并打开。

- 点击Application Shortcuts,点击添加快捷键。如下。

- 输入快捷键对应cmd:
xfce4-screenshooter -f,点OK。

- 在Command Shortcut界面,在键盘上按下你想要设置得键。该界面会显示你所按下得键,就创建好屏幕截图快捷键了。

WSL的 ubuntu终端滚动条消失
解决办法:【WSL】终端窗口无法滚动查看前面内容的解决办法

windows与Linux子系统文件传递
R:windows的磁盘被挂载在linux子系统/mnt下。
cd /mnt 就可以看到windows的磁盘内容。

关于ubuntu镜像源
配置文件/etc/apt/sources.list 需要root权限
18.04
国内镜像源阿里、网易、清华、中科大
#阿里源
deb http://mirrors.aliyun.com/ubuntu/ bionic main restricted universe multiverse
deb http://mirrors.aliyun.com/ubuntu/ bionic-security main restricted universe multiverse
deb http://mirrors.aliyun.com/ubuntu/ bionic-updates main restricted universe multiverse
deb http://mirrors.aliyun.com/ubuntu/ bionic-proposed main restricted universe multiverse
deb http://mirrors.aliyun.com/ubuntu/ bionic-backports main restricted universe multiverse
deb-src http://mirrors.aliyun.com/ubuntu/ bionic main restricted universe multiverse
deb-src http://mirrors.aliyun.com/ubuntu/ bionic-security main restricted universe multiverse
deb-src http://mirrors.aliyun.com/ubuntu/ bionic-updates main restricted universe multiverse
deb-src http://mirrors.aliyun.com/ubuntu/ bionic-proposed main restricted universe multiverse
deb-src http://mirrors.aliyun.com/ubuntu/ bionic-backports main restricted universe multiverse
16.04镜像源
deb http://mirrors.aliyun.com/ubuntu/ xenial main
deb-src http://mirrors.aliyun.com/ubuntu/ xenial maindeb http://mirrors.aliyun.com/ubuntu/ xenial-updates main
deb-src http://mirrors.aliyun.com/ubuntu/ xenial-updates maindeb http://mirrors.aliyun.com/ubuntu/ xenial universe
deb-src http://mirrors.aliyun.com/ubuntu/ xenial universe
deb http://mirrors.aliyun.com/ubuntu/ xenial-updates universe
deb-src http://mirrors.aliyun.com/ubuntu/ xenial-updates universedeb http://mirrors.aliyun.com/ubuntu/ xenial-security main
deb-src http://mirrors.aliyun.com/ubuntu/ xenial-security main
deb http://mirrors.aliyun.com/ubuntu/ xenial-security universe
deb-src http://mirrors.aliyun.com/ubuntu/ xenial-security universe
github提速
测试有点效果
https://blog.csdn.net/weixin_41469272/article/details/103202456
关于限制WSL的内存占用
http://bbs.pcbeta.com/viewthread-1829766-1-1.html
https://www.jianshu.com/p/c63ab83ee1e7
在 %UserProfile% 文件夹下创建.wslconfig文件。
打开windows cmd,输入:
echo %UserProfile% 查看%UserProfile% 对应位置。
在%UserProfile% 对应位置下创建.wslconfig文件
输入以下内容:
[wsl2]
memory=4GB
swap=8GB
localhostForwarding=true
然后最好重启以下WSL。WSL-Ubuntu18.04 LTS 重启方法:
WSL服务重启
管理员权限运行cmd
#停止
net stop LxssManager
#启动
net start LxssManager