SpringBoot专题学习Part27:SpringBoot整合RabbitMQ(发送接收消息、序列化、监听消息、AmqpAdmin的使用)
一、介绍
RabbitMQ是一套开源的消息队列服务软件 是由LShift提供的一个AMQP的开源实现
由以高性能 健壮以及可伸缩性出名的Erlang写成
具有很高的稳定性和可靠性
二、使用
1、准备和配置
首先是引入RabbitMQ的依赖
若使用Spring Initializer创建项目 可在创建的时候带上RabbitMQ模块
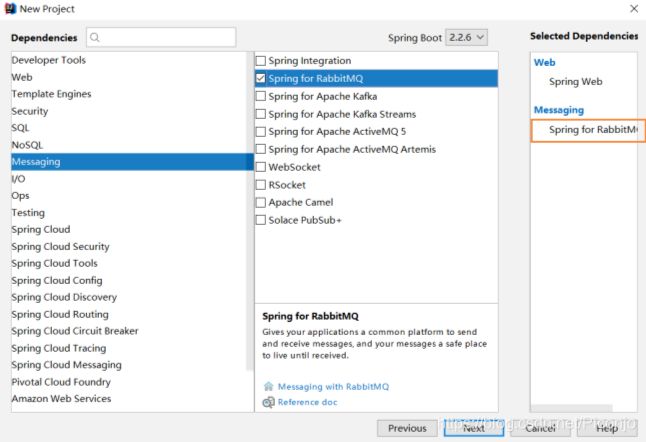
或者直接手动引入依赖:
<dependency>
	<groupId>org.springframework.bootgroupId>
	<artifactId>spring-boot-starter-amqpartifactId>
dependency>
然后 在配置文件中配置RabbitMQ的连接信息:
# ip地址 默认为localhost
spring.rabbitmq.host=111.111.111.111
# 用户名 默认为guest
spring.rabbitmq.username=guest
# 密码 默认为guest
spring.rabbitmq.password=guest
# 端口号 默认为5672
spring.rabbitmq.port=5672
# 虚拟主机地址 默认为/
spring.rabbitmq.virtual-host=/
RabbitMQ的自动配置类是RabbitAutoConfiguration
里面配置了连接工厂(ConnectionFactory)
RabbitProperties类里封装了RabbitMQ的所有配置属性
在自动配置类中还配置了RabbitTemplate
该Template用于给RabbitMQ发送和接收消息 类似于JDBC的JdbcTemplate
在自动配置类中还配置了AmqpAdmin
是RabbitMQ的系统管理功能组件 用于给RabbitMQ声明队列 创建交换器等
2、RabbitTemplate发送接收消息
首先在类里注入RabbitTemplate
因为SpringBoot就是靠着RabbitTemplate来发送接收消息的:
@Autowired
RabbitTemplate rabbitTemplate;
①、发送消息 :
单播模式 点对点发送
首先要选择用于发送的交换器和该交换器绑定的路由键
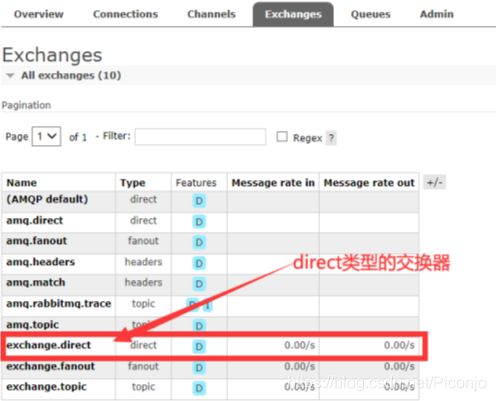
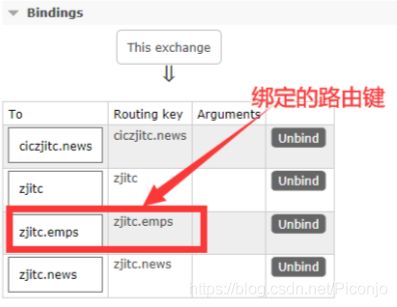
// 传入要发送的对象 自动序列化并发送给RabbitMQ
// rabbitTemplate.convertAndSend(exchange,routeKey,object)
Map<String,Object> map=new HashMap<>();
map.put("msg","HelloWorld");
map.put("data", Arrays.asList(true,123,"abc"));
// 对象被默认序列化之后发送
rabbitTemplate.convertAndSend("exchange.direct","zjitc.emps",map);
②、接收消息:
// 指定队列名来获取 接收的时候会自动转换
Object o = rabbitTemplate.receiveAndConvert("zjitc.emps");
// 收到的结果的类型
System.out.println(o.getClass());// class java.util.HashMap
System.out.println(o);// {msg=HelloWorld, data=[true, 123, abc]}
接收之后 队列中的该条消息就没有了 因为已经被"阅读"了
③、序列化:
可将数据自动转换为JSON格式发送
RabbitTemplate里内置有一个MessageConverter(消息转换器) 默认使用的是SimpleMessageConverter
该SimpleMessageConverter底层是使用SerializationUtils转换的 因此导致了显示乱码结果
MessageConverter有很多实现 可以更换一个 换成Jackson2JsonMessageConverter:
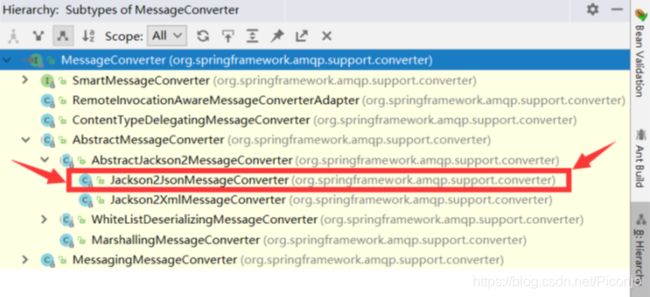
注:MessageConverter是org.springframework.amqp.support.converter.MessageConverter 不要导错包了
@Configuration
public class MyAMQPConfig {

    @Bean
    public MessageConverter messageConverter()
    {
        // 换成Jackson2JsonMessageConverter
        return new Jackson2JsonMessageConverter();
    }
}
加上之后 自动配置会立即生效 RabbitAutoConfiguration会识别自定义的MessageConverter并且一并添加
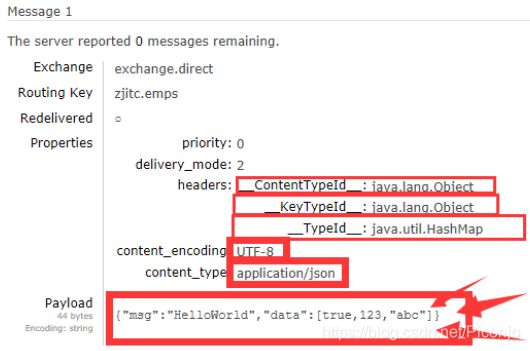
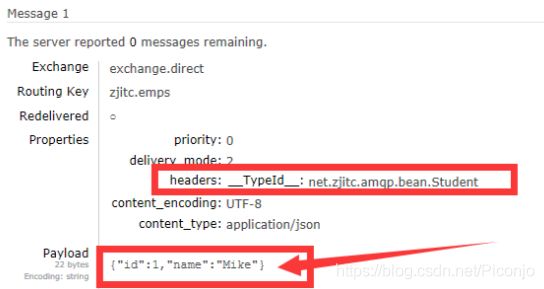
此时显示的就是JSON格式的数据了
还能发送接收自定义的类:
发送:
rabbitTemplate.convertAndSend("exchange.direct","zjitc.emps",new Student(1,"Mike"));
同样 也可正常序列化接收:
// 指定队列名来获取 接收的时候会自动转换
Object o = rabbitTemplate.receiveAndConvert("zjitc.emps");
// 收到的结果的类型
System.out.println(o.getClass());// class net.zjitc.amqp.bean.Student
不仅只能点对点发送 也可广播发送消息:
广播的时候是发送给所有的queue 因此无需指定消息队列的key 留空即可 但不能不填 否则会接收不到消息
rabbitTemplate.convertAndSend("exchange.fanout","",new Student(2,"Pico"));
3、监听消息队列的内容
使用@RabbitListener和@EnableRabbit注解实现
首先 须开启基于注解的Rabbit模式
将@EnableRabbit注解加在启动类上:
@SpringBootApplication
@EnableRabbit // 开启基于注解的RabbitMQ模式
public class SpringbootAmqpApplication {

    public static void main(String[] args) {
        SpringApplication.run(SpringbootAmqpApplication.class, args);
    }
}
然后用@RabbitListener注解加在方法上来监听消息队列 并指定要监听的消息队列的key key传入的是数组形式 因而可监听多个消息队列
方法的入参的要接收的类的类型
@Service
public class StudentService {

    // 只要指定的队列有消息进入 该方法即会被调用 接收之后 队列中的该条数据就没有了
    @RabbitListener(queues = "zjitc.emps")
    public void receive(Student student)
    {
        System.out.println("叮咚!您刚刚收到一个新学生 信息为:"+student);
    }
}
![]()
消息发送后 立刻收到了
还可接收消息头和消息体:
用org.springframework.amqp.core.Message对象来接收
@RabbitListener(queues = "zjitc.news")
public void receiveWithHeader(Message message)
{
    System.out.println(message.getMessageProperties());
    System.out.println(message.getBody());
}
![]()
4、AmqpAdmin的使用
AmqpAdmin的功能是可在程序中对交换器(Exchange)和消息队列(Queen)和绑定规则进行操作(创建 删除 绑定 等等)
首先 要在类里注入AmqpAdmin:
@Autowired
AmqpAdmin amqpAdmin;
创建
创建的时候 使用以declare开头的方法
declare就是声明的意思(多学了一个单词
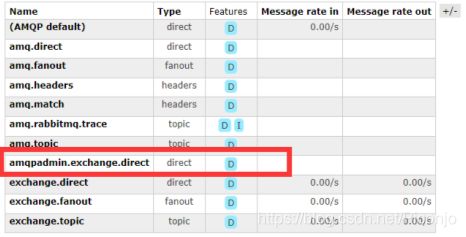
创建交换器:
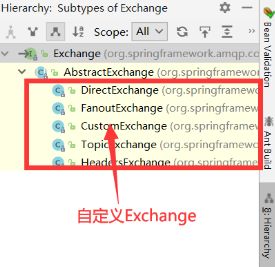
使用declareExchange()方法创建一个交换器:
// 创建交换器 可指定交换器的名字
amqpAdmin.declareExchange(new DirectExchange("amqpadmin.exchange.direct"));
创建队列:
// 当传入的是两个参数时 第一个参数代表队列的key 第二个参数代表是否可持久化
amqpAdmin.declareQueue(new Queue("amqpadmin.queue",true));
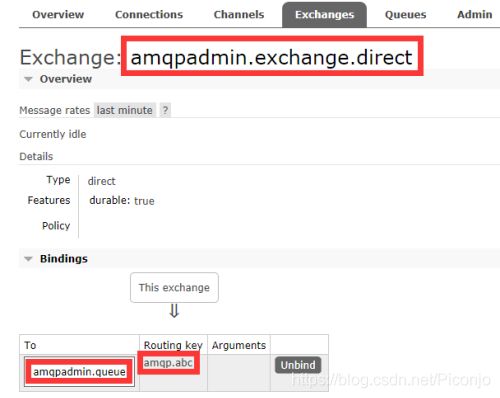
创建绑定规则:
// Binding(目的地,目的地的类型(消息队列还是交换器),交换器名字,路由键,参数头信息(若没有则填null))
amqpAdmin.declareBinding(new Binding("amqpadmin.queue", Binding.DestinationType.QUEUE,"amqpadmin.exchange.direct","amqp.abc",null));
创建的方法是declare 删除的方法是delete 其余都是一样的 这里就不多加赘述了(其实是懒

