Ubuntu系列-ubuntu -16.10 文件系统和内核制作
ubuntu 系统制作
Aut. wmy
Dat.2016.11.20
Ver.v1.0
前言:
Board:rk3288,纯净linux内核。不能从android源代码里面把kernel单独抠出来,那样会无法启动ubuntu文件系统。
一、内核镜像制作
1.linux-boot.img。
内核编译会生成zImage和resource.img这两个关键的文件,有两种打包方式,主要和分区文件参数相关:1.zImage和initrd.img打包成linux-boot.img烧到boot分区,resource.img单独烧到一个分区;2.zImage、initrd.img、resource.img合起来打包成linux-boot.img烧到boot分区。
1)第一种方式,zImage由内核编译生成,initrd.img是引导内核的一个分区,是开源的,可以用以下方式获得并编译:
git clone
https://github.com/TeeFirefly/initrd.git
make -C initrd
编译之后会生成initrd.img,用:
mkbootimg --ramdisk initrd.img --kernel zImage -o linux-boot.img
可以生成目标镜像,mkbootimg可以去百度搜索下载安装。当然还有一种办法获得initrd.img,解包现有的initrd.img:
unmkbootimg --kernel zImage --ramdisk initrd.img -i linux-boot.img
解包后的文件在当前目录下。
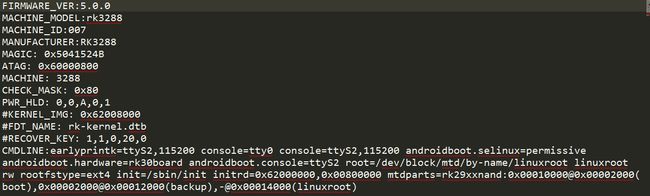
这种方式的分区文件如下图所示:
2)第二种方式,与一不同的就是打包方式多了一个参数:
mkbootimg --kernel zImage --ramdisk initrd.img --second resource.img -o linux-boot.img
当然对应的解包方式也一样了。
分区如下图所示:
建议用第二种方式。
二、文件系统制作
1、先从官方上获取ubuntu core的tar包:
http://cdimage.ubuntu.com/ubuntu-base/releases/16.10/release/
可以从上面地址中选择合适的镜像包下载,比如适合rk3288的板子:
ubuntu-base-16.10-base-armhf.tar.gz
。
也可以用命令下载到本地:
wget -p rootfs
http://cdimage.ubuntu.com/ubuntu-base/releases/16.10/release/
ubuntu-base-16.10-base-armhf.tar.gz
2.开始客制化文件系统
在上面下载的tar包的当前路径下:比如rootfs文件夹
mkdir ubuntu
tar -xpzf ubuntu-base-16.10-base-armhf.tar.gz -C ubuntu/
解压完毕后,安装虚拟启动器,模拟启动这个ubuntu文件系统:
apt-get install qemu-user-static
cp /usr/bin/qemu-arm-static ubuntu/usr/bin/
拷贝PC主机端的dns配置,因为待会安装程序时要用网络:
sudo cp -b /etc/resolv.conf ubuntu/etc/resolv.conf
增加软件源:
sudo vim etc/apt/source.list
加入如下两行内容,保存后退出:
deb
http://ports.ubuntu.com/ubuntu-ports/
xenial main universe
deb-src
http://ports.ubuntu.com/ubuntu-ports/
xenial main universe
经过上述步骤,已经对ubuntu根文件系统做了简单的配置,现在可以用工具切换到此根文件系统了。
为了简化操作过程,这里使用一个切换根文件系统的脚本,如下所示:
#!/bin/bash

functionmnt() {
    echo"MOUNTING"
    sudomount-t proc /proc${2}proc
    sudomount-t sysfs /sys${2}sys
    sudomount-o bind /dev${2}dev

    sudochroot ${2}
}

functionumnt() {
    echo"UNMOUNTING"
    sudoumount${2}proc
    sudoumount${2}sys
    sudoumount${2}dev

}


if[ "$1"== "-m"] && [ -n "$2"] ;
then
    mnt $1 $2
elif[ "$1"== "-u"] && [ -n "$2"];
then
    umnt $1 $2
else
    echo""
    echo"Either 1'st, 2'nd or both parameters were missing"
    echo""
    echo"1'st parameter can be one of these: -m(mount) OR -u(umount)"
    echo"2'nd parameter is the full path of rootfs directory(with trailing '/')"
    echo""
    echo"For example: ch-mount -m /media/sdcard/"
    echo""
    echo1st parameter : ${1}
    echo2nd parameter : ${2}
fi
在rootfs目录下创建mount.sh文件,并将上面内容复制到文件中:
chmod +x ch-mount.sh
./mount.sh -m ubuntu/
这个时候会切换到模拟启动的ubuntu文件系统下,如下所示
这个时候就可以对文件系统进行客制化了。
先更新源:
apt-get update
先装个ipconfig命令:
apt-get install net-tools
用ifconfig 查看下网络情况,发现ip地址和ubuntu主机地址一样。
开始安装一些常用工具,还有xserver,用来启动ubuntu桌面环境。
apt-get install git vim openssh-server
需要一段时间,可以去做做其他事。
接着开始安装桌面环境,这里选择安装xubu
ntu桌面,比较炫酷一点:
apt-get install ubuntu-session
apt-get install xubuntu-desktop
需要很长时间。
全部安装完之后,添加一个用户ubuntu,并设置密码:
useradd -s '/bin/bash' -m -G adm,sudo ubuntu
修改ubuntu用户密码,回车后按提示输入两次密码:
passwd ubuntu
修改root帐号的密码,回车后按提示输入两次密码:
passwd root
配置网络使其开机就能联网:
echo auto eth0 > /etc/network/interfaces.d/eth0
echo iface eth0 inet dhcp >> /etc/network/interfaces.d/eth0
文件系统安装到此为止,但需要做一些配置使其能够起来,修改~/.profile文件:
打开文件后找到“mesg n”,
将其更改为“
tty -s && mesg n
”。
这个意思是开机后直接以root身份登录桌面系统。
启动一个开机服务脚本:
touch /etc/rc.local :
#!/bin/sh -e
#
# rc.local
#
# This script is executed at the end of each multiuser runlevel.
# Make sure that the script will "exit 0" on success or any other
# value on error.
#
# In order to enable or disable this script just change the execution
# bits.
#
# By default this script does nothing.

/usr/local/bin/first-boot-recovery.sh
exit 0
/usr/local/bin/first-boot-recovery.sh
脚本可以放入你开机要处理的事情。建议所有用户级别添加的脚本都放到这个目录下。
这里执行的是resize2fs命令如下:
#!/bin/bash

clean_first_boot () {
    rm -f /firstboot 2>/dev/null
    sync
}

if [ -e /firstboot ]; then
    echo "======Expanding the rootfs..."
    resize2fs /dev/block/mtd/by-name/linuxroot
    if [ $? == 1 ]; then
        e2fsck -f -y /dev/block/mtd/by-name/linuxroot
        resize2fs /dev/block/mtd/by-name/linuxroot
    fi

    if [ ! -e /dev/block/mtd/by-name/system ]; then
        rm -f /usr/local/bin/b2android*
    fi
    clean_first_boot
fi
需要在根目录创建一个firstboot文件判断是否第一次升级启动。
ubuntu-16.10 开机启动脚本有所改变,由systemd 来控制,所以现在要激活一个服务:
cd /lib/systemd/system/
vim rc-local.service
#  This file is part of systemd.
#
#  systemd is free software; you can redistribute it and/or modify it
#  under the terms of the GNU Lesser General Public License as published by
#  the Free Software Foundation; either version 2.1 of the License, or
#  (at your option) any later version.

# This unit gets pulled automatically into multi-user.target by
# systemd-rc-local-generator if /etc/rc.local is executable.
[Unit]
Description=/etc/rc.local Compatibility
ConditionFileIsExecutable=/etc/rc.local
After=network.target

[Service]
Type=forking
ExecStart=/etc/rc.local start
TimeoutSec=0
RemainAfterExit=yes
GuessMainPID=no
在文件末尾加上:
[Install]
WantedBy=multi-user.target
表示开机会启动。
然后最关键的一步,将这个文件链接到 /etc/systemd/system/rc-local.service ,当然本来是没有这个文件的。
ln -fs /lib/systemd/system/rc-local.service /etc/systemd/system/rc-local.service
最后进入etc那个目录ls -ln确认一下文件是否链接正确。
最后一定要给rc.local加上可执行权限:
chmod +x rc.local
开机桌面会跳出错误的提示框,下面两句可以屏蔽:
chmod 4754 /usr/lib/dbus-1.0/dbus-daemon-launch-helper
chown root:messagebus /usr/lib/dbus-1.0/dbus-daemon-launch-helper
安装java环境:
http://www.oracle.com/technetwork/cn/java/javase/downloads/jdk8-downloads-2133151-zhs.html
下载jdk arm版 32位:
| Linux ARM 32 硬浮点 ABI | 77.78 MB | jdk-8u111-linux-arm32-vfp-hflt.tar.gz |
下载之后再windows解压,jdk1.8.0_111 生成这样的文件夹,在/usr/local 创建文件夹java 把jdk1.8.0_111 拷贝进去。并给到权限:chmod 777 /usr/local/java -R
然后开始配置java:
vi ~/.bashrc
在末尾添加:
export JAVA_HOME=/usr/local/java/jdk1.8.0_111
export JRE_HOME=${JAVA_HOME}/jre
export CLASSPATH=.:${JAVA_HOME}/lib:${JRE_HOME}/lib
export PATH=${JAVA_HOME}/bin:$PATH
:wq退出。执行source ~/.bashrc
javac -version 如果出现1.8等字样表示配置成功。
蓝牙wifi配置:
主要是讲蓝牙wifi的固件拷贝到相关目录下,具体什么目录根据kernel的代码而定,一般wifi是kernel决定为:/system/etc/firmware
蓝牙有文件系统层配置脚本开机加载,位置由脚本确定。
把蓝牙相关的脚本放到开机启动rc.local中:
/usr/local/bin/bluetooth.sh
#!/bin/bash

echo "start bluetooth ..."
sleep 10
echo "start bluetooth "
echo 1 >/sys/class/rfkill/rfkill0/state

/usr/bin/brcm_patchram_plus --patchram /system/vendor/firmware/bcm43438a0.hcd --baudrate 1500000 --enable_lpm --enable_hci --no2bytes /dev/ttyS0

echo "done"
要是没有/usr/bin/brcm_patchram_plus这个工具可以从网上去下载一个
然后把指定的蓝牙固件放到/system/vendor/firmware下。
加载成功之后,hciconfig命令可以看到设备信息。
文件系统制作完毕,如果想修改桌面或者加入一些其他的开源库sdk,可以继续对其改造。
exit命令推出模拟文件系统。
./mount.sh -u ubuntu/
卸载文件系统
接下来开始打包镜像:
dd if=/dev/zero of=ubuntu.img bs=1M count=4000
sudo mkfs.ext4 ubuntu.img
mkdir ubuntu-mount
sudo mount ubuntu.img ubuntu-mount
sudo cp -rfp ubuntu/* ubuntu-mount/
sudo umount ubuntu-mount
e2fsck -p -f ubuntu.img
resize2fs -M ubuntu.img
以上生成ubuntu.img就是16.10的根文件系统,烧录到linuxroot分区后,系统起来。
接下来说明如何打包成一个整包:
先下载:
链接:http://pan.baidu.com/s/1gfNsY4b 密码:1tbs
这里面有rk的打包脚本等,可以看情况修改parameter分区文件,下载之后把之前编译好的 linux-boot.img、 linux-rootfs.img 放到这个文件夹,点击运行mkupdate.bat 批量脚本,稍后就会生成一个update.img