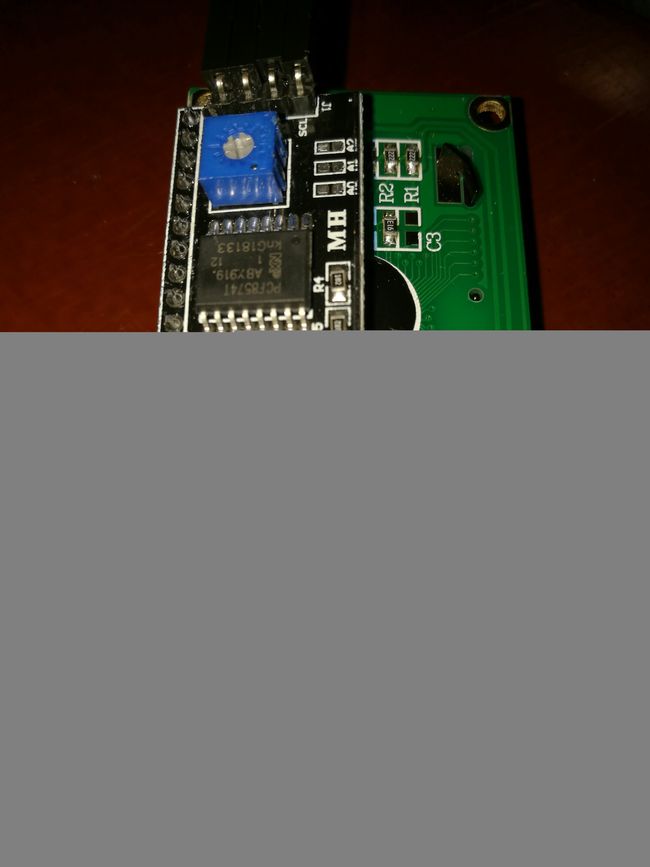
- Arduino学习-按键灯
哎,别笑,总比刷抖音强点吧1、效果2、代码constintbuttonPin=2;constintledPin=13;intbuttonState=0;voidsetup(){//putyoursetupcodehere,torunonce:pinMode(buttonPin,INPUT);pinMode(ledPin,OUTPUT);}voidloop(){//putyourmaincodehe
- 嵌入式系统:多路温度采集与环境报警监测
DevCyberX
嵌入式
概述:本文介绍了如何使用单片机、LM35温度传感器、ADC0832模数转换器和DS18B20数字温度传感器构建一个嵌入式系统,用于多路温度采集和环境报警监测。通过该系统,可以实时监测多个温度传感器的温度,并在温度超过设定阈值时触发报警。硬件组件:单片机:选择一款适合的单片机(如Arduino、STM32等)作为主控制器。LM35温度传感器:用于测量环境温度。ADC0832模数转换器:将模拟信号转换
- macOS使用minicom调试串口
坚果-大发
智能硬件极客玩物
macOS开发Arduino时有时候需要调试串口1.配置minicom$minicom-sctl-AZ按下O或选择进入“Serialportsetup”选项修改Device为/dev/tty.usbmodem1411保存为默认参数,选择“Savesetupasdfl”并回车即可:接下来选择“Exit”并回车。2.再次运行$minicom初始化完成之后,minicom就会连接到串口,并显示。3.使用
- 【Arduino 动手做】由操纵杆控制的 SCARA 机械臂
驴友花雕
Arduino动手做嵌入式硬件单片机c++Arduino动手做由操纵杆控制的SCARA机械臂
《Arduino手册(思路与案例)》栏目介绍:在电子制作与智能控制的应用领域,本栏目涵盖了丰富的内容,包括但不限于以下主题:ArduinoBLDC、ArduinoCNC、ArduinoE-Ink、ArduinoESP32SPP、ArduinoFreeRTOS、ArduinoFOC、ArduinoGRBL、ArduinoHTTP、ArduinoHUB75、ArduinoIoTCloud、Arduin
- 【Arduino 动手做】DIY Arduino 机器人手臂,带智能手机控制
驴友花雕
Arduino动手做机器人智能手机嵌入式硬件单片机c++机器人手臂带智能手机控制Arduino动手做
《Arduino手册(思路与案例)》栏目介绍:在电子制作与智能控制的应用领域,本栏目涵盖了丰富的内容,包括但不限于以下主题:ArduinoBLDC、ArduinoCNC、ArduinoE-Ink、ArduinoESP32SPP、ArduinoFreeRTOS、ArduinoFOC、ArduinoGRBL、ArduinoHTTP、ArduinoHUB75、ArduinoIoTCloud、Arduin
- 【ESP32最全学习笔记(基础篇)——7.ESP32 ADC – 使用 Arduino IDE 读取模拟值】
「已注销」
ESP32学习笔记学习ESP32单片机嵌入式硬件Arduino
关于本教程:ESP32基础篇1.ESP32简介2.ESP32Arduino集成开发环境3.VS代码和PlatformIO4.ESP32引脚5.ESP32输入输出6.ESP32脉宽调制7.ESP32模拟输入☑8.ESP32中断定时器9.ESP32深度睡眠
- Ch55xduino 项目使用教程
Ch55xduino项目使用教程ch55xduino项目地址:https://gitcode.com/gh_mirrors/ch/ch55xduino1.项目介绍Ch55xduino是一个为CH55X系列微控制器提供的Arduino编程接口。CH55X是一系列低成本的MCS51USB微控制器,Ch55xduino项目旨在简化这些设备的编程环境设置,使用户能够像使用ArduinoIDE一样轻松地编写
- Arduino CH552 ADC的使用
perseverance52
WCH-E8051单片机开发CH552ADC
ArduinoCH552ADC的使用CH552ADC简介CH552芯片提供8位的模拟数字转换器,包括电压比较器和ADC模块。该转换器具有4个模拟信号输入通道,可以分时采集,支持0到VCC模拟输入电压范围。ADC寄存器ADC控制寄存器(ADC_CTRL)ADC配置寄存器(ADC_CFG):ADC数据寄存器(ADC_DATA):ADC功能ADC采样模式配置步骤:(1)、设置ADC_CFG寄存器中的AD
- 【花雕学编程】Arduino FOC 之动态角度输入的五连杆分析
驴友花雕
嵌入式硬件单片机c++动态角度输入的五连杆分析ArduinoFOC
Arduino是一个开放源码的电子原型平台,它可以让你用简单的硬件和软件来创建各种互动的项目。Arduino的核心是一个微控制器板,它可以通过一系列的引脚来连接各种传感器、执行器、显示器等外部设备。Arduino的编程是基于C/C++语言的,你可以使用ArduinoIDE(集成开发环境)来编写、编译和上传代码到Arduino板上。Arduino还有一个丰富的库和社区,你可以利用它们来扩展Ardui
- ESP32 PWM开发对比:底层驱动 VS Arduino封装,谁更适合你?
小_楠_天_问
嵌入式硬件Arduinoesp32esp32-s3单片机PWM底层开发ESP-IDF
ESP32PWM开发对比:底层驱动VSArduino封装,谁更适合你?在ESP32的开发中,我们常常需要通过PWM(脉宽调制)控制LED灯的亮度、马达速度、蜂鸣器音调等。本篇文章将通过一个具体案例——呼吸灯效果,深入对比底层驱动方式(ESP-IDF原生API)与Arduino封装函数方式,帮助你理解它们之间的差异与各自适用的场景。我之前使用的是Arduino封装进行的PWM开发,但发现esp32开
- 【花雕学编程】Arduino动手做(238)---带 LVGL 的 ESP32 CYD:在屏幕上显示图像猫
驴友花雕
嵌入式硬件单片机c++Arduino动手做ESP32CYD显示图像猫ESP322432S028
37款传感器与执行器的提法,在网络上广泛流传,其实Arduino能够兼容的传感器模块肯定是不止这37种的。鉴于本人手头积累了一些传感器和执行器模块,依照实践出真知(一定要动手做)的理念,以学习和交流为目的,这里准备逐一动手尝试系列实验,不管成功(程序走通)与否,都会记录下来——小小的进步或是搞不掂的问题,希望能够抛砖引玉。【Arduino】168种传感器模块系列实验(资料代码+仿真编程+图形编程)
- 【花雕学编程】Arduino动手做(238)---ESP32 Cheap Yellow Display 2.8寸开发板(CYD)引脚详解
驴友花雕
嵌入式硬件单片机c++Arduino动手做ESP32-2432S028ESP32CYD引脚详解
37款传感器与执行器的提法,在网络上广泛流传,其实Arduino能够兼容的传感器模块肯定是不止这37种的。鉴于本人手头积累了一些传感器和执行器模块,依照实践出真知(一定要动手做)的理念,以学习和交流为目的,这里准备逐一动手尝试系列实验,不管成功(程序走通)与否,都会记录下来——小小的进步或是搞不掂的问题,希望能够抛砖引玉。【Arduino】168种传感器模块系列实验(资料代码+仿真编程+图形编程)
- ESP32+Arduino IDE+PWM呼吸灯/舵机
AAA五金机电
idec++pythonvscode单片机物联网
前言pwm在单片机里的应用还是很广泛滴,包括呼吸灯、电机、舵机等等,大一做校电赛的时候没搞懂pwm,一直念念不忘,最近认真学了一下感觉还是挺简单滴!有一些电路基础知识就可以很快掌握了。PWM基本原理PWM:全称PulseWidthModulation:脉冲宽度调制(简称脉宽调制,通俗的讲就是调节脉冲的宽度),是电子电力应用中非常重要的一种控制技术。PWM频率:是指一秒钟内从高电平时间在到低电平时间
- ESP32S3接入讯飞在线语音识别教程及配套源代码
2401_88800025
高级技术笔记高级笔记语音识别人工智能音视频嵌入式硬件单片机
1.准备工作1.1硬件准备ESP32-S3开发板(推荐ESP32-S3-WROOM-1)麦克风模块(如SPH0645LM4H或WM8978)MicroSD卡模块(可选,用于存储语音文件)扬声器模块(可选,用于播放识别结果)1.2软件准备安装ArduinoIDE(推荐2.0版本以上)安装ESP32-S3开发支持注册讯飞开放平台账号并创建应用获取讯飞语音识别API的AppID、APIKey和APISe
- Arduino DS18B20编译错误解决方法
木子欢儿
DS18B20.cpp:Inmemberfunction'uint8_tDS18B20::getResolution()':DS18B20.cpp:101:1:error:controlreachesendofnon-voidfunction[-Werror=return-type]101|}|^cc1plus.exe:somewarningsbeingtreatedaserrorsexitsta
- Arduino ESP8266 – ESP8266WiFiGeneric API库函数介绍
perseverance52
嵌入式开发笔记esp8266Arduino
ESP8266–ESP8266WiFiGenericAPI库函数介绍ESP8266WiFiGeneric-API库函数介绍ESP8266WiFiSTAClass、ESP8266WiFiScanClass、ESP8266WiFiAPClass可以访问ESP8266WiFiGenericClass的private和protected成员.整体上来说,方法可以分为两类:第一类方法,管理WIFi事件(Wi
- esp32 支持 sd卡 micropython 文件系统_ESP32 / ESP8266 MicroPython教程:读取文件
weixin_39891317
esp32支持sd卡micropython文件系统
原标题:ESP32/ESP8266MicroPython教程:读取文件引言本篇ESP32/ESP8266MicroPython教程主要说明如何从MicroPython的文件系统中读取一个文件。本教程在esp32和esp8266上进行了测试。通常我会使用Putty与MicroPython命令行界面进行交互。但是为了演示,我在本篇教程中会使用ArduinoSerialMonitor与设备进行交互。因为
- ESP32学习笔记-读取SD卡并显示到屏幕上
搞机械的假程序猿
ESP32学习笔记学习笔记ESP32
硬件FireBeetle2ESP32-E开发板1.54"240x240IPS广视角TFT显示屏硬件接线测试代码//加载库#include"Arduino.h"#include"FS.h"#include"SD.h"#include"SPI.h"#include"DFRobot_GDL.h"//定义显示屏针脚#defineTFT_DCD2#defineTFT_CSD6#defineTFT_RSTD3
- 解锁 Hello World 的 N 种炫酷玩法
目录一、引言二、编程语言之美2.1C语言艺术字输出2.2用汇编语言实现经典三、硬件交互的奇妙世界3.1Arduino与LED的舞蹈3.2STM32点亮小灯四、AI模型应用的创新之旅4.1OpenAIAPI初体验4.2LangChain框架的魅力五、总结与展望一、引言在编程的世界里,“HelloWorld”就像是一把神奇的钥匙,开启了无数人探索编程奥秘的大门。它作为编程学习的经典入门示例,有着不可替
- DIY语音控制车辆玩具全攻略:从硬件组装到功能实现
欧阳天羲
硬件工程语音识别自动驾驶
一、设备清单与成本估算1.1硬件组件列表组件名称价格(元)备注ArduinoUno兼容板7.04控制核心,支持多传感器接入DFRobot离线语音识别模块105支持10条自定义语音指令L298N电机驱动板5双路电机驱动,带散热片直流减速电机×2(JGB37-520)3012V供电,150转/分钟SG90微型舵机5控制前轮转向HC-SR04超声波传感器2.45测距范围2-400cm18650锂电池(3
- 一些针对FOC算法的 Clark/Park变换 和 SVPWM生成 的案例代码
鹿屿二向箔
算法
以下是一些针对FOC算法的Clark/Park变换和SVPWM生成的案例代码,涵盖Python仿真、C语言嵌入式实现和ArduinoSimpleFOC库的示例。代码将保持简洁,并附带关键注释。1.Python仿真示例(1)Clark/Park变换实现importnumpyasnpdefclark_transform(ia,ib,ic):"""Clark变换(幅值不变,k=2/3)"""i_alph
- 用大白话和日常比喻给你讲清楚 Arduino 中 setup() 外面和里面的区别
yifa20160404
arduinoc++
就像准备做饭和真正开火一样:voidsetup()外面(全局区):准备食材和工具就像做饭前,把要用到的东西都摆在台面上这里是你一次性声明所有要用到的东西,告诉Arduino:“这些调料(常量)固定不变!”#defineLED_PIN13//比如:盐罐子就放灶台左边constint按钮=2;//酱油瓶放右边,位置定死!“这些菜(变量)全程都能用!”int温度;//比如:切好的青菜放碗里,随时取Str
- Arduino 编程超清晰总结
yifa20160404
arduino
Arduino编程超清晰总结(厨房比喻版)1.全局区(setup()外面)→厨房台面作用:摆放所有食材和工具调料罐(常量):#defineLED13食材碗(变量):int温度;智能厨具(对象):Servo我的舵机;特点:▶️全程可用:setup()和loop()都能随手拿▶️只摆不操作:不能在这里炒菜(不能执行函数)2.voidsetup()→开火前准备作用:一次性开机动作插电器:我的舵机.att
- ESP32S3控制舵机:当电子大脑遇上机械肌肉
SlientICE
单片机硬件工程stm32嵌入式硬件物联网
文章总结(帮你们节约时间)电机的分类及舵机在其中的位置舵机的内部结构和工作原理ESP32S3的强大功能及其与舵机控制的完美结合EC11旋转编码器的使用方法及与ESP32S3的配合详细的硬件连接和Arduino代码实现电机家族大集合:舵机只是其中一员想象一下电子世界中的"运动员"家族——电机们。它们就像是电子项目中的肌肉组织,负责将电能转化为机械能,让静止的物体有了灵魂和动作。这个大家族可真不小!直
- ESP32S3 GPIO全模式解析:掀开Arduino底层的神秘面纱
SlientICE
单片机嵌入式硬件物联网硬件工程
文章总结(帮你们节约时间)ESP32S3的GPIO输入输出功能及底层实现原理。详细讲解了ESP32S3的8种GPIO工作模式。解释了ESP32S3GPIO寄存器配置及底层驱动机制。展示了如何从底层实现LED控制和按键输入功能。GPIO:ESP32S3的神经末梢想象一下,如果ESP32S3是一个大脑,那么GPIO(通用输入输出接口)就是它的神经末梢,负责感知外界信息并作出反应。这些小小的引脚承担着与
- 【雕爷学编程】Arduino FOC 之 SimpleFOC 库的主要函数
驴友花雕
ArduinoFOC嵌入式硬件单片机c++ArduinoFOCSimpleFOC函数
Arduino是一个开放源码的电子原型平台,它可以让你用简单的硬件和软件来创建各种互动的项目。Arduino的核心是一个微控制器板,它可以通过一系列的引脚来连接各种传感器、执行器、显示器等外部设备。Arduino的编程是基于C/C++语言的,你可以使用ArduinoIDE(集成开发环境)来编写、编译和上传代码到Arduino板上。Arduino还有一个丰富的库和社区,你可以利用它们来扩展Ardui
- ArduinoFFT库版本差异导致峰值频率提取问题分析
尤颖贝Dora
ArduinoFFT库版本差异导致峰值频率提取问题分析arduinoFFTFastFourierTransformforArduino项目地址:https://gitcode.com/gh_mirrors/ar/arduinoFFT问题背景在使用ArduinoFFT库进行音频频率分析时,用户报告了不同版本间的兼容性问题。具体表现为:在使用ArduinoNano和MAX9814麦克风进行音频采样时,
- 【花雕学编程】Arduino动手做(247)---搭建Goouuu ESP32-S3 N16R8的开发环境
驴友花雕
嵌入式硬件单片机c++Arduino动手做ESP32开发环境GoouuuESP32
37款传感器与执行器的提法,在网络上广泛流传,其实Arduino能够兼容的传感器模块肯定是不止这37种的。鉴于本人手头积累了一些传感器和执行器模块,依照实践出真知(一定要动手做)的理念,以学习和交流为目的,这里准备逐一动手尝试系列实验,不管成功(程序走通)与否,都会记录下来——小小的进步或是搞不掂的问题,希望能够抛砖引玉。【Arduino】168种传感器模块系列实验(资料代码+仿真编程+图形编程)
- 程序代码篇---ESP32-S3小智固件
Atticus-Orion
深度学习篇程序代码篇上位机知识篇AIEsp32-S3小智
Q1:ESP32-S3小智语音对话系统的整体架构是怎样的?A1:该系统采用“语音采集→唤醒词检测→ASR→NLP→TTS→语音播放”的流水线架构:硬件层:ESP32-S3芯片+麦克风阵列(如INMP441)+扬声器(如MAX98357A)。驱动层:ESP-IDF或Arduino框架提供的I2S、ADC、DAC驱动。算法层:唤醒词检测:基于MicroML(如TensorFlowLiteMicro)。
- ESP8266模块无限重启崩溃的问题
FHNCSDN
学习问题esp8266重启
问题背景:最近使用ESP8266模块(NodeMCU)在Arduino环境下进行开发调试时遇到了一个ESP8266模块无限重启崩溃的问题。这个问题不是第一次发生了,很久之前遇到了后面也不知道怎么解决了。这一次再次碰到了,经过查阅网上的资料以及不断尝试,貌似找到了对于此现象的解决方法。可能并不一定都是这个问题,这里作为记录,为大家提供一个解决方法。解决方法:更新库(我用该方法解决)考虑全局变量和局部
- Enum用法
不懂事的小屁孩
enum
以前的时候知道enum,但是真心不怎么用,在实际开发中,经常会用到以下代码:
protected final static String XJ = "XJ";
protected final static String YHK = "YHK";
protected final static String PQ = "PQ";
- 【Spark九十七】RDD API之aggregateByKey
bit1129
spark
1. aggregateByKey的运行机制
/**
* Aggregate the values of each key, using given combine functions and a neutral "zero value".
* This function can return a different result type
- hive创建表是报错: Specified key was too long; max key length is 767 bytes
daizj
hive
今天在hive客户端创建表时报错,具体操作如下
hive> create table test2(id string);
FAILED: Execution Error, return code 1 from org.apache.hadoop.hive.ql.exec.DDLTask. MetaException(message:javax.jdo.JDODataSto
- Map 与 JavaBean之间的转换
周凡杨
java自省转换反射
最近项目里需要一个工具类,它的功能是传入一个Map后可以返回一个JavaBean对象。很喜欢写这样的Java服务,首先我想到的是要通过Java 的反射去实现匿名类的方法调用,这样才可以把Map里的值set 到JavaBean里。其实这里用Java的自省会更方便,下面两个方法就是一个通过反射,一个通过自省来实现本功能。
1:JavaBean类
1 &nb
- java连接ftp下载
g21121
java
有的时候需要用到java连接ftp服务器下载,上传一些操作,下面写了一个小例子。
/** ftp服务器地址 */
private String ftpHost;
/** ftp服务器用户名 */
private String ftpName;
/** ftp服务器密码 */
private String ftpPass;
/** ftp根目录 */
private String f
- web报表工具FineReport使用中遇到的常见报错及解决办法(二)
老A不折腾
finereportweb报表java报表总结
抛砖引玉,希望大家能把自己整理的问题及解决方法晾出来,Mark一下,利人利己。
出现问题先搜一下文档上有没有,再看看度娘有没有,再看看论坛有没有。有报错要看日志。下面简单罗列下常见的问题,大多文档上都有提到的。
1、没有返回数据集:
在存储过程中的操作语句之前加上set nocount on 或者在数据集exec调用存储过程的前面加上这句。当S
- linux 系统cpu 内存等信息查看
墙头上一根草
cpu内存liunx
1 查看CPU
1.1 查看CPU个数
# cat /proc/cpuinfo | grep "physical id" | uniq | wc -l
2
**uniq命令:删除重复行;wc –l命令:统计行数**
1.2 查看CPU核数
# cat /proc/cpuinfo | grep "cpu cores" | u
- Spring中的AOP
aijuans
springAOP
Spring中的AOP
Written by Tony Jiang @ 2012-1-18 (转)何为AOP
AOP,面向切面编程。
在不改动代码的前提下,灵活的在现有代码的执行顺序前后,添加进新规机能。
来一个简单的Sample:
目标类:
[java]
view plain
copy
print
?
package&nb
- placeholder(HTML 5) IE 兼容插件
alxw4616
JavaScriptjquery jQuery插件
placeholder 这个属性被越来越频繁的使用.
但为做HTML 5 特性IE没能实现这东西.
以下的jQuery插件就是用来在IE上实现该属性的.
/**
* [placeholder(HTML 5) IE 实现.IE9以下通过测试.]
* v 1.0 by oTwo 2014年7月31日 11:45:29
*/
$.fn.placeholder = function
- Object类,值域,泛型等总结(适合有基础的人看)
百合不是茶
泛型的继承和通配符变量的值域Object类转换
java的作用域在编程的时候经常会遇到,而我经常会搞不清楚这个
问题,所以在家的这几天回忆一下过去不知道的每个小知识点
变量的值域;
package 基础;
/**
* 作用域的范围
*
* @author Administrator
*
*/
public class zuoyongyu {
public static vo
- JDK1.5 Condition接口
bijian1013
javathreadConditionjava多线程
Condition 将 Object 监视器方法(wait、notify和 notifyAll)分解成截然不同的对象,以便通过将这些对象与任意 Lock 实现组合使用,为每个对象提供多个等待 set (wait-set)。其中,Lock 替代了 synchronized 方法和语句的使用,Condition 替代了 Object 监视器方法的使用。
条件(也称为条件队列或条件变量)为线程提供了一
- 开源中国OSC源创会记录
bijian1013
hadoopsparkMemSQL
一.Strata+Hadoop World(SHW)大会
是全世界最大的大数据大会之一。SHW大会为各种技术提供了深度交流的机会,还会看到最领先的大数据技术、最广泛的应用场景、最有趣的用例教学以及最全面的大数据行业和趋势探讨。
二.Hadoop
&nbs
- 【Java范型七】范型消除
bit1129
java
范型是Java1.5引入的语言特性,它是编译时的一个语法现象,也就是说,对于一个类,不管是范型类还是非范型类,编译得到的字节码是一样的,差别仅在于通过范型这种语法来进行编译时的类型检查,在运行时是没有范型或者类型参数这个说法的。
范型跟反射刚好相反,反射是一种运行时行为,所以编译时不能访问的变量或者方法(比如private),在运行时通过反射是可以访问的,也就是说,可见性也是一种编译时的行为,在
- 【Spark九十四】spark-sql工具的使用
bit1129
spark
spark-sql是Spark bin目录下的一个可执行脚本,它的目的是通过这个脚本执行Hive的命令,即原来通过
hive>输入的指令可以通过spark-sql>输入的指令来完成。
spark-sql可以使用内置的Hive metadata-store,也可以使用已经独立安装的Hive的metadata store
关于Hive build into Spark
- js做的各种倒计时
ronin47
js 倒计时
第一种:精确到秒的javascript倒计时代码
HTML代码:
<form name="form1">
<div align="center" align="middle"
- java-37.有n 个长为m+1 的字符串,如果某个字符串的最后m 个字符与某个字符串的前m 个字符匹配,则两个字符串可以联接
bylijinnan
java
public class MaxCatenate {
/*
* Q.37 有n 个长为m+1 的字符串,如果某个字符串的最后m 个字符与某个字符串的前m 个字符匹配,则两个字符串可以联接,
* 问这n 个字符串最多可以连成一个多长的字符串,如果出现循环,则返回错误。
*/
public static void main(String[] args){
- mongoDB安装
开窍的石头
mongodb安装 基本操作
mongoDB的安装
1:mongoDB下载 https://www.mongodb.org/downloads
2:下载mongoDB下载后解压
- [开源项目]引擎的关键意义
comsci
开源项目
一个系统,最核心的东西就是引擎。。。。。
而要设计和制造出引擎,最关键的是要坚持。。。。。。
现在最先进的引擎技术,也是从莱特兄弟那里出现的,但是中间一直没有断过研发的
- 软件度量的一些方法
cuiyadll
方法
软件度量的一些方法http://cuiyingfeng.blog.51cto.com/43841/6775/在前面我们已介绍了组成软件度量的几个方面。在这里我们将先给出关于这几个方面的一个纲要介绍。在后面我们还会作进一步具体的阐述。当我们不从高层次的概念级来看软件度量及其目标的时候,我们很容易把这些活动看成是不同而且毫不相干的。我们现在希望表明他们是怎样恰如其分地嵌入我们的框架的。也就是我们度量的
- XSD中的targetNameSpace解释
darrenzhu
xmlnamespacexsdtargetnamespace
参考链接:
http://blog.csdn.net/colin1014/article/details/357694
xsd文件中定义了一个targetNameSpace后,其内部定义的元素,属性,类型等都属于该targetNameSpace,其自身或外部xsd文件使用这些元素,属性等都必须从定义的targetNameSpace中找:
例如:以下xsd文件,就出现了该错误,即便是在一
- 什么是RAID0、RAID1、RAID0+1、RAID5,等磁盘阵列模式?
dcj3sjt126com
raid
RAID 1又称为Mirror或Mirroring,它的宗旨是最大限度的保证用户数据的可用性和可修复性。 RAID 1的操作方式是把用户写入硬盘的数据百分之百地自动复制到另外一个硬盘上。由于对存储的数据进行百分之百的备份,在所有RAID级别中,RAID 1提供最高的数据安全保障。同样,由于数据的百分之百备份,备份数据占了总存储空间的一半,因而,Mirror的磁盘空间利用率低,存储成本高。
Mir
- yii2 restful web服务快速入门
dcj3sjt126com
PHPyii2
快速入门
Yii 提供了一整套用来简化实现 RESTful 风格的 Web Service 服务的 API。 特别是,Yii 支持以下关于 RESTful 风格的 API:
支持 Active Record 类的通用API的快速原型
涉及的响应格式(在默认情况下支持 JSON 和 XML)
支持可选输出字段的定制对象序列化
适当的格式的数据采集和验证错误
- MongoDB查询(3)——内嵌文档查询(七)
eksliang
MongoDB查询内嵌文档MongoDB查询内嵌数组
MongoDB查询内嵌文档
转载请出自出处:http://eksliang.iteye.com/blog/2177301 一、概述
有两种方法可以查询内嵌文档:查询整个文档;针对键值对进行查询。这两种方式是不同的,下面我通过例子进行分别说明。
二、查询整个文档
例如:有如下文档
db.emp.insert({
&qu
- android4.4从系统图库无法加载图片的问题
gundumw100
android
典型的使用场景就是要设置一个头像,头像需要从系统图库或者拍照获得,在android4.4之前,我用的代码没问题,但是今天使用android4.4的时候突然发现不灵了。baidu了一圈,终于解决了。
下面是解决方案:
private String[] items = new String[] { "图库","拍照" };
/* 头像名称 */
- 网页特效大全 jQuery等
ini
JavaScriptjquerycsshtml5ini
HTML5和CSS3知识和特效
asp.net ajax jquery实例
分享一个下雪的特效
jQuery倾斜的动画导航菜单
选美大赛示例 你会选谁
jQuery实现HTML5时钟
功能强大的滚动播放插件JQ-Slide
万圣节快乐!!!
向上弹出菜单jQuery插件
htm5视差动画
jquery将列表倒转顺序
推荐一个jQuery分页插件
jquery animate
- swift objc_setAssociatedObject block(version1.2 xcode6.4)
啸笑天
version
import UIKit
class LSObjectWrapper: NSObject {
let value: ((barButton: UIButton?) -> Void)?
init(value: (barButton: UIButton?) -> Void) {
self.value = value
- Aegis 默认的 Xfire 绑定方式,将 XML 映射为 POJO
MagicMa_007
javaPOJOxmlAegisxfire
Aegis 是一个默认的 Xfire 绑定方式,它将 XML 映射为 POJO, 支持代码先行的开发.你开发服 务类与 POJO,它为你生成 XML schema/wsdl
XML 和 注解映射概览
默认情况下,你的 POJO 类被是基于他们的名字与命名空间被序列化。如果
- js get max value in (json) Array
qiaolevip
每天进步一点点学习永无止境max纵观千象
// Max value in Array
var arr = [1,2,3,5,3,2];Math.max.apply(null, arr); // 5
// Max value in Jaon Array
var arr = [{"x":"8/11/2009","y":0.026572007},{"x"
- XMLhttpRequest 请求 XML,JSON ,POJO 数据
Luob.
POJOjsonAjaxxmlXMLhttpREquest
在使用XMlhttpRequest对象发送请求和响应之前,必须首先使用javaScript对象创建一个XMLHttpRquest对象。
var xmlhttp;
function getXMLHttpRequest(){
if(window.ActiveXObject){
xmlhttp:new ActiveXObject("Microsoft.XMLHTTP
- jquery
wuai
jquery
以下防止文档在完全加载之前运行Jquery代码,否则会出现试图隐藏一个不存在的元素、获得未完全加载的图像的大小 等等
$(document).ready(function(){
jquery代码;
});
<script type="text/javascript" src="c:/scripts/jquery-1.4.2.min.js&quo

