iOS-AutoLayout还不会,你就累到死
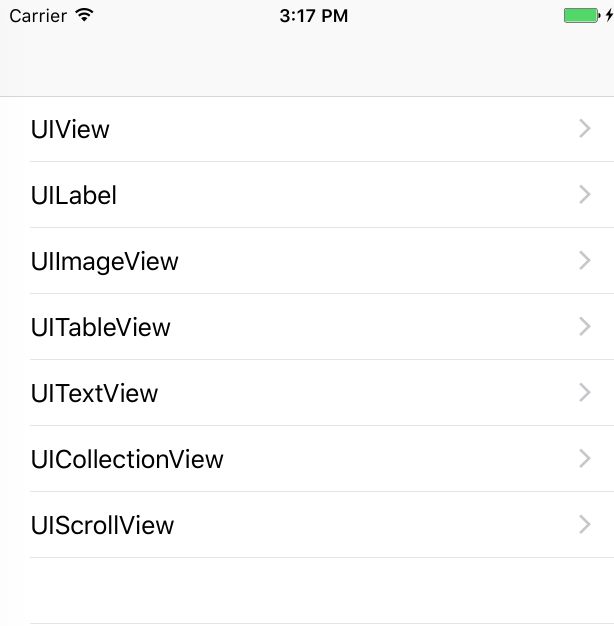
花时间写了个Demo,包含比较全面从UIView,UILabel,UIImageView的自适应到UITextView,UITableView,UICollectionView,UIScrollView都有,可以下载学习一下。Demo地址
注意不配合demo也许会不知所云!
iOS8之后 使用AutoLayout是非常方便的,更何况iOS11都要发布了,不会还想着支持iOS7吧!(iOS7也是支持autolayout的,只是有一些坑及与iOS8API的不同)。
iOS8以后,对于UIScrollView及UITableView,UICollectionViewCell的高度自适应解决了我们一直头疼的变高问题!!!
如果你还不用,那么你觉得你是偷懒了,懒得去学,其实你在开发中浪费了更多的时间与脑细胞。
UIView的自适应
UIView可以根据其subviews自动适配自己的宽高,也就是如果其subviews能有明确的足够的约束信息,那么view的宽高就可以被确定了
UILabel的自适应
有时候如果想UILabel的文字增多变宽变高,要如何实现?其实UILabel是一个比较特殊的元素,只要设置了宽度约束,高度就会自适应了(UILabel设置lines=0表示自动换行,具体数字是限制多少行)。如我们给UILabel设置约束宽度不大于200,然后动态改变它上边的文字,它就自适应了高度
UIImageView
看到网上好多人问如何处理图片自适应的问题,比如固定imageView的宽度,高度根据网络获取的image来动态改变。很遗憾,UIImageView并没有自动布局。我们可以让后台返回宽高,或者请求到image对象后,根据image的size来获取宽高。然后根据宽高的缩放比例来适配
[self.imageViewRef mas_makeConstraints:^(MASConstraintMaker *make) {
        make.edges.equalTo(self.contentView);
}];customCell.imageViewRef.image = image;
[customCell.imageViewRef mas_updateConstraints:^(MASConstraintMaker *make) {
make.height.mas_equalTo([UIScreen mainScreen].bounds.size.width * image.size.height / image.size.width);
}];UITextView的高度自适应
要点:
- UITextView的高度自适应只需要不限制其height
- scrollEnabled = NO 只有不可滚动才会自动扩展其高度
- 若textView的内容发生偏移,请看UITextView内容偏移的问题处理
 - (UITextView *)textView
{
    if (!_textView) {
        _textView = [[UITextView alloc] init];
        _textView.backgroundColor = [UIColor grayColor];
        _textView.scrollEnabled = NO;
        _textView.font = [UIFont systemFontOfSize:20];
    }
    return _textView;
}

 - (void)makeContraints
{
    WEAKSELF
    [self.textView mas_makeConstraints:^(MASConstraintMaker *make) {
        make.left.right.equalTo(weakSelf.view);
        make.top.mas_equalTo(100);
        make.height.greaterThanOrEqualTo(@100);
    }];
}
UITableViewCell的自适应
*兼容iOS7 时 :
用systemLayoutSizeFittingSize来取高。步骤是先在数据model中添加一个height的属性用来缓存高,然后在table view的heightForRowAtIndexPath代理里static一个只初始化一次的Cell实例,然后根据model内容填充数据,最后根据cell的contentView的systemLayoutSizeFittingSize的方法获取到cell的高,然后缓存给model的height
//还是那个熟悉的高度的代理,iOS8之后就少用它吧
 - (CGFloat)tableView:(UITableView *)tableView heightForRowAtIndexPath:(NSIndexPath *)indexPath {
    static CustomCell *cell;
    //只初始化一次cell
    static dispatch_once_t onceToken;
    dispatch_once(&onceToken, ^{
        cell = [tableView dequeueReusableCellWithIdentifier:"CustomCell"];
    });
    DataModel *model = self.dataArray[(NSUInteger) indexPath.row];
    [cell makeupData:model];

    if (model.cellHeight <= 0) {
        //使用systemLayoutSizeFittingSize获取高度
        model.cellHeight = [cell.contentView systemLayoutSizeFittingSize:UILayoutFittingCompressedSize].height + 1;
    }
    return model.cellHeight;
}
在 iOS 8 中,cell 如果有一个确定的宽度/高度,autolayout 会自动根据 cell 中的内容计算出对应的高度/宽度。(目前不需要适配iOS7了,iOS11之后iOS8的适配也快抛弃了)
要让 table view 的 cell 自适应内容,有几个要点:
设置的 AutoLayout 约束必须让 cell 的 contentView 知道如何自动延展。关键点是 contentView 的 4 个边都要设置连接到内容的约束,并且内容是会动态改变尺寸的。
UITableView 的 rowHeight 的值要设置为 UITableViewAutomaticDimension
实现tableView.estimatedRowHeight属性或者 estimatedHeightForRowAtIndexPath代理。
//需要设置的两句代码:一点计算 cell 高度的代码都没有!!连heightForRowAtIndexPath都不用实现
 _tableView.estimatedRowHeight = 80;
_tableView.rowHeight = UITableViewAutomaticDimension;
UITextView 在Cell中的高度自适应
需要textView高度自适应的需求时常表现为—UITextView嵌套在Cell中:
//  TextViewCell.m
//cell初始化
-(instancetype)initWithStyle:(UITableViewCellStyle)style reuseIdentifier:(NSString *)reuseIdentifier
{
    self = [super initWithStyle:style reuseIdentifier:reuseIdentifier];
    if (self) {
        [self.contentView addSubview:self.textView];
         __weak typeof(self) weakSelf = self;
        [self.textView mas_makeConstraints:^(MASConstraintMaker *make) {
            make.edges.equalTo(weakSelf.contentView);
        }];
    }
    return self;
}

-(UITextView *)textView
{
    if (!_textView) {
        _textView = [[UITextView alloc]init];
        _textView.backgroundColor = [UIColor greenColor];
        _textView.font = [UIFont systemFontOfSize:20];
        //scrollEnabled 必须设置为NO,否则sizeToFit适配不了
        _textView.scrollEnabled = NO;
        _textView.delegate = self;
    }
    return _textView;
}

//实现变高的关键所在
-(void)textViewDidChange:(UITextView *)textView
{
    [textView sizeToFit];
    UITableView *tableView = [self tableView];
    [tableView beginUpdates];
    [tableView endUpdates];
}

- (UITableView *)tableView
{
    UIView *tableView = self.superview;

    while (![tableView isKindOfClass:[UITableView class]] && tableView) {
        tableView = tableView.superview;
    }

    return (UITableView *)tableView;
}
//tableView的代码
-(UITableView *)tableView
{
    if (!_tableView) {
        _tableView = [[UITableView alloc]initWithFrame:self.view.bounds style:UITableViewStylePlain];
        _tableView.delegate = self;
        _tableView.dataSource = self;

        [_tableView registerClass:[TextViewCell class] forCellReuseIdentifier:@"TextViewCell"];

//自适应cell需要的代码
        _tableView.estimatedRowHeight = 40;
        _tableView.rowHeight = UITableViewAutomaticDimension;

    }
    return _tableView;
}
UICollectionViewCell的自适应
在 collection view 中也能让 cell 自适应内容大小,如果 UICollectionView 的 layout 是一个 UICollectionViewFlowLayout,只需要将 layout.itemSize = … 改成 layout.estimatedItemSize = …。 只要设置了 layout 的 estimatedItemSize,collection view 就会根据 cell 里面的 autolayout 约束去确定cell 的大小
原理:
collection view 根据 layout 的 estimatedItemSize 算出估计的 contentSize,有了 contentSize collection view 就开始显示
collection view 在显示的过程中,即将被显示的 cell 根据 autolayout 的约束算出自适应内容的 size
layout 从 collection view 里获取更新过的 size attribute
layout 返回最终的 size attribute 给 collection view
collection 使用这个最终的 size attribute 展示 cell
//只需要实现估算高度,cell会根据其subviews自动获取大小。
//也就是说cell的subviews需要有足够的约束信息推断出cell的size

layout.estimatedItemSize = CGSizeMake(SCREEN_WIDTH/2 , 150);
UIScrollView的自适应
UIScrollView也可以自适应,自适应UIScrollView就不需要我们再计算contentSize了。
但是要注意的是:UIScrollView的contentSize是根据它的subView来计算的,也就是其subViews自身必须能够确定大小。
UIView *container = [UIView new];
[scrollView addSubview:container];
[container mas_makeConstraints:^(MASConstraintMaker *make) {
    make.edges.equalTo(scrollView);
    //这里的宽度的意思是:contentSize的宽固定,高度变化,竖直方向滑动
    make.width.equalTo(scrollView);
}];
总结:
AutoLayout 已经是势在必行了,曾经它增加了代码量,使很多人还停留在frame不舍得转过来,现在呢,它可以极大的方便开发者,还可以省很多代码。只要多加练习,对于iOS的布局就不会再那么恐怖了!
