Ubuntu16.04安装mediawiki
总体思路:LAMP+mediawiki
一、LAMP=Linux+apache+MySQL+PHP
1、安装Apache
** 安装指令:
sudo apt-get update
sudo apt-get install apache2
验证方法:浏览器内输入:http://本机IP
2、MySQL安装
** 安装指令:
sudo apt-get install mysql-server mysql-client
验证方法:mysql -u root -p
sudo mysql_secure_installation
按照自己的需求,修改root密码、删除示例用户和数据、禁止远程root登录、MySQL实时响应等
a)为root用户设置密码
b)删除匿名账号
c)取消root用户远程登录
d)删除test库和对test库的访问权限
e)刷新授权表使修改生效
通过这几项的设置能够提高mysql库的安全。建议生产环境中mysql安装这完成后一定要运行一次mysql_secure_installation,详细步骤请参看下面的命令:
[root@server1 ~]# mysql_secure_installation
NOTE: RUNNING ALL PARTS OF THIS SCRIPT IS RECOMMENDED FOR ALL MySQL
SERVERS IN PRODUCTION USE! PLEASE READ EACH STEP CAREFULLY!
In order to log into MySQL to secure it, we'll need the current
password for the root user. If you've just installed MySQL, and
you haven't set the root password yet, the password will be blank,
so you should just press enter here.
Enter current password for root (enter for none):<–初次运行直接回车
OK, successfully used password, moving on…
Setting the root password ensures that nobody can log into the MySQL
root user without the proper authorisation.
Set root password? [Y/n] <– 是否设置root用户密码,输入y并回车或直接回车
New password: <– 设置root用户的密码
Re-enter new password: <– 再输入一次你设置的密码
Password updated successfully!
Reloading privilege tables..
… Success!
By default, a MySQL installation has an anonymous user, allowing anyone
to log into MySQL without having to have a user account created for
them. This is intended only for testing, and to make the installation
go a bit smoother. You should remove them before moving into a
production environment.
Remove anonymous users? [Y/n] <– 是否删除匿名用户,生产环境建议删除,所以直接回车
… Success!
Normally, root should only be allowed to connect from 'localhost'. This
ensures that someone cannot guess at the root password from the network.
Disallow root login remotely? [Y/n] <–是否禁止root远程登录,根据自己的需求选择Y/n并回车,建议禁止
… Success!
By default, MySQL comes with a database named 'test' that anyone can
access. This is also intended only for testing, and should be removed
before moving into a production environment.
Remove test database and access to it? [Y/n] <– 是否删除test数据库,直接回车
- Dropping test database…
… Success!
- Removing privileges on test database…
… Success!
Reloading the privilege tables will ensure that all changes made so far
will take effect immediately.
Reload privilege tables now? [Y/n] <– 是否重新加载权限表,直接回车
… Success!
Cleaning up…
All done! If you've completed all of the above steps, your MySQL
installation should now be secure.
Thanks for using MySQL
3、安装PHP
** 安装指令:
sudo apt-get install php7.0
验证方法:php7.0 -v
4、安装其他模块
** 安装指令:
sudo apt-get install libapache2-mod-php7.0
sudo apt-get install php7.0-mysql
======重启服务====
service apache2 restart
service mysql restart
测试Apache能否解析PHP
vim /var/www/html/phpinfo.php
文件中写:
*******VIM使用方法见下一篇****************
浏览器访问:http://ubuntu地址/phpinfo.php,出现PHP Version网页
5、修改权限
sudo chmod 777 /var/www
6、安装phpMyAdmin
** 安装指令:
sudo apt-get install phpmyadmin
安装:选择apache2,点击确定。<=========这一步很重要
下一步选择是要配置数据库,并输入密码。
##创建phpMyAdmin快捷方式:sudo ln -s /usr/share/phpmyadmin /var/www/html
##启用Apache mod_rewrite模块:sudo a2enmod rewrite
#####重启服务:
service php7.0-fpm restart
service apache2 restart
验证方法:
浏览器访问:http://ubuntu地址/phpmyadmin
7、配置Apache
vim /etc/apache2/apache2.conf
添加:
AddType application/x-httpd-php .php .htm .html
AddDefaultCharset UTF-8
重启Apache服务:sudo service apache2 restart
二、mediawiki安装
1、下载MediaWiki
创建目录test,
mkdir /home/test
切换到该目录
cd /home/test
下载MediaWiki包
sudo wget http://releases.wikimedia.org/mediawiki/1.25/mediawiki-1.25.2.tar.gz <========(此处可以按照新的版本下载)
解压缩
sudo tar -xzvf mediawiki-1.25.2.tar.gz
2、拷贝到Apache根目录下
sudo cp -r /home/test/mediawiki-1.25.2 /var/www/html <======使用管理员权限将解压好的文件复制到apache2下,因为var目录需要权限,不然失败
cd /var/www/html
sudo mv mediawiki-1.25.2 mediawiki <======= 将文件移动到mediawiki的目录下
3、配置数据库
登录MySAQL数据库:mysql -uroot -p,为MediaWiki创建专用DB及用户
mysql> CREATE DATABASE wiki;
mysql> CREATE USER wikiuser@localhost IDENTIFIED BY 'wikipass';
mysql> GRANT index, create, select, insert, update, delete, alter, lock tables on wiki.* TO wikiuser@localhost;
mysql> FLUSH PRIVILEGES;
mysql> exit <======如果exit无效,使用“\q”退出编辑
三、mediawiki配置
1、设置语言
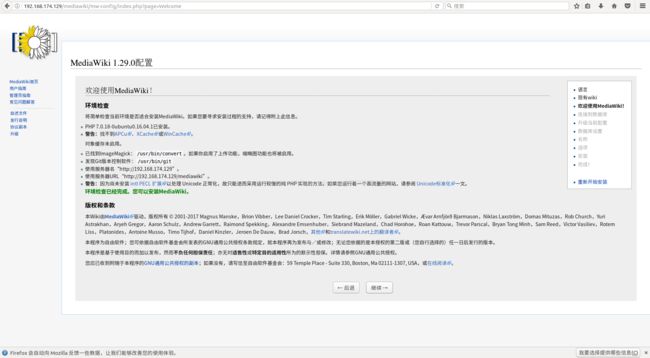
2、检测环境的情况
3、设置数据库账号信息
4、选择存储引擎:InnoDB; 数据库字符集:UTF-8
5、设置管理员账号信息
7、将生成的LocalSettings.php 复制到mediawiki根目录
sudo cp -r /home/lcr/下载/LocalSettings.php /var/www/html/mediawiki


