Android Wear应用程序开发的简要说明,对每个初学者和中级android开发人员都很有帮助。
介绍
Android通过在电视,服装和汽车等各种电子模块中扩展下一代应用程序开发概念,扩展了其整个范围和可能性。本文是关于未来新兴应用程序开发平台Android Wear应用程序开发的简要概述和概述。
本文介绍了Android可穿戴设备及其功能的清晰概念。这里讨论了磨损平台中Android应用程序开发的高级概述。如果你是Android爱好者,喜欢玩代码并且喜欢用它制作出令人惊叹的应用程序,让我们为我们的腕表打造一些很酷的东西吧!
Android Wear
从技术上讲,它是专为可穿戴智能手表和计算机设计的Android操作系统版本。需要运行Android版本4.3或更高版本的移动设备,或者iOS版本8.2或更高版本,支持有限且与这些手表配对。它是从API级别20引入的,代码名称是KITKAT_WATCH。
Android Wear(来源:tech.thaivisa.com)
历史
Android的可穿戴平台于2014年3月18日首次推出,同时发布了开发者预览版。让我们回滚历史记录,以获得关于平台的一些关键点。
- Samsung Gear Live和LG G Watch于2014年6月25日在Google I / O上发布。
- 摩托罗拉的Moto 360于2014年9月5日发布。
- 2014年12月10日关于Android 5.0 Lollipop的更新开始推出。
- 谷歌于2015年8月31日推出了适用于iOS 8.2或更新版本的配对应用程序。
目前摩托罗拉,三星,LG,HTC和华硕正在为Android生产可穿戴智能手表。
功能一目了然
谷歌为这款智能手表平台推出了一些很酷的功能,但在其移动平台上仍然缺席。让我们来看看-
- Google即时:可能是智能手表最重要的功能。当你问“好谷歌,我的心率是多少”或“最近的消防局在哪里?”时,很高兴能从你的手表中得到答案,有点像“钢铁侠”电影中的JARVIS。
- 声明:与手表保持联系,一目了然。
- 天气更新:不时获取更新的天气报告。
- 旅行:一目了然地收到您的旅行信息。
- 提醒:永远不要错过任何一件事。获取日历和其他提醒。
- 与移动设备交互:从手表播放手机的音乐!
- Google Fit:支持骑行和跑步跟踪。只需说“Ok Google,开始跑步”。
- 支持谷歌地图,睡眠追踪,查找手机功能等等!
开始之前
本文简要介绍了针对磨损平台的应用程序开发过程。因此,无论是开发还是对代码结构有充分的了解,您都需要掌握一些关于Android应用程序开发的知识,还需要掌握JAVA知识。如果您觉得自己没有足够的知识,没有问题,请花些时间学习JAVA和OOP。为了制作应用,我们将使用Android Studio。如果您的计算机有4GB内存和JDK 7或更高版本,您就可以开始使用了。要与工作室一起正确设置所有开发环境,您可以关注此YouTube视频。注意OS和JDK之间的版本(32/64位)匹配。
磨损应用的设计原则
由于手表比您的移动设备屏幕更小,因此该平台的设计原则与传统的Android应用程序完全不同。在从官方网站进行简要说明之前,您可以看一下关键设计指南 -
- 遵循5秒规则,这意味着您的应用中的任何内容都应使用此典型时间与其用户进行交互。您的用户不应该超过这个时间保持他/她的注意力。如果超过该时间,您应该重新考虑您的应用功能和设计!
- 设计记住你的大拇指规则!考虑一下,当你走路或吃东西时,很难放慢这些活动,集中精力去做一块手表。因此,虽然设计在屏幕上为拇指放置了足够的空间来完成这项工作。不要设计你的应用程序,使项目太相邻,总是设计大手势。
- 如果您的应用中显示的内容太多,请将其拆分为多个页面(卡片)。
- 避免使用您的传统输入系统,一目了然,将其保持在最低限度,一目了然,易于阅读,为您的手表使用更智能的解决方案,向“ Google Now ” 问好。
建立你的第一次磨损应用
首先,我们将继续专注于制作一个“Hello Wear”应用程序,该应用程序将演示制作基本服装应用程序并将应用程序运行到磨损模拟器中的步骤。接下来,我们将抛光应用程序并制作一些很酷的东西!
SDK要求
在构建可穿戴应用程序之前,先检查两件事。你必须-
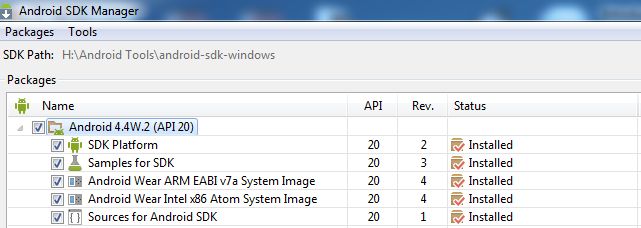
- 将您的Android SDK工具更新至23.0.0或更高版本
- 使用Android 4.4W.2(API 20)或更高版本更新Android SDK 。
从SDK Manager中选择提到的工具并将其更新到最新版本。
图1:Android SDK工具
图2:可穿戴应用程序所需的最低Android SDK版本
如果您没有真正的Android手表,那么不要忘记安装列出的Android Wear系统映像,他们需要构建磨损模拟器。
创建一个新项目
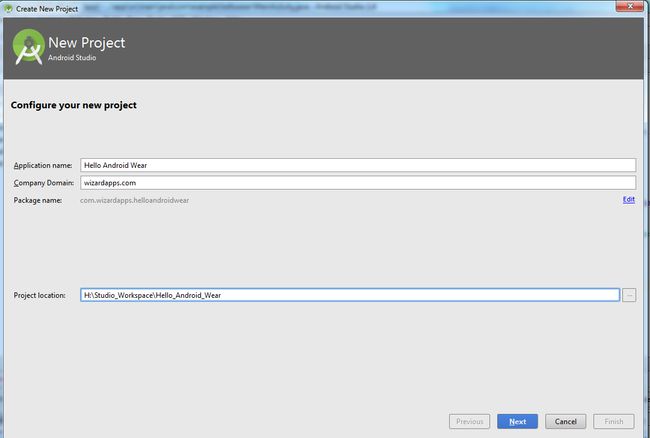
打开Android Studio并选择“新建项目”选项。为您的应用命名,我们在这里使用“Hello Android Wear”作为应用名称以及公司域名。
图1:为Android服装创建一个新项目
为您的磨损应用选择最低SDK版本,在这里我们选择了API 20,其代号为KitKat Wear。
图2:选择定位SDK版本
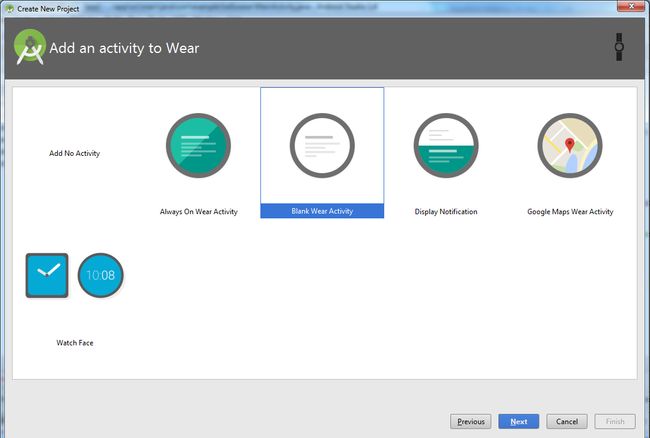
Wear支持各种类型的专业活动,包括表盘,谷歌地图等。但我们在我们的案例中选择了“空白磨损活动”。
图3:选择空白磨损活动
现在设置您的活动和布局文件名,有不同的矩形和圆形布局文件以及主布局文件。保持默认名称到现在为止,我们稍后会讨论它们。单击完成按钮,然后等待一段时间来构建您的磨损应用程序的Gradle项目信息。
图4:设置布局和活动名称
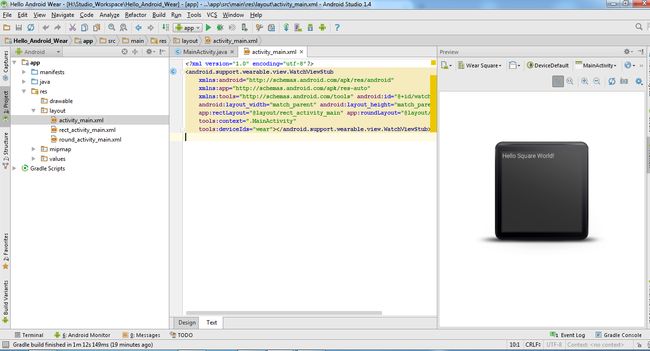
当所有过程成功完成后,您将找到工作室窗口,如下所示。
图5:成功构建后的项目窗口
创建磨损虚拟设备
要创建磨损模拟器,请单击Studio窗口右上角的AVD Manager按钮。然后单击AVD Manager窗口的“ Create Virtual Device ”按钮,该窗口位于窗口的左下角。
图1:选择AVD Manager
接下来,从左侧面板的“类别”列表中选择“ 磨损 根据屏幕尺寸和形状(圆形/方形),右侧列出的设备很少,您可以根据自己的选择进行选择。目前,我们选择圆形磨损,屏幕尺寸为1.65“,分辨率为320 * 320。
![]()
图2:选择模拟器的磨损
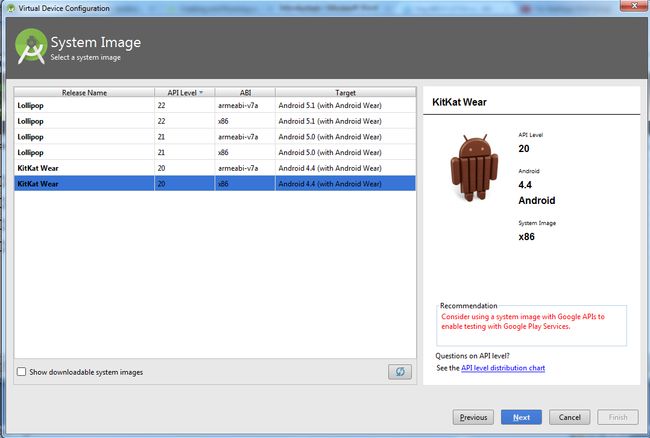
可在下一个窗口看到可用的系统映像。我们选择了一款针对Android 4.4的x86。由于快速的性能,始终优先考虑x86模拟器而不是armeabi-v7a模拟器。
图3:选择系统映像
但请记住,x86仿真器需要HAXM加速器才能获得更好的性能。因此,请从SDK Manager窗口安装它。
图4:安装HAXM以提高仿真器性能
您可以使用“ 显示高级设置”按钮编辑模拟器的配置,即ram,SD卡等。
图5:AVD配置窗口
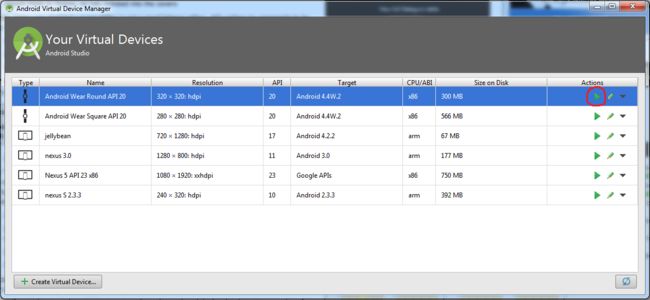
当您的磨损虚拟设备准备就绪时,它将显示在AVD Manager窗口中。单击红色标记的启动按钮以启动模拟器。
图6:AVD清单
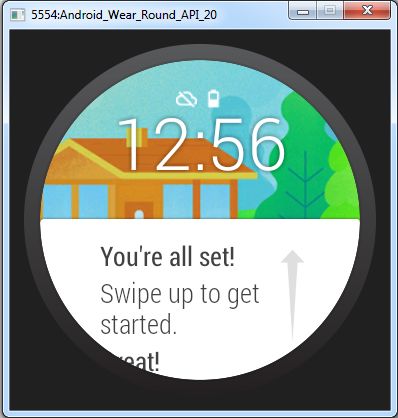
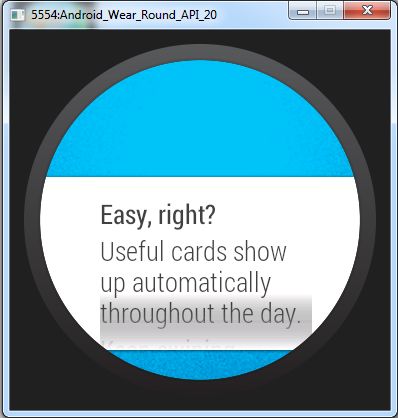
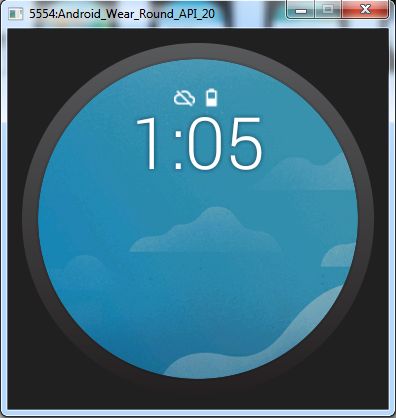
根据您的PC性能和可用RAM,仿真器将在15秒到1分钟的时间范围内启动。准备好后,它将如下所示。
图7:Android Wear模拟器
部署项目以穿戴模拟器
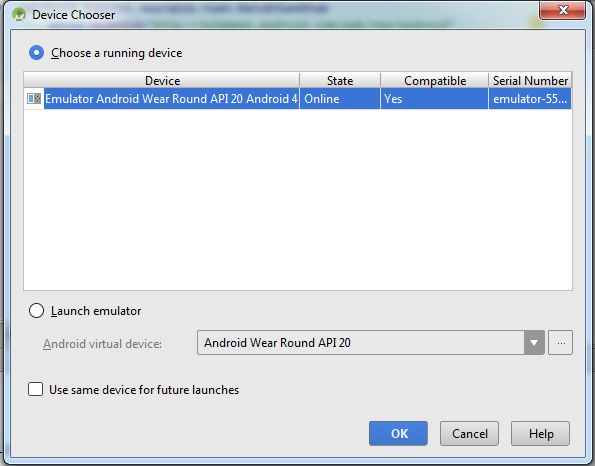
现在创建的磨损模拟器已准备好运行您的项目。按工作室窗口顶部中间的绿色“运行”按钮。当gradle构建完成后,将出现一个名为“ Device Choose r” 的窗口,您将在此处看到创建的Wear模拟器。单击“确定”按钮继续。
图1:设备选择器窗口
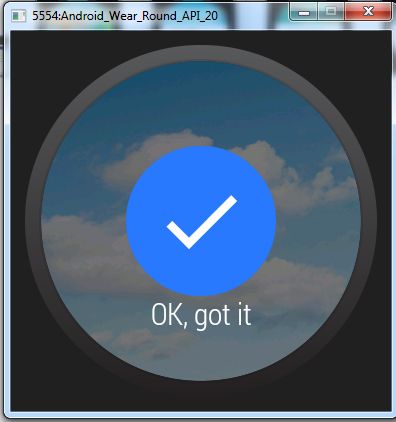
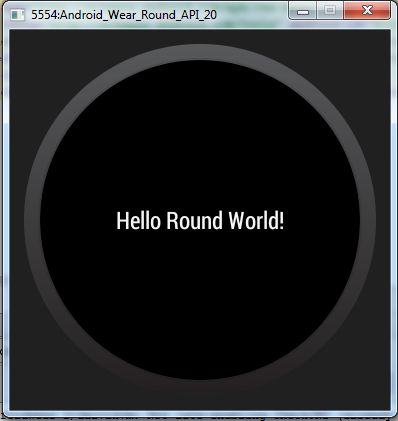
项目成功运行后,您将在模拟器中看到如下图所示的输出。
图2:部署项目后的输出
更改文本值
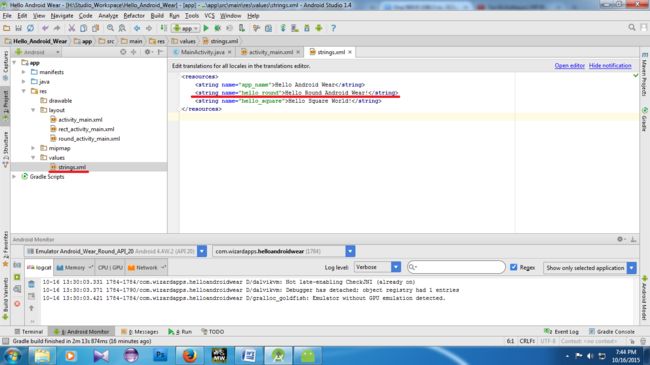
让我们更改文本值,使其像“Hello Round Android Wear!”在左侧面板中查找项目树,并在values文件夹下选择strings.xml。将标记为“hello_round”的字符串值更改为“Hello Round Android Wear!”。
图1:从string.xml更改文本值
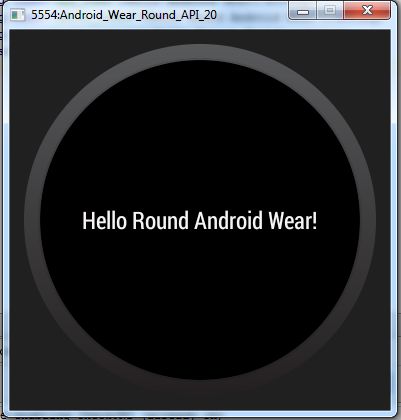
现在运行该项目。您将找到如下输出。滑动屏幕即可从应用中退出。它完成了我们的“Hello Android Wear”应用程序。
图2:更改文本后的输出
相当多的事实
在离开这里之前需要考虑一些重要因素。
在圆形和矩形之间切换
在创建项目时,我们为矩形和圆形磨损设备找到了2种不同的布局名称。在项目结构中,您将在布局文件夹下找到这两个布局文件以及一个主xml布局文件。名为“ rect_activity_main.xml” 的文件定义了方形磨损屏幕的布局,而“ round_activity_main.xml”定义了圆形磨损屏幕的布局。
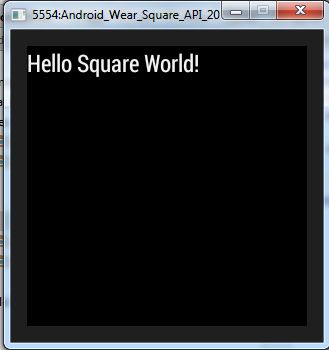
当我们制作另一个针对方形屏幕的模拟器并运行我们之前做的相同项目时,输出看起来相似,但文本值不是因为我们没有更改string.xml 文件中方形屏幕的textview的字符串值。
图:圆形和方形磨损仿真器的输出比较
当您为磨损应用创建布局时,您需要考虑方形和圆形磨损设备的不同机制。因为相同的布局或设计可能会在设备屏幕的角落附近被裁剪,或者可能看起来不太好。克服这种情况有两种解决方案,一种是WatchViewStub 另一种解决方案BoxInsetLayout。
介绍WatchViewStub
转到activity_main.xml文件,你可能会发现xml代码有一个起始和结束标签WatchViewStub,对吧?
WatchViewStub 在运行时检测屏幕形状并膨胀矩形或圆形布局。您需要分别为矩形和圆形布局创建和填充UI视图。
隐藏 复制代码
.support.wearable.view.WatchViewStub
    xmlns:android="http://schemas.android.com/apk/res/android"
    xmlns:app="http://schemas.android.com/apk/res-auto"
    xmlns:tools="http://schemas.android.com/tools"
    ...

    app:rectLayout="@layout/rect_activity_main"
    app:roundLayout="@layout/round_activity_main"
    ...>

android.support.wearable.view.WatchViewStub> XML布局名称应该与app中定义的值匹配:rectLayout和app:roundLayout 您的activity_main.xml。基于我们前面做的例子,它们应该被命名为rect_activity_main.xml和round_activity_main.xml分别。
现在从JAVA的角度来看,在通胀完成之前,您无法访问任何子视图。您应该实现OnLayoutInflatedListener接口以检测布局通胀何时完成。当右视图膨胀时,WatchViewStub 将调用onLayoutInflated 获取子视图所需引用的方法findViewById。
隐藏 复制代码
final WatchViewStub stub = (WatchViewStub) findViewById(R.id.watch_view_stub);

stub.setOnLayoutInflatedListener(new WatchViewStub.OnLayoutInflatedListener() {
    @Override
    public void onLayoutInflated(WatchViewStub stub) {
        mTextView = (TextView) stub.findViewById(R.id.text);
    }
});
BoxInsetLayout
BoxInsetLayout允许您定义适用于方形和圆形屏幕的单一布局。要在此区域内显示,布局内的子视图将指定layout_box具有top,bottom,left和right或all组合的属性。
![]()
图:圆形屏幕上的BoxInsetLayout
建立一个很酷的东西
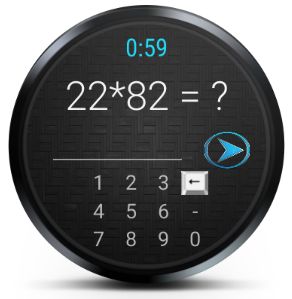
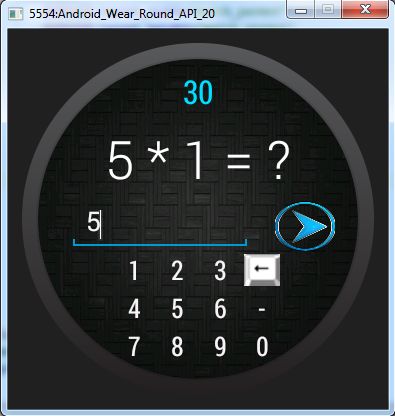
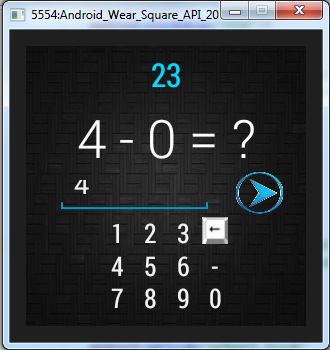
让我们扩展我们的工作并做一些很酷的事情。我们将制作一个数学游戏,在60秒的时间范围内生成随机方程式,因此用户将获得得分结果。
设计
首先,我们需要设计适合圆形和方形设备的主布局文件。我们将使用WatchViewStub来完成这项工作。
我们将如下设计我们的应用程序。让我们设计吧xml。
图1:应用布局
<?xml version = “1.0” encoding = “utf-8” ?>
< LinearLayout xmlns:android = “http://schemas.android.com/apk/res/android” android :layout_width = “match_parent” android :layout_height = “ match_parent“ android :background = ”@ drawable / back“ android :orientation = ”vertical“ >
< LinearLayout android :layout_width = “fill_parent” android :layout_height = “fill_parent” android :layout_weight = “2” >
< TextView android :id = “@ + id / textTimer” android :layout_width = “match_parent” android :layout_height = “match_parent” android :fontFamily = “sans-serif-condensed” android :gravity = “center” android :text = “ 0:59“ android :textColor = ”@ android :color / holo_blue_bright“ android :textSize = ”22sp“ />
LinearLayout >
< LinearLayout android :layout_width = “fill_parent” android :layout_height = “fill_parent” android :layout_weight = “1.5” android :orientation = “vertical” android :weightSum = “2” >
< LinearLayout android :layout_width = “fill_parent” android :layout_height = “fill_parent” android :layout_weight = “0.8” >
< TextView android :id = “@ + id / gameEquation” android :layout_width = “match_parent” android :layout_height = “wrap_content” android :fontFamily = “sans-serif-light” android :gravity = “center” android :text = “ 22 * 82 =?“ android :textColor = “@ android :color / white” android :textSize = “35sp” />
LinearLayout >
< LinearLayout android :layout_width = “fill_parent” android :layout_height = “fill_parent” android :layout_weight = “1.2” android :orientation = “horizontal” android :weightSum = “3” >
< EditText android :id = “@ + id / answer” android :layout_width = “match_parent” android :layout_height = “wrap_content” android :layout_marginLeft = “20dp” android :layout_weight = “1” />
< ImageView android :id = “@ + id / next” android :layout_width = “match_parent” android :layout_height = “match_parent” android :layout_gravity = “center” android :layout_marginLeft = “15dp” android :layout_marginRight = “15dp” android : layout_weight = “2” android :background = “@ drawable / next” android :scaleType = “fitXY” />
LinearLayout >
LinearLayout >
< LinearLayout android :layout_width = “fill_parent” android :layout_height = “fill_parent” android :layout_marginBottom = “10dp” android :layout_marginLeft = “50dp” android :layout_marginRight = “50dp” android :layout_weight = “1.5” android :orientation = “vertical “ android :weightSum = ”3“ >
< LinearLayout android :layout_width = “match_parent” android :layout_height = “match_parent” android :layout_weight = “1” android :orientation = “horizontal” android :weightSum = “4” >
< TextView android :layout_width = “match_parent” android :layout_height = “match_parent” android :layout_weight = “1” android :gravity = “center” android :text = “1” android :textSize = “18sp” android :onClick = “onText1_Click “ android :clickable = ”true“ />
< TextView android :layout_width = “match_parent” android :layout_height = “match_parent” android :layout_weight = “1” android :gravity = “center” android :text = “2” android :textSize = “18sp” android :onClick = “onText2_Click “ android :clickable = ”true“ />
< TextView android :layout_width = “match_parent” android :layout_height = “match_parent” android :layout_weight = “1” android :gravity = “center” android :text = “3” android :textSize = “18sp” android :onClick = “onText3_Click “ android :clickable = ”true“ />
< TextView android :layout_width = “match_parent” android :layout_height = “match_parent” android :layout_weight = “1” android :gravity = “center” android :background = “@ drawable / backspace” android :layout_margin = “2dp” android :onClick = “onTextBackSpace_Click” android :clickable = “true” />
LinearLayout >
< LinearLayout android :layout_width = “fill_parent” android :layout_height = “fill_parent” android :layout_weight = “1” android :orientation = “horizontal” android :weightSum = “4” >
< TextView android :layout_width = “match_parent” android :layout_height = “match_parent” android :layout_weight = “1” android :gravity = “center” android :text = “4” android :textSize = “18sp” android :onClick = “onText4_Click “ android :clickable = ”true“ />
< TextView android :layout_width = “match_parent” android :layout_height = “match_parent” android :layout_weight = “1” android :gravity = “center” android :text = “5” android :textSize = “18sp” android :onClick = “onText5_Click “ android :clickable = ”true“ />
< TextView android :layout_width = “match_parent” android :layout_height = “match_parent” android :layout_weight = “1” android :gravity = “center” android :text = “6” android :textSize = “18sp” android :onClick = “onText6_Click “ android :clickable = ”true“ />
< TextView android :layout_width = “match_parent” android :layout_height = “match_parent” android :layout_weight = “1” android :gravity = “center” android :text = “ - ” android :textSize = “18sp” android :onClick = “onTextMinus_Click “ android :clickable = ”true“/>
LinearLayout >
< LinearLayout android :layout_width = “fill_parent” android :layout_height = “fill_parent” android :layout_weight = “1” android :orientation = “horizontal” android :weightSum = “4” >
< TextView android :layout_width = “match_parent” android :layout_height = “match_parent” android :layout_weight = “1” android :gravity = “center” android :text = “7” android :textSize = “18sp” android :onClick = “onText7_Click “ android :clickable = ”true“ />
< TextView android :layout_width = “match_parent” android :layout_height = “match_parent” android :layout_weight = “1” android :gravity = “center” android :text = “8” android :textSize = “18sp” android :onClick = “onText8_Click “ android :clickable = ”true“ />
< TextView android :layout_width = “match_parent” android :layout_height = “match_parent” android :layout_weight = “1” android :gravity = “center” android :text = “9” android :textSize = “18sp” android :onClick = “onText9_Click “ android :clickable = ”true“ />
< TextView android :layout_width = “match_parent” android :layout_height = “match_parent” android :layout_weight = “1” android :gravity = “center” android :text = “0” android :textSize = “18sp” android :onClick = “onText0_Click “ android :clickable = ”true“ />
LinearLayout >
LinearLayout >
LinearLayout >
功能
为了计算游戏时间,我们需要一个CountDownTimer 控件和一些变量来追踪时间。
隐藏 复制代码
private long timeRemaining = 0;
private final int gameLengthInMillis = 60000;
private final int countDownInterval = 1000;

public CountDownTimer timer;现在我们将利用onTick 事件ot CountDownTimer,并将剩余时间值打印到textview。
隐藏 复制代码
// Set countdown

timer = new CountDownTimer(gameLengthInMillis, countDownInterval) {
    @Override
    public void onTick(long millisUntilFinished) {

        if (isPaused || isCanceled) {

            timer.cancel();
            Log.d("GameActivity:", "Timer >>1st timer cancled. remaining time:" + millisUntilFinished);

        } else {

            timeRemaining = millisUntilFinished;
            mTextView.setText(Long.toString(timeRemaining / 1000));
        }
    }
为了生成随机方程,我们将使用一个单独的类,它将随机生成运算符和数字。
隐藏 复制代码
private char[] operators = new char[] { '+', '-', '*', '/' }; // generate operator隐藏 复制代码
int firstNumber = random.nextInt(10); // generate first random number
int secondNumber = random.nextInt(10); // generate second random number
在生成所有这3个随机事物之后,我们将连接它们以生成方程式。
隐藏 复制代码
String equation = first + " " + operator + " " + second + " = ?" ;接下来,我们需要抛出一个按钮事件,该事件将在每次点击时刷新此随机方程。我们还需要将用户输入答案与其真实答案进行比较。此外,我们需要跟踪正确和错误的答案并计算其数量。为了解决数学方程,我们可以使用一个名为的第三方开源项目evalex。
隐藏 复制代码
buttonNext.setOnClickListener(new View.OnClickListener() {

                            public void onClick(View v) {

                                if (editTextAns.getText().toString().isEmpty()) {
                                    Toast.makeText(getApplicationContext(), "Please write some answer first", Toast.LENGTH_SHORT).show();
                                } else {
                                    total += 1;
                                    int ans = Integer.parseInt(editTextAns.getText().toString());
                                    if (ans == randomEquation.answer) {
                                        correct += 1;
                                    } else {
                                    }
                                    editTextAns.setText("");
                                    refreshEquation();
                                }
                            }
                        }
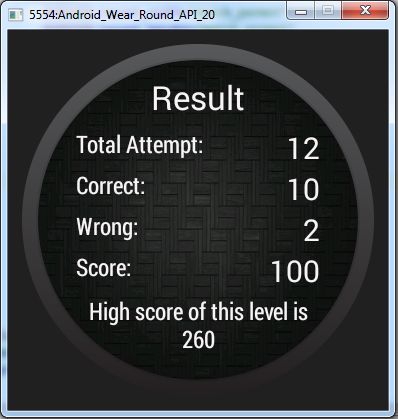
);当计时器完成时,我们需要导航到结果页面以显示用户性能。因此我们将使用onFinish()方法CountDownTimer。
隐藏 复制代码
@Override

public void onFinish() {

    Intent intent = new Intent(MainActivity.this, ResultsActivity.class);
    intent.putExtra("correct", correct);
    intent.putExtra("total", total);
    startActivity(intent);
    finish();

    Log.d("GameActivity:", "Timer >> finished 1 min");
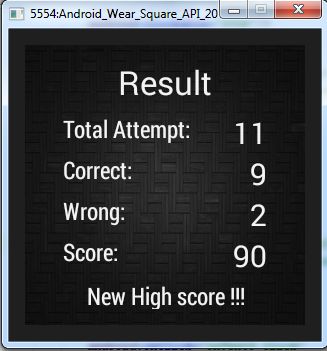
}在ResultsActivity.class 我们将打印传递给这个活动的价值和通过保存它跟踪最高分SharedPreferences。
隐藏 复制代码
final SharedPreferences sharedPreferences = getSharedPreferences("prefs", 0);
int currentHighScore = sharedPreferences.getInt("highscore", 0);

if (score > currentHighScore) {
    isHighScore = true;
    SharedPreferences.Editor sharedPreferencesEditor = sharedPreferences.edit();
    sharedPreferencesEditor.putInt("highscore", score);
    sharedPreferencesEditor.commit();
    highScoreTextView.setText("New High score !!!");
} else {
 highScoreTextView.setText("High score of this level is " + currentHighScore);
}
在我们构建项目后成功设置所有这些组件后,我们将获得一个很酷的数学应用程序,肯定会在您的空闲时间娱乐您!
图2:数学游戏的最终输出
附加功能
将Wear模拟器与Android设备连接
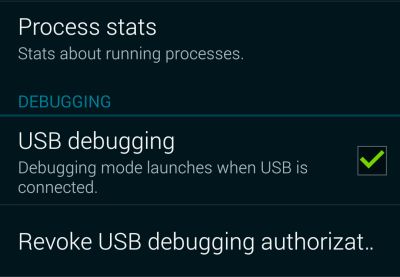
让我们将我们的磨损模拟器与我们真正的Android设备(手机/平板电脑)连接起来。要执行此操作,请转至设备的“设置”,如果之前未选择“ 从开发者选项中进行USB调试”,请进行检查。
图1:保持USB调试开启
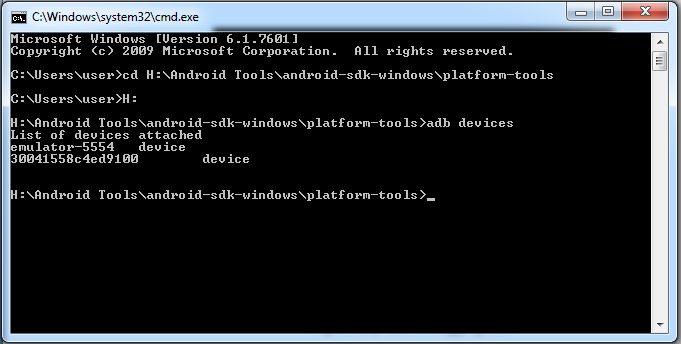
现在从Google Play 下载Android Wear应用并将其安装到您的设备上。安装完成后,将设备连接到计算机并打开命令窗口。编写命令“ adb devices ”
图2:adb命令中可用的连接设备列表
接下来编写此命令“ adb -d forward tcp:5601 tcp:5601 ”以打开要连接的端口。
打开设备的蓝牙连接,并将其与磨损仿真器配对。配对过程完成后,您将在设备上看到此窗口的应用程序。
![]()
图3:与仿真器连接的设备。
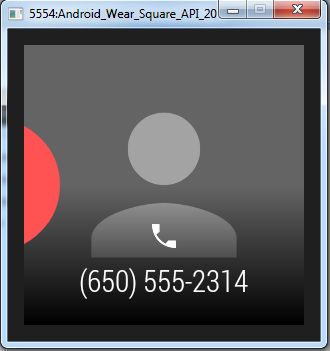
要检查您的设备是否与磨损模拟器连接,您可以尝试多种方法,我们在这里查看Watch Notifications。选择它,你会发现一个窗口,几乎没有选择。从那里选择“ 拨入电话 ”选项,您将直接收到磨损模拟器的呼叫通知。瞧!,您的设备和磨损模拟器现已连接。您可以通过磨损模拟器等控制设备的音乐播放器。
图4:从设备发送呼叫通知到磨损仿真器。
兴趣点
如本文前面所述,将整个可穿戴平台覆盖到一篇文章中是一个漫长的旅程。但是我们已经看到了在这个平台上开发应用程序的最重要因素。我们创建了一个示例Hello Wear应用程序,创建了模拟器并构建了应用程序。然后我们为我们的手表创建了一个完整的数学游戏。有几千个范围可以将此应用程序升级为业务类应用程序。有了一些逻辑层次,它可能会更有乐趣。关于谷歌地图,WatchFace等可用的可穿戴应用程序开发范围还有更多有趣的范围。希望我能在不久的将来回来讨论那些令人敬畏的主题。在此之前,玩Android Wear玩得开心。快乐的Droiding!


