pyqt5画直线(UI界面)----计算机图形学
运行环境: ubantu18 + pycharm + pyqt5
运行效果:
大体思路:
左边界面为键入的直线信息,右边的界面显示画图效果。整个界面使用desiger 新建 Main Window 拖拽生成 UI界面。右边画图部分的实现使用paintEvent(QPaintEvent*)函数。由于paintEvent(QPaintEvent*)函数是QWidget类中的虚函数,用于ui的绘制,所以自定义一个类继承自 QWidget类 来实现画图框架。
信号与自定义槽
按键效果为:点击 color 键,设定画笔为左边选择的颜色。 点击 OK 键开始右边界面和直线的绘制。
为实现上面两个功能分别自定义两个函数 chosecolor() 和 drawline()。
再将函数与按键的 clicked(点击事件)绑定。
self.pushButton.clicked.connect(self.chosecolor)
self.pushButton_2.clicked.connect(self.drawline)


    def chosecolor(self):
        print(self.comboBox.currentText())
        if self.comboBox.currentText()=='blue':
            self.color=Qt.blue
        elif self.comboBox.currentText()=='red':
            self.color=Qt.red
        elif self.comboBox.currentText()=='green':
            self.color=Qt.green


    def drawline(self):
        x0 = int(self.lineEdit.text())
        y0 = int(self.lineEdit_2.text())
        x1 = int(self.lineEdit_3.text())
        y1 = int(self.lineEdit_4.text())
        。。。。。
坐标转换
PyQt5中的坐标体系:左上角为原点(0, 0),向右为x轴正向,向下为y轴正向。
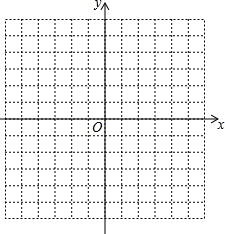
我们常用的坐标系:
因此需要进行坐标系的转换。
此外,由于 PyQt5 绘图中像素点间隔较小,为了便于能清晰的看出画线算法对像素点的选择,我这里采用 10 个像素点为 1 格。
size = self.size() # 获得窗口的尺寸。

for i in points:
            x = 10 * i.x() + size.width() / 2.0   # size.width() :窗口宽度
            y = size.height() - (10 * i.y() + size.height() / 2.0)  #size.height():窗口高度
            painter.drawPoint(x, y)
显示子窗口
主窗口右边添加 gridLayout 布局,以放置自定义的画图框架。
self.gridLayoutWidget = QtWidgets.QWidget(self.centralwidget)
        self.gridLayoutWidget.setGeometry(QtCore.QRect(400, 0, 720, 720))
        self.gridLayoutWidget.setObjectName("gridLayoutWidget")
        self.gridLayout = QtWidgets.QGridLayout(self.gridLayoutWidget)
        self.gridLayout.setContentsMargins(0, 0, 0, 0)
        self.gridLayout.setObjectName("gridLayout")
实例化自定义绘图窗口为 demo ,再将其添加到 gridLayout 布局中,并显示。
        self.gridLayout.addWidget(self.demo)  # 添加子窗口
        self.demo.show()
直线显示覆盖
为了实现多次绘制直线的操作,在显示绘图窗口前,需要先检查 gridLayout 布局中是否已经存在上一次的绘图,如果有的话,需要进行移除。采用 removeWidget(self.demo) 进行不完全移除(即把存在的组件移除,但是其中的绘图内容还在。),实现多次绘图的显示。
if self.gridLayout.count():
    self.gridLayout.removeWidget(self.demo)
PS: 如需参考完整代码,请移步:https://download.csdn.net/download/qq_42185999/11834669 进行下载


