1.模板简介
创建项目,基本配置
第一步:配置数据库
第二步:创建APP,配置APP
第三步:配置模板路径
第四步:配置分发urls.py(APP里面的)
根目录下,增加命名空间namespace,作用:反向解析
url(r'^', include('booktest.urls',namespace='booktest')),
APP中urls.py
from django.conf.urls import url
from booktest import views
urlpatterns = [
    url(r'^$',views.index,name='index'),
]
模板的设计实现了业务逻辑(view)与显示内容(template)的分离,一个视图可以使用任意一个模板,一个模板可以供多个视图使用,包含两个部分
(1)HTML的静态部分(html css js)
(2)动态插入内容部分(DTL)
DTL:模板语言(django template Language)
常用方式:在项目的根目录下创建templates目录,设置DIRS值(settings.py)
DIRS=[os.path.join(BASE_DIR,"templates")]
1.1 模板处理
包含2步:
第一步:加载(读取模板内容,IO操作)----可以解析原生的HTML,没法解析DTL
第二步:渲染-----将DTL转化(替换为)为HTML
经过渲染的最后生成的都是HTML内容了
浏览器
第一步:渲染(HTML)
第二步:执行(JS)
原始代码
from django.template import loader, RequestContext
from django.http import HttpResponse

def index(request):
    tem = loader.get_template('temtest/index.html')
    context = RequestContext(request, {})
    return HttpResponse(tem.render(context))
快捷函数
- 为了减少加载模板、渲染模板的重复代码,django提供了快捷函数
- render_to_string("")
- render(request,'模板',context)
1.2 DTL(模板语言(django template Language))
模板语言包括
- 变量
- 标签 { % 代码块 % }
- 过滤器
- 注释{# 代码或html #}
变量
语法:{{ variable }}
- 变量名必须由字母、数字、下划线(不能以下划线开头)和点组成
- 当模版引擎遇到点("."),会按照下列顺序查询:
- 字典查询,例如:book["id"]
- 属性或方法查询,例如:book.id
- 数字索引查询,例如:book[id]
- 如果变量不存在, 模版系统将插入'' (空字符串)
models.py,跟test2一致---加了个showname方法给模板去调用
from django.db import models


# Create your models here.

class BookInfo(models.Model):
	# 书名
	btitle = models.CharField(max_length=20)
	# 发布日期,数据库中的字段名db_column
	bpub_date = models.DateTimeField(db_column='pub_date')
	# 阅读量
	bread = models.IntegerField(default=0)
	# 评论数
	bcomment = models.IntegerField(default=0, null=False)
	# 逻辑删除
	isDelete = models.BooleanField(default=False)

	# 元选项
	class Meta:
		# 表名字
		db_table = 'bookinfo'
		# 默认排序规则(会增加数据库的开销)
		ordering = ['id']

	def __str__(self):
		return "%s" % self.btitle


class HeroInfo(models.Model):
	# 英雄名称
	hname = models.CharField(max_length=20)
	# 性别
	hgender = models.BooleanField(default=True)
	# 英雄描述
	hcontent = models.CharField(max_length=100)
	# 属于哪本书
	hBook = models.ForeignKey("BookInfo", on_delete=models.CASCADE, )
	# 逻辑删除
	isDelete = models.BooleanField(default=False)

	def __str__(self):
		return "%s" % self.hname
	# 模板调用的方法
	def showname(self):
		return self.hname
views.py
from django.shortcuts import render
from .models import *
# Create your views here.
def index(request):
	hero = HeroInfo.objects.get(pk=2)
	context = {'hero':hero}
	return render(request,'booktest/index.html',context=context)
index.html
    index


{{ hero.showname }}
效果(遇到点,第二种:调用方法)
标签----执行代码段
- 语法:{ % tag % }
- 作用
- 在输出中创建文本
- 控制循环或逻辑
- 加载外部信息到模板中供以后的变量使用
for标签
{ %for ... in ...%}
循环逻辑
{{forloop.counter}}表示当前是第几次循环
{ %empty%}
给出的列表为或列表不存在时,执行此处
{ %endfor%}
if标签
{ %if ...%}
逻辑1
{ %elif ...%}
逻辑2
{ %else%}
逻辑3
{ %endif%}
comment标签
{ % comment % }
多行注释
{ % endcomment % }
include:加载模板并以标签内的参数渲染-----一般不用
{ %include "foo/bar.html" % }
url:反向解析(见1.3)
{ % url 'name' p1 p2 %}
过滤器
- 语法:{ { 变量|过滤器 }},例如{ { name|lower }},表示将变量name的值变为小写输出
- 使用管道符号 (|)来应用过滤器
- 通过使用过滤器来改变变量的计算结果
- 可以在if标签中使用过滤器结合运算符
# 一般
if list1|length > 1
# 串联
name|lower|upper
# 拼接
list|join:", "
# 默认值
value|default:"什么也没有"
# 格式化
value|date:'Y-m-d'
views.py
from django.shortcuts import render
from .models import *
# Create your views here.
def index(request):
	# hero = HeroInfo.objects.get(pk=2)
	# context = {'hero':hero}
	list = HeroInfo.objects.filter(isDelete=False)
	context = {'list':list}
	return render(request,'booktest/index.html',context=context)
urls.py(未变)
index.html
index
{{ hero.showname }}
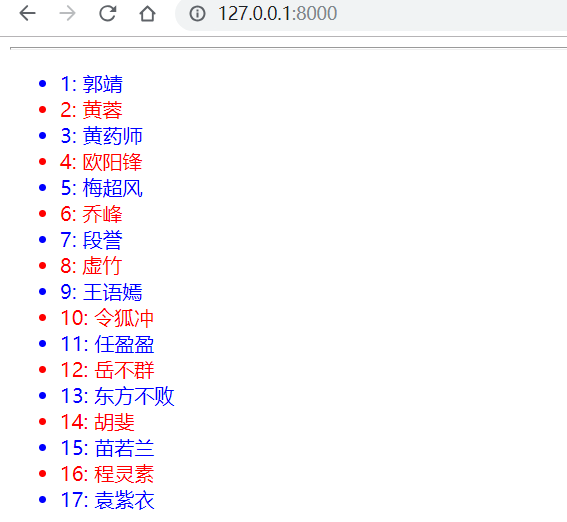
{% comment %}
{#for标签#}
{#奇数行红色,偶数显示为蓝色#}
{# 过滤器 #}
{% endcomment %}
{% for hero in list %}
{# 除2为整数 #}
{% if forloop.counter|divisibleby:'2' %}
{#循环的第几次#}
- {{forloop.counter}}: {{hero.showname}}
{% else %}
- {{forloop.counter}}: {{hero.showname}}
{% endif %}
{% empty %}
{#list没内容的时候执行这里#}
啥也没找到
{% endfor %}
效果
1.2 反向解析
根据你配置的url动态生成链接地址,不用将url写死
views.py(增加的部分)
def show(request,id):
	context = {'id':id}
	return render(request,'booktest/show.html',context=context)
urls.py(增加的部分)
	# 正向解析,根据地址,匹配url
	# 反向解析,根据url规则,生成地址
    url(r'^(\d+)$',views.show,name='show'),
index.html(增加的部分)
show.html
    show


{{ id }}
效果
点击显示
即使根目录下urls.py进行了改变,反向解析会跟着一起变,不需要跟着更改,方便
2 模板继承
网页的头部,网页的尾部都一样,使用模板继承----定义到一个地方,去调用它
- 模板继承可以减少页面内容的重复定义,实现页面内容的重用
- 典型应用:网站的头部、尾部是一样的,这些内容可以定义在父模板中,子模板不需要重复定义
- block标签:在父模板中预留区域,在子模板中填充
- extends继承:继承,写在模板文件的第一行
views.py
from django.shortcuts import render
from .models import *
# Create your views here.
# 模板继承
def index2(request):
	return render(request,'booktest/index2.html')
urls.py
url(r'^index2$',views.index2,name='index2'),base.html(前部或后部)
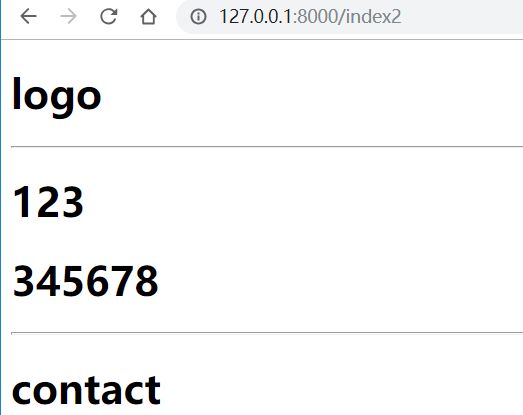
    base
    {% block head %}
    {% endblock %}


logo

{#利用block挖坑#}
{% block content1 %}
    1234abcd
{% endblock %}

contact
index2.html(继承base.html)
{% extends 'booktest/base.html' %}

{% block content1 %}
    123
345678
{% endblock content1 %}
效果
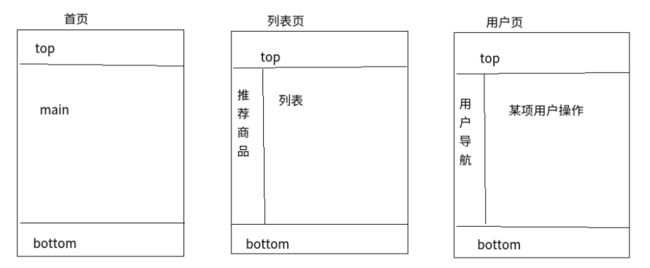
2.1三层继承结构
- 三层继承结构使代码得到最大程度的复用,并且使得添加内容更加简单
- 如下图为常见的电商页面
views.py
from django.shortcuts import render
from .models import *
# Create your views here.
def uesr1(request):
	return render(request,'booktest/user1.html')

def uesr2(request):
	return render(request,'booktest/user2.html')

def goods(request):
	return render(request,'booktest/base_goods.html')
urls.py
    url(r'^user1$',views.uesr1,name='user1'),
    url(r'^user2$',views.uesr2,name='user2'),

    url(r'^goods$',views.goods,name='goods'),
base.html------相同的头部和尾部
    base
    {% block head %}
    {% endblock %}


logo

{#利用block挖坑#}
{% block content1 %}
    1234abcd
{% endblock %}

contact
base_user.html-----继承base.html
{% extends 'booktest/base.html' %}
{% block content1 %}


    {% block index%}用户导航{% endblock %}
    {#用户页面挖坑#}
    {% block uesr_content %}用户信息{% endblock %}


{% endblock content1 %}
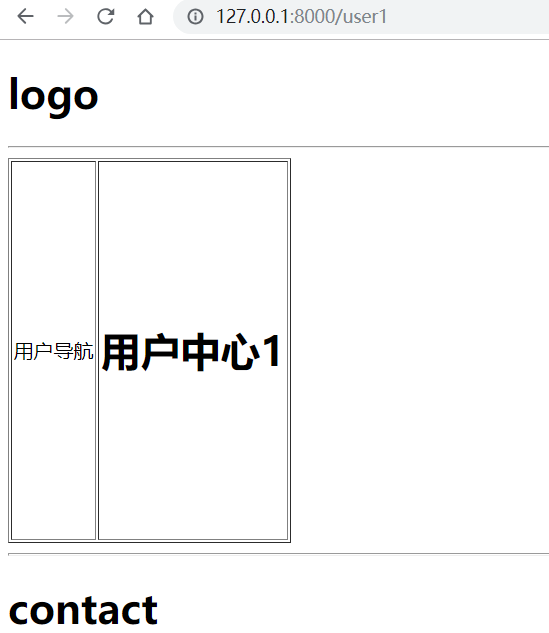
user1.html----继承base_user.html
{% extends 'booktest/base_user.html' %}
{% block uesr_content %}
用户中心1
{% endblock uesr_content %}
效果
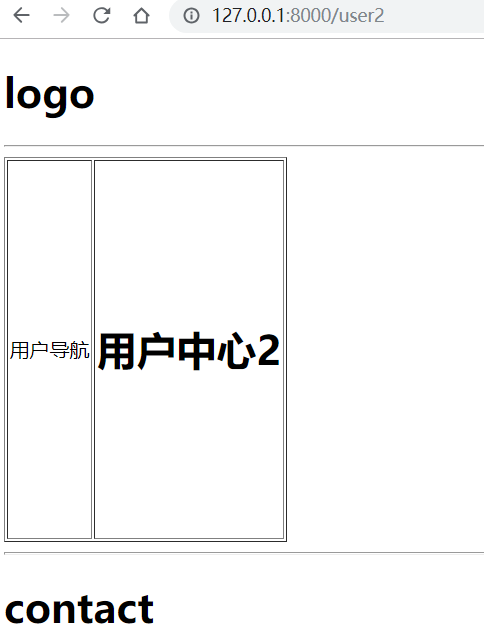
uesr2.html
{% extends 'booktest/base_user.html' %}
{% block uesr_content %}
用户中心2
{% endblock uesr_content %}
效果
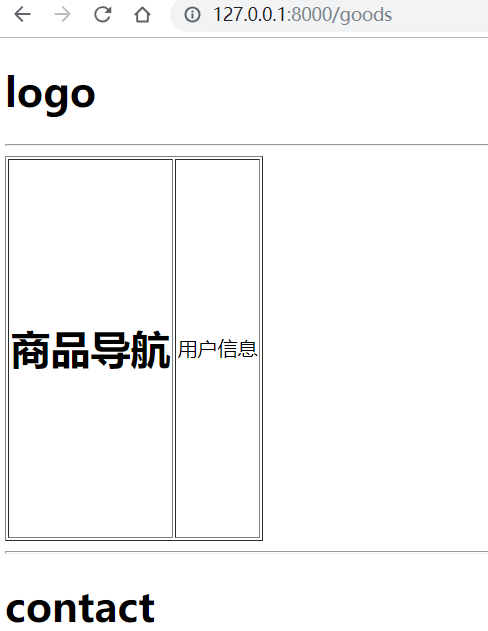
base_goods.py---继承base_user.html
{% extends 'booktest/base_user.html' %}
{% block index %}
商品导航
{% endblock index %}
效果
2.2 HTML转义
富文本编辑器---将其转义在显示
- html转义,就是将包含的html标签输出,而不被解释执行,原因是当显示用户提交字符串时,可能包含一些攻击性的代码,如js脚本
- Django会将如下字符自动转义:
< 会转换为<

> 会转换为>

' (单引号) 会转换为'

" (双引号)会转换为 "

& 会转换为 &
views.py
from django.shortcuts import render
from .models import *
# Create your views here.
def htmlTest(request):
context = {'t1':'123
'}
return render(request,'booktest/htmlTest.html',context=context)
urls.py
url(r'^htmlTest$',views.htmlTest,name='htmlTest'),
htmlTest.html
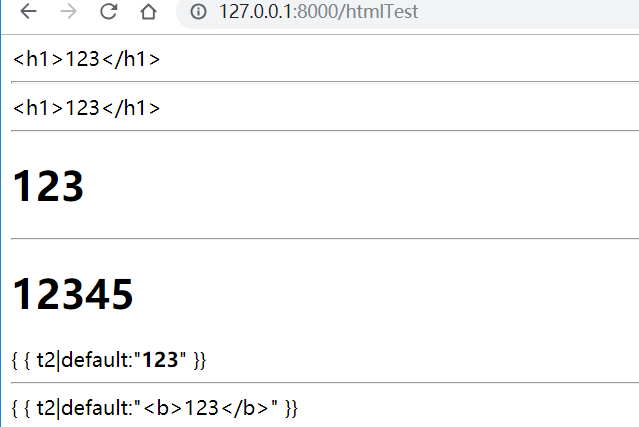
    Title


{#将原本传过来的html原封不动输出#}
{{ t1 }}

{#转义,默认#}
{{ t1|escape }}

{#不转义#}
{{ t1|safe }}

{#标签关闭转义#}
{% autoescape off %}
    12345
{% endautoescape %}

{#字面值转义#}
{#不转义#}
{ { t2|default:"123" }}

{#手动转义#}
{ { t2|default:"123" }}
效果
2.3 CSRF(Cross Site Request Forgery,跨站请求伪造)
- 某些恶意网站上包含链接、表单按钮或者JavaScript,它们会利用登录过的用户在浏览器中的认证信息试图在你的网站上完成某些操作,这就是跨站攻击
views.py
from django.shortcuts import render
from .models import *


# Create your views here.
# 表单页面
def csrf1(request):
	return render(request, 'booktest/csrf1.html')


# 接受表单内容,显示出来
def csrf2(request):
	uname = request.POST['uname']
	context = {'uname': uname}
	return render(request, 'booktest/csrf2.html',context=context)
urls.py
	url(r'^csrf1/$', views.csrf1,name='csrf1'),
	url(r'^csrf2/$', views.csrf2,name='csrf2'),
csrf1.html
csrf1
csrf2.html
    show


{{ uname }}
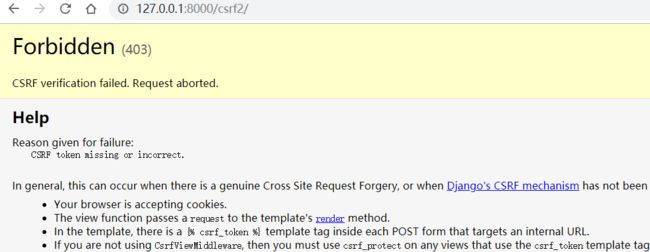
效果
提交后
解决办法1
注释掉settings.py内的csrf部分
重新提交,效果如下
如果禁用之后其他人得到代码,也可以这样访问你的网站(源码,直接链接),不能禁用
解决方案2:仅需加一个csrf保护
csrf1.html
csrf1
就不会产生Forbidden
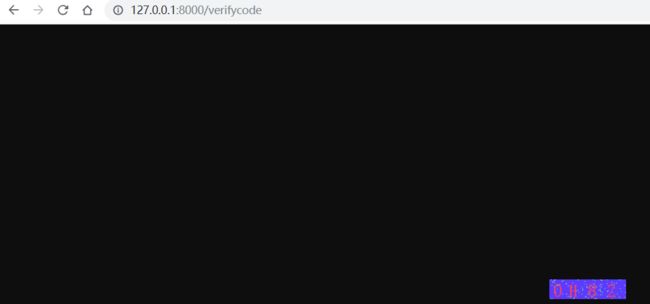
2.4 验证码
- 在用户注册、登录页面,为了防止暴力请求,可以加入验证码功能,如果验证码错误,则不需要继续处理,可以减轻一些服务器的压力
- 使用验证码也是一种有效的防止crsf的方法
找一个第三方验证码,放到网站中,看看效果
- Image表示画布对象
- ImageDraw表示画笔对象
-
ImageFont表示字体对象
views.py
from django.shortcuts import render
from .models import *
from django.http import HttpResponse


# Create your views here.

def verifycode(request):
	# 引入绘图模块
	from PIL import Image, ImageDraw, ImageFont
	# 引入随机函数模块
	import random
	# 定义变量,用于画面的背景色、宽、高
	bgcolor = (random.randrange(20, 100), random.randrange(
		20, 100), 255)
	width = 100
	height = 25
	# 创建画面对象
	im = Image.new('RGB', (width, height), bgcolor)
	# 创建画笔对象
	draw = ImageDraw.Draw(im)
	# 调用画笔的point()函数绘制噪点
	for i in range(0, 100):
		xy = (random.randrange(0, width), random.randrange(0, height))
		fill = (random.randrange(0, 255), 255, random.randrange(0, 255))
		draw.point(xy, fill=fill)
	# 定义验证码的备选值
	str1 = 'ABCD123EFGHIJK456LMNOPQRS789TUVWXYZ0'
	# 随机选取4个值作为验证码
	rand_str = ''
	for i in range(0, 4):
		rand_str += str1[random.randrange(0, len(str1))]
	# 构造字体对象
	font = ImageFont.truetype('simsun.ttc', 23)
	# 构造字体颜色
	fontcolor = (255, random.randrange(0, 255), random.randrange(0, 255))
	# 绘制4个字
	draw.text((5, 2), rand_str[0], font=font, fill=fontcolor)
	draw.text((25, 2), rand_str[1], font=font, fill=fontcolor)
	draw.text((50, 2), rand_str[2], font=font, fill=fontcolor)
	draw.text((75, 2), rand_str[3], font=font, fill=fontcolor)
	# 释放画笔
	del draw
	# 存入session,用于做进一步验证
	request.session['verifycode'] = rand_str
	# 内存文件操作
	import io
	buf = io.BytesIO()
	# 将图片保存在内存中,文件类型为png
	im.save(buf, 'png')
	# 将内存中的图片数据返回给客户端,MIME类型为图片png
	return HttpResponse(buf.getvalue(), 'image/png')

# 使用验证码,展示与输入
def verifyTest1(request):
	return render(request,'booktest/verifyTest1.html')
# 接收对比
def verifyTest2(request):
	# 输入的
	code1 = request.POST['code1']
	code2 = request.session['verifycode']
	if code1==code2:
		return HttpResponse('OK')
	else:
		return HttpResponse('NO')
urls.py
	url(r'^verifycode$', views.verifycode,name='verifycode'),
	url(r'^verifyTest1$', views.verifyTest1,name='verifyTest1'),
	url(r'^verifyTest2$', views.verifyTest2,name='verifyTest2'),
验证码展示
verifyTest1.html
verifyTest1
效果
提交

