Tomcat笔记④——Web请求的处理过程
从前文分析可知,Connector组件时用来处理连接请求的,而Connector组件下的Endpoint组件就是用来监听请求的,所以我们先从Endpoint组件开始分析。
Endpoint
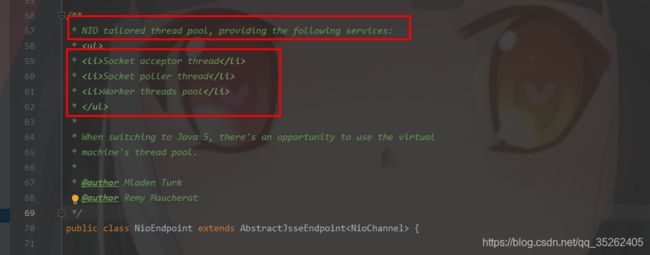
tomcat的EndPoint组件使用的是NIOEndpoint对象,这个对象里有三个重要的组件,Endpoint的功能也是通过这三个组件实现的。
- Acceptor
- Poller
- Worker
这三个组件在源码中也有描述,可以说NIOEndpoint的功能就是通过这三个组件提供,而且这三个组件都是以线程的形式工作的。
NioEndpoint.Acceptor
这里直接去分析run方法,可以发现在这个组件中接收了用户在浏览器中发送的请求
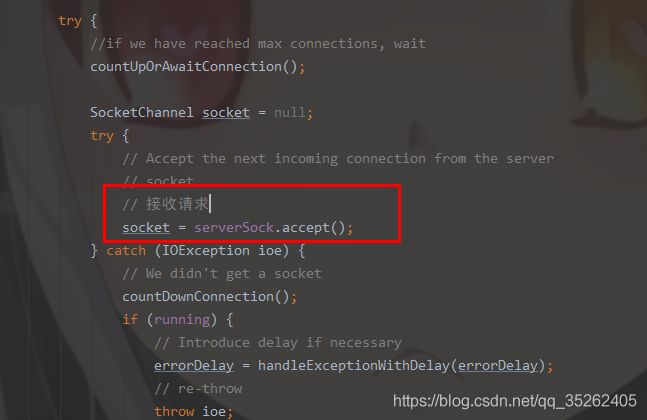
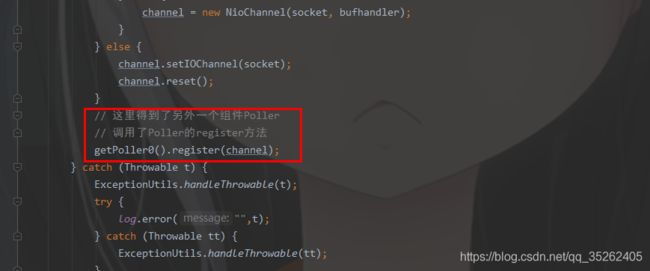
然后调用了NIOEndpoint的setSocketOptions方法,这里主要是调用了NIOEndpoint中的另外一个组件Poller

这里将channel传了过去,这个channel就是刚才得到的socket的channel,属于NIO的组件,相当于BIO中服务端与客户端连接的socket
NioEndpoint.Poller
这里主要是将一个PollerEvent对象加入到了一个events队列,并且唤醒了Selector,这时就需要分析run方法。
public void register(final NioChannel socket) {
    socket.setPoller(this);
    NioSocketWrapper ka = new NioSocketWrapper(socket, NioEndpoint.this);
    socket.setSocketWrapper(ka);
    ka.setPoller(this);
    ka.setReadTimeout(getSocketProperties().getSoTimeout());
    ka.setWriteTimeout(getSocketProperties().getSoTimeout());
    ka.setKeepAliveLeft(NioEndpoint.this.getMaxKeepAliveRequests());
    ka.setSecure(isSSLEnabled());
    ka.setReadTimeout(getConnectionTimeout());
    ka.setWriteTimeout(getConnectionTimeout());
    // 这里从缓存中拿出一个PollerEvent对象
    PollerEvent r = eventCache.pop();
    // 这里设置了读事件
    ka.interestOps(SelectionKey.OP_READ);//this is what OP_REGISTER turns into.
    if ( r==null) r = new PollerEvent(socket,ka,OP_REGISTER);
    else r.reset(socket,ka,OP_REGISTER);
    // 这里将PollerEvent向events队列中添加
    // 并且唤醒了selector
    addEvent(r);
}
这个run方法主要干了两件事,调用events方法对刚才的events队列进行了处理,向轮询器中注册事件和socket

然后调用processKey方法,轮询事件,并调用处理器处理事件
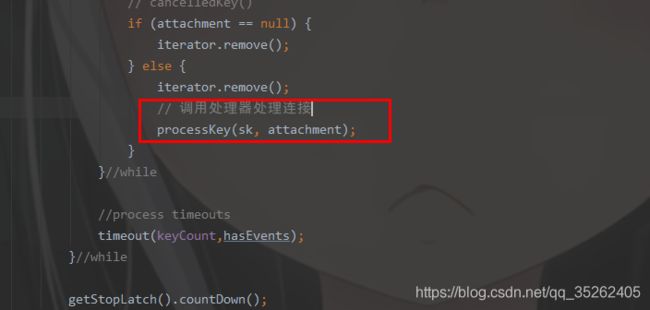
最终还是调用的processSocket方法处理的触发的事件

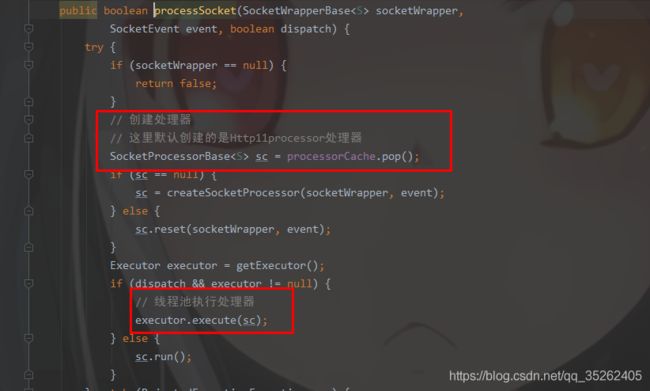
processSocket方法中拿到对应的处理器调用线程池执行处理器,然后就是NIOEndpoint的第三个组件开始工作了,不过这个组件的实体类就是下面从缓存中拿出来或者创建出来的SocketProcessorBase对象,默认会创建一个Http11processor对象来处理。
NioEndpoint.Worker
这里的Worker其实就是上面拿到的Http11processor对象
这里主要分析下面这个方法
org.apache.coyote.http11.AbstractHttp11Protocol#createProcessor
这个方法主要对一些连接请求的设置,并且设置了一个适配器,而这个适配器也正是后面完成匹配mapper的组件,这个是配置的实现类就是CoyoteAdapter

CoyoteAdapter
这个适配器我们主要关注它的service方法,主要的代码逻辑如下
@Override
public void service(org.apache.coyote.Request req, org.apache.coyote.Response res)
        throws Exception {

    // 这里是将org.apache.coyote.Request和org.apache.coyote.Response
    // 转换成org.apache.catalina.connector.Request和org.apache.catalina.connector.Response

    Request request = (Request) req.getNote(ADAPTER_NOTES);
    Response response = (Response) res.getNote(ADAPTER_NOTES);

    if (request == null) {
        // Create objects
        // 通过connector创建request和response
        request = connector.createRequest();
        request.setCoyoteRequest(req);
        response = connector.createResponse();
        response.setCoyoteResponse(res);

        // Link objects
        // 把request和response链接起来
        // 这样这两个对象就是一一对应的了
        request.setResponse(response);
        response.setRequest(request);

        // Set as notes
        req.setNote(ADAPTER_NOTES, request);
        res.setNote(ADAPTER_NOTES, response);

        // Set query string encoding
        // 设置URI的编码
        req.getParameters().setQueryStringCharset(connector.getURICharset());
    }

    if (connector.getXpoweredBy()) {
        response.addHeader("X-Powered-By", POWERED_BY);
    }

    boolean async = false;
    boolean postParseSuccess = false;

    req.getRequestProcessor().setWorkerThreadName(THREAD_NAME.get());

    try {
        // Parse and set Catalina and configuration specific
        // request parameters
        // postParseRequest方法在mapper中解析请求
        // 相当于查找在mapper中是否有请求连接对应的映射
        postParseSuccess = postParseRequest(req, request, res, response);

        if (postParseSuccess) {

            //check valves if we support async
            // 拿到Engine容器
            // 设置异步支持
            request.setAsyncSupported(
                    connector.getService().getContainer().getPipeline().isAsyncSupported());

            // Calling the container
            // 拿到Engine容器的pipeline
            // 取其中第一个StandardEngineValve
            // 然后执行它的invoke方法
            connector.getService().getContainer().getPipeline().getFirst().invoke(
                    request, response);
        }
        //、、、、、省略若干代码
}
这个方法主要干了下面几件事:
- 将传进来的org.apache.coyote.Request和org.apache.coyote.Response转换成org.apache.catalina.connector.Request和org.apache.catalina.connector.Response
- postParseRequest方法在mapper中解析请求
- 拿到Engine容器并设置是否需要异步支持
- 拿到Engine容器的pipeline,取其中第一个StandardEngineValve,然后执行它的invoke方法
接下来就是StandardEngineValve的invoke方法,而且下面就是容器组件的层层调用,属于责任链模式。
当容器的完成了它们的工作后就又会回到适配去将得到的结果响应回去,这里是通过finishResponse方法完成的

1.org.apache.catalina.connector.Response#finishResponse
2.org.apache.catalina.connector.OutputBuffer#close
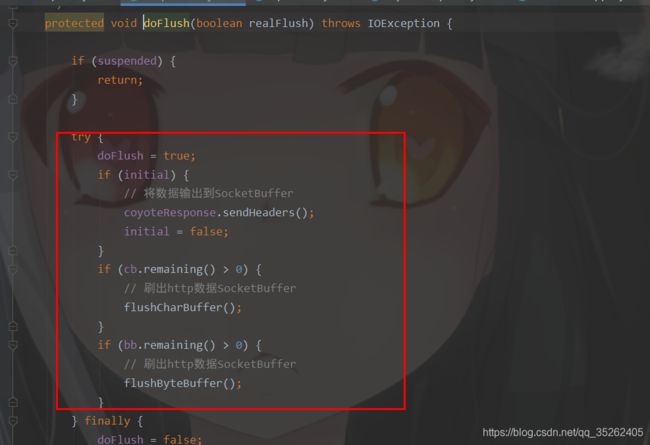
这个close方法中就是通过doFlush方法将数据输出到outputBuffer去
@Override
public void close() throws IOException {

    if (closed) {
        return;
    }
    if (suspended) {
        return;
    }

    // If there are chars, flush all of them to the byte buffer now as bytes are used to
    // calculate the content-length (if everything fits into the byte buffer, of course).
    // 刷新返回字符buffer
    // 刷出到ByteChunk中去
    if (cb.remaining() > 0) {
        flushCharBuffer();
    }


    if ((!coyoteResponse.isCommitted()) && (coyoteResponse.getContentLengthLong() == -1)
            && !coyoteResponse.getRequest().method().equals("HEAD")) {
        // If this didn't cause a commit of the response, the final content
        // length can be calculated. Only do this if this is not a HEAD
        // request since in that case no body should have been written and
        // setting a value of zero here will result in an explicit content
        // length of zero being set on the response.
        if (!coyoteResponse.isCommitted()) {
            coyoteResponse.setContentLength(bb.remaining());
        }
    }

    // ByteChunk数据对象刷出到outputBuffer
    if (coyoteResponse.getStatus() == HttpServletResponse.SC_SWITCHING_PROTOCOLS) {
        doFlush(true);
    } else {
        doFlush(false);
    }
    closed = true;

    // The request should have been completely read by the time the response
    // is closed. Further reads of the input a) are pointless and b) really
    // confuse AJP (bug 50189) so close the input buffer to prevent them.
    // 转换成HttpServletResponse
    Request req = (Request) coyoteResponse.getRequest().getNote(CoyoteAdapter.ADAPTER_NOTES);
    req.inputBuffer.close();

    coyoteResponse.action(ActionCode.CLOSE, null);
}
StandardEngineValve
@Override
public final void invoke(Request request, Response response)
    throws IOException, ServletException {

    // Select the Host to be used for this Request
    // 拿到子容器Host
    Host host = request.getHost();
    if (host == null) {
        response.sendError
            (HttpServletResponse.SC_BAD_REQUEST,
             sm.getString("standardEngine.noHost",
                          request.getServerName()));
        return;
    }
    if (request.isAsyncSupported()) {
        // 设置是否需要设置异步支持
        request.setAsyncSupported(host.getPipeline().isAsyncSupported());
    }

    // Ask this Host to process this request
    // 同样是拿到子容器Host的pipeline
    // 取第一个StandardHostValve对象
    // 调用StandardHostValve的invoke方法
    host.getPipeline().getFirst().invoke(request, response);
}
这个方法主要干了下面三件事:
- 拿到子容器Host
- 设置子容器Host是否需要设置异步支持
- 拿到子容器Host的pipeline,取第一个StandardHostValve对象,调用StandardHostValve的
invoke方法
StandardHostValve
@Override
public final void invoke(Request request, Response response)
    throws IOException, ServletException {

    // Select the Context to be used for this Request
    // 拿到子容器Context
    Context context = request.getContext();
    if (context == null) {
        return;
    }

    if (request.isAsyncSupported()) {
        // 设置子容器Context是否需要异步支持
        request.setAsyncSupported(context.getPipeline().isAsyncSupported());
    }

    boolean asyncAtStart = request.isAsync();

    try {
        context.bind(Globals.IS_SECURITY_ENABLED, MY_CLASSLOADER);

        if (!asyncAtStart && !context.fireRequestInitEvent(request.getRequest())) {
            // Don't fire listeners during async processing (the listener
            // fired for the request that called startAsync()).
            // If a request init listener throws an exception, the request
            // is aborted.
            return;
        }

        // Ask this Context to process this request. Requests that are
        // already in error must have been routed here to check for
        // application defined error pages so DO NOT forward them to the the
        // application for processing.
        try {
            if (!response.isErrorReportRequired()) {
                // 拿到子容器Context的pipeline
                // 取第一个StandardContextValve对象
                // 调用StandardContextValve的invoke方法
                context.getPipeline().getFirst().invoke(request, response);
            }
        } catch (Throwable t) {
            ExceptionUtils.handleThrowable(t);
            container.getLogger().error("Exception Processing " + request.getRequestURI(), t);
            // If a new error occurred while trying to report a previous
            // error allow the original error to be reported.
            if (!response.isErrorReportRequired()) {
                request.setAttribute(RequestDispatcher.ERROR_EXCEPTION, t);
                throwable(request, response, t);
            }
        }
        // 、、、、、、、、
        // 省略若干代码
}
这里也同父容器一样主要干了三件事:
- 拿到子容器Context
- 设置子容器Context是否需要设置异步支持
- 拿到子容器Context的pipeline,取第一个StandardContextValve对象,调用StandardContextValve的
invoke方法
StandardContextValve
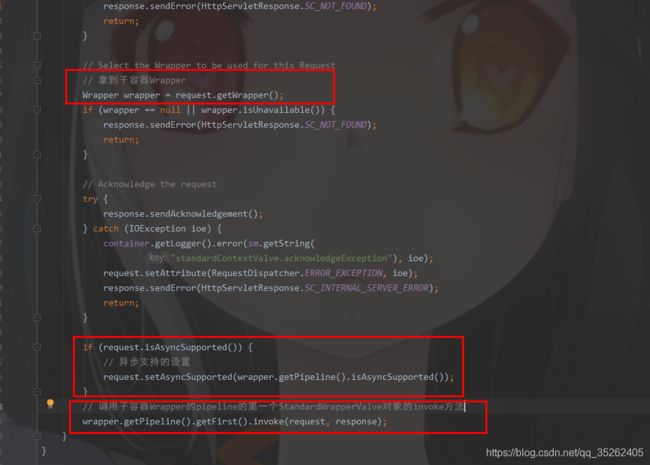
StandardWrapperValve
public final void invoke(Request request, Response response)
    throws IOException, ServletException {

    // Initialize local variables we may need
    boolean unavailable = false;
    Throwable throwable = null;
    // This should be a Request attribute...
    long t1=System.currentTimeMillis();
    // 增加请求次数
    // CAS
    requestCount.incrementAndGet();
    // standardWrapper和Valve对应
    StandardWrapper wrapper = (StandardWrapper) getContainer();
    Servlet servlet = null;
    // 获取父容器
    Context context = (Context) wrapper.getParent();

    // Check for the application being marked unavailable
    if (!context.getState().isAvailable()) {
        response.sendError(HttpServletResponse.SC_SERVICE_UNAVAILABLE,
                       sm.getString("standardContext.isUnavailable"));
        unavailable = true;
    }

    // Check for the servlet being marked unavailable
    // 这里会从已加载的servlet中向响应中设置一些信息
    if (!unavailable && wrapper.isUnavailable()) {
        container.getLogger().info(sm.getString("standardWrapper.isUnavailable",
                wrapper.getName()));
        long available = wrapper.getAvailable();
        if ((available > 0L) && (available < Long.MAX_VALUE)) {
            response.setDateHeader("Retry-After", available);
            response.sendError(HttpServletResponse.SC_SERVICE_UNAVAILABLE,
                    sm.getString("standardWrapper.isUnavailable",
                            wrapper.getName()));
        } else if (available == Long.MAX_VALUE) {
            response.sendError(HttpServletResponse.SC_NOT_FOUND,
                    sm.getString("standardWrapper.notFound",
                            wrapper.getName()));
        }
        // 如果servlet已经加载了就会设置为true
        unavailable = true;
    }

    // Allocate a servlet instance to process this request
    // servlet默认的是在第一次请求的时候实例化的,延迟加载
    try {
        if (!unavailable) {
            // 加载servlet,第一次请求一般都会在这里加载
            servlet = wrapper.allocate();
        }
    } catch (UnavailableException e) {
        container.getLogger().error(
                sm.getString("standardWrapper.allocateException",
                        wrapper.getName()), e);
        long available = wrapper.getAvailable();
        if ((available > 0L) && (available < Long.MAX_VALUE)) {
            response.setDateHeader("Retry-After", available);
            response.sendError(HttpServletResponse.SC_SERVICE_UNAVAILABLE,
                       sm.getString("standardWrapper.isUnavailable",
                                    wrapper.getName()));
        } else if (available == Long.MAX_VALUE) {
            response.sendError(HttpServletResponse.SC_NOT_FOUND,
                       sm.getString("standardWrapper.notFound",
                                    wrapper.getName()));
        }
    } catch (ServletException e) {
        container.getLogger().error(sm.getString("standardWrapper.allocateException",
                         wrapper.getName()), StandardWrapper.getRootCause(e));
        throwable = e;
        exception(request, response, e);
    } catch (Throwable e) {
        ExceptionUtils.handleThrowable(e);
        container.getLogger().error(sm.getString("standardWrapper.allocateException",
                         wrapper.getName()), e);
        throwable = e;
        exception(request, response, e);
        servlet = null;
    }

    // 获取servlet的path
    MessageBytes requestPathMB = request.getRequestPathMB();
    DispatcherType dispatcherType = DispatcherType.REQUEST;
    if (request.getDispatcherType()==DispatcherType.ASYNC) dispatcherType = DispatcherType.ASYNC;
    request.setAttribute(Globals.DISPATCHER_TYPE_ATTR,dispatcherType);
    request.setAttribute(Globals.DISPATCHER_REQUEST_PATH_ATTR,
            requestPathMB);
    // Create the filter chain for this request
    // 实例化一个filterChain,就是过滤器链
    ApplicationFilterChain filterChain =
            ApplicationFilterFactory.createFilterChain(request, wrapper, servlet);

    // Call the filter chain for this request
    // NOTE: This also calls the servlet's service() method
    try {
        if ((servlet != null) && (filterChain != null)) {
            // Swallow output if needed
            if (context.getSwallowOutput()) {
                try {
                    SystemLogHandler.startCapture();
                    if (request.isAsyncDispatching()) {
                        request.getAsyncContextInternal().doInternalDispatch();
                    } else {
                        // 在servlet执行之前执行上面实例化的过滤器链
                        filterChain.doFilter(request.getRequest(),
                                response.getResponse());
                    }
                } finally {
                    String log = SystemLogHandler.stopCapture();
                    if (log != null && log.length() > 0) {
                        context.getLogger().info(log);
                    }
                }
            } else {
                if (request.isAsyncDispatching()) {
                    request.getAsyncContextInternal().doInternalDispatch();
                } else {
                    filterChain.doFilter
                        (request.getRequest(), response.getResponse());
                }
            }

        }
    } // 省略异常处理

    // Release the filter chain (if any) for this request
    if (filterChain != null) {
        // 释放资源
        filterChain.release();
    }

    // Deallocate the allocated servlet instance
    try {
        if (servlet != null) {
            // 回收到servlet实例池
            wrapper.deallocate(servlet);
        }
    } catch (Throwable e) {
        ExceptionUtils.handleThrowable(e);
        container.getLogger().error(sm.getString("standardWrapper.deallocateException",
                         wrapper.getName()), e);
        if (throwable == null) {
            throwable = e;
            exception(request, response, e);
        }
    }

	// 省略后面的代码
}
在StandardWrapperValve的invoke方法中主要做了下面几件事:
- 加载Servlet
- 实例化过滤器链和执行过滤器链
其中加载Servlet可以着重分析一下,Servlet默认的是在第一次请求的时候实例化的,延迟加载。
所以一般默认会在下面的allocate方法中实例化Servlet

下面就是Servlet的实例化过程
@Override
public Servlet allocate() throws ServletException {

    // If we are currently unloading this servlet, throw an exception
    if (unloading) {
        throw new ServletException(sm.getString("standardWrapper.unloading", getName()));
    }

    boolean newInstance = false;

    // If not SingleThreadedModel, return the same instance every time

    /**
     * servlet实例化有两个模式
     * 两种模式都会进入第一个if语句中实例化servlet
     * 1.线程模式
     * 2.非单线程模式
     */

    if (!singleThreadModel) {
        // Load and initialize our instance if necessary
        // 下面的是非单线程模式
        // 使用的dcl模式,双重检查锁定,保证线程的安全
        // 这是属于两种模式公用的语句块
        if (instance == null || !instanceInitialized) {
            synchronized (this) {
                if (instance == null) {
                    try {
                        if (log.isDebugEnabled()) {
                            log.debug("Allocating non-STM instance");
                        }

                        // Note: We don't know if the Servlet implements
                        // SingleThreadModel until we have loaded it.
                        // 加载servlet
                        instance = loadServlet();
                        newInstance = true;
                        if (!singleThreadModel) {
                            // For non-STM, increment here to prevent a race
                            // condition with unload. Bug 43683, test case
                            // #3
                            // 实例化次数加1
                            countAllocated.incrementAndGet();
                        }
                    } catch (ServletException e) {
                        throw e;
                    } catch (Throwable e) {
                        ExceptionUtils.handleThrowable(e);
                        throw new ServletException(sm.getString("standardWrapper.allocate"), e);
                    }
                }
                if (!instanceInitialized) {
                    initServlet(instance);
                }
            }
        }

        // 这下面是单线程模式
        // 下面只有单线程模式才会进入
        if (singleThreadModel) {
            // 如果创建了实例
            if (newInstance) {
                // Have to do this outside of the sync above to prevent a
                // possible deadlock
                synchronized (instancePool) {
                    // 向实例池中放入实例,这样每一个线程都使用不同的实例
                    instancePool.push(instance);
                    nInstances++;
                }
            }
        } else {
            if (log.isTraceEnabled()) {
                log.trace("  Returning non-STM instance");
            }
            // For new instances, count will have been incremented at the
            // time of creation
            if (!newInstance) {
                countAllocated.incrementAndGet();
            }
            return instance;
        }
    }

    synchronized (instancePool) {
        while (countAllocated.get() >= nInstances) {
            // Allocate a new instance if possible, or else wait
            // 下面是对于实例池数量超过最大值的处理
            if (nInstances < maxInstances) {
                try {
                    instancePool.push(loadServlet());
                    nInstances++;
                } catch (ServletException e) {
                    throw e;
                } catch (Throwable e) {
                    ExceptionUtils.handleThrowable(e);
                    throw new ServletException(sm.getString("standardWrapper.allocate"), e);
                }
            } else {
                try {
                    instancePool.wait();
                } catch (InterruptedException e) {
                    // Ignore
                }
            }
        }
        if (log.isTraceEnabled()) {
            log.trace("  Returning allocated STM instance");
        }
        countAllocated.incrementAndGet();
        return instancePool.pop();
    }
}
当最后filter链和Servlet执行过后,就是将response返回回去,这就需要回到CoyoteAdapter的service方法。
