E3项目错误和技术记录
1、在SSM整合的时候,忘记更改web.xml文件。导致RequestMapping的路径访问不到。
2、dao包和pojo包出错。原因:没有将jre改成jdk。如下图:
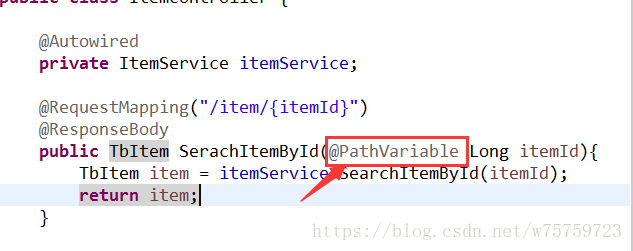
3、在绑定参数时忘记加上@PathVariable语句 导致获取不到Url上的参数。
@PathVariable的作用:通过 @PathVariable 可以将 URL 中占位符参数绑定到控制器处理方法的入参中:URL 中的 {xxx} 占位符可以通过 @PathVariable(“xxx“) 绑定到操作方法的入参中。
4、远程通信的技术:Webservice,restful,dubbo(本项目使用)
5、dubbo远程通信失败,不能连接?
1>首先将下面的IP地址改为公网IP
2>在阿里云安全组规则中开放2181端口
3>关闭阿里云服务器的防火墙。
6、没有实现序列化借口错误,错误如下
将POJO实现序列化接口(所有的POJO都实现)
注:所有的POJO都实现序列化接口后,需要用maven重新install POJO那个jar。
7、debug的相关配置
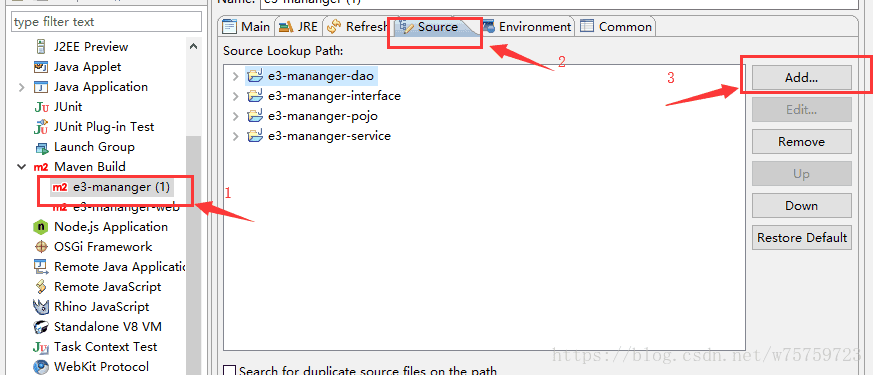
点击debug中的 debug Configurations
第一步:选择要配置的项目
第二步:选择Source,删除里面默认的包。
第三步:点击Add,将需要的jar包添加进去。
8、服务端超时错误解决
在service配置文件中手动设置超时时间。
将超时时间设置为10分钟。(默认是1秒钟,1000毫秒)
9、dubbo监控中心不能使用
!待解决(应该是因为JDK版本过高)
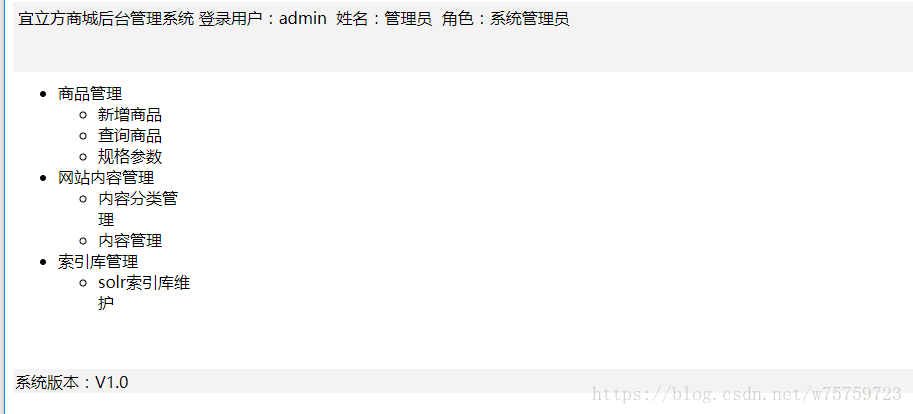
10、首页JS和CSS文件无法加载,错误如下图
原因:因为在web.xml中配置的/,拦截所有。所以样式文件也被拦截。
解决方法:修改springmvc.xml,配置资源映射文件。
配置格式要记住
11、 Failed to execute goal org.apache.maven.plugins:maven-compiler-plugin:3.2:compile (default-compile) on project e3-mananger-interface: Compilation failure
[ERROR] No compiler is provided in this environment. Perhaps you are running on a JRE rather than a JDK?
在maven install时的错误
解决方法:https://blog.csdn.net/faryang/article/details/52863426
12、nginx的安装(nginx的安装包是一个源码包,c语言的)
首先在CentOS7下安装环境和开发包(复制粘贴)
- 需要安装gcc的环境。yum install gcc-c++
- 第三方的开发包。
- PCRE
PCRE(Perl Compatible Regular Expressions)是一个Perl库,包括 perl 兼容的正则表达式库。nginx的http模块使用pcre来解析正则表达式,所以需要在linux上安装pcre库。
yum install -y pcre pcre-devel
注:pcre-devel是使用pcre开发的一个二次开发库。nginx也需要此库。
- zlib
zlib库提供了很多种压缩和解压缩的方式,nginx使用zlib对http包的内容进行gzip,所以需要在linux上安装zlib库。
yum install -y zlib zlib-devel
- openssl
OpenSSL 是一个强大的安全套接字层密码库,囊括主要的密码算法、常用的密钥和证书封装管理功能及SSL协议,并提供丰富的应用程序供测试或其它目的使用。
nginx不仅支持http协议,还支持https(即在ssl协议上传输http),所以需要在linux安装openssl库。
yum install -y openssl openssl-devel
安装步骤
第一步:把nginx的源码包上传到linux系统
第二步:解压缩
[root@localhost ~]# tar zxf nginx-1.8.0.tar.gz
第三步:使用configure命令创建一makeFile文件。
./configure \
--prefix=/usr/local/nginx \
--pid-path=/var/run/nginx/nginx.pid \
--lock-path=/var/lock/nginx.lock \
--error-log-path=/var/log/nginx/error.log \
--http-log-path=/var/log/nginx/access.log \
--with-http_gzip_static_module \
--http-client-body-temp-path=/var/temp/nginx/client \
--http-proxy-temp-path=/var/temp/nginx/proxy \
--http-fastcgi-temp-path=/var/temp/nginx/fastcgi \
--http-uwsgi-temp-path=/var/temp/nginx/uwsgi \
--http-scgi-temp-path=/var/temp/nginx/scgi
注意:启动nginx之前,上边将临时文件目录指定为/var/temp/nginx,需要在/var下创建temp及nginx目录
[root@localhost sbin]# mkdir /var/temp/nginx/client -p
第四步:make
第五步:make install
进入sbin目录,启动nginx
[root@localhost sbin]# ./nginx
关闭nginx:
[root@localhost sbin]# ./nginx -s stop
推荐使用:
[root@localhost sbin]# ./nginx -s quit
重启nginx:
- 先关闭后启动。
- 刷新配置文件:
[root@localhost sbin]# ./nginx -s reload
启动之后如果端口冲突去,nginx.conf配置文件中将端口更改。
然后在阿里云控制台开放更改后的端口。
13、mybatis实现主键返回
keyProperty:返回主键的值存在id中
resultType:这里的long代表java.lang.long的别名(mybatis起的别名)
order:决定在插入操作之前查询主键还是在插入操作后查询主键。
14、redis的后台启动方式
将安装包中的redis.conf文件复制到安装 目录的bin文件夹下
![]()
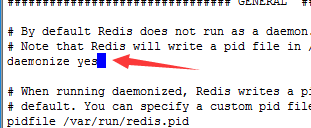
然后修改redis.conf配置文件
将daemonize改为yes
使用命令 ./redis-server redis.conf 启动服务
使用命令ps aux|grep redis 查看进程 检测服务是否已经启动
关闭redis服务的命令1>kill + 进程号(正常关闭,kill-9是强制关闭)
2>./redis.cli shutdown
15、redis集群的搭建(伪分布式,用一台服务器)
将安装后的redis文件夹下的bin文件夹复制到redis-cluster文件夹下
将复制后的redis文件夹中的dump.rdb 等文件删除(需要一个干净的redis),并且更改端口号,解开注释cluster-enabled yes
然后将此文件夹复制6份,命名redis01-06
使用ruby脚本搭建集群。需要ruby的运行环境。
安装ruby
yum install ruby
yum install rubygems
安装ruby脚本运行使用的包。
[root@localhost ~]# gem install redis-3.0.0.gem
Successfully installed redis-3.0.0
1 gem installed
Installing ri documentation for redis-3.0.0...
Installing RDoc documentation for redis-3.0.0...
将redis-3.0.0 中src下的redis-trib.rb复制到redis-cluster文件夹下
创建启动集群的脚本start-all.sh
cd redis01
./redis-server redis.conf
cd ..
cd redis02
./redis-server redis.conf
cd ..
cd redis03
./redis-server redis.conf
cd ..
cd redis04
./redis-server redis.conf
cd ..
cd redis05
./redis-server redis.conf
cd ..
cd redis06
./redis-server redis.conf
cd ..
将start-all.sh脚本设置为可执行文件
chmod u+x start-all.sh
进入redis-cluster目录执行:
./redis-trib.rb create --replicas 1 IP:7001 IP:7002 IP:7003 IP:7004 IP:7005 IP:7006(如果有问题,看下面四点)
1>需要关闭防火墙
2>打开对应端口,本次为7001-7006
3>打开对应的总集端口17001-17006
4>在阿里云安全组中进行配置
!!!如果运行第一次没成功,第二次运行之前,需要先进入到redis服务中flushall,然后cluster reset(或者写一个脚本将生成nodes文件删除)
16、


