Prometheus+grafana监控服务器及数据库实践笔记
Prometheus+grafana监控服务器及数据库实践笔记
Prometheus的安装
Prometheus安装脚本
vim setupprometheus.sh
#!/bin/bash
cd /opt
#下载
#wget https://github.com/prometheus/prometheus/releases/download/v2.19.2/prometheus-2.19.2.linux-amd64.tar.gz
#创建目录
mkdir /opt/prometheus
#解压
tar -zxf prometheus-2.19.2.linux-amd64.tar.gz -C /opt/prometheus --strip-components=1
#授权目录可执行
chown -R root:root /opt/prometheus
#启动
cd /opt/prometheus
nohup ./prometheus --config.file=prometheus.yml --storage.tsdb.retention=45d &
firewall-cmd --zone=public --add-port=9090/tcp --permanent
firewall-cmd --reload
#执行脚本完成安装;
./setupprometheus.sh
Prometheus添加系统服务脚本
vim /etc/systemd/system/prometheus.service
[Unit]
Description=Prometheus Server
Documentation=https://prometheus.io/docs/introduction/overview/
After=network.target
[Service]
Type=simple
User=root
Restart=on-failure
ExecStart=/opt/prometheus/prometheus --config.file=/opt/prometheus/prometheus.yml --storage.tsdb.path=/var/lib/prometheus
Restart=on-failure
[Install]
WantedBy=multi-user.target
Prometheus启动
#启动脚本授权可执行
chmod +x /etc/systemd/system/prometheus.service
#系统服务配置重新加载
systemctl daemon-reload
#服务添加可随机启动
systemctl enable prometheus.service
#启动服务
systemctl start prometheus.service
#查看服务状态
systemctl status prometheus.service
grafana-server的安装
vim setupgrafana.sh
#!/bin/bash
#下载
wget https://dl.grafana.com/oss/release/grafana-7.0.5-1.x86_64.rpm
#安装
yum localinstall grafana-7.0.5-1.x86_64.rpm
#启动
/etc/init.d/grafana-server start
firewall-cmd --zone=public --add-port=3000/tcp --permanent
firewall-cmd --reload
#写完要授权可执行
chmod +x setupgrafana.sh
#然后运行脚本安装
./setupgrafana.sh
node_exporter的安装
vim setupnode_exporter.sh
#!/bin/bash
cd /opt
mkdir -p /opt/prometheus/exporters
wget https://github.com/prometheus/node_exporter/releases/download/v1.0.1/node_exporter-1.0.1.linux-amd64.tar.gz
tar zxf node_exporter-1.0.1.linux-amd64.tar.gz -C /opt/prometheus/exporters
mv /opt/prometheus/exporters/node_exporter-1.0.1.linux-amd64 /opt/prometheus/exporters/node_exporter
chown -R root:root /opt/prometheus
cd /opt/prometheus
nohup ./exporters/node_exporter/node_exporter &
firewall-cmd --zone=public --add-port=9100/tcp --permanent
firewall-cmd --reload
添加到系统服务
写入node_exporter.service文件
vim /etc/systemd/system/node_exporter.service
在其中添加如下内容,然后保存退出
[Unit]
Description=Node Exporter
Wants=network-online.target
After=network-online.target
[Service]
User=root
ExecStart=/opt/prometheus/exporters/node_exporter/node_exporter
[Install]
WantedBy=default.target
#授权可执行
chmod +x /etc/systemd/system/node_exporter.service
#重载systemd系统
systemctl daemon-reload
#启动服务
systemctl start node_exporter
systemctl status node_exporter
systemctl enable node_exporter
mysqld_exporter的安装
vim setupmysqld_exporter.sh
#!/bin/bash
cd /opt
wget https://github.com/prometheus/mysqld_exporter/releases/download/v0.12.1/mysqld_exporter-0.12.1.linux-amd64.tar.gz
tar zxf mysqld_exporter-0.12.1.linux-amd64.tar.gz -C /opt/prometheus/exporters
mv /opt/prometheus/exporters/mysqld_exporter-0.12.1.linux-amd64 /opt/prometheus/exporters/mysqld_exporter
chown -R root:root /opt/prometheus
cd /opt/prometheus
mysql -uroot -pPassword123+ -e"GRANT REPLICATION CLIENT, PROCESS ON . TO ‘prom’@‘localhost’ identified by ‘123456’;"
mysql -uroot -pPassword123+ -e"GRANT SELECT ON performance_schema.* TO ‘prom’@‘localhost’;"
cat [client]
user=prom
password=123456
host=localhost
port=3306
socket=/tmp/mysql.sock #这个要看具体环境做调整,否则采集不到数据
EOF
启动数据抓取
chown -R root:root /opt/prometheus
cd /opt/prometheus/
nohup ./exporters/mysqld_exporter/mysqld_exporter --config.my-cnf="/opt/prometheus/exporters/.my.cnf" & #如果不用这个,可以按系统服务方式启动
firewall-cmd --zone=public --add-port=9104/tcp --permanent
firewall-cmd --reload
#添加到系统服务
#写入 mysqld_exporter.service文件
vim /etc/systemd/system/mysqld_exporter.service
#在其中添加如下内容,然后保存退出
[Unit]
Description=Mysqld Exporter
Wants=network-online.target
After=network-online.target
[Service]
User=root
ExecStart=/opt/prometheus/exporters/mysqld_exporter/mysqld_exporter --config.my-cnf=/opt/prometheus/exporters/.my.cnf
[Install]
WantedBy=default.target
chmod +x /etc/systemd/system/mysqld_exporter.service
#重载systemd系统
systemctl daemon-reload
#启动服务
systemctl status mysqld_exporter
systemctl start mysqld_exporter
systemctl enable mysqld_exporter
alertmanager的安装配置
cd /opt/tools
tar zxf alertmanager-0.21.0.linux-amd64.tar.gz
mv alertmanager-0.21.0.linux-amd64 /opt/prometheus/alertmanager
cd /opt/prometheus/alertmanager/
mkdir -p /opt/prometheus/alertmanager/data
chown -R root:root /opt/prometheus
#添加启动文件
vim /usr/lib/systemd/system/alertmanager.service
[Unit]
Description=Alertmanager
After=network.target
[Service]
Type=simple
User=root
ExecStart=/opt/prometheus/alertmanager/alertmanager --config.file=/opt/prometheus/alertmanager/alertmanager.yml --storage.path=/opt/prometheus/alertmanager/data
Restart=on-failure
[Install]
WantedBy=multi-user.target
chmod +x /usr/lib/systemd/system/alertmanager.service
#重载systemd系统
systemctl daemon-reload
#设置随机启动,启动等
systemctl enable alertmanager.service
systemctl start alertmanager.service
systemctl status alertmanager.service
prometheus.yml配置
vim /opt/prometheus/prometheus.yml
#my global config
global:
scrape_interval: 15s # Set the scrape interval to every 15 seconds. Default is every 1 minute.
evaluation_interval: 15s # Evaluate rules every 15 seconds. The default is every 1 minute.
#scrape_timeout is set to the global default (10s).
#Alertmanager configuration
alerting:
alertmanagers:
- static_configs:
- targets: [“localhost:9093”] #配置Alertmanager端口
#- alertmanager:9093
- targets: [“localhost:9093”] #配置Alertmanager端口
#Load rules once and periodically evaluate them according to the global ‘evaluation_interval’.
rule_files:
#- “first_rules.yml”
#- “second_rules.yml”
- “rules.yml” #添加告警规则
#A scrape configuration containing exactly one endpoint to scrape:
#Here it’s Prometheus itself.
scrape_configs:
#The job name is added as a label job= to any timeseries scraped from this config.
-
job_name: ‘prometheus’
#metrics_path defaults to ‘/metrics’
#scheme defaults to ‘http’.static_configs:
- targets: [‘192.168.96.128:9090’]
-
job_name: ‘OS’
static_configs:-
targets: [‘192.168.96.128:9100’]
labels:
instance: ‘192.168.96.128’ -
targets: [‘192.168.96.129:9100’]
labels:
instance: ‘192.168.96.129’
-
-
job_name: ‘mysql’
static_configs:-
targets: [‘192.168.96.129:9104’]
labels:
instance: ‘192.168.96.129’ -
targets: [‘192.168.96.128:9104’]
labels:
instance: ‘192.168.96.128’
-
邮件接收告警配置的
[root@localhost alertmanager]# cat alertmanager.yml
global: #若所有的邮件配置使用相同的SMTP配置,则可以直接定义全局的SMTP配置
smtp_smarthost: ‘smtp.126.com:465’
smtp_from: ‘[email protected]’
smtp_auth_username: ‘[email protected]’
smtp_auth_password: ‘AAAAAAA’ #这是授权码,不是密码,
smtp_require_tls: false
route: #顶级路由必须匹配所有报警,因为他要接受所有报警,再分匹配到分支路由上
group_by: [‘alertname’] #满足group_by中定义标签名称,那么这些告警将会合并为一个通知发送给接收器。
group_wait: 1s #同一group的等待时间,在等待时间内当前group接收到了新的告警,这些告警将会合并为一个通知向receiver发送
group_interval: 5s #同一Gourp发送告警通知的时间间隔
repeat_interval: 1h #在连续告警触发的情况下,重复发送告警的时间间隔
receiver: ‘default-receiver’
routes: #分支路由,可设置不同的匹配规则
-
receiver: ‘default-receiver’
match: #匹配告警规则的key:value
severity: ‘critical’ -
receiver: ‘weijialei45’
match:
instance: ‘192.168.XX.XX’ -
receiver: ‘dwltest’
match:
job: ‘docker-ypy’
receivers: -
name: ‘default-receiver’
email_configs:- to: ‘[email protected]’
send_resolved: true #告警解除发送恢复通知
- to: ‘[email protected]’
-
name: ‘dwltest’
email_configs:- to: ‘[email protected],[email protected]’
send_resolved: true
- to: ‘[email protected],[email protected]’
-
name: ‘weijialei45’
email_configs:- to: [email protected],[email protected]’
send_resolved: true
- to: [email protected],[email protected]’
登录grafana
在浏览器输入:http://IP:3000 ,初次登录需要修改admin的密码

如果是还没有导入过仪表板,则导入一个,仪表板在:https://grafana.com/grafana/dashboards 下载

如下图,点击红框选择自己要导入的json模板,添加数据源

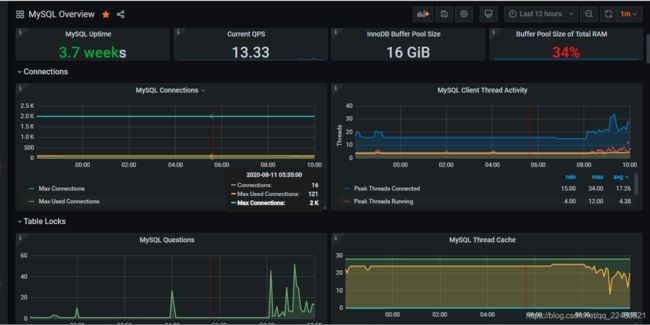
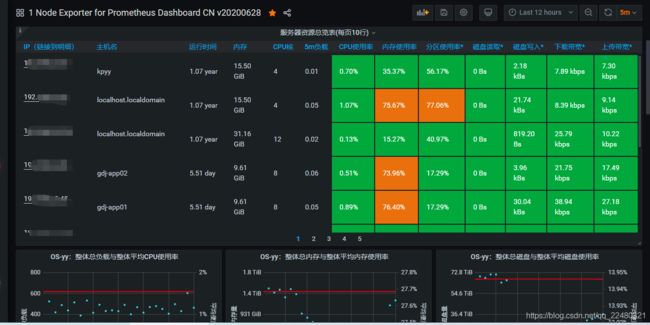
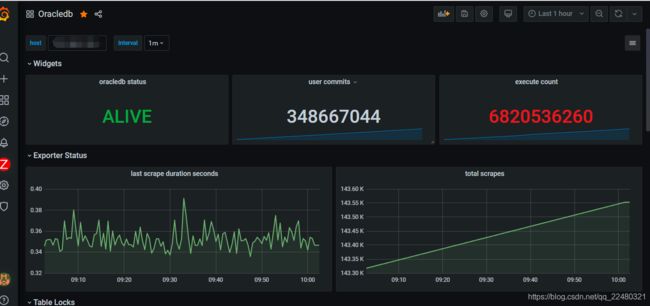
就可以看到炫酷的监控界面如下:


