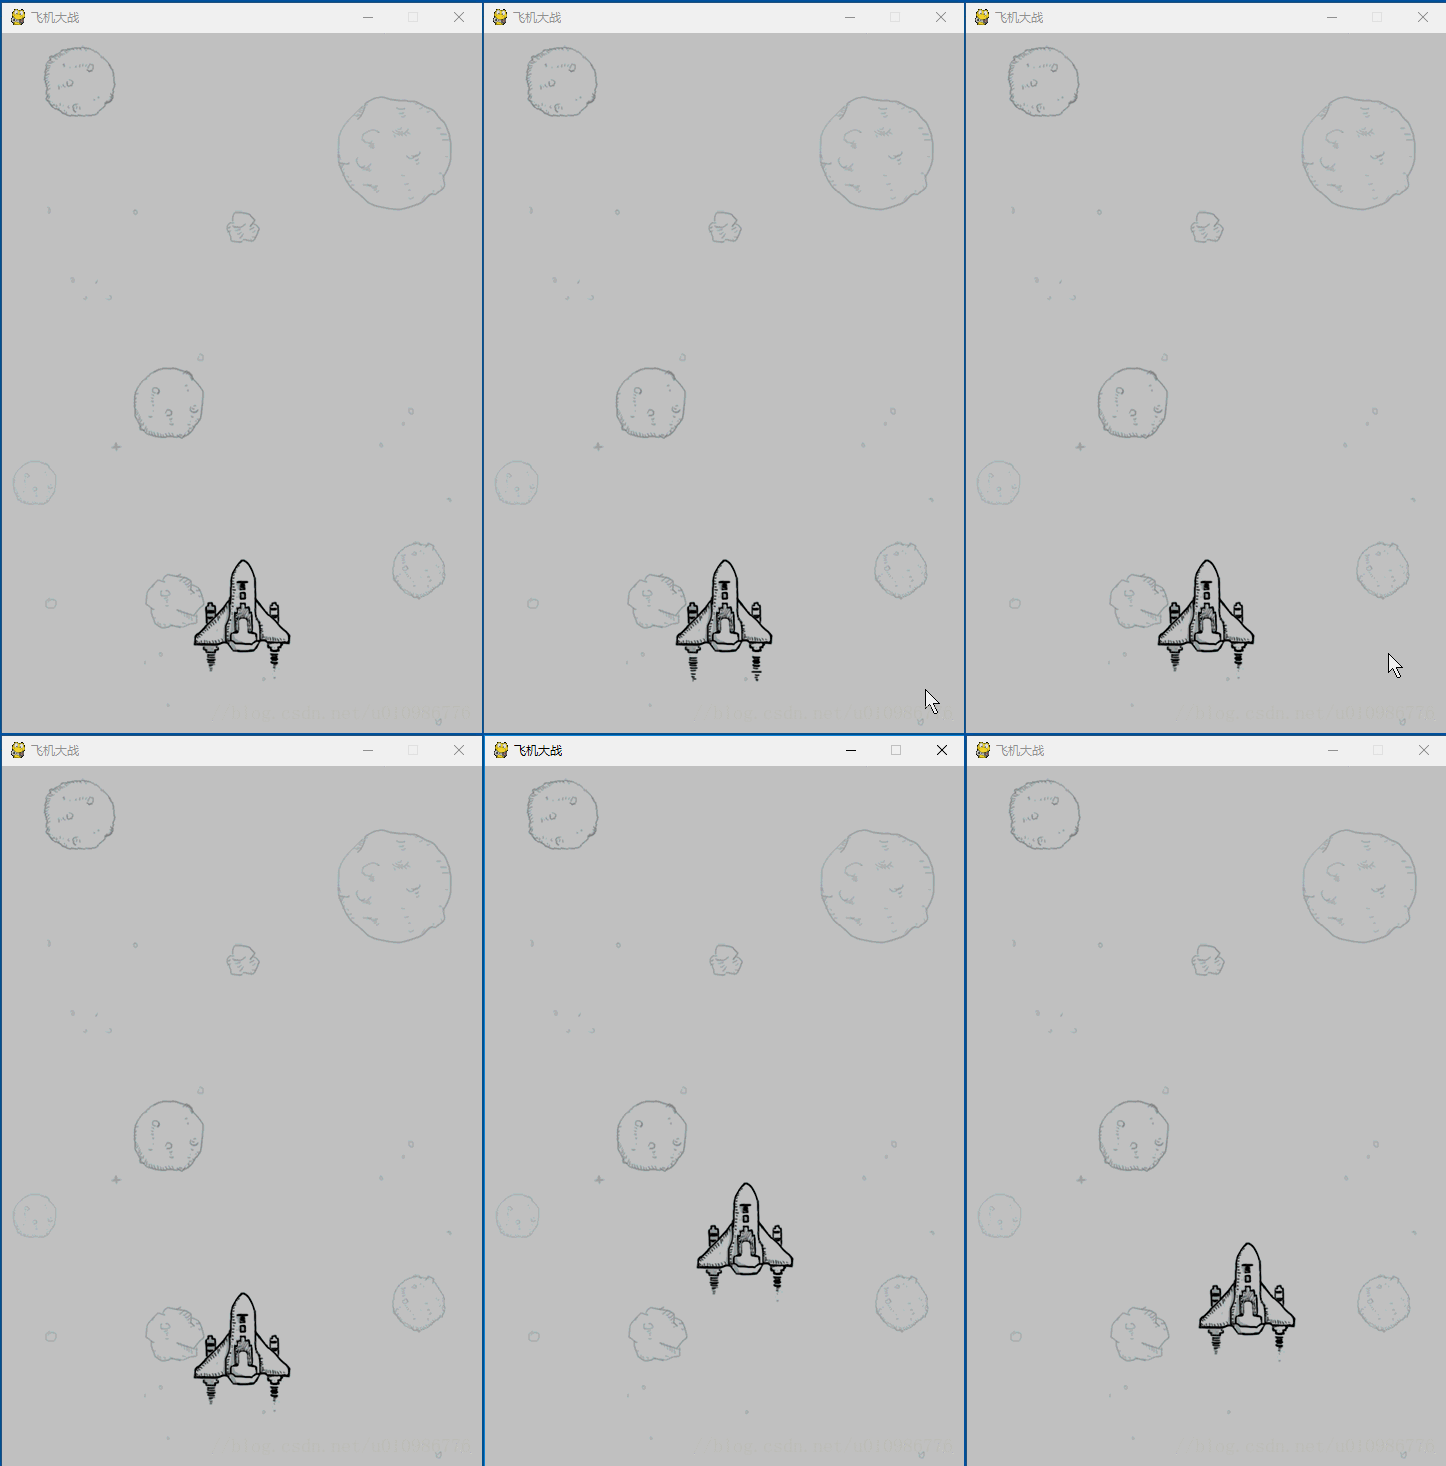
12.4pygame游戏开发框架(4):绘制精灵
@定义英雄类Hero
- 首先Hero必须继承于框架的Sprite父类,精灵就是动画角色;
- 本例中,除了构造方法外,精灵的行为主要体现在其飞行方法上;
- 在构造方法中,主要做了如下几件事情:
- 加载图片形成了英雄喷火的两帧所对应的表面对象,这个表面将来要绘制在【游戏窗口表面】上;
- 以其中任意一个表面为基准获取了英雄的矩形对象(这里两个表面的大小是完全一致的);
- 通过调节矩形对象的left和top将英雄的矩形摆在窗口偏底部的正中央;
- 精灵的飞行,就是通过动态控制矩形的left和top变更矩形位置,从而改变精灵位置的;
import pygame
from pygame.sprite import Sprite

# 继承于精灵类
class Hero(Sprite):

    # 创建英雄对象
    # 传入窗口宽高参数
    def __init__(self,winWidth,winHeight):

        # 调用精灵父类方法
        super().__init__()

        # 记录窗口宽高
        self.winWidth = winWidth
        self.winHeight = winHeight

        # 加载英雄喷火飞行图片的两帧
        # 这里由于英雄图片有透明区域,因此必须使用convert_alpha()来转化为表面对象
        self.mSurface1 = pygame.image.load("./images/me1.png").convert_alpha()
        self.mSurface2 = pygame.image.load("./images/me2.png").convert_alpha()

        # 以第一幅图片为基准获取矩形对象
        self.rect = self.mSurface1.get_rect()

        # 定义飞行速度
        self.speed = 10

        # 计算英雄出现的位置,此处使其出现的位置位于窗口偏底部的正中央
        # 通过矩形的left和top确定矩形区域的位置
        self.rect.left = self.winWidth // 2 - self.rect.width // 2
        self.rect.top = self.winHeight - 50 - self.rect.height

        # 从mSurface1生成非透明区域遮罩,用于做碰撞检测
        self.mask = pygame.mask.from_surface(self.mSurface1)

    # 向左飞行
    def moveLeft(self):

        # 只要矩形区域的左边缘没有越界,就持续更新精灵矩形的位置
        if self.rect.left > 0:
            self.rect.left -= self.speed

    # 向右飞行:只要右侧没有越界就持续更新矩形位置
    def moveRight(self):
        if self.rect.right < self.winWidth:
            self.rect.left += self.speed

    # 向上飞行:只要矩形顶部没有越界就持续更新矩形的位置
    def moveUp(self):
        if self.rect.top > 0:
            self.rect.top -= self.speed

    # 向下飞行:只要矩形底部没有越界就持续更新矩形的位置
    def moveDown(self):
        if self.rect.bottom < self.winHeight:
            self.rect.bottom += self.speed

    # 按指定向量移动矩形位置
    def move(self,dx,dy):
        self.rect.left += dx
        self.rect.top += dy
@绘制英雄表面在窗口表面上
- 游戏的帧率定义为每秒60帧,这里的count是当前的帧序号;
- 在不同的帧交替地绘制英雄精灵的两个不同表面,在精灵的实时矩形位置,这就形成了英雄的动画效果;
    # 创建英雄实例
    hero = Hero(width,height)

    # 记录帧序号
    count = 0

    # 开启消息循环
    while True:

        #此处省略处理事件的代码...

        # 绘制背景
        windowSurface.blit(bgSurface, (0, 0))

        # 绘制飞机
        if count % 3 == 0:
            windowSurface.blit(hero.mSurface1, hero.rect)
        else:
            windowSurface.blit(hero.mSurface2, hero.rect)

        # 刷新界面
        pygame.display.flip()

        # 时钟停留一帧的时长
        clock.tick(60)
@处理用户事件
- 这里的事件处理模式是:在每一帧中持续地处理键盘按下事件;
- 只要按下按键w,就持续地将精灵的矩形位置上移,在下一次重绘时精灵就会被绘制在移动后的位置上,形成动画效果;
- wsad几个按键分别实现上下左右的飞行,原理都是相同的;
# 检测当前按下的按钮有哪些
bools = pygame.key.get_pressed()
# print(bools)
if bools[pygame.K_UP] or bools[pygame.K_w]:
    hero.moveUp()
if bools[pygame.K_DOWN] or bools[pygame.K_s]:
    hero.moveDown()
if bools[pygame.K_LEFT] or bools[pygame.K_a]:
    hero.moveLeft()
if bools[pygame.K_RIGHT] or bools[pygame.K_d]:
    hero.moveRight()
@完整测试代码
import pygame
import sys

from demos.W3.myplane.Hero import Hero

# 全局初始化
pygame.init()

# 设置窗口大小和标题
resolution = width, height = 480, 700
windowSurface = pygame.display.set_mode(resolution)  # 设置分辨率并得到全局的绘图表面
pygame.display.set_caption("飞机大战")

# 加载背景图
bgSurface = pygame.image.load("./images/background.png").convert()

# 创建时钟对象
clock = pygame.time.Clock()

if __name__ == '__main__':

    # 创建英雄实例
    hero = Hero(width,height)

    # 记录帧序号
    count = 0

    # 开启消息循环
    while True:

        count += 1

        # 处理用户输入
        for event in pygame.event.get():

            # 处理退出事件
            if event.type == pygame.QUIT:
                pygame.quit()
                sys.exit()

            # 感应和处理鼠标事件
            if event.type == pygame.MOUSEBUTTONDOWN:
                print("MOUSEBUTTONDOWN @ ", event.pos)
            if event.type == pygame.MOUSEBUTTONUP:
                print("MOUSEBUTTONUP @ ", event.pos)
            if event.type == pygame.MOUSEMOTION:
                # print("MOUSEMOTION @ ", event.pos)
                pass

            # 处理键盘事件
            if event.type == pygame.KEYDOWN:
                if event.key == pygame.K_SPACE:
                    print("开炮!")

        # 检测当前按下的按钮有哪些
        bools = pygame.key.get_pressed()
        # print(bools)
        if bools[pygame.K_UP] or bools[pygame.K_w]:
            hero.moveUp()
        if bools[pygame.K_DOWN] or bools[pygame.K_s]:
            hero.moveDown()
        if bools[pygame.K_LEFT] or bools[pygame.K_a]:
            hero.moveLeft()
        if bools[pygame.K_RIGHT] or bools[pygame.K_d]:
            hero.moveRight()

        # 绘制背景
        windowSurface.blit(bgSurface, (0, 0))

        # 绘制飞机
        if count % 3 == 0:
            windowSurface.blit(hero.mSurface1, hero.rect)
        else:
            windowSurface.blit(hero.mSurface2, hero.rect)

        # 刷新界面
        pygame.display.flip()

        # 时钟停留一帧的时长
        clock.tick(60)
        pass