从0-1搭建DolphinScheduler开发环境
1
文档编写目的
记录从0-1搭建DolphinScheduler开发环境的过程(mac)
便于更多有意愿贡献ds的老铁搭建开发环境参与贡献
2
所需前置条件
需要安装好-jdk maven mysql
nvm
github链接:https://github.com/nvm-sh/nvm
# 安装nvm
curl -o- https://raw.githubusercontent.com/nvm-sh/nvm/v0.35.3/install.sh | bash
# 刷新profile
source ~/.bash_profile
# 安装指定的node版本
nvm install v12.12.0
# 配置npm源
npm config set registry https://registry.npm.taobao.org/nvm安装完成
zookeeper
下载链接:
https://www.apache.org/dyn/closer.lua/zookeeper/zookeeper-3.4.14/zookeeper-3.4.14.tar.gz
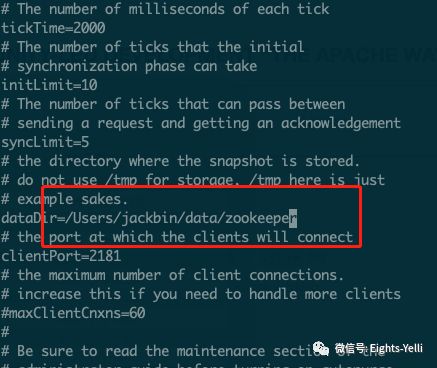
在conf目录下新建zoo_sample.cfg文件的的副本,并将副本改名为zoo.cfg
本地启zk需要注意下 zk的数据目录
cp zoo_sample.cfg zoo.cfg启动zookeeper
# 启动zk
./zkServer.sh start
# 停止zk
./zkServer.sh stop
zk安装完成
3
开发环境搭建
获取代码
fork项目到自己的仓库
拉取自己仓库中的ds代码
# clone fork下来的代码
git clone https://github.com/Eights-Li/incubator-dolphinscheduler.git
后端开发环境搭建
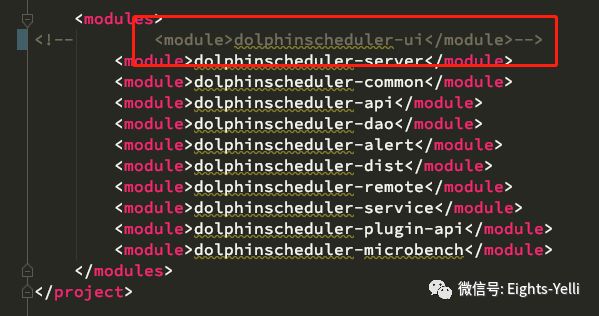
导入idea,刷下maven,执行源码编译命令,在pom中注释掉ui模块
# 执行编译命令
mvn -U clean package -Prelease -Dmaven.test.skip=true
在apiserver启动类上指定配置文件
@PropertySource(ignoreResourceNotFound = false, value = "classpath:application-api.properties")去除pom中的mysql的scope
配置dao模块中的数据库连接信息
配置zk连接信息
指定各模块的配置文件
@PropertySource(ignoreResourceNotFound = false, value = "classpath:master.properties")

@PropertySource(ignoreResourceNotFound = false, value = "classpath:worker.properties")
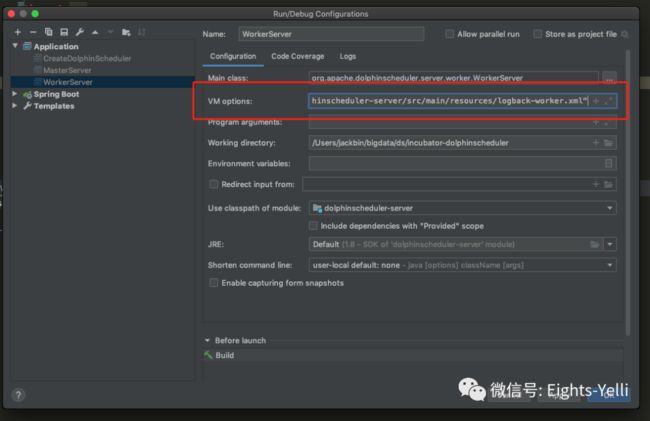
在worker-server启动的vm option中添加日志配置,否则会出现task instance的log path为空,导致本地调试不正常
-Dspring.profiles.active=worker -Dlogging.config="dolphinscheduler-server/src/main/resources/logback-worker.xml"启动三个服务 api master worker, 正常启动表明后端开发环境搭建完成
前端开发环境搭建
采用webstorm导入ds的前端模块,运行npm install
在拉取依赖包的过程中出现node-sass错误,则需要执行一下
npm install node-sass --unsafe-perm
# 如果提示需要rebuild node-sass 则执行
npm rebuild node-sass
手动安装node-sass
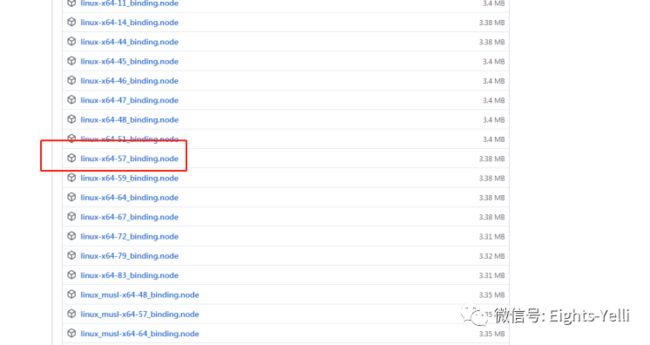
网不好(没梯子)的老铁可能会遇到node-sass的安装问题,这里提供手工安装node-sass的流程
下载node-sass的安装包
https://github.com/sass/node-sass/releases
# 设置环境变量
set SASS_BINARY_PATH=$NodeSassFile
node-sass依赖node-gyp下载node-header.tar.gz,需要下载node的headers文件
如node-v8.16.2-headers.tar.gz,将该包上传到服务器指定目录/home/dscheduler/node-header中
下载地址:
https://nodejs.org/download/release/v8.16.2/
设置对应的header路径
npm config set tarball /home/dscheduler/node-header/node-v8.16.2-headers.tar.gz
执行安装node-sass
set SASS_BINARY_PATH=$NodeSassFile && npm install node-sass
4
开发环境前后端测试
初始化数据库
在mysql中执行数据库创建命令
CREATE DATABASE dolphinscheduler DEFAULT CHARACTER SET utf8 DEFAULT COLLATE
utf8_general_ci;
CREATE USER 'dscheduler'@'%' IDENTIFIED BY 'dscheduler';
GRANT ALL PRIVILEGES ON dolphinscheduler.* TO 'dscheduler'@'%' IDENTIFIED BY 'dscheduler';
flush privileges;
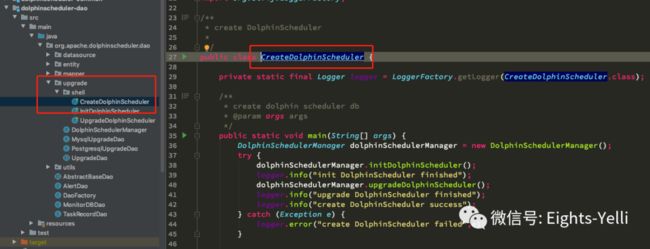
执行dao模块下的CreateDolphinScheduler
数据库创建成功
启动前后端服务
在idea中启动 api master worker
修改前端项目中的.env文件
# back end interface address
API_BASE = http://localhost:12345
# If IP access is required for local development, remove the "#"
DEV_HOST = 127.0.0.1
运行npm run start启动前端页面,访问http://localhost:8888/
采用管理员账户admin dolphinscheduler123进行登陆,出现页面即整个项目的页面,则开发环境搭建完成
5
本地运行第一个shell任务
新建一个租户
将管理员用户挂到新建的租户上
建立一个HelloDolphinScheduler的shell任务
上线运行
运行成功


