- SpringBlade dict-biz/list 接口 SQL 注入漏洞
文章永久免费只为良心
oracle数据库
SpringBladedict-biz/list接口SQL注入漏洞POC:构造请求包查看返回包你的网址/api/blade-system/dict-biz/list?updatexml(1,concat(0x7e,md5(1),0x7e),1)=1漏洞概述在SpringBlade框架中,如果dict-biz/list接口的后台处理逻辑没有正确地对用户输入进行过滤或参数化查询(PreparedSta
- spring如何整合druid连接池?
惜.己
springspringjunit数据库javaidea后端xml
目录spring整合druid连接池1.新建maven项目2.新建mavenModule3.导入相关依赖4.配置log4j2.xml5.配置druid.xml1)xml中如何引入properties2)下面是配置文件6.准备jdbc.propertiesJDBC配置项解释7.配置druid8.测试spring整合druid连接池1.新建maven项目打开IDE(比如IntelliJIDEA,Ecl
- SpringCloudAlibaba—Sentinel(限流)
菜鸟爪哇
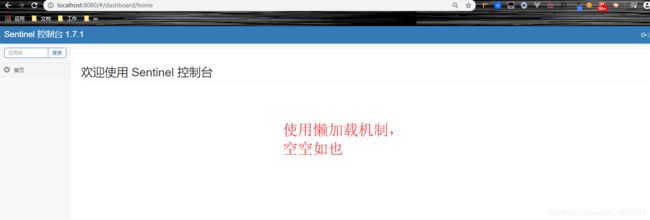
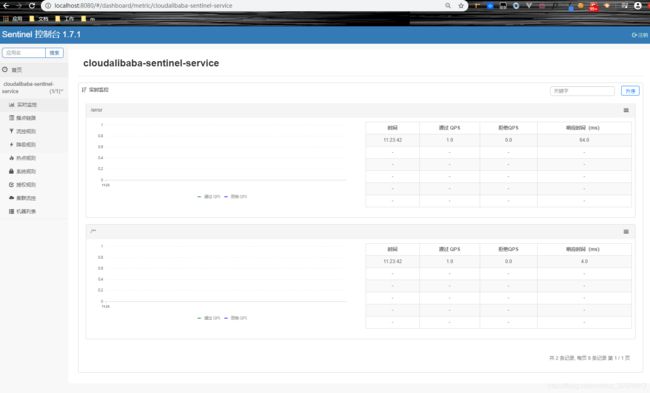
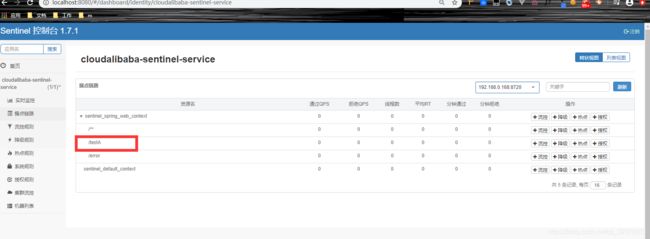
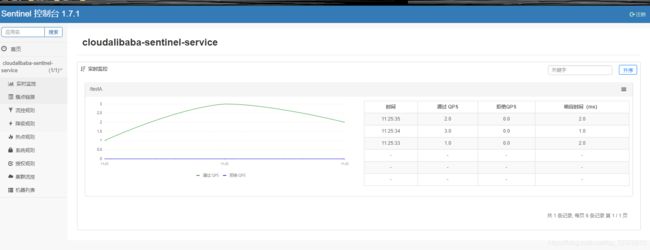
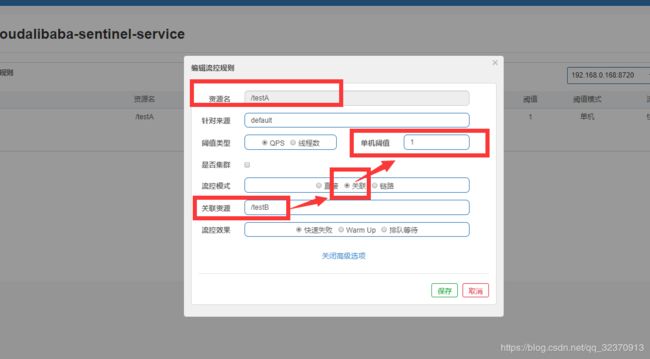
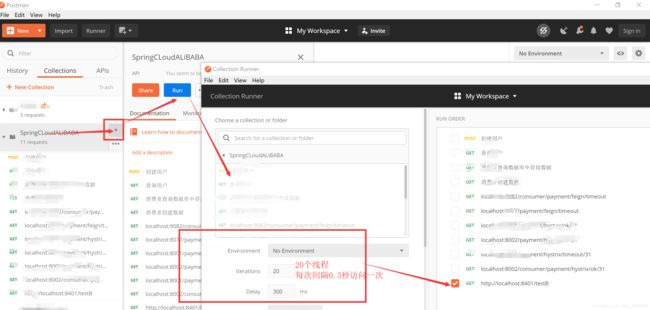
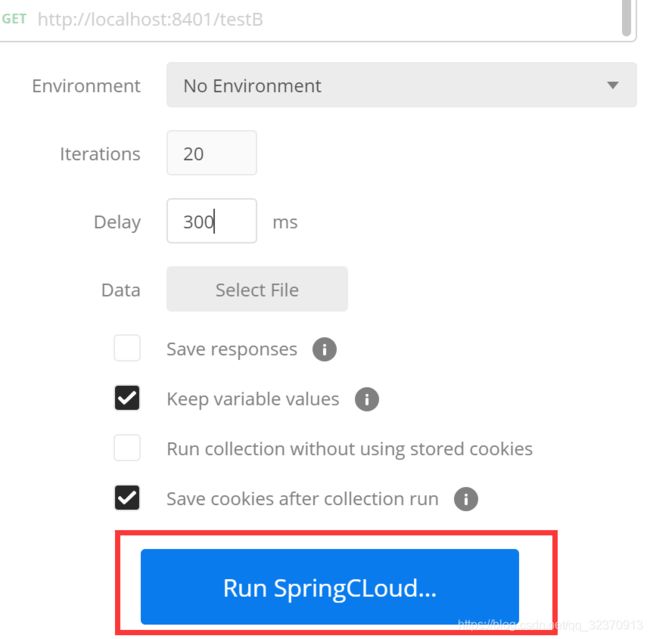
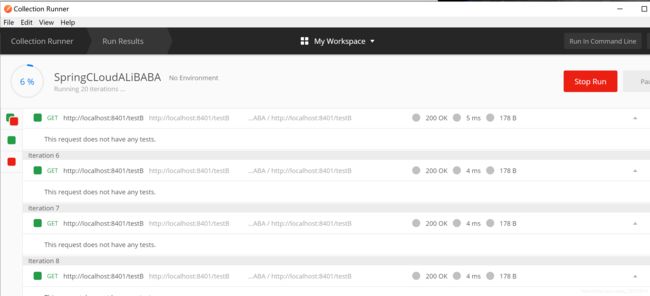
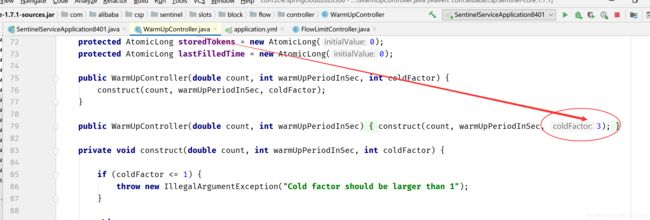
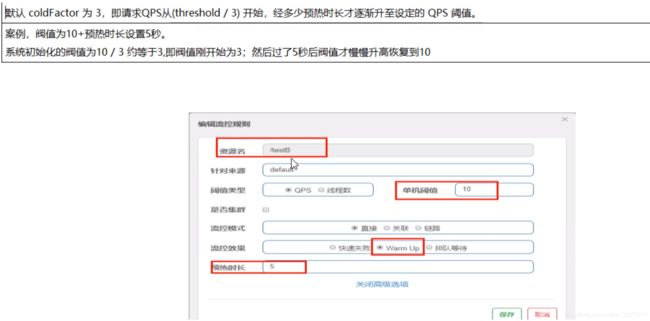
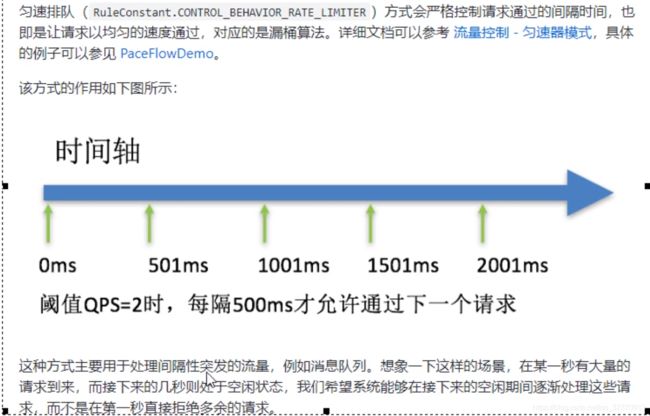
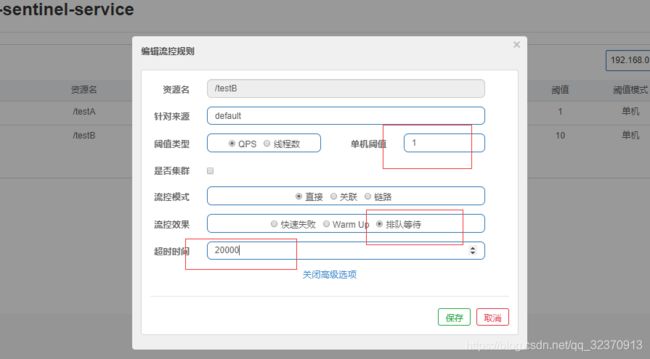
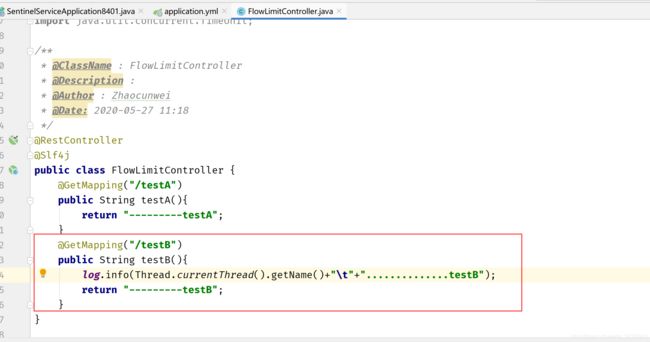
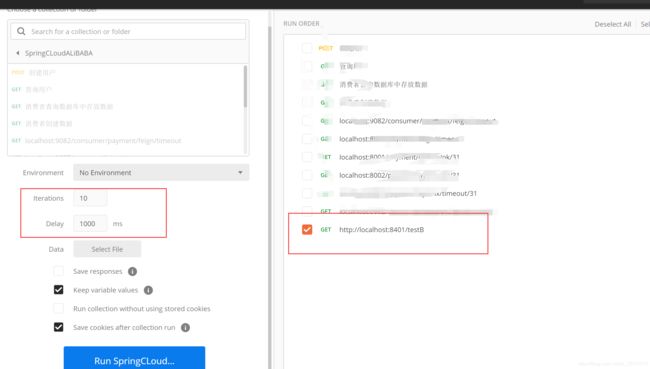
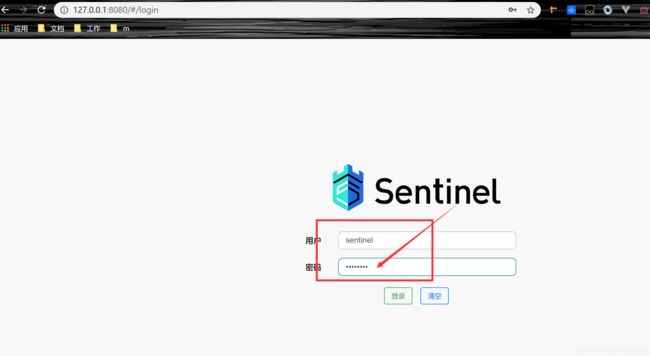
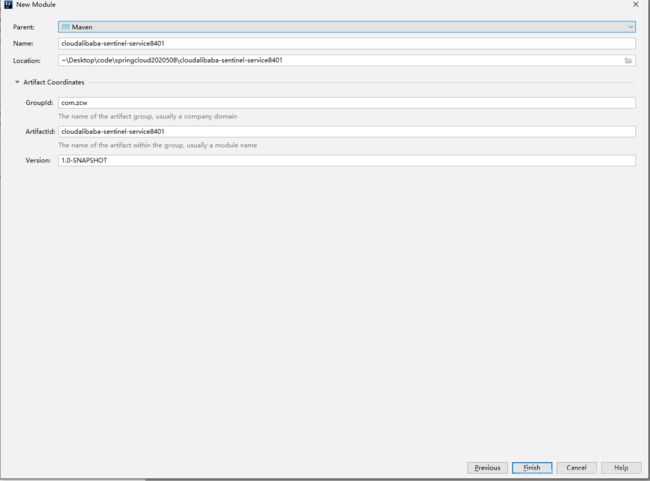
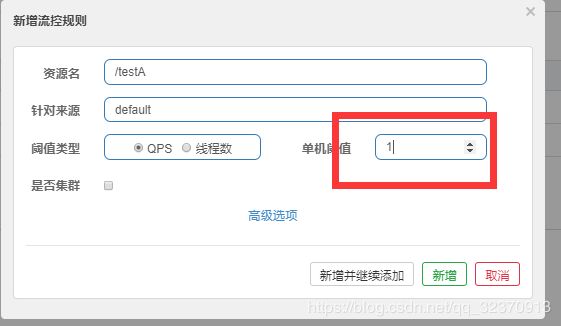
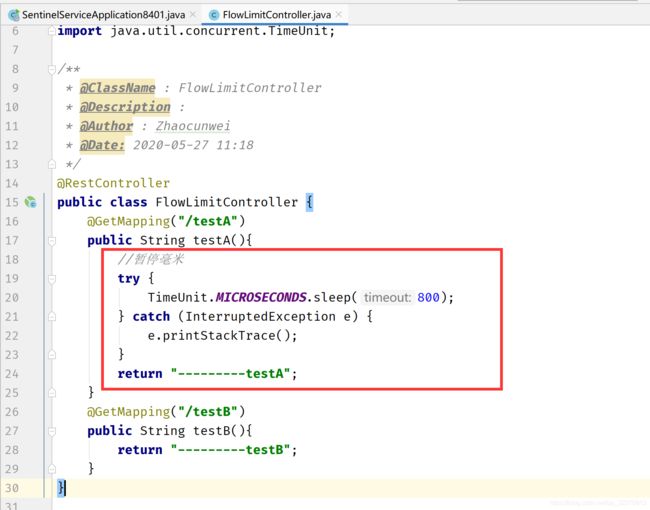
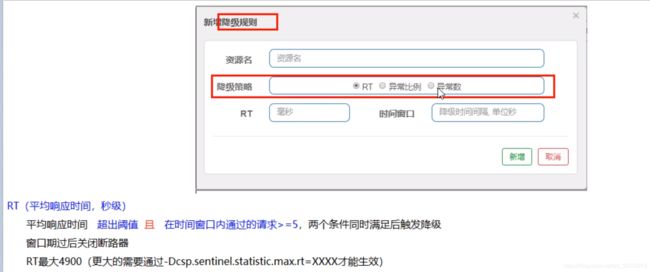
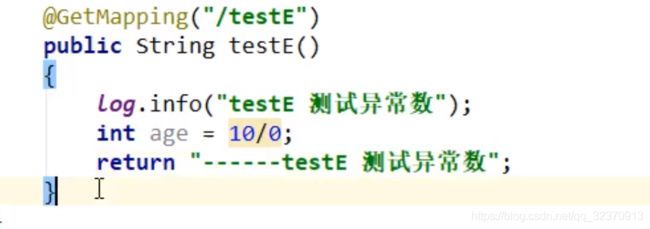
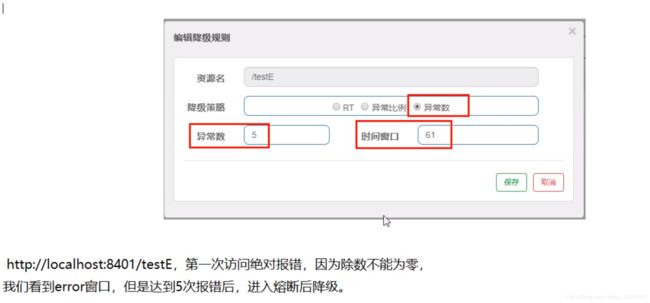
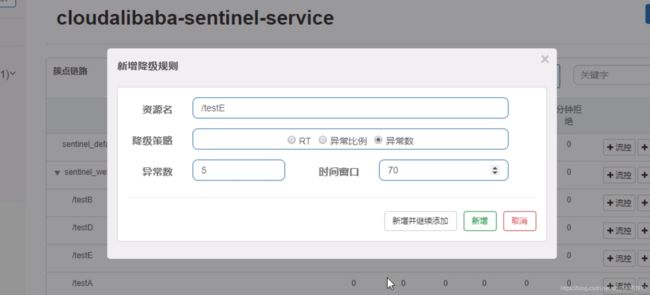
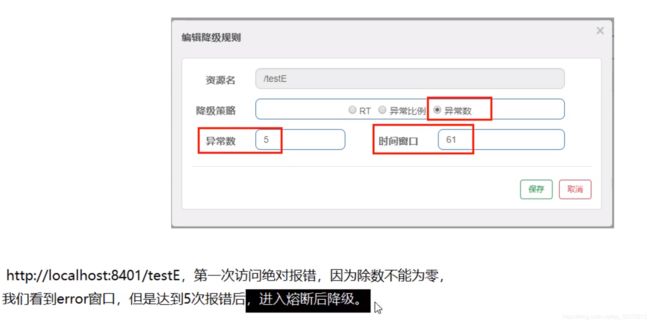
前言:自己在学习过程的记录,借鉴别人文章,记录自己实现的步骤。借鉴文章:https://blog.csdn.net/u014494148/article/details/105484410Sentinel介绍Sentinel诞生于阿里巴巴,其主要目标是流量控制和服务熔断。Sentinel是通过限制并发线程的数量(即信号隔离)来减少不稳定资源的影响,而不是使用线程池,省去了线程切换的性能开销。当资源
- springboot+vue项目实战一-创建SpringBoot简单项目
苹果酱0567
面试题汇总与解析springboot后端java中间件开发语言
这段时间抽空给女朋友搭建一个个人博客,想着记录一下建站的过程,就当做笔记吧。虽然复制zjblog只要一个小时就可以搞定一个网站,或者用cms系统,三四个小时就可以做出一个前后台都有的网站,而且想做成啥样也都行。但是就是要从新做,自己做的意义不一样,更何况,俺就是专门干这个的,嘿嘿嘿要做一个网站,而且从零开始,首先呢就是技术选型了,经过一番思量决定选择-SpringBoot做后端,前端使用Vue做一
- Spring MVC 全面指南:从入门到精通的详细解析
一杯梅子酱
技术栈学习springmvcjava
引言:SpringMVC,作为Spring框架的一个重要模块,为构建Web应用提供了强大的功能和灵活性。无论是初学者还是有一定经验的开发者,掌握SpringMVC都将显著提升你的Web开发技能。本文旨在为初学者提供一个全面且易于理解的学习路径,通过详细的知识点分析和实际案例,帮助你快速上手SpringMVC,让学习过程既深刻又高效。一、SpringMVC简介1.1什么是SpringMVC?Spri
- Spring Boot中实现跨域请求
BABA8891
springboot后端java
在SpringBoot中实现跨域请求(CORS,Cross-OriginResourceSharing)可以通过多种方式,以下是几种常见的方法:1.使用@CrossOrigin注解在SpringBoot中,你可以在控制器或者具体的请求处理方法上使用@CrossOrigin注解来允许跨域请求。在控制器上应用:importorg.springframework.web.bind.annotation.
- 博客网站制作教程
2401_85194651
javamaven
首先就是技术框架:后端:Java+SpringBoot数据库:MySQL前端:Vue.js数据库连接:JPA(JavaPersistenceAPI)1.项目结构blog-app/├──backend/│├──src/main/java/com/example/blogapp/││├──BlogApplication.java││├──config/│││└──DatabaseConfig.java
- RabbitMQ生产者重复机制与确认机制
java炒饭小能手
java-rabbitmqrabbitmqjava
重复机制生产者发送消息时,出现了网络故障,导致与MQ的连接中断。为了解决这个问题,SpringAMQP提供的消息发送时的重试机制。即:当RabbitTemplate与MQ连接超时后,多次重试。需要修该发送端模块的application.yaml文件,添加下面的内容:spring:rabbitmq:connection-timeout:1s#设置MQ的连接超时时间template:retry:ena
- 【Java】已解决:org.springframework.jdbc.datasource.lookup.DataSourceLookupFailureException
屿小夏
java开发语言
文章目录一、分析问题背景问题背景描述出现问题的场景二、可能出错的原因三、错误代码示例四、正确代码示例五、注意事项已解决:org.springframework.jdbc.datasource.lookup.DataSourceLookupFailureException在使用Spring框架进行开发时,数据源的配置和使用是非常关键的一环。然而,有时候我们可能会遇到org.springframewo
- SpringBoot和SpringMVC是什么关系?SpringBoot替代SpringMVC了吗?
瑞金彭于晏
springboot后端javaMVCspring数据库
SpringBoot和SpringMVC都是SpringFramework生态系统中的一部分,但它们各自扮演着不同的角色和提供不同的功能集。理解它们之间的关系,首先需要了解SpringFramework本身。SpringFrameworkSpringFramework是一个全面的、开源的应用程序开发框架,它提供了广泛的功能来支持企业应用开发的几乎所有方面。SpringFramework的核心特性之
- spring mvc @RequestBody String类型参数
zoyation
spring-mvcspringmvc
通过如下配置:text/html;charset=UTF-8application/json;charset=UTF-8在springmvc的Controller层使用@RequestBody接收Content-Type为application/json的数据时,默认支持Map方式和对象方式参数@RequestMapping(value="/{code}/saveUser",method=Requ
- Java -jar 如何在后台运行项目
vincent_hahaha
撸了今年阿里、头条和美团的面试,我有一个重要发现.......>>>说到运行jar包通常我们都会以下面的方式运行:java-jarspringboot-0.0.1-SNAPSHOT.jar这样运行的话会有一个问题,就是我们一关闭当前窗口就会停止运行项目,要想解决这个问题,就需要在后台运行。nohupjava-jarbabyshark-0.0.1-SNAPSHOT.jar >log.file 2>&
- spring security中几大组件的作用和执行顺序
阿信在这里
javaspring
springsecurity中几大组件的作用和执行顺序在SpringSecurity中,AuthenticationProvider、GroupPermissionEvaluator、PermissionEvaluator、AbstractAuthenticationProcessingFilter、DefaultMethodSecurityExpressionHandler和ManageSecu
- 探索Zebra4J:构建高效企业级Web应用的微服务框架
叶准鑫Natalie
探索Zebra4J:构建高效企业级Web应用的微服务框架ZebraZebra4J/Zebra4Js基于SpringBoot的JavaWeb/Nodejs框架项目地址:https://gitcode.com/gh_mirrors/zebra/Zebra项目介绍在当今快速发展的技术环境中,构建高效、可扩展的企业级Web应用是每个开发团队的追求。Zebra4J作为一款基于SpringBoot的全新微服务
- 基于JavaWeb开发的Java+SpringMvc+vue+element实现上海汽车博物馆平台
网顺技术团队
成品程序项目javavue.js汽车课程设计springboot
基于JavaWeb开发的Java+SpringMvc+vue+element实现上海汽车博物馆平台作者主页网顺技术团队欢迎点赞收藏⭐留言文末获取源码联系方式查看下方微信号获取联系方式承接各种定制系统精彩系列推荐精彩专栏推荐订阅不然下次找不到哟Java毕设项目精品实战案例《1000套》感兴趣的可以先收藏起来,还有大家在毕设选题,项目以及论文编写等相关问题都可以给我留言咨询,希望帮助更多的人文章目录基
- 分布式锁和spring事务管理
暴躁的鱼
锁及事务分布式springjava
最近开发一个小程序遇到一个需求需要实现分布式事务管理业务需求用户在使用小程序的过程中可以查看景点,对景点地区或者城市标记是否想去,那么需要统计一个地点被标记的人数,以及记录某个用户对某个地点是否标记为想去,用两个表存储数据,一个地点表记录改地点被标记的次数,一个用户意向表记录某个用户对某个地点是否标记为想去。由于可能有多个用户同时标记一个地点,每个用户在前端点击想去按钮之后,后台接收到请求,从数据
- Java面试笔记记录6
今天背八股了吗
java面试笔记
1.Spring是什么?特性?有哪些模块?Spring是一个轻量级、非入侵式的控制反转Ioc和面向切面AOP的框架。特性:1.Ioc和DISpring的核心就是一个大的工厂容器,可以维护所有对象的创建和依赖关系,Spring工厂用于生成Bean,并且管理Bean的生命周期,实现高内聚低耦合的设计理念。2.AOP编程Spring提供面向切面编程,可以方便实现对程序进行权限拦截、运行监控等切面功能。3
- Sentinel
眼泪落在琴弦
springcloudjavajava
Sentinel(服务熔断降级限流)1.引入spring-cloud-starter-alibaba-sentinel2.下载sentinel服务器3.配置application地址信息4.在控制台调整参数【默认所以流控设置保存在内存中,重启失效】5.想实时监控需每个微服务导入actuator,并配置application暴露所有端口6.自定义sentinel流控返回数据7.配置sentinel类
- Spring @Async 深度解读:默认线程池执行器的配置与优化
小码快撩
springjava前端
在Spring中,@Async注解用于异步执行方法。默认情况下,@Async注解的任务是由一个线程池执行的。然而,这个默认的线程池是如何初始化的呢?本文将深入探讨这一过程,帮助你理解Spring异步任务背后的线程池执行器的初始化原理。1.@Async的基本使用首先,让我们快速回顾一下@Async的基本用法。@Async通常用于标注在需要异步执行的方法上,比如:@Servicepublicclass
- Sentinel实时监控不展示问题
朱杰jjj
sentinelsentinel
问题官方插件Endpoint支持,可以实时统计出SpringBoot的健康状况和请求的调用信息在使用Endpoint特性之前需要在Maven中添加spring-boot-starter-actuator依赖,并在配置中允许Endpoints的访问。SpringBoot1.x中添加配置management.security.enabled=false。暴露的endpoint路径为/sentinelS
- 36. MyBatis如何支持多数据库操作?如何配置不同的数据源?
这孩子叫逆
Mybatis笔记mybatis数据库
在许多企业级应用中,可能需要访问多个数据库。MyBatis可以通过配置多个数据源和动态切换数据源来支持多数据库操作。下面介绍如何在MyBatis中配置和使用多个数据源。1.多数据源的基本配置1.1配置多个数据源要支持多个数据源,首先需要在Spring或SpringBoot中配置不同的数据源。假设我们要连接两个数据库db1和db2,可以通过以下步骤进行配置。SpringBoot示例:applicat
- SpringBoot整合ES搜索引擎 实现网站热搜词及热度计算
码踏云端
springbootElasticsearchspringbootelasticsearch后端热搜词热度计算java
博主简介:历代文学网(PC端可以访问:https://literature.sinhy.com/#/literature?__c=1000,移动端可微信小程序搜索“历代文学”)总架构师,15年工作经验,精通Java编程,高并发设计,Springboot和微服务,熟悉Linux,ESXI虚拟化以及云原生Docker和K8s,热衷于探索科技的边界,并将理论知识转化为实际应用。保持对新技术的好奇心,乐于
- Spring Security静态资源过滤(11)
小黑屋说YYDS
spring
在一个实际项目中,并非所有的请求都需要经过SpringSecurity过滤器,有一些特殊的请求,例如静态资源等,一般来说并不需要经过SpringSecurity过滤器链,用户如果访问这些静态资源,直接返回对应的资源即可。回顾关于WebSecurity的讲解,提到它里边维护了一个ignoredRequests变量,该变量,记录的就是所有需要被忽略的请求,这些被忽略的请求将不再经过SpringSecu
- Spring Security定义多个过滤器链(10)
小黑屋说YYDS
spring
在SpringSecurity中可以同时存在多个过滤器链,一个WebSecurityConfigurerAdapter的实例就可以配置一条过滤器链。我们来看如下一个案例:@ConfigurationpublicclassSecurityConfig{@BeanUserDetailsServiceus(){InMemoryUserDetailsManagerusers=newInMemoryUser
- java 技术 架构 相关文档
圣心
java架构开发语言
在Java中,有许多不同的技术和架构,这里我将列举一些常见的Java技术和架构,并提供一些相关的文档资源。SpringFrameworkSpring是一个开源的Java/JavaEE全功能框架,以Apache许可证形式发布,提供了一种实现企业级应用的方法。官方文档:SpringFrameworkSpringBootSpringBoot是Spring的一个子项目,旨在简化创建生产级的Spring应用
- SpringSecurity初学总结
weixin_66442229
spring
springSecurity安全框架基于Java的安全框架主要有:SpringSecurity和Shiro介绍基础概念安全框架是对用户访问权限的控制,保证应用的安全性。其主要的工作是用户认证和用户授权|鉴权主要应用于Spring的企业应用系统,提供声明式的安全访问控制解决方案。它提供了一组可以在Spring应用上下文中配置的Bean能很好的结合Spring的DI依赖注入和AOP面向切面编程功能应用
- java获取applicationcontext,SpringBoot获取ApplicationContext的3种方式
花儿街参考
ApplicationContext是什么?简单来说就是Spring中的容器,可以用来获取容器中的各种bean组件,注册监听事件,加载资源文件等功能。ApplicationContext获取的几种方式1直接使用Autowired注入@ComponentpublicclassBook1{@AutowiredprivateApplicationContextapplicationContext;pub
- SpringBoot 设置传入参数非必要
loveLifeLoveCoding
springbootspringbootjavaspring
查看RequestParam源码packageorg.springframework.web.bind.annotation;importjava.lang.annotation.Documented;importjava.lang.annotation.ElementType;importjava.lang.annotation.Retention;importjava.lang.annotat
- SpringBoot 获取 ApplicationContext
loveLifeLoveCoding
springbootspringbootjavaspring
1.概念ApplicationContext是什么?简单来说就是Spring中的容器,可以用来获取容器中的各种bean组件,注册监听事件,加载资源文件等功能2.获取ApplicationContext的方式2.1.创建工具类通过此工具类,可以方便的获取bean组件,获取配置信息等importorg.springframework.beans.BeansException;importorg.spr
- java打印标签(机型TOSHIBA条码打印机B-EX4T)
嘘
JAVAjava
java打印标签实现方式标签效果代码获取更多相关资料实现rfid写入功能实现方式打印机设置网络ipjava获取socket连接,调用TPCL指令标签效果代码packageorg.jeecg.modules.invinfo.util;importorg.jeecg.modules.invinfo.vo.BatKcInventoryDetailVo;importorg.springframework.
- jQuery 键盘事件keydown ,keypress ,keyup介绍
107x
jsjquerykeydownkeypresskeyup
本文章总结了下些关于jQuery 键盘事件keydown ,keypress ,keyup介绍,有需要了解的朋友可参考。
一、首先需要知道的是: 1、keydown() keydown事件会在键盘按下时触发. 2、keyup() 代码如下 复制代码
$('input').keyup(funciton(){
- AngularJS中的Promise
bijian1013
JavaScriptAngularJSPromise
一.Promise
Promise是一个接口,它用来处理的对象具有这样的特点:在未来某一时刻(主要是异步调用)会从服务端返回或者被填充属性。其核心是,promise是一个带有then()函数的对象。
为了展示它的优点,下面来看一个例子,其中需要获取用户当前的配置文件:
var cu
- c++ 用数组实现栈类
CrazyMizzz
数据结构C++
#include<iostream>
#include<cassert>
using namespace std;
template<class T, int SIZE = 50>
class Stack{
private:
T list[SIZE];//数组存放栈的元素
int top;//栈顶位置
public:
Stack(
- java和c语言的雷同
麦田的设计者
java递归scaner
软件启动时的初始化代码,加载用户信息2015年5月27号
从头学java二
1、语言的三种基本结构:顺序、选择、循环。废话不多说,需要指出一下几点:
a、return语句的功能除了作为函数返回值以外,还起到结束本函数的功能,return后的语句
不会再继续执行。
b、for循环相比于whi
- LINUX环境并发服务器的三种实现模型
被触发
linux
服务器设计技术有很多,按使用的协议来分有TCP服务器和UDP服务器。按处理方式来分有循环服务器和并发服务器。
1 循环服务器与并发服务器模型
在网络程序里面,一般来说都是许多客户对应一个服务器,为了处理客户的请求,对服务端的程序就提出了特殊的要求。
目前最常用的服务器模型有:
·循环服务器:服务器在同一时刻只能响应一个客户端的请求
·并发服务器:服
- Oracle数据库查询指令
肆无忌惮_
oracle数据库
20140920
单表查询
-- 查询************************************************************************************************************
-- 使用scott用户登录
-- 查看emp表
desc emp
- ext右下角浮动窗口
知了ing
JavaScriptext
第一种
<!DOCTYPE html PUBLIC "-//W3C//DTD XHTML 1.0 Transitional//EN" "http://www.w3.org/TR/xhtml1/DTD/xhtml1-transitional.dtd">
<html xmlns="http://www.w3.org/1999/
- 浅谈REDIS数据库的键值设计
矮蛋蛋
redis
http://www.cnblogs.com/aidandan/
原文地址:http://www.hoterran.info/redis_kv_design
丰富的数据结构使得redis的设计非常的有趣。不像关系型数据库那样,DEV和DBA需要深度沟通,review每行sql语句,也不像memcached那样,不需要DBA的参与。redis的DBA需要熟悉数据结构,并能了解使用场景。
- maven编译可执行jar包
alleni123
maven
http://stackoverflow.com/questions/574594/how-can-i-create-an-executable-jar-with-dependencies-using-maven
<build>
<plugins>
<plugin>
<artifactId>maven-asse
- 人力资源在现代企业中的作用
百合不是茶
HR 企业管理
//人力资源在在企业中的作用人力资源为什么会存在,人力资源究竟是干什么的 人力资源管理是对管理模式一次大的创新,人力资源兴起的原因有以下点: 工业时代的国际化竞争,现代市场的风险管控等等。所以人力资源 在现代经济竞争中的优势明显的存在,人力资源在集团类公司中存在着 明显的优势(鸿海集团),有一次笔者亲自去体验过红海集团的招聘,只 知道人力资源是管理企业招聘的 当时我被招聘上了,当时给我们培训 的人
- Linux自启动设置详解
bijian1013
linux
linux有自己一套完整的启动体系,抓住了linux启动的脉络,linux的启动过程将不再神秘。
阅读之前建议先看一下附图。
本文中假设inittab中设置的init tree为:
/etc/rc.d/rc0.d
/etc/rc.d/rc1.d
/etc/rc.d/rc2.d
/etc/rc.d/rc3.d
/etc/rc.d/rc4.d
/etc/rc.d/rc5.d
/etc
- Spring Aop Schema实现
bijian1013
javaspringAOP
本例使用的是Spring2.5
1.Aop配置文件spring-aop.xml
<?xml version="1.0" encoding="UTF-8"?>
<beans
xmlns="http://www.springframework.org/schema/beans"
xmln
- 【Gson七】Gson预定义类型适配器
bit1129
gson
Gson提供了丰富的预定义类型适配器,在对象和JSON串之间进行序列化和反序列化时,指定对象和字符串之间的转换方式,
DateTypeAdapter
public final class DateTypeAdapter extends TypeAdapter<Date> {
public static final TypeAdapterFacto
- 【Spark八十八】Spark Streaming累加器操作(updateStateByKey)
bit1129
update
在实时计算的实际应用中,有时除了需要关心一个时间间隔内的数据,有时还可能会对整个实时计算的所有时间间隔内产生的相关数据进行统计。
比如: 对Nginx的access.log实时监控请求404时,有时除了需要统计某个时间间隔内出现的次数,有时还需要统计一整天出现了多少次404,也就是说404监控横跨多个时间间隔。
Spark Streaming的解决方案是累加器,工作原理是,定义
- linux系统下通过shell脚本快速找到哪个进程在写文件
ronin47
一个文件正在被进程写 我想查看这个进程 文件一直在增大 找不到谁在写 使用lsof也没找到
这个问题挺有普遍性的,解决方法应该很多,这里我给大家提个比较直观的方法。
linux下每个文件都会在某个块设备上存放,当然也都有相应的inode, 那么透过vfs.write我们就可以知道谁在不停的写入特定的设备上的inode。
幸运的是systemtap的安装包里带了inodewatch.stp,位
- java-两种方法求第一个最长的可重复子串
bylijinnan
java算法
import java.util.Arrays;
import java.util.Collections;
import java.util.List;
public class MaxPrefix {
public static void main(String[] args) {
String str="abbdabcdabcx";
- Netty源码学习-ServerBootstrap启动及事件处理过程
bylijinnan
javanetty
Netty是采用了Reactor模式的多线程版本,建议先看下面这篇文章了解一下Reactor模式:
http://bylijinnan.iteye.com/blog/1992325
Netty的启动及事件处理的流程,基本上是按照上面这篇文章来走的
文章里面提到的操作,每一步都能在Netty里面找到对应的代码
其中Reactor里面的Acceptor就对应Netty的ServerBo
- servelt filter listener 的生命周期
cngolon
filterlistenerservelt生命周期
1. servlet 当第一次请求一个servlet资源时,servlet容器创建这个servlet实例,并调用他的 init(ServletConfig config)做一些初始化的工作,然后调用它的service方法处理请求。当第二次请求这个servlet资源时,servlet容器就不在创建实例,而是直接调用它的service方法处理请求,也就是说
- jmpopups获取input元素值
ctrain
JavaScript
jmpopups 获取弹出层form表单
首先,我有一个div,里面包含了一个表单,默认是隐藏的,使用jmpopups时,会弹出这个隐藏的div,其实jmpopups是将我们的代码生成一份拷贝。
当我直接获取这个form表单中的文本框时,使用方法:$('#form input[name=test1]').val();这样是获取不到的。
我们必须到jmpopups生成的代码中去查找这个值,$(
- vi查找替换命令详解
daizj
linux正则表达式替换查找vim
一、查找
查找命令
/pattern<Enter> :向下查找pattern匹配字符串
?pattern<Enter>:向上查找pattern匹配字符串
使用了查找命令之后,使用如下两个键快速查找:
n:按照同一方向继续查找
N:按照反方向查找
字符串匹配
pattern是需要匹配的字符串,例如:
1: /abc<En
- 对网站中的js,css文件进行打包
dcj3sjt126com
PHP打包
一,为什么要用smarty进行打包
apache中也有给js,css这样的静态文件进行打包压缩的模块,但是本文所说的不是以这种方式进行的打包,而是和smarty结合的方式来把网站中的js,css文件进行打包。
为什么要进行打包呢,主要目的是为了合理的管理自己的代码 。现在有好多网站,你查看一下网站的源码的话,你会发现网站的头部有大量的JS文件和CSS文件,网站的尾部也有可能有大量的J
- php Yii: 出现undefined offset 或者 undefined index解决方案
dcj3sjt126com
undefined
在开发Yii 时,在程序中定义了如下方式:
if($this->menuoption[2] === 'test'),那么在运行程序时会报:undefined offset:2,这样的错误主要是由于php.ini 里的错误等级太高了,在windows下错误等级
- linux 文件格式(1) sed工具
eksliang
linuxlinux sed工具sed工具linux sed详解
转载请出自出处:
http://eksliang.iteye.com/blog/2106082
简介
sed 是一种在线编辑器,它一次处理一行内容。处理时,把当前处理的行存储在临时缓冲区中,称为“模式空间”(pattern space),接着用sed命令处理缓冲区中的内容,处理完成后,把缓冲区的内容送往屏幕。接着处理下一行,这样不断重复,直到文件末尾
- Android应用程序获取系统权限
gqdy365
android
引用
如何使Android应用程序获取系统权限
第一个方法简单点,不过需要在Android系统源码的环境下用make来编译:
1. 在应用程序的AndroidManifest.xml中的manifest节点
- HoverTree开发日志之验证码
hvt
.netC#asp.nethovertreewebform
HoverTree是一个ASP.NET的开源CMS,目前包含文章系统,图库和留言板功能。代码完全开放,文章内容页生成了静态的HTM页面,留言板提供留言审核功能,文章可以发布HTML源代码,图片上传同时生成高品质缩略图。推出之后得到许多网友的支持,再此表示感谢!留言板不断收到许多有益留言,但同时也有不少广告,因此决定在提交留言页面增加验证码功能。ASP.NET验证码在网上找,如果不是很多,就是特别多
- JSON API:用 JSON 构建 API 的标准指南中文版
justjavac
json
译文地址:https://github.com/justjavac/json-api-zh_CN
如果你和你的团队曾经争论过使用什么方式构建合理 JSON 响应格式, 那么 JSON API 就是你的 anti-bikeshedding 武器。
通过遵循共同的约定,可以提高开发效率,利用更普遍的工具,可以是你更加专注于开发重点:你的程序。
基于 JSON API 的客户端还能够充分利用缓存,
- 数据结构随记_2
lx.asymmetric
数据结构笔记
第三章 栈与队列
一.简答题
1. 在一个循环队列中,队首指针指向队首元素的 前一个 位置。
2.在具有n个单元的循环队列中,队满时共有 n-1 个元素。
3. 向栈中压入元素的操作是先 移动栈顶指针&n
- Linux下的监控工具dstat
网络接口
linux
1) 工具说明dstat是一个用来替换 vmstat,iostat netstat,nfsstat和ifstat这些命令的工具, 是一个全能系统信息统计工具. 与sysstat相比, dstat拥有一个彩色的界面, 在手动观察性能状况时, 数据比较显眼容易观察; 而且dstat支持即时刷新, 譬如输入dstat 3, 即每三秒收集一次, 但最新的数据都会每秒刷新显示. 和sysstat相同的是,
- C 语言初级入门--二维数组和指针
1140566087
二维数组c/c++指针
/*
二维数组的定义和二维数组元素的引用
二维数组的定义:
当数组中的每个元素带有两个下标时,称这样的数组为二维数组;
(逻辑上把数组看成一个具有行和列的表格或一个矩阵);
语法:
类型名 数组名[常量表达式1][常量表达式2]
二维数组的引用:
引用二维数组元素时必须带有两个下标,引用形式如下:
例如:
int a[3][4]; 引用:
- 10点睛Spring4.1-Application Event
wiselyman
application
10.1 Application Event
Spring使用Application Event给bean之间的消息通讯提供了手段
应按照如下部分实现bean之间的消息通讯
继承ApplicationEvent类实现自己的事件
实现继承ApplicationListener接口实现监听事件
使用ApplicationContext发布消息
![]()
