ELK安装
多加节点
三台全新虚拟机:
先装jdk
内存锁定,如果内存够就打开,如果内存不够就不打开
(先修改配置,再打开)
#server1,2,3安装elasticsearch
[root@server1 ~]# ls
elasticsearch-6.6.1.rpm  jdk-8u121-linux-x64.rpm
[root@server1 ~]# rpm -ivh jdk-8u121-linux-x64.rpm
[root@server1 ~]# rpm -ivh elasticsearch-6.6.1.rpm
#编辑yml文件:
[root@server1 ~]# vim /etc/elasticsearch/elasticsearch.yml
 17 cluster.name: my-es
 23 node.name: server1
 55 network.host: 172.25.76.1
 59 http.port: 9200
#开启服务,查看状态是running,但是查看日志,服务是没有起来的,需要添加操作系统安全设置并且关闭swap分区的自动挂载
[root@server1 ~]# systemctl start elasticsearch
[root@server1 ~]# systemctl status elasticsearch
[root@server1 ~]# cat /var/log/elasticsearch/my-es.log
#添加操作系统安全设置
[root@server1 ~]# vim /etc/security/limits.conf
elasticsearch  -  nofile  65536  #设置最大文件数
elasticsearch  -  nproc   4096   #最大进程数
elasticsearch  -  memlock unlimited  #不限制内存
[root@server1 ~]# vim /usr/lib/systemd/system/elasticsearch.service
 42 LimitMEMLOCK=infinity  #设定限制内存是无限的
#注释swap分区
[root@server1 ~]# swapoff -a
[root@server1 ~]# vim /etc/fstab
#打开内存锁定
[root@server1 ~]# vim /etc/elasticsearch/elasticsearch.yml
 43 bootstrap.memory_lock: true
#重新加载elasticsearch
[root@server1 ~]# systemctl daemon-reload
[root@server1 ~]# netstat -atnlp | grep :9200
tcp6       0      0 172.25.76.1:9200        :::*                    LISTEN      11958/java
#打开浏览器
http://172.25.76.1:9200/
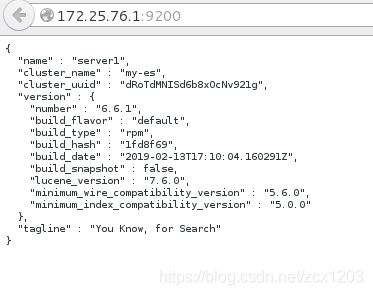
UI界面监测数据
- 开启服务
[root@server1 ~]# systemctl start elasticsearch.service
[root@server1 ~]# swapoff -a
检测端口:
[root@server1 ~]# netstat -natlp | grep :9200
tcp6       0      0 172.25.76.1:9200        :::*                    LISTEN      10122/java
- 添加节点(需要解析名,时间同步)
[root@server1 ~]# vim /etc/elasticsearch/elasticsearch.yml
 68 discovery.zen.ping.unicast.hosts: ["server1", "server2", "server3"]

[root@server1 ~]# rpm -ivh nodejs-9.11.2-1nodesource.x86_64.rpm
- 虚拟机上网
[root@foundation36 ~]# iptables -t nat -I POSTROUTING -s 172.25.76.0/24 -j MASQUERADE

[root@server1 ~]# node -v  #版本
[root@server1 ~]# npm config list
#更改npm域(更改为taobao的,这样安装会快)
[root@server1 ~]# npm set registry https://registry.npm.taobao.org/
[root@server1 ~]# npm config list
; cli configs
metrics-registry = "https://registry.npm.taobao.org/"
#解压安装包
[root@server1 ~]# yum install -y unzip
[root@server1 ~]# unzip elasticsearch-head-master.zip
#安装过程需要phantomjs,解压后放在/uar/local/bin(可在线下载但是会很慢)
[root@server1 ~]# yum install -y bzip2
[root@server1 ~]# tar jxf phantomjs-2.1.1-linux-x86_64.tar.bz2
[root@server1 ~]# cd phantomjs-2.1.1-linux-x86_64/bin
[root@server1 bin]# ls
phantomjs
[root@server1 bin]# cp phantomjs /usr/local/bin/
#查看是否有执行权限
[root@server1 bin]# ll /usr/local/bin/phantomjs
-rwxr-xr-x 1 root root 67932064 Jan 24  2016 /usr/local/bin/phantomjs
#安装UI界面
[root@server1 bin]# cd
[root@server1 ~]# cd elasticsearch-head-master/
[root@server1 elasticsearch-head-master]# npm install
#更改监听的主机号
[root@server1 _site]# cd /root/elasticsearch-head-master/_site
[root@server1 _site]# vim app.js
4360                         this.base_uri = this.config.base_uri || this.prefs.get     ("app-base_uri") || "http://172.25.76.1:9200";
#UI界面后台运行
[root@server1 elasticsearch-head-master]# npm run start &
#浏览器访问
http://172.25.76.1:9100/
#跨域名访问
[root@server1 ~]# vim /etc/elasticsearch/elasticsearch.yml
http.cors.enabled: true
http.cors.allow-origin: "*"
[root@server1 ~]# systemctl restart elasticsearch.service
点击连接
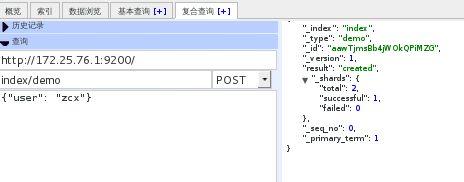
复合查询—执行动作—提交动作—刷新
master设置
[root@server1 ~]# vim /etc/elasticsearch/elasticsearch.yml
node.master: true
node.data: false
[root@server2 ~]# vim /etc/elasticsearch/elasticsearch.yml
node.master: false
node.data: true
[root@server3 ~]# vim /etc/elasticsearch/elasticsearch.yml
node.master: false
node.data: true
#刷新浏览器
http://172.25.76.1:9100/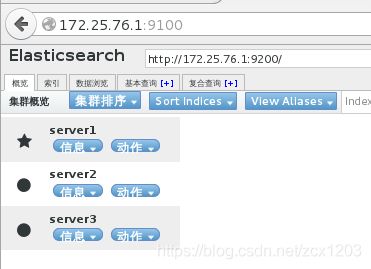

- 执行动作写在脚本里
[root@server2 ~]# cd /etc/logstash/conf.d/
[root@server2 conf.d]# vim es.conf
input {
stdin {}
}
output {
stdout {}
    elasticsearch {
            hosts => ["172.25.36.1:9200"]  #输出主机号
            index => "logstash-%{+YYYY.MM.dd}" #指定一个索引
    }
}
- 执行脚本
[root@server2 conf.d]# /usr/share/logstash/bin/logstash -f /etc/logstash/conf.d/es.conf
westos
{
    "@timestamp" => 2019-06-22T05:20:57.930Z,
      "@version" => "1",
          "host" => "server2",
       "message" => "westos"
}
linux
{
    "@timestamp" => 2019-06-22T05:21:02.501Z,
      "@version" => "1",
          "host" => "server2",
       "message" => "linux"
}
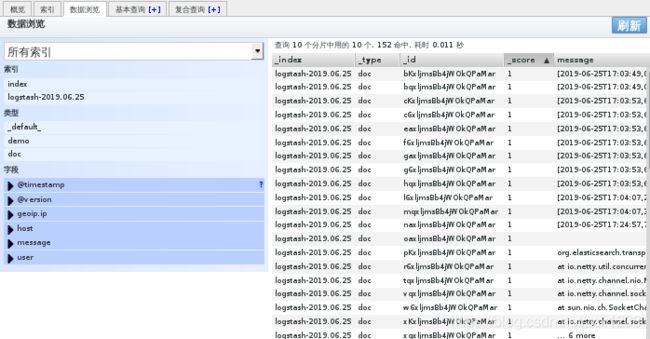
- 浏览器查看:已经输出到es里

##输入文件,文件模块file##
- 编辑脚本文件
[root@server2 conf.d]# vim es.conf
input {
#       stdin {}
        file {
                path => "/var/log/elasticsearch/my-es.log"  #文件路径
                start_position => "beginning"  #读取文件的位置

        }
}

output {
        stdout {}

        elasticsearch {
                hosts => ["172.25.76.1:9200"]
                index => "logstash-%{+YYYY.MM.dd}"
        }

}
- 执行脚本
[root@server2 conf.d]# /usr/share/logstash/bin/logstash -f /etc/logstash/conf.d/es.conf
- 浏览器查看:已经输出到es里
#####syslog插件,把自己伪装成日志系统##
- 编辑脚本
[root@server2 ~]# cd /etc/logstash/conf.d/
[root@server2 conf.d]# vim es.conf
input {
#       stdin {}
#       file {
#               path => "/var/log/elasticsearch/my-es.log"
#               start_position => "beginning"
#       }

        syslog {
                port => 514
        }
}

output {
        stdout {}

        elasticsearch {
                hosts => ["172.25.36.1:9200"]
                index => "syslog-%{+YYYY.MM.dd}"
        }

}
- 执行
[root@server2 file]# /usr/share/logstash/bin/logstash -f /etc/logstash/conf.d/es.conf
- master上(server1上):
[root@server1 ~]# vim /etc/rsyslog.conf
*.* @@172.25.76.2:514  #@@tcp
[root@server1 ~]# systemctl restart rsyslog.service
- 测试:
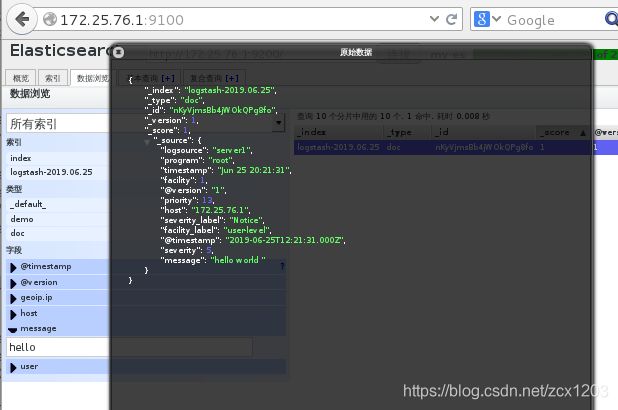
[root@server1 ~]# logger hello world
[root@server1 ~]# cat /var/log/messages
Jun 25 20:21:31 server1 root: hello world
- 分别在server2和浏览器上查看,已同步
日志过滤
- 删除之前的记录文件(先删除浏览器中的)
[root@server2 conf.d]# cd /usr/share/logstash/data/plugins/inputs/file/
[root@server2 file]# l.
.  ..  .sincedb_d5a86a03368aaadc80f9eeaddba3a9f5
[root@server2 file]# rm -f .sincedb_d5a86a03368aaadc80f9eeaddba3a9f5


[root@server2 ~]# cd /etc/logstash/conf.d/
[root@server2 conf.d]# vim test.conf
input {
  stdin {
    codec => multiline {
      pattern => "^EOF"
      negate => "true"
      what => "previous"  #向上合并
    }

  }
}
output {
        stdout {}  #输出到终端
}


[root@server2 conf.d]# /usr/share/logstash/bin/logstash -f /etc/logstash/conf.d/test.conf
haha
heihei
lala
EOF
{
    "@timestamp" => 2019-06-25T13:45:06.420Z,
          "host" => "server2",
       "message" => "haha\nheihei\nlala",
          "tags" => [
        [0] "multiline"
    ],
      "@version" => "1"
}
#遇到EOF向上合并输出
#日志合并
[root@server2 conf.d]# vim es.conf
input {
#       stdin {}
        file {
                path => "/var/log/elasticsearch/my-es.log"
                start_position => "beginning"
                codec => multiline {
                        pattern => "^\["
                        negate => "true"
                        what => "previous"
        	}
	}

        syslog {
                port => 514
        }
}

output {
        stdout {}

        elasticsearch {
                hosts => ["172.25.76.1:9200"]
                index => "syslog-%{+YYYY.MM.dd}"
        }


[root@server2 conf.d]# /usr/share/logstash/bin/logstash -f /etc/logstash/conf.d/es.conf
过滤日志(apache)filter模块
[root@server2 conf.d]# vim test.conf
input {
        stdin{}
}
filter {
  grok {
    match => { "message" => "%{IP:client} %{WORD:method} %{URIPATHPARAM:request} %{NUMBER:bytes} %{NUMBER:duration}" }
  }
}
output {
        stdout {}
}


55.3.244.1 GET /index.html 15824 0.043
{
      "duration" => "0.043",
       "message" => "55.3.244.1 GET /index.html 15824 0.043",
    "@timestamp" => 2019-06-22T07:55:22.989Z,
      "@version" => "1",
       "request" => "/index.html",
         "bytes" => "15824",
          "host" => "server2",
        "client" => "55.3.244.1",
        "method" => "GET"
}
[root@server2 conf.d]# yum install -y httpd
[root@server2 conf.d]# systemctl start httpd
[root@server2 conf.d]# vim /var/www/html/index.html
www.westos.org

[root@server2 conf.d]# chmod 755 /var/log/httpd/
[root@server2 conf.d]# vim es.conf
input {
	file {
                path => "/var/log/httpd/access_log"
        }
}
filter {
  grok {
    match => { "message" => "%{HTTPD_COMBINEDLOG}" }
  }
}
output {
        stdout {}

        elasticsearch {
                hosts => ["172.25.76.1:9200"]
                index => "apachelog-%{+YYYY.MM.dd}"
        }
}

[root@server2 conf.d]# /usr/share/logstash/bin/logstash -f /etc/logstash/conf.d/es.conf
真机访问:100次
[root@foundation36 ~]# ab -c 1 -n 100 http://172.25.76.2/index.html
server2查看有信息输出
输出到redis
- server3:安装编译redis
[root@server3 ~]# tar zxf redis-3.0.6.tar.gz
[root@server3 ~]# cd redis-3.0.6/
[root@server3 redis-3.0.6]# ls
[root@server3 redis-3.0.6]# yum install -y gcc make
[root@server3 redis-3.0.6]# make
[root@server3 redis-3.0.6]# make install
[root@server3 redis-3.0.6]# cd utils/
[root@server3 utils]# ls
#安装
[root@server3 utils]# ./install_server.sh  #回车

[root@server3 redis-3.0.6]# vim /etc/redis/6379.conf
70 bind 0.0.0.0
-
开启服务
-
编辑脚本
[root@server2 conf.d]# vim es.conf
        file {
                path => "/var/log/httpd/access_log"
                start_position => "beginning"
        }
}
filter {
  grok {
    match => { "message" => "%{HTTPD_COMBINEDLOG}" }
  }
}

output {
        stdout {}
        redis {
                host => [ "172.25.76.3:6379" ]
                data_type => "list"
                key => logstashtoredis
        }

[root@server2 conf.d]# /usr/share/logstash/bin/logstash -f /etc/logstash/conf.d/es.conf

[root@foundation36 ~]# ab -c 1 -n 100 http://172.25.76.2/index.html
server2查看有信息输出
从redis输入,es输出
server3:安装log
[root@server3 utils]# yum install -y ruby
[root@server3 ~]# rpm -ivh logstash-6.6.1.rpm


[root@server3 ~]# cd /etc/logstash/conf.d/
[root@server3 conf.d]# vim test.conf
(未执行成功)
'''
input {
        redis {
                host => ["172.25.36.3:6379"]
                data_type => "list"
                key => logstashtoredis
        }
}

output {
        stdout {}
        elasticsearch {
                hosts => ["172.25.36.1:9200"]
                index => "apachelog-%{+YYYY.MM.dd}"
        }
}
###可视化,实时展示###
server1:安装
[root@server1 ~]# rpm -ivh kibana-6.6.1-x86_64.rpm
更改配置文件:
[root@server1 ~]# vim /etc/kibana/kibana.yml
  2 server.port: 5601
  7 server.host: "172.25.36.1"
 28 elasticsearch.hosts: ["http://172.25.36.1:9200"]
 37 kibana.index: ".kibana"
开启服务:
[root@server1 ~]# systemctl start kibana.service
[root@server1 ~]# netstat -atlnp | grep :5601
tcp        0      0 172.25.36.1:5601        0.0.0.0:*               LISTEN      11709/node
浏览器访问:
http://172.25.76.1:5601/