- Java大厂面试实录:谢飞机的电商场景技术问答(Spring Cloud、MyBatis、Redis、Kafka、AI等)
Java大厂面试实录:谢飞机的电商场景技术问答(SpringCloud、MyBatis、Redis、Kafka、AI等)本文模拟知名互联网大厂Java后端岗位面试流程,以电商业务为主线,由严肃面试官与“水货”程序员谢飞机展开有趣的对话,涵盖SpringCloud、MyBatis、Redis、Kafka、SpringSecurity、AI等热门技术栈,并附详细解析,助力求职者备战大厂面试。故事设定谢
- Java大厂面试故事:谢飞机的互联网音视频场景技术面试全纪录(Spring Boot、MyBatis、Kafka、Redis、AI等)
来旺
Java场景面试宝典JavaSpringBootMyBatisKafkaRedis微服务AI
Java大厂面试故事:谢飞机的互联网音视频场景技术面试全纪录(SpringBoot、MyBatis、Kafka、Redis、AI等)互联网大厂技术面试不仅考察技术深度,更注重业务场景与系统设计能力。本篇以严肃面试官与“水货”程序员谢飞机的对话,带你体验音视频业务场景下的Java面试全过程,涵盖主流技术栈,并附详细答案解析,助你面试无忧。故事场景设定谢飞机是一名有趣但技术基础略显薄弱的程序员,这次应
- Spring Cloud Gateway 的执行链路详解
愤怒的代码
SpringCloudspringcloud
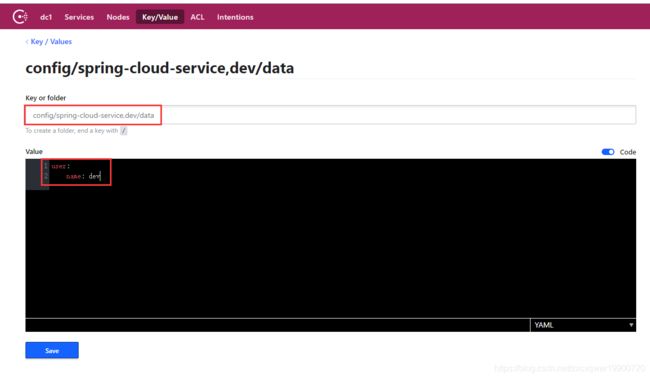
SpringCloudGateway的执行链路详解核心目标明确SpringCloudGateway的请求处理全过程(从接收到请求→到转发→到返回响应),方便你在合适的生命周期节点插入你的逻辑。核心执行链路图(执行顺序)┌──────────────┐│客户端请求│└────┬─────────┘↓┌────┴─────────────┐│NettyHttpServer│←→ReactorNetty
- RocketMQ 核心特性实战详解
愤怒的代码
RocketMQ实战rocketmq
RocketMQ核心特性实战详解本文基于RocketMQ4.x+rocketmq-spring-boot-starter2.3.1,从零搭建,逐步讲解RocketMQ11大核心特性,每一段代码都能直接跑。0.项目环境准备依赖引入在pom.xml文件添加:org.apache.rocketmqrocketmq-spring-boot-starter2.3.1配置文件application.ymlse
- Java 调用 HTTP 接口的 7 种方式:全网最全指南
Java调用HTTP接口的7种方式:全网最全指南在开发过程中,调用HTTP接口是最常见的需求之一。本文将详细介绍Java中7种主流的调用HTTP接口的方式,包括每种工具的优缺点和完整代码实现。1.使用RestTemplateRestTemplate是Spring提供的同步HTTP客户端,适用于传统项目。尽管从Spring5开始被标记为过时,它仍然是许多开发者的首选。示例代码importorg.sp
- docker0网卡没有ip一步解决
ξ流ぁ星ぷ132
tcp/ip网络服务器
正常查看ip的时候一直显示没有ip这里先删除docker0网卡iplinkdeletedocker0然后重启服务systemctlrestartdocker再次查看显示有ip了并且查看配置文件也是正常的cat/etc/docker/daemon.json{"registry-mirrors":["https://docker.m.daocloud.io","https://docker.imgdb
- JVM与Spring Boot核心解析
AIHacksCash
Java场景面试宝典JavaJVMSpringBoot
我是廖志伟,一名Java开发工程师、《Java项目实战——深入理解大型互联网企业通用技术》(基础篇)、(进阶篇)、(架构篇)清华大学出版社签约作家、Java领域优质创作者、CSDN博客专家、阿里云专家博主、51CTO专家博主、产品软文专业写手、技术文章评审老师、技术类问卷调查设计师、幕后大佬社区创始人、开源项目贡献者。拥有多年一线研发和团队管理经验,研究过主流框架的底层源码(Spring、Spri
- Spring WebFlux 响应式编程原理与实战指南
SpringWebFlux响应式编程原理与实战指南一、技术背景与应用场景随着微服务与高并发的迅速发展,传统的阻塞式编程模型在处理大量并发请求时容易导致线程资源耗尽、响应延迟增高。SpringWebFlux基于ReactiveStreams规范,通过非阻塞、背压机制,实现高吞吐、低延迟的Web服务。典型应用场景包括:实时数据推送:WebSocket或Server-SentEvents场景。高并发AP
- 老系统改造增加初始化,自动化数据源配置(tomcat+jsp+springmvc)
老系统改造增加初始化,自动化数据源配置一、前言二、改造描述1、环境说明2、实现步骤简要思考三、开始改造1、准备sql初始化文件2、启动时自动读取jdbc文件,创建数据源,如未配置,需要一个默认的临时数据源2.1去掉spingmvc原本配置的固定dataSource,改为动态dataSource2.2代码类,这里是示例,我就不管规范了,放到一起2.2.1DynamicDataSourceConfig
- 面试官:Spring 如何控制 Bean 的加载顺序?
在大多数情况下,我们不需要手动控制Bean的加载顺序,因为Spring的IoC容器足够智能。核心原则:依赖驱动加载SpringIoC容器会构建一个依赖关系图(DependencyGraph)。如果BeanA依赖于BeanB(例如,A的构造函数需要一个B类型的参数),Spring会保证在创建BeanA之前,BeanB已经被完全创建和初始化好了。@ServicepublicclassServiceA{
- 学习日记-spring-day45-7.10
永日45670
学习springjava
知识点:1.初始化Bean单例池完成getBeancreateBean(1)知识点核心内容重点单例词初始化在容器初始化阶段预先创建单例对象,避免在getBean时动态创建单例词必须在容器初始化时完成加载,否则会触发异常getBean方法逻辑1.从beanDefinitionMap查询BeanDefinition2.根据scope判断单例/多例3.单例:直接从单例词获取4.多例:反射动态创建新对象多
- spring揭秘31-spring任务调度02-spring集成任务执行与调度-spring官方文档
文章目录【README】【1】spring任务执行器(TaskExecutor)抽象【1.1】TaskExecutor实现类(执行器)【1.2】使用TaskExecutor代码实践【2】spring任务调度抽象(TaskScheduler)【2.1】Trigger触发器接口【2.1.1】Trigger实现类【2.2】任务调度器(TaskScheduler)实现【3】任务调度与任务异步执行的注解支持
- Spring 声明式事务:从原理到实现的完整解析
Code季风
Spring详解spring数据库后端开发语言javaspringboot
在后端开发中,事务管理是保证数据一致性的核心机制。尤其是在复杂业务场景下,一个操作可能涉及多步数据库操作,任何一步失败都需要回滚到初始状态。Spring的声明式事务通过AOP思想,将事务管理从业务逻辑中剥离,让开发者更专注于核心业务。本文将结合实际实现,详解声明式事务的核心机制和设计思路。一、为什么需要声明式事务?在讨论实现之前,我们先明确一个问题:为什么要用声明式事务,而不是手动编写事务代码?假
- Ubuntu 安装 RAGFlow 简单流程
steven_41936912
ubuntulinuxRAGFlow
Docker拉取镜像慢可以更换镜像源sudotee/etc/docker/daemon.json<<-'EOF'{"registry-mirrors":["https://docker.m.daocloud.io","https://docker.imgdb.de","https://docker-0.unsee.tech","https://docker.hlmirror.com","https
- Java实习模拟面试之安徽九德 —— 面向对象编程、Spring框架与数据库技术详解
培风图南以星河揽胜
java面试java面试spring
关键词:Java实习生、模拟面试、安徽九德、SpringBoot、MySQL、Redis、面向对象编程、团队协作一、前言作为一名计算机相关专业的学生,想要顺利进入一家互联网公司或软件开发企业实习,技术面试是必须面对的一道门槛。本文将带你走进一场真实的Java实习生模拟面试场景,以“安徽九德”公司为背景,围绕其发布的招聘岗位要求,进行一次全方位的技术面试演练。本次模拟面试涵盖以下核心知识点:Java
- Spring Boot基础
小李是个程序
springboot后端java
5.SpringBoot配置解析5.1.基础服务端口:server.port=8080(应用启动后监听8080端口)应用名称:spring.application.name=Chat64(注册到服务发现等场景时的标识)5.2.数据库连接(MySQL)URL:jdbc:mysql://localhost:3306/ai-chat(连接本地3306端口的ai-chat数据库,含时区、编码等参数)驱动:
- Spring 如何干预 Bean 的生命周期?
冰糖心书房
SpringIOCIocspringBean生命周期
Spring提供了多种机制让我们能够在Bean生命周期的不同节点“插入”自己的逻辑,这些机制可以分为两大类:针对单个Bean的干预和针对所有/多个Bean的全局干预。一、针对单个Bean的干预(最常用)这些方法让你为一个特定的Bean类定义其初始化和销毁逻辑。1.使用JSR-250注解(推荐方式)这是现在最优雅、也是Spring官方推荐的方式。它使用Java的标准注解,与Spring框架解耦。@P
- Spring Framework 7.020.Spring 表达式语言(SpEL)Spring Expression Language
程序员勇哥
Java全套教程SpringFramework7springmysql数据库javaspringboot
SpringFramework7.020.Spring表达式语言(SpEL)SpringExpressionLanguageSpring表达式语言(SpEL)简介表达式求值核心特性类表达式集合数组映射函数操作符类型构造函数变量函数模板表达式bean定义中的表达式基于注解的配置中的表达式SpEL编译器解析器配置自定义评估上下文Spring表达式语言(简称SpEL)是一种强大的表达式语言,支持在运行时
- RabbitMQ 消息队列:从入门到Spring Boot实战
无糖星轨
rabbitmqspringbootjava
RabbitMQ作为一款开源的、基于AMQP(AdvancedMessageQueuingProtocol)协议实现的消息代理,凭借其强大的功能、灵活的路由机制以及出色的性能,在业界得到了广泛的应用。无论是处理高并发订单、异步通知、日志收集还是系统解耦,RabbitMQ都能发挥其独特的作用。1.RabbitMQ核心概念RabbitMQ的强大功能离不开其背后一系列精心设计的核心概念。理解这些概念是掌
- SpringAOP中的JointPoint和ProceedingJoinPoint使用详解(附带详细示例)
如何在5年薪百万
springboot
概念JointPointJointPoint是程序运行过程中可识别的点,这个点可以用来作为AOP切入点。JointPoint对象则包含了和切入相关的很多信息。比如切入点的对象,方法,属性等。我们可以通过反射的方式获取这些点的状态和信息,用于追踪tracing和记录logging应用信息。Pointcutpointcut是一种程序结构和规则,它用于选取joinpoint并收集这些point的上下文信
- Apache Dubbo实战:JavaSDK使用
秃了也弱了。
Dubboapachedubbo
文章目录一、写在前面二、基于zookeeper:快速创建dubbo应用1、maven包(客户端+服务端)(注意spring版本)2、application.yml配置文件(客户端+服务端)3、定义公共接口4、启动类添加注解@EnableDubbo5、服务端6、客户端7、启动试试吧8、拓展:使用JavaConfig代替注解三、拓展配置1、注册中心2、版本与分组3、传递调用参数4、泛化调用5、泛化实现
- uni-app X APP在线升级 解决【uni-upgrade-center-app】未配置uni-upgrade-center 问题
着急解决问题的同学可以直接查看第7项和7.3项。1、按照官网的指导文档进行升级中心配置。App升级中心uni-upgrade-center|uniCloud2、升级中心分为两个部分:uni-upgrade-centerAdmin管理后台和uni-upgrade-center-app前台检测更新3、后台管理部分按照上面的连接操作即可。4、当执行到前台检测更新时遇到了这个问题“PossibleUnha
- spring boot 详解以及原理
经典1992
springboot后端java
SpringBoot是Spring框架的扩展,旨在简化Spring应用的开发和部署。它通过自动配置和约定优于配置的原则,让开发者能够快速搭建独立运行的、生产级别的Spring应用。以下是SpringBoot的详细解析和工作原理:一、SpringBoot的核心特性自动配置根据项目依赖和配置,自动配置Spring框架的组件(如数据源、Web服务器等)。例如,添加spring-boot-starter-
- 【服务器】Ubuntu、CentOS、Debian、Alibaba Cloud Linux等操作系统有什么不同?
Ubuntu目标用户:Ubuntu适合初学者和对图形界面友好的用户,也适用于开发人员和需要最新软件的企业。更新策略:Ubuntu提供长期支持版本(LTS),每两年发布一次,并提供五年的支持。非LTS版本每六个月发布一次,但仅提供九个月的支持。包管理系统:使用APT包管理系统,拥有庞大的软件仓库。社区支持:拥有非常活跃的开发者社区,提供了丰富的文档和第三方资源。稳定性与创新性:在保持稳定的同时,Ub
- mac挂载阿里云盘做本地盘【webdav-aliyundriver】【CloudMounter】
木有会
杂七杂八家庭工作站鼓捣鼓捣
转自:提升工作效率-mac挂载阿里云盘做本地盘webdav-aliyundriver用来把阿里云盘变成本地文件服务器。CloudMounter这个工具可以用来挂载文件服务器当做本地磁盘。webdav-aliyundriver安装:github:https://github.com/messense/aliyundrive-webdav比较喜欢用docker,感觉干净些。下载镜像dockerpull
- uniapp对接unipush 1.0 ios/android
车轮滚滚__
uni-appiosandroid
配置注意需要打包自定义基座之后在手机上运行自定义基座才可以!官方有文档可以根据文档来我这里用的是1.0为什么没有2.0因为2.0要用uinicloud注意每次打包之后cid都会变cid用户的标识iduniapp通过这个id可以把消息推送给指定人前端代码前端要做的很简单直接放到app.vue中onLaunch钩子中即可麻烦的在后端和个推的对接onPushMessage(that){//#ifdefA
- redission 实现滑动窗口(注解)推荐
结构目录相关代码org.redissonredisson-spring-boot-starter3.17.0packageorg.example.redission.config;importorg.redisson.Redisson;importorg.redisson.api.RedissonClient;importorg.redisson.config.Config;importorg.s
- Spring Boot + Mybatis数据库多数据源解决驼峰映射不生效问题
yy1209357299
springBootmybatismybatis数据库springboot
1、问题描述做查询操作时,返回数据为NULL,导致当使用这条数据报空指针错误2、说明在数据库字段命名规范中,通常使用下划线“_”来连接两个单词,比如:user_id。但是在Java开发中,实体字段通常采用驼峰命名法,比如userId。如果不开启驼峰命名法,则映射到对象无法赋值解决方法:1、直接为结果集设定一个resultMapselectuser_idfromtable;2、配置文件加入以下配置m
- SpringBoot + Logback 实现日志脱敏【手把手案例】
甘蓝聊Java
【更新中...】项目中的那些事springbootlogbackLogback日志脱敏Java日志脱敏
文章目录背景分析现有Logback配置了解PatternLayout中的Converter解决第1步:创建自定义Converter第2步:自定义logback配置文件第3步:调整yaml配置第4步:启动服务并验证参考背景SpringBoot+MyBatis+MySQL+Logback框架,使用MySQL的AES_DECRYPT()和AES_ENCRYPT()函数,由于日志设置为debug级别,导致
- SpringBoot日志脱敏:敏感信息保护全面指南
Clf丶忆笙
springboot后端java日志脱敏
文章目录一、日志脱敏概述与核心概念1.1什么是日志脱敏1.2为什么需要日志脱敏1.3常见需要脱敏的敏感信息类型1.4脱敏技术核心原理二、SpringBoot基础日志脱敏实现2.1基于正则表达式的简单脱敏2.2在SpringBoot中集成基础脱敏2.3基础实现的优缺点分析三、基于注解的高级脱敏方案3.1自定义脱敏注解3.2实现自定义JSON序列化器3.3在实体类中应用脱敏注解3.4测试与验证四、Sp
- 继之前的线程循环加到窗口中运行
3213213333332132
javathreadJFrameJPanel
之前写了有关java线程的循环执行和结束,因为想制作成exe文件,想把执行的效果加到窗口上,所以就结合了JFrame和JPanel写了这个程序,这里直接贴出代码,在窗口上运行的效果下面有附图。
package thread;
import java.awt.Graphics;
import java.text.SimpleDateFormat;
import java.util
- linux 常用命令
BlueSkator
linux命令
1.grep
相信这个命令可以说是大家最常用的命令之一了。尤其是查询生产环境的日志,这个命令绝对是必不可少的。
但之前总是习惯于使用 (grep -n 关键字 文件名 )查出关键字以及该关键字所在的行数,然后再用 (sed -n '100,200p' 文件名),去查出该关键字之后的日志内容。
但其实还有更简便的办法,就是用(grep -B n、-A n、-C n 关键
- php heredoc原文档和nowdoc语法
dcj3sjt126com
PHPheredocnowdoc
<!doctype html>
<html lang="en">
<head>
<meta charset="utf-8">
<title>Current To-Do List</title>
</head>
<body>
<?
- overflow的属性
周华华
JavaScript
<!DOCTYPE html PUBLIC "-//W3C//DTD XHTML 1.0 Transitional//EN" "http://www.w3.org/TR/xhtml1/DTD/xhtml1-transitional.dtd">
<html xmlns="http://www.w3.org/1999/xhtml&q
- 《我所了解的Java》——总体目录
g21121
java
准备用一年左右时间写一个系列的文章《我所了解的Java》,目录及内容会不断完善及调整。
在编写相关内容时难免出现笔误、代码无法执行、名词理解错误等,请大家及时指出,我会第一时间更正。
&n
- [简单]docx4j常用方法小结
53873039oycg
docx
本代码基于docx4j-3.2.0,在office word 2007上测试通过。代码如下:
import java.io.File;
import java.io.FileInputStream;
import ja
- Spring配置学习
云端月影
spring配置
首先来看一个标准的Spring配置文件 applicationContext.xml
<?xml version="1.0" encoding="UTF-8"?>
<beans xmlns="http://www.springframework.org/schema/beans"
xmlns:xsi=&q
- Java新手入门的30个基本概念三
aijuans
java新手java 入门
17.Java中的每一个类都是从Object类扩展而来的。 18.object类中的equal和toString方法。 equal用于测试一个对象是否同另一个对象相等。 toString返回一个代表该对象的字符串,几乎每一个类都会重载该方法,以便返回当前状态的正确表示.(toString 方法是一个很重要的方法) 19.通用编程:任何类类型的所有值都可以同object类性的变量来代替。
- 《2008 IBM Rational 软件开发高峰论坛会议》小记
antonyup_2006
软件测试敏捷开发项目管理IBM活动
我一直想写些总结,用于交流和备忘,然都没提笔,今以一篇参加活动的感受小记开个头,呵呵!
其实参加《2008 IBM Rational 软件开发高峰论坛会议》是9月4号,那天刚好调休.但接着项目颇为忙,所以今天在中秋佳节的假期里整理了下.
参加这次活动是一个朋友给的一个邀请书,才知道有这样的一个活动,虽然现在项目暂时没用到IBM的解决方案,但觉的参与这样一个活动可以拓宽下视野和相关知识.
- PL/SQL的过程编程,异常,声明变量,PL/SQL块
百合不是茶
PL/SQL的过程编程异常PL/SQL块声明变量
PL/SQL;
过程;
符号;
变量;
PL/SQL块;
输出;
异常;
PL/SQL 是过程语言(Procedural Language)与结构化查询语言(SQL)结合而成的编程语言PL/SQL 是对 SQL 的扩展,sql的执行时每次都要写操作
- Mockito(三)--完整功能介绍
bijian1013
持续集成mockito单元测试
mockito官网:http://code.google.com/p/mockito/,打开documentation可以看到官方最新的文档资料。
一.使用mockito验证行为
//首先要import Mockito
import static org.mockito.Mockito.*;
//mo
- 精通Oracle10编程SQL(8)使用复合数据类型
bijian1013
oracle数据库plsql
/*
*使用复合数据类型
*/
--PL/SQL记录
--定义PL/SQL记录
--自定义PL/SQL记录
DECLARE
TYPE emp_record_type IS RECORD(
name emp.ename%TYPE,
salary emp.sal%TYPE,
dno emp.deptno%TYPE
);
emp_
- 【Linux常用命令一】grep命令
bit1129
Linux常用命令
grep命令格式
grep [option] pattern [file-list]
grep命令用于在指定的文件(一个或者多个,file-list)中查找包含模式串(pattern)的行,[option]用于控制grep命令的查找方式。
pattern可以是普通字符串,也可以是正则表达式,当查找的字符串包含正则表达式字符或者特
- mybatis3入门学习笔记
白糖_
sqlibatisqqjdbc配置管理
MyBatis 的前身就是iBatis,是一个数据持久层(ORM)框架。 MyBatis 是支持普通 SQL 查询,存储过程和高级映射的优秀持久层框架。MyBatis对JDBC进行了一次很浅的封装。
以前也学过iBatis,因为MyBatis是iBatis的升级版本,最初以为改动应该不大,实际结果是MyBatis对配置文件进行了一些大的改动,使整个框架更加方便人性化。
- Linux 命令神器:lsof 入门
ronin47
lsof
lsof是系统管理/安全的尤伯工具。我大多数时候用它来从系统获得与网络连接相关的信息,但那只是这个强大而又鲜为人知的应用的第一步。将这个工具称之为lsof真实名副其实,因为它是指“列出打开文件(lists openfiles)”。而有一点要切记,在Unix中一切(包括网络套接口)都是文件。
有趣的是,lsof也是有着最多
- java实现两个大数相加,可能存在溢出。
bylijinnan
java实现
import java.math.BigInteger;
import java.util.regex.Matcher;
import java.util.regex.Pattern;
public class BigIntegerAddition {
/**
* 题目:java实现两个大数相加,可能存在溢出。
* 如123456789 + 987654321
- Kettle学习资料分享,附大神用Kettle的一套流程完成对整个数据库迁移方法
Kai_Ge
Kettle
Kettle学习资料分享
Kettle 3.2 使用说明书
目录
概述..........................................................................................................................................7
1.Kettle 资源库管
- [货币与金融]钢之炼金术士
comsci
金融
自古以来,都有一些人在从事炼金术的工作.........但是很少有成功的
那么随着人类在理论物理和工程物理上面取得的一些突破性进展......
炼金术这个古老
- Toast原来也可以多样化
dai_lm
androidtoast
Style 1: 默认
Toast def = Toast.makeText(this, "default", Toast.LENGTH_SHORT);
def.show();
Style 2: 顶部显示
Toast top = Toast.makeText(this, "top", Toast.LENGTH_SHORT);
t
- java数据计算的几种解决方法3
datamachine
javahadoopibatisr-languer
4、iBatis
简单敏捷因此强大的数据计算层。和Hibernate不同,它鼓励写SQL,所以学习成本最低。同时它用最小的代价实现了计算脚本和JAVA代码的解耦,只用20%的代价就实现了hibernate 80%的功能,没实现的20%是计算脚本和数据库的解耦。
复杂计算环境是它的弱项,比如:分布式计算、复杂计算、非数据
- 向网页中插入透明Flash的方法和技巧
dcj3sjt126com
htmlWebFlash
将
Flash 作品插入网页的时候,我们有时候会需要将它设为透明,有时候我们需要在Flash的背面插入一些漂亮的图片,搭配出漂亮的效果……下面我们介绍一些将Flash插入网页中的一些透明的设置技巧。
一、Swf透明、无坐标控制 首先教大家最简单的插入Flash的代码,透明,无坐标控制: 注意wmode="transparent"是控制Flash是否透明
- ios UICollectionView的使用
dcj3sjt126com
UICollectionView的使用有两种方法,一种是继承UICollectionViewController,这个Controller会自带一个UICollectionView;另外一种是作为一个视图放在普通的UIViewController里面。
个人更喜欢第二种。下面采用第二种方式简单介绍一下UICollectionView的使用。
1.UIViewController实现委托,代码如
- Eos平台java公共逻辑
蕃薯耀
Eos平台java公共逻辑Eos平台java公共逻辑
Eos平台java公共逻辑
>>>>>>>>>>>>>>>>>>>>>>>>>>>>>>>>>>>>>>>
蕃薯耀 2015年6月1日 17:20:4
- SpringMVC4零配置--Web上下文配置【MvcConfig】
hanqunfeng
springmvc4
与SpringSecurity的配置类似,spring同样为我们提供了一个实现类WebMvcConfigurationSupport和一个注解@EnableWebMvc以帮助我们减少bean的声明。
applicationContext-MvcConfig.xml
<!-- 启用注解,并定义组件查找规则 ,mvc层只负责扫描@Controller -->
<
- 解决ie和其他浏览器poi下载excel文件名乱码
jackyrong
Excel
使用poi,做传统的excel导出,然后想在浏览器中,让用户选择另存为,保存用户下载的xls文件,这个时候,可能的是在ie下出现乱码(ie,9,10,11),但在firefox,chrome下没乱码,
因此必须综合判断,编写一个工具类:
/**
*
* @Title: pro
- 挥洒泪水的青春
lampcy
编程生活程序员
2015年2月28日,我辞职了,离开了相处一年的触控,转过身--挥洒掉泪水,毅然来到了兄弟连,背负着许多的不解、质疑——”你一个零基础、脑子又不聪明的人,还敢跨行业,选择Unity3D?“,”真是不自量力••••••“,”真是初生牛犊不怕虎•••••“,••••••我只是淡淡一笑,拎着行李----坐上了通向挥洒泪水的青春之地——兄弟连!
这就是我青春的分割线,不后悔,只会去用泪水浇灌——已经来到
- 稳增长之中国股市两点意见-----严控做空,建立涨跌停版停牌重组机制
nannan408
对于股市,我们国家的监管还是有点拼的,但始终拼不过飞流直下的恐慌,为什么呢?
笔者首先支持股市的监管。对于股市越管越荡的现象,笔者认为首先是做空力量超过了股市自身的升力,并且对于跌停停牌重组的快速反应还没建立好,上市公司对于股价下跌没有很好的利好支撑。
我们来看美国和香港是怎么应对股灾的。美国是靠禁止重要股票做空,在
- 动态设置iframe高度(iframe高度自适应)
Rainbow702
JavaScriptiframecontentDocument高度自适应局部刷新
如果需要对画面中的部分区域作局部刷新,大家可能都会想到使用ajax。
但有些情况下,须使用在页面中嵌入一个iframe来作局部刷新。
对于使用iframe的情况,发现有一个问题,就是iframe中的页面的高度可能会很高,但是外面页面并不会被iframe内部页面给撑开,如下面的结构:
<div id="content">
<div id=&quo
- 用Rapael做图表
tntxia
rap
function drawReport(paper,attr,data){
var width = attr.width;
var height = attr.height;
var max = 0;
&nbs
- HTML5 bootstrap2网页兼容(支持IE10以下)
xiaoluode
html5bootstrap
<!DOCTYPE html>
<html>
<head lang="zh-CN">
<meta charset="UTF-8">
<meta http-equiv="X-UA-Compatible" content="IE=edge">