ConstraintLayout 2.0 新特性 MotionLayout 制作炫酷动画
转自:反魂蝶五分
https://blog.csdn.net/u014290233/article/details/94398813
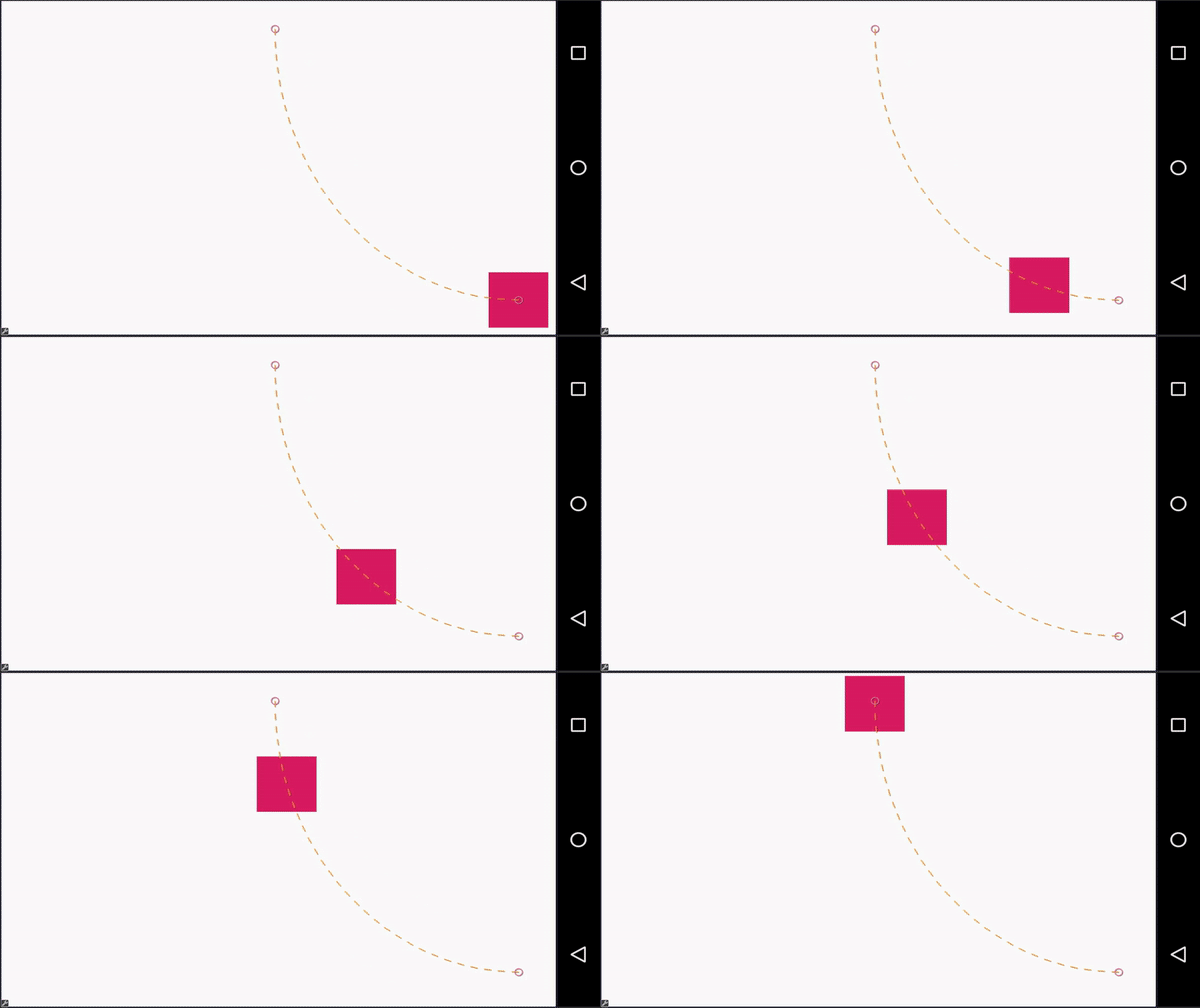
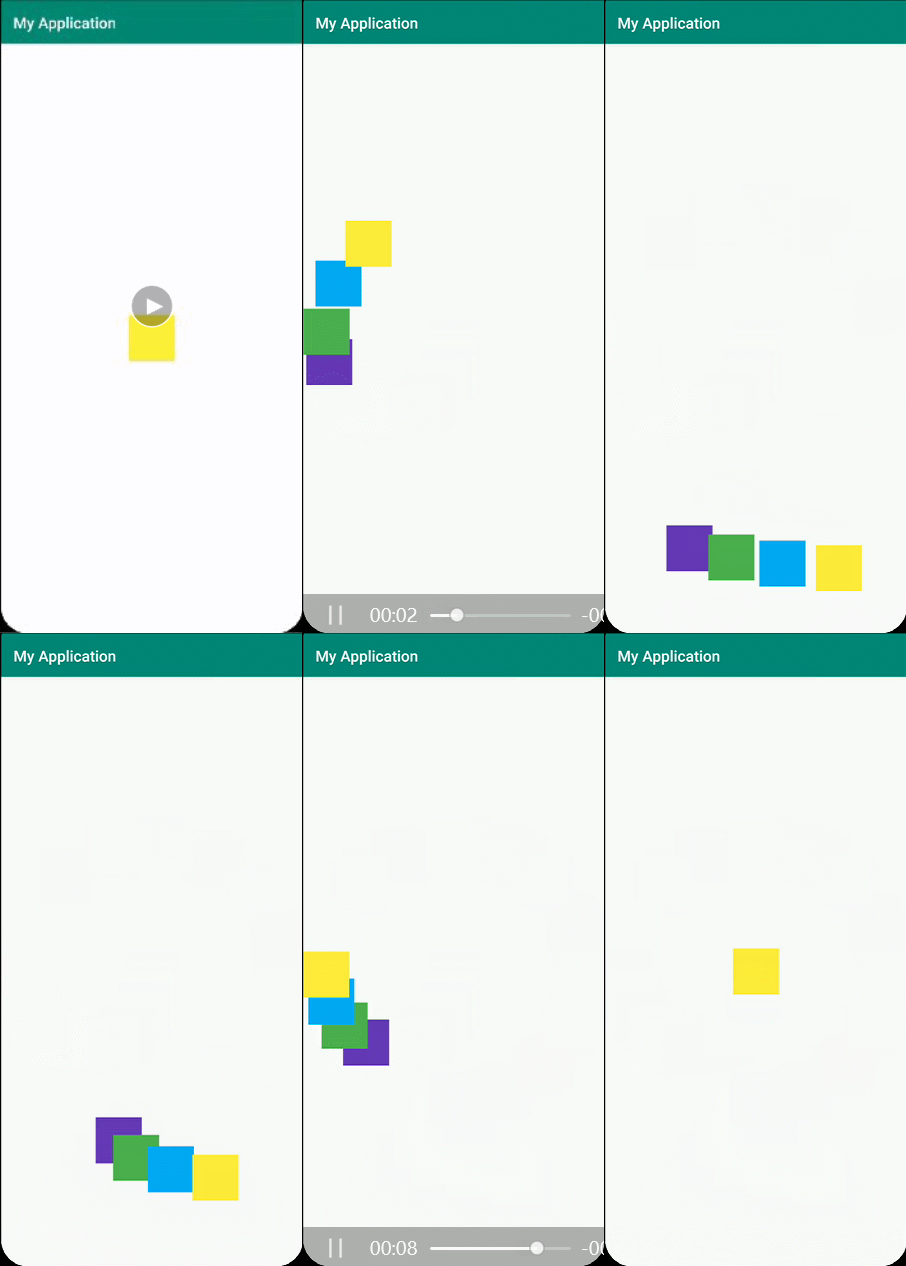
在今年的Google I/O 上 Google 开发者展示了这么一段视频 What’s New in ConstraintLayout (Google I/O’19) (视频在youtube上,需要),截了其中一段做了个gif图
图中动画使用ConstraintLayout 2.0里的MotionLayout完成。
ConstraintLayout 2.0现在还是beta版,不过已经可以实行图中的动画了。
今天可以做一个简易版的动画。
本项目环境配置:
Android Studio 3.4.1
ConstraintLayout 2.0.0-beta1
新建项目,引入ConstraintLayout 库
implementation 'com.android.support.constraint:constraint-layout:2.0.0-beta1'
布局根节点使用MotionLayout替换ConstraintLayout
<?xml version="1.0" encoding="utf-8"?>
<android.support.constraint.motion.MotionLayout xmlns:android="http://schemas.android.com/apk/res/android"
    xmlns:app="http://schemas.android.com/apk/res-auto"
    xmlns:tools="http://schemas.android.com/tools"
    android:id="@+id/activity_motion"
    android:layout_width="match_parent"
    android:layout_height="match_parent"
    android:layout_marginTop="20dp"
    android:layout_marginBottom="20dp"
    app:layoutDescription="@xml/motion_scene"
    app:showPaths="true"
    tools:context=".MainActivity">

    <ImageView
        android:id="@+id/main_image1"
        android:layout_width="60dp"
        android:layout_height="60dp"
        android:background="@color/color1"
        app:layout_constraintBottom_toBottomOf="parent"
        app:layout_constraintLeft_toLeftOf="parent"
        app:layout_constraintRight_toRightOf="parent"
        app:layout_constraintTop_toTopOf="parent"
        tools:ignore="ContentDescription" />

</android.support.constraint.motion.MotionLayout>
xml里引入motion_scene文件:
<?xml version="1.0" encoding="utf-8"?>
<MotionScene xmlns:android="http://schemas.android.com/apk/res/android"
    xmlns:motion="http://schemas.android.com/apk/res-auto">

    <Transition
        motion:constraintSetEnd="@id/end"
        motion:constraintSetStart="@id/start"
        motion:duration="4000"
        motion:motionInterpolator="easeInOut">
        <OnClick
            motion:clickAction="toggle"
            motion:targetId="@id/main_image1" />

            ......
            ......

    </Transition>

    <ConstraintSet android:id="@+id/start">
        <Constraint
            android:id="@+id/main_image1"
            android:layout_width="60dp"
            android:layout_height="60dp"
            motion:drawPath="path"
            motion:layout_constraintBottom_toBottomOf="parent"
            motion:layout_constraintLeft_toLeftOf="parent"
            motion:layout_constraintRight_toRightOf="parent"
            motion:layout_constraintTop_toTopOf="parent"
            motion:pathMotionArc="startVertical" />
    </ConstraintSet>

    <ConstraintSet android:id="@+id/end">
        <Constraint
            android:id="@+id/main_image1"
            android:layout_width="60dp"
            android:layout_height="60dp"
            motion:layout_constraintBottom_toBottomOf="parent"
            motion:layout_constraintLeft_toLeftOf="parent"
            motion:layout_constraintRight_toRightOf="parent" />

    </ConstraintSet>

</MotionScene>
我们先从最简单的入手,定义一个ImageView,两个ConstraintSet 分别定义开始位置和结束位置,然后在Transition处引入:
motion:duration 定义动画时长
motion:motionInterpolator定义缓动动画 (这里推荐一个网站 缓动函数速查表)
http://www.xuanfengge.com/easeing/easeing/
<OnClick
            motion:clickAction="toggle"
            motion:targetId="@id/main_image1" />
这段代码 表示监听main_image1的点击事件,并在开始位置和结束位置之间切换状态
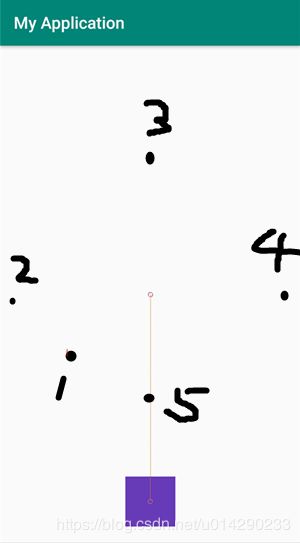
为了使图片旋转一周,我们需要定义5个关键点
先添加第一个关键点
<KeyFrameSet>

            <KeyPosition
                motion:framePosition="20"
                motion:keyPositionType="parentRelative"
                motion:motionTarget="@id/main_image1"
                motion:pathMotionArc="flip"
                motion:percentX="0.25"
                motion:percentY="0.65" />

        </KeyFrameSet>
motion:motionTarget表示关键点应用的控件
motion:framePosition表示这个点处于动画进行到20%时
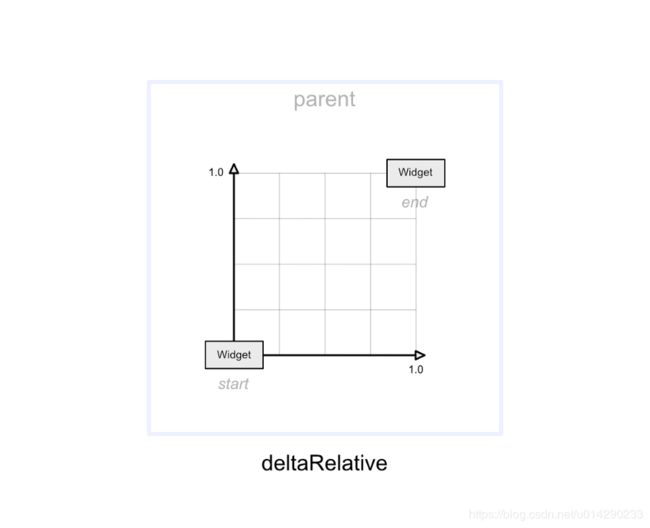
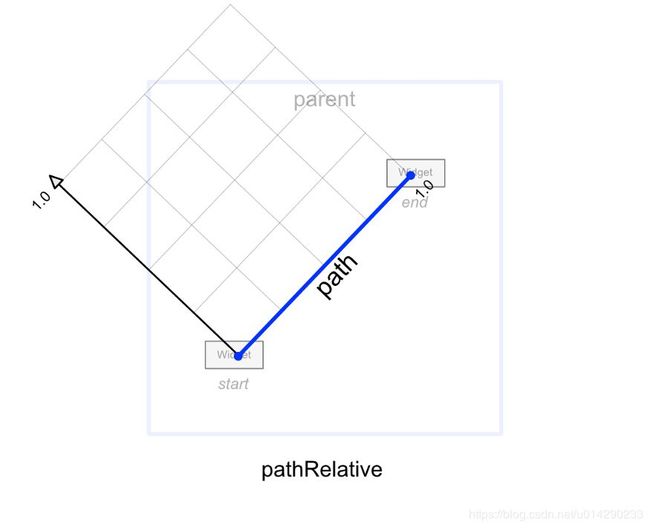
motion:keyPositionType表示使用的坐标系,有三种选择
parentRelative
deltaRelative
pathRelative
motion:percentX motion:percentX 关键点的(x,y)坐标
三种坐标系的区别
parentRelative
这个我使用后发现与引用的博客里不一样,这个是与Android坐标系一致,以父容器左上角为坐标原点,向右为x轴正方向,向下为y轴正方向。
deltaRelative
以控件开始位置和结束位置定义坐标系,开始位置为坐标原点,水平方向为X轴,垂直方向为Y轴。
pathRelative
以起始位置为坐标原点,起始位置到结束位置的path为X轴,垂直方向为Y轴。
motion:pathMotionArc 表示两点之间的path形状,默认是none(线性) ,flip表示翻转当前弧形方向
startHorizontal
startVertical
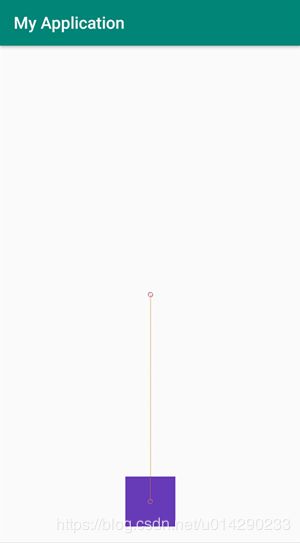
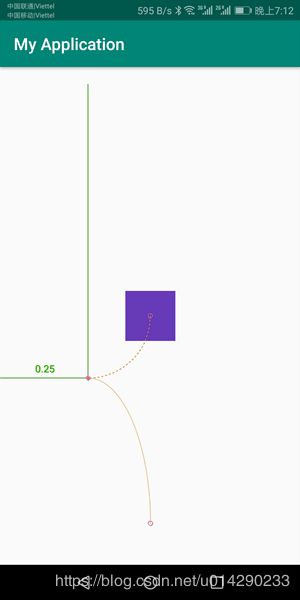
第一个关键点定义完成后运行如图
如此这样,定义完其他的关键点:
<KeyFrameSet>

            <KeyPosition
                motion:framePosition="20"
                motion:keyPositionType="parentRelative"
                motion:motionTarget="@id/main_image1"
                motion:pathMotionArc="flip"
                motion:percentX="0.25"
                motion:percentY="0.65" />
            <KeyPosition
                motion:framePosition="36"
                motion:keyPositionType="parentRelative"
                motion:motionTarget="@id/main_image1"
                motion:pathMotionArc="flip"
                motion:percentX="0"
                motion:percentY="0.5" />
            <KeyPosition
                motion:framePosition="52"
                motion:keyPositionType="parentRelative"
                motion:motionTarget="@id/main_image1"
                motion:pathMotionArc="startHorizontal"
                motion:percentX="0.5"
                motion:percentY="0.25" />
            <KeyPosition
                motion:framePosition="68"
                motion:keyPositionType="parentRelative"
                motion:motionTarget="@id/main_image1"
                motion:pathMotionArc="startVertical"
                motion:percentX="1"
                motion:percentY="0.5" />
            <KeyPosition
                motion:framePosition="84"
                motion:keyPositionType="parentRelative"
                motion:motionTarget="@id/main_image1"
                motion:pathMotionArc="none"
                motion:percentX="0.5"
                motion:percentY="0.75" />

        </KeyFrameSet>
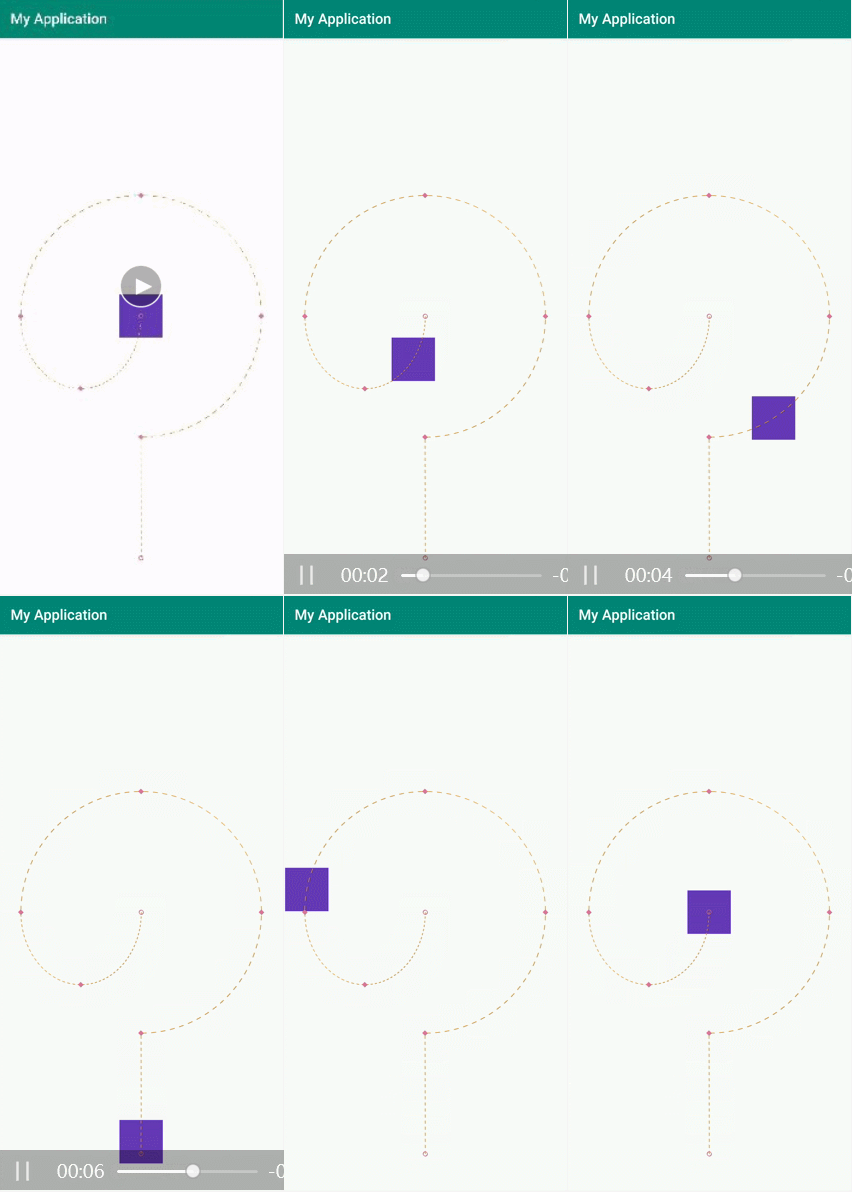
运行效果如下:
添加其他的ImageView,更改最后的显示位置,将ImageView1的关键点复制3份,分别设成其他的ImageView的关键点:
<ConstraintSet android:id="@+id/start">
        <Constraint
            android:id="@+id/main_image1"
            android:layout_width="60dp"
            android:layout_height="60dp"
            motion:drawPath="path"
            motion:layout_constraintBottom_toBottomOf="parent"
            motion:layout_constraintLeft_toLeftOf="parent"
            motion:layout_constraintRight_toRightOf="parent"
            motion:layout_constraintTop_toTopOf="parent"
            motion:pathMotionArc="startVertical" />

        <Constraint
            android:id="@+id/main_image2"
            android:layout_width="60dp"
            android:layout_height="60dp"
            motion:drawPath="path"
            motion:layout_constraintBottom_toBottomOf="parent"
            motion:layout_constraintLeft_toLeftOf="parent"
            motion:layout_constraintRight_toRightOf="parent"
            motion:layout_constraintTop_toTopOf="parent"
            motion:pathMotionArc="startVertical" />
        <Constraint
            android:id="@+id/main_image3"
            android:layout_width="60dp"
            android:layout_height="60dp"
            motion:drawPath="path"
            motion:layout_constraintBottom_toBottomOf="parent"
            motion:layout_constraintLeft_toLeftOf="parent"
            motion:layout_constraintRight_toRightOf="parent"
            motion:layout_constraintTop_toTopOf="parent"
            motion:pathMotionArc="startVertical" />
        <Constraint
            android:id="@+id/main_image4"
            android:layout_width="60dp"
            android:layout_height="60dp"
            motion:drawPath="path"
            motion:layout_constraintBottom_toBottomOf="parent"
            motion:layout_constraintLeft_toLeftOf="parent"
            motion:layout_constraintRight_toRightOf="parent"
            motion:layout_constraintTop_toTopOf="parent"
            motion:pathMotionArc="startVertical" />

    </ConstraintSet>

    <ConstraintSet android:id="@+id/end">
        <Constraint
            android:id="@+id/main_image1"
            android:layout_width="60dp"
            android:layout_height="60dp"
            motion:layout_constraintBottom_toBottomOf="parent"
            motion:layout_constraintLeft_toLeftOf="parent"
            motion:layout_constraintRight_toLeftOf="@id/main_image2"
            motion:layout_constraintVertical_chainStyle="spread_inside" />
        <Constraint
            android:id="@+id/main_image2"
            android:layout_width="60dp"
            android:layout_height="60dp"
            motion:layout_constraintBottom_toBottomOf="parent"
            motion:layout_constraintLeft_toRightOf="@id/main_image1"
            motion:layout_constraintRight_toLeftOf="@id/main_image3" />
        <Constraint
            android:id="@+id/main_image3"
            android:layout_width="60dp"
            android:layout_height="60dp"
            motion:layout_constraintBottom_toBottomOf="parent"
            motion:layout_constraintLeft_toRightOf="@id/main_image2"
            motion:layout_constraintRight_toLeftOf="@id/main_image4" />
        <Constraint
            android:id="@+id/main_image4"
            android:layout_width="60dp"
            android:layout_height="60dp"
            motion:layout_constraintBottom_toBottomOf="parent"
            motion:layout_constraintLeft_toRightOf="@id/main_image3"
            motion:layout_constraintRight_toRightOf="parent" />

    </ConstraintSet>
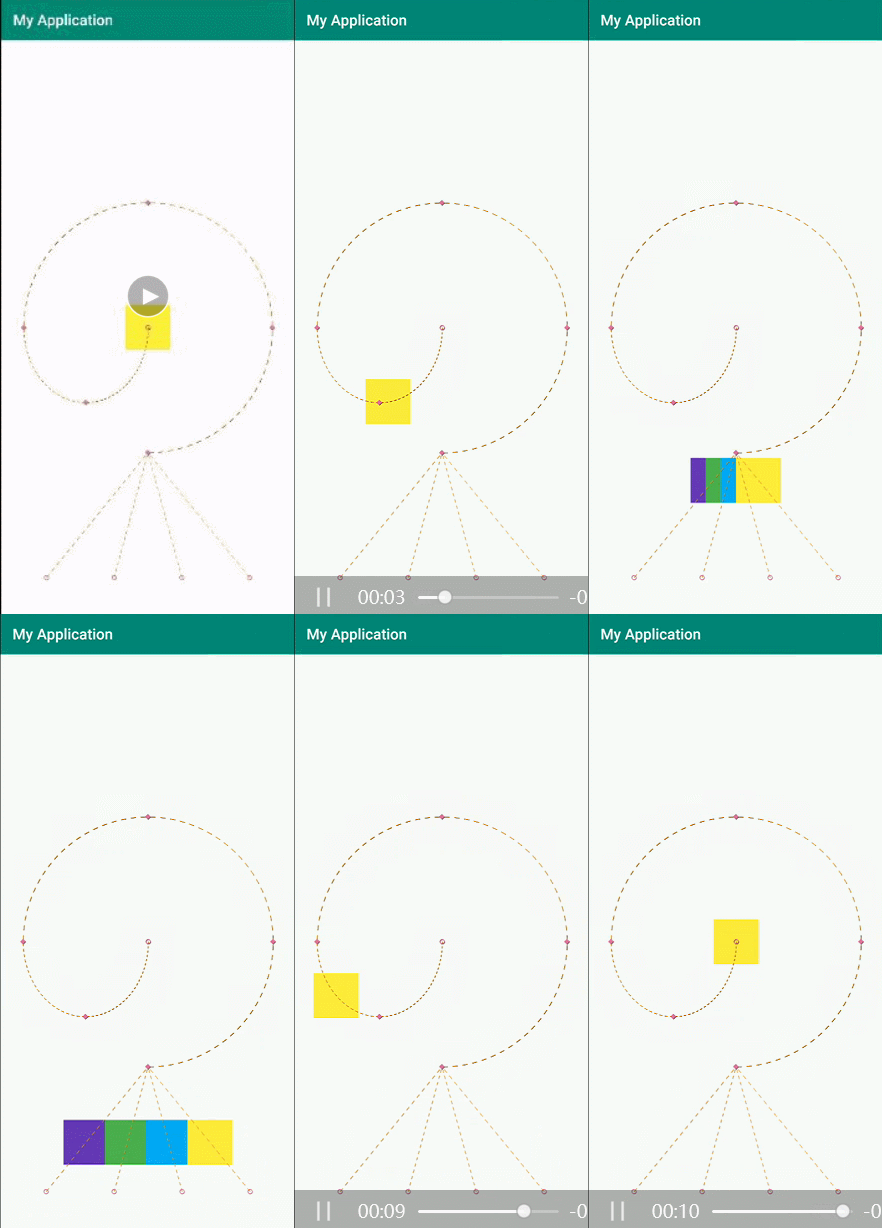
效果如下:
可以看到效果和演示视频差不多了,接下来使4个ImageView依次运动
更改每个ImageView的每个motion:framePosition,使各个关键点产生距离,最终效果如下
代码已上传github github地址
https://github.com/LGD2009/MotionLayoutExample
参考文章:
MotionLayout 基础教程
https://juejin.im/post/5cadc1ba6fb9a0686e40bb82
「译」MotionLayout 介绍 (part II)
https://juejin.im/post/5c1c8f74f265da61682b591c
Defining motion paths in MotionLayout
https://medium.com/google-developers/defining-motion-paths-in-motionlayout-6095b874d37
开发者全社区
关注本公众号领取Android\Python\AI\Java等高级进阶资源
关注后回复“百度”、“阿里”、“腾讯”、“资源”有惊喜
![]()
