docker+nginx部署多个tomcat实现分布式
1、首先要安装docker不会的可以访问:https://blog.csdn.net/qq_40948117/article/details/105142192
2、docker安装nginx
docker pull nginx:latest#拉取最新nginx镜像
如果拉取镜像超时可换取国内仓库:https://blog.csdn.net/qq_40948117/article/details/105213458
docker images #查看是否有nginx的镜像
创建将要挂载的目录
mkdir -p /data/nginx/{conf,conf.d,html,logs}编辑挂载目录的配置文件
vim /data/nginx/conf/nginx.conf
user  nginx;
worker_processes  1;

error_log  /var/log/nginx/error.log warn;
pid        /var/run/nginx.pid;


events {
    worker_connections  1024;
}


http {
    include       /etc/nginx/mime.types;
    default_type  application/octet-stream;

    log_format  main  '$remote_addr - $remote_user [$time_local] "$request" '
                      '$status $body_bytes_sent "$http_referer" '
                      '"$http_user_agent" "$http_x_forwarded_for"';

    access_log  /var/log/nginx/access.log  main;

    sendfile        on;
    #tcp_nopush     on;

    keepalive_timeout  65;

    #gzip  on;

    include /etc/nginx/conf.d/*.conf;
}
vim /data/nginx/conf.d/default.conf
server {
    listen       80;
    server_name  localhost;

    #charset koi8-r;
    #access_log  /var/log/nginx/log/host.access.log  main;

    location / {
        #root   /data/nginx/html;
        root   /usr/share/nginx/html;
        index  index.html index.htm;
        #autoindex  on;
        #try_files $uri /index/index/page.html;
        #try_files $uri /index/map/page.html;
    }

    #error_page  404              /404.html;

    # redirect server error pages to the static page /50x.html
    #
    error_page   500 502 503 504  /50x.html;
    location = /50x.html {
        root   /usr/share/nginx/html;
    }

    # proxy the PHP scripts to Apache listening on 127.0.0.1:80
    #
    #location ~ \.php$ {
    #    proxy_pass   http://127.0.0.1;
    #}

    # pass the PHP scripts to FastCGI server listening on 127.0.0.1:9000
    #
    #location ~ \.php$ {
    #    root           html;
    #    fastcgi_pass   127.0.0.1:9000;
    #    fastcgi_index  index.php;
    #    fastcgi_param  SCRIPT_FILENAME  /scripts$fastcgi_script_name;
    #    include        fastcgi_params;
    #}

    # deny access to .htaccess files, if Apache's document root
    # concurs with nginx's one
    #
    #location ~ /\.ht {
    #    deny  all;
    #}
}
vim /data/nginx/html/index.html
系统时间 启动nginx容器
#将容器中nginx的80端口映射到本地的81端口
docker run --name nginx81 -d -p 81:80 -v /data/nginx/html:/usr/share/nginx/html -v /data/nginx/conf/nginx.conf:/etc/nginx/nginx.conf  -v /data/nginx/logs:/var/log/nginx -v /data/nginx/conf.d:/etc/nginx/conf.d -d nginx:latest
查看启动的容器
docker ps
查看开放的端口号:firewall-cmd --list-ports
如果没有81端口则开辟一个端口
firewall-cmd --zone=public --add-port=端口号/tcp --permanent
重启防火墙:firewall-cmd --reload
去浏览器输入:http://虚拟机ip:81即可看到
3、安装tomcat
docker pull tomcat:latest
输入命令docker images 即可看到
创建相应的tomcat载入文件
mkdir -p ~/tomcat/tomcat1/webapps/ROOT ~/tomcat/tomcat1/conf ~/tomcat/tomcat1/logsmkdir -p ~/tomcat/tomcat2/webapps/ROOT ~/tomcat/tomcat2/conf ~/tomcat/tomcat2/logs
可到根目录查看
ls -l /root
分别在tomcat1和tomcat2/webapps/ROOT下创建index.html
vi /root/tomcat/tomcat1/webapps/ROOT/index.html
内容为:server tomcat1
vi /root/tomcat/tomcat2/webapps/ROOT/index.html
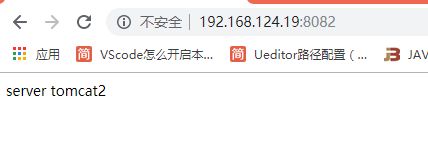
内容为:server tomcat 2
启动两个tomcat模拟多个服务
docker run -d -p 8081:8080 --name tomcat1 -v ~/tomcat/tomcat1/webapps:/usr/local/tomcat/tomcat1/webapps tomcat
docker run -d -p 8082:8080 --name tomcat2 -v ~/tomcat/tomcat2/webapps:/usr/local/tomcat/tomcat2/webapps tomcat
启动查看是否有tomcat的容器启动
docker ps
访问页面:http://ip:8081、http://ip:8082会出现相应的页面
如果出现404可进入容器内看一下是否有一个webapps.dist文件
docker exec -it 容器id bash
ls -l tomcat
如果有把webapps.dist文件重名为webapps,把原有的webapps删除掉,应为原来的webapps可能为空
然后退出exit
然后重启容器:docker restart 容器id即可
4、将tomcat配置进如nginx
查看容器的ip地址
命令:docker exec -it 容器id或者容器名称 ip addr #分别查看tomcat1和tomcat2的ip地址
后面要配置
vim /data/nginx/conf.d/default.conf#nginx代理tomcat集群配置
server {
    listen       80;
    server_name  localhost;

    location / {
         root   /usr/share/nginx/html;
         index  index.html index.htm;
         proxy_set_header X-Real-IP $remote_addr;
         proxy_set_header X-Forward-For $proxy_add_x_forwarded_for;
         proxy_set_header Host $http_host;
         proxy_set_header X-Nginx-Proxy true;
         proxy_pass http://my_tomcat/;#代理的地址
         proxy_redirect off;
         try_files $uri $uri/ /index.html;
    }
        error_page   500 502 503 504  /50x.html;
        location = /50x.html {
             root   /usr/share/nginx/html;
    }
}

    upstream my_tomcat {
        #ip_hash;
        server 172.17.0.5:8080;#tomcat1的ip
        server 172.17.0.4:8080;#tomcat2的ip
    }
重启nginx容器
docker restart nginx81
进入浏览器:http://ip:81,多次刷新可实现tomcat1和tomcat2切换,即nginx的轮询


