LayoutAnimationController实战案例
LayoutAnimationController实战案例
在上篇博客中,我们已经学习了LayoutAnimationController的基本使用,探究了LayoutAnimationController的源码,在这篇博客中,我们会实战几个小案例来加深印象。
上篇博客,LayoutAnimationController源码深入学习
| 案例一 |
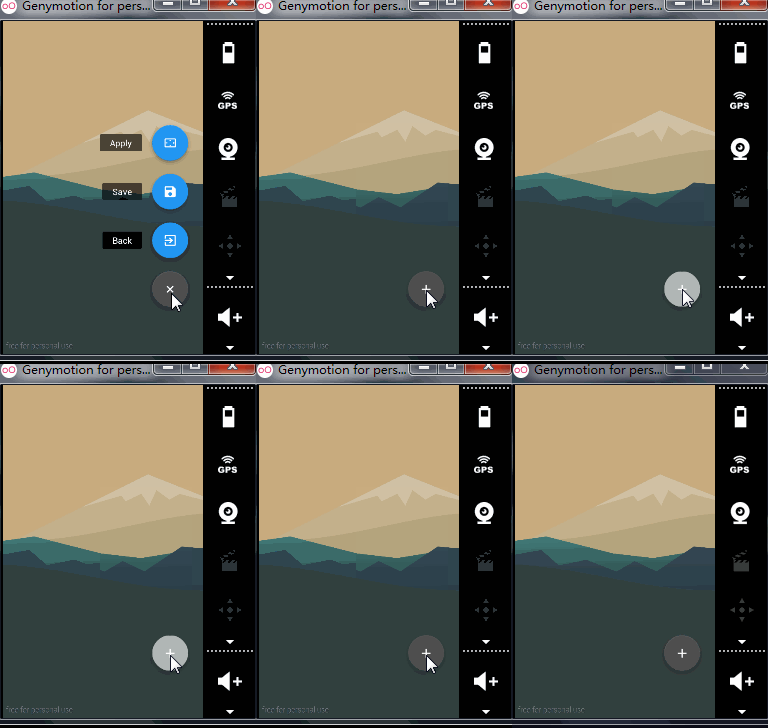
我们先看看效果图:
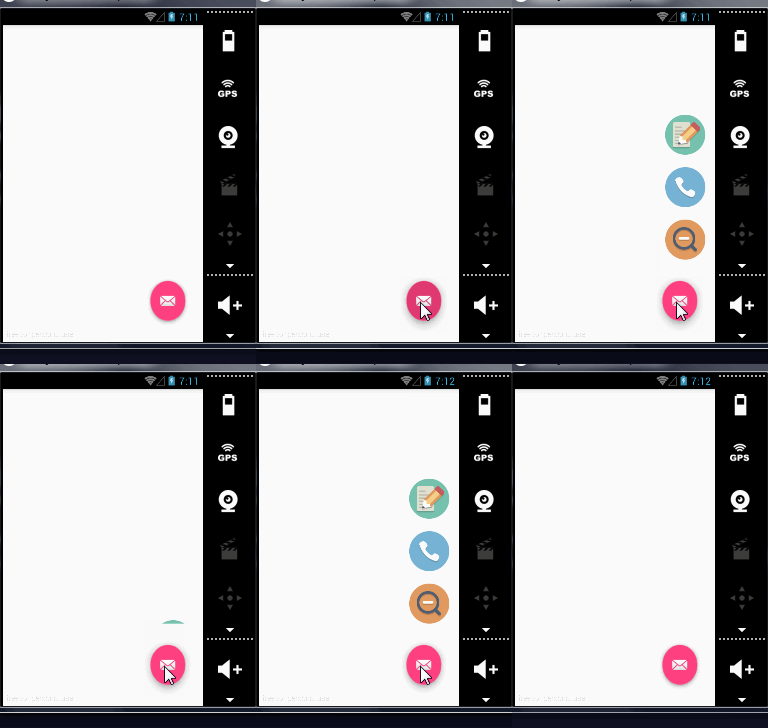
在相托图中,点击按钮,其它按钮从下往上展开,再次点击,从下到上消失。
实现思路:
- 我们先把展开后样式布局好,然后隐藏。
- 当我们点击按钮时,通过LayoutAnimation将各个控件展示出来
- 采用TranslateAnimation进行实现。
看下布局文件展示的效果图:
然后我们开始编写bottom_in和bottom_out动画。
bottom_in的动画效果:
    <translate
        android:fromYDelta="100%p"
        android:toYDelta="0"
        android:duration="200"
        xmlns:android="http://schemas.android.com/apk/res/android">
    translate>
bottom_out的动画效果:
    <translate
        android:fromYDelta="0"
        android:toYDelta="100%p"
        android:duration="200"
        android:fillAfter="true"
        xmlns:android="http://schemas.android.com/apk/res/android">
    translate>
下面我们简要看看代码:
    public class MainActivity extends Activity {
        private LinearLayout linearLayout;
        /**
         * 判断处理view的展开还是关闭
         */
        private boolean tripFlag = false;
        @Override
        protected void onCreate(Bundle savedInstanceState) {
            super.onCreate(savedInstanceState);
            setContentView(R.layout.activity_main);
            linearLayout = (LinearLayout) findViewById(R.id.linear_container);
            findViewById(R.id.iv_rotate).setOnClickListener(new View.OnClickListener() {
                @Override
                public void onClick(View v) {
                    if(tripFlag){
                        //创建一个LayoutAnimationController对象
                        LayoutAnimationController controller =
                                new LayoutAnimationController(AnimationUtils.loadAnimation(getApplication(), R.anim.bottom_out));
                        //设置Order顺序
                        controller.setOrder(LayoutAnimationController.ORDER_REVERSE);
                        //将controller赋值给view group
                        linearLayout.setLayoutAnimation(controller);
                        //开启动画
                        linearLayout.startLayoutAnimation();
                        tripFlag = false;
                    }else{
                        linearLayout.setVisibility(View.VISIBLE);
                        LayoutAnimationController controller =
                                new LayoutAnimationController(AnimationUtils.loadAnimation(getApplication(), R.anim.bottom_in));
                        //controller.setOrder(LayoutAnimationController.ORDER_REVERSE);
                        linearLayout.setLayoutAnimation(controller);
                        linearLayout.startLayoutAnimation();
                        tripFlag = true;
                    }
                }
            });
        }
看看我们的效果图:
| 案例二、ListView的Item飞入效果 |
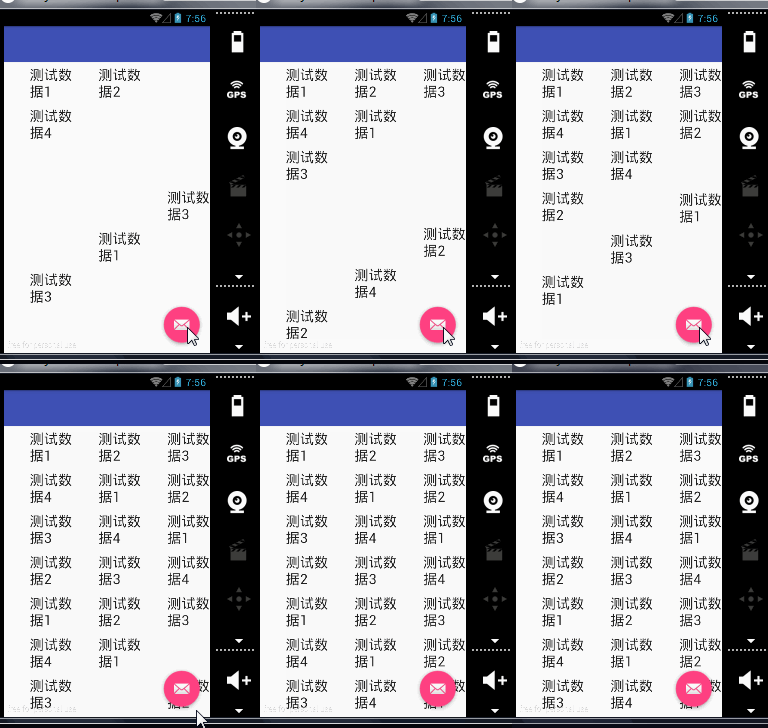
ListView的Item飞入效果,这里运用的也是LayoutAnimation进行实现,从右方飞入也是一个接著Translate动画进行实现的效果。
right_in动画:
    <translate
        android:fromXDelta="100%p"
        android:toXDelta="0"
        android:duration="200"
        xmlns:android="http://schemas.android.com/apk/res/android">
    translate>
代码中使用:
    listView = (ListView) findViewById(R.id.listView);
        listView.setAdapter(new ArrayAdapter(this, android.R.layout.simple_expandable_list_item_1, getData()));
        LayoutAnimationController listViewController = new LayoutAnimationController(AnimationUtils.loadAnimation(getApplication(),R.anim.right_in));
        listView.setLayoutAnimation(listViewController);
        listView.startLayoutAnimation();
效果图:
| 案例三、GridView动画效果 |
在上一篇博客中,我们了解到GridLayoutAnimationController是一个针对GridView之类具有行列性质控件使用的,所以这篇我们就简要的看看他的效果。既然具有行列性质,那么它的运动方向就比较多。可以同时设置多个方向进行操作。
- public static final int DIRECTION_LEFT_TO_RIGHT = 0x0;从左到右
- public static final int DIRECTION_RIGHT_TO_LEFT = 0x1;从右到左
- public static final int DIRECTION_TOP_TO_BOTTOM = 0x0;从上到下
- public static final int DIRECTION_BOTTOM_TO_TOP = 0x2;从下到上
- public static final int DIRECTION_HORIZONTAL_MASK = 0x1;水平方向
- public static final int DIRECTION_VERTICAL_MASK = 0x2;竖直方向
还有一个问题,就是行列优先级问题。通过函数setDirectionPriority()进行设定。
- public static final int PRIORITY_NONE = 0;行列同级,默认值
- public static final int PRIORITY_COLUMN = 1;列优先
- public static final int PRIORITY_ROW = 2;行优先
动画我们还是采用上面的从下到上的动画,只需要看看使用代码即可。
     gridView = (GridView) findViewById(R.id.gridView);
      gridView.setAdapter(new ArrayAdapter(this, android.R.layout.simple_expandable_list_item_1, getData()));
      GridLayoutAnimationController gridLayoutAnimationController = new GridLayoutAnimationController(
                        AnimationUtils.loadAnimation(getApplication(),R.anim.bottom_in));
       //设置动画播放顺序
      gridLayoutAnimationController.setOrder(LayoutAnimationController.ORDER_NORMAL);
        //设置动画播放方向
      gridLayoutAnimationController.setDirection(GridLayoutAnimationController.DIRECTION_LEFT_TO_RIGHT);
        //设置动画播放顺序的优先级
      gridLayoutAnimationController.setDirectionPriority(GridLayoutAnimationController.PRIORITY_NONE);
      gridView.setLayoutAnimation(gridLayoutAnimationController);
gridView.startLayoutAnimation(); | 案例四、自定义LayoutAnimationController |
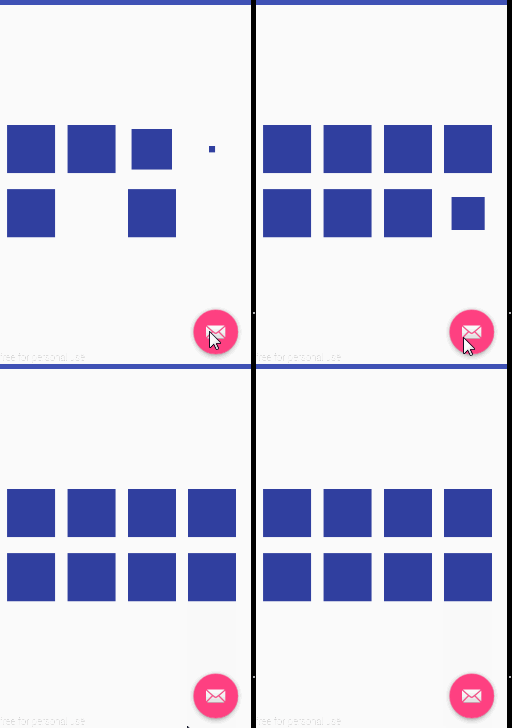
看下我们的目标效果图:
上面的效果图中,使用的是基本的Scale缩放动画,我们先进行定义出来。
    <scale xmlns:android="http://schemas.android.com/apk/res/android"
        android:duration="100"
        android:fromXScale="0"
        android:toXScale="1"
        android:fromYScale="0"
        android:toYScale="1"
        android:fillAfter="true"
        android:pivotX="50%"
        android:pivotY="50%"
        >

    scale>
接着就是我们的自定义LayoutAnimationController。
public class MyLayoutAnimationController extends LayoutAnimationController {
public static final int ORDER_CUSTOM  = 6;

public MyLayoutAnimationController(Animation anim) {
    super(anim);
}

public MyLayoutAnimationController(Animation anim, float delay) {
    super(anim, delay);
}

public MyLayoutAnimationController(Context context, AttributeSet attrs) {
    super(context, attrs);
}


protected int getTransformedIndex(AnimationParameters params) {
    if(getOrder() == ORDER_CUSTOM){//view顺序以1开头
        if(params.index == 2)return 4;
        else if(params.index == 3)return 5;
        else if(params.index == 4)return 2;
        else if(params.index == 5)return 6;
        else if(params.index == 6)return 3;
        else return params.index;
    }else{
        return super.getTransformedIndex(params);
    }
}
}
我们通过重写getTransformedIndex()方法改变view展现的顺序,有点小问题,但是主要讲解思路吧!
实例代码下载
作者:mr_dsw 欢迎转载,与人分享是进步的源泉!
转载请保留地址:http://blog.csdn.net/mr_dsw


