Python之OpenGL笔记(33):透视投影画六角星
一、目的
1、摄像机应用,透视投影画六角星;
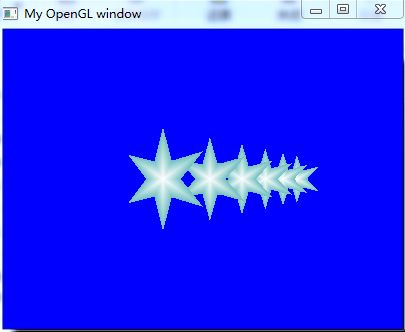
二、程序运行结果
三、透视投影
吴亚峰《OpenGL ES 3.x游戏开发》(上卷)内容
现实世界中人眼观察物体时会有“近大远小”的效果,因此,要想开发出更加真实的场景,仅使用正交投影是远远不够的,这时可以采用透视投影。透视投影的投影线是不平行的,他们相交于视点。通过透视投影,可以产生现实世界中“近大远小”的效果,大部分 3D 游戏采用的都是透视投影。
透视投影中,视景体为锥台形区域,如图 5-7 所示。

从图 5-7 中可以看出,透视投影的投影线互不平行,都相交于视点。因此,同样尺寸的物体,近处的投影出来大,远处的投影出来小,从而产生了现实世界中“近大远小”的效果,图 5-8 更清楚地说明了这个问题。

本案例的场景是由一组距离观察点越来越远的相同尺寸的六角星构成。由于采用的投影方式为透视投影,因此,最终显示在屏幕上的多个六角星近大远小。
四、源代码
"""
程序名称:GL_frustumM.py
编程: dalong10
功能: 透视投影的实现
参考资料: 《OpenGL ES 3.x游戏开发》(上卷)吴亚峰
"""
import myGL_Funcs        #Common OpenGL utilities,see myGL_Funcs.py
import glfw
from OpenGL.GL import *
import numpy
import numpy as np
import pyrr
from PIL import Image

StarVS = """
# version 330
layout(location = 0) in vec3 a_position; //顶点位置
layout(location = 1) in vec3 a_color;   //顶点颜色
uniform mat4 rotation;                  //总变换矩阵
out vec3 v_color;                       //用于传递给片元着色器的变量
void main()
{
    gl_Position = rotation * vec4(a_position, 1.0);  //根据总变换矩阵计算此次绘制此顶点位置
    v_color = a_color;          //将接收的颜色传递给片元着色器
}
"""

StarFS = """
# version 330
in vec3 v_color;      //接收从顶点着色器过来的参数
out vec4 out_color;   //输出到的片元颜色
void main()
{
    out_color = vec4(v_color, 1.0f); //给此片元颜色值
}
"""

class SixPointedStar:
    def initVertexData(self,R,r,z):  # 初始化顶点数据的initVertexData方法
        self.vertexs   = np.array([], np.float32)  # 位置FloatArray(numPoint * 3)
        self.colorArray = np.array([], np.float32)    # 颜色FloatArray(numPoint * 4)
        # 把矩形平铺在一个平面上
        PI = np.pi
        tempAngle=int(360/6)
        count=0
        for angle in range(0,360,tempAngle):  # 循环生成构成六角形各三角形的顶点坐标
            x1=0.0  #第一个三角形,三个点
            y1=0.0
            z1=z
            x2=R*np.cos(PI*angle/180)
            y2=R*np.sin(PI*angle/180)
            z2=z
            x3=r*np.cos(PI*(angle+tempAngle/2)/180)
            y3=r*np.sin(PI*(angle+tempAngle/2)/180)
            z3=z

            x4=0
            y4=0
            z4=z
            x5=r*np.cos(PI*(angle+tempAngle/2)/180)
            y5=r*np.sin(PI*(angle+tempAngle/2)/180)
            z5=z
            x6=R*np.cos(PI*(angle+tempAngle)/180)
            y6=R*np.sin(PI*(angle+tempAngle)/180)
            z6=z

            self.vertexs=np.hstack((self.vertexs, np.array([x1,y1,z1], np.float32) ))  #每个顶点xyz三个坐标,6个顶点
            self.vertexs=np.hstack((self.vertexs, np.array([1,1,1], np.float32) ))    #中心点为白色
            self.vertexs=np.hstack((self.vertexs, np.array([x2,y2,z2], np.float32) ))
            self.vertexs=np.hstack((self.vertexs, np.array([0.45,0.75,0.75], np.float32) ))    #边上的点为淡蓝色
            self.vertexs=np.hstack((self.vertexs, np.array([x3,y3,z3], np.float32) ))
            self.vertexs=np.hstack((self.vertexs, np.array([0.45,0.75,0.75], np.float32) ))    #边上的点为淡蓝色

            self.vertexs=np.hstack((self.vertexs, np.array([x4,y4,z4], np.float32) ))
            self.vertexs=np.hstack((self.vertexs, np.array([1,1,1], np.float32) ))    #中心点为白色
            self.vertexs=np.hstack((self.vertexs, np.array([x5,y5,z5], np.float32) ))
            self.vertexs=np.hstack((self.vertexs, np.array([0.45,0.75,0.75], np.float32) ))    #边上的点为淡蓝色
            self.vertexs=np.hstack((self.vertexs, np.array([x6,y6,z6], np.float32) ))
            self.vertexs=np.hstack((self.vertexs, np.array([0.45,0.75,0.75], np.float32) ))    #边上的点为淡蓝色

    def __init__(self,R,r,z):
        self.R= R
        self.r= r
        self.z = z
        self.initVertexData(R,r,z)
        # load shaders
        self.program = myGL_Funcs.loadShaders(StarVS, StarFS)
        #print('ok1')
        glUseProgram(self.program)
        self.vertIndex = glGetAttribLocation(self.program, b"a_position")
        self.colorIndex = glGetAttribLocation(self.program, b"a_color")
                    # set up vertex array object (VAO)
        self.vao = glGenVertexArrays(1)
        glBindVertexArray(self.vao)
        #  Step2: 创建并绑定VBO 对象 传送数据
        #self.vertexs= vertices
        vertexData = numpy.array(self.vertexs, numpy.float32)
        self.vertexBuffer = glGenBuffers(1)
        glBindBuffer(GL_ARRAY_BUFFER, self.vertexBuffer)
        glBufferData(GL_ARRAY_BUFFER, 4*len(vertexData), vertexData, GL_STATIC_DRAW)
                    # enable arrays
        # 顶点位置属性
        glEnableVertexAttribArray(self.vertIndex)
        glVertexAttribPointer(self.vertIndex, 3, GL_FLOAT, GL_FALSE, vertexData.itemsize * 6, ctypes.c_void_p(0))
        # 顶点颜色属性
        glEnableVertexAttribArray(self.colorIndex)
        glVertexAttribPointer(self.colorIndex, 3, GL_FLOAT, GL_FALSE, vertexData.itemsize * 6, ctypes.c_void_p(12))
        # unbind VAO
        glBindVertexArray(0)
        glBindBuffer(GL_ARRAY_BUFFER, 0)

    def render(self, model):
        # use shader
        glUseProgram(self.program)
        # set modelview matrix
        glUniformMatrix4fv(glGetUniformLocation(self.program, 'rotation'),
                          1, GL_FALSE, model)
        # bind VAO
        glBindVertexArray(self.vao)
        # draw
        #print(len(self.vertexs))
        glDrawArrays(GL_TRIANGLES,0,len(self.vertexs) )
        # unbind VAO
        glBindVertexArray(0)

# glfw callback functions
def window_resize(window, width, height):
    glViewport(0, 0, width, height)


if __name__ == '__main__':
    import sys
    import glfw
    import OpenGL.GL as gl
    cameraPos=np.array([2.0, 0.0, 3])      # 眼睛的位置(默认z轴的正方向)
    cameraFront=np.array([0.0, 0.0, 0.0])  # 瞄准方向的参考点(默认在坐标原点)
    cameraUp=np.array([0.0, 1.0, 0.0])     # 定义对观察者而言的上方(默认y轴的正方向)

    # Initialize the library
    if not glfw.init():
        sys.exit()
    # Create a windowed mode window and its OpenGL context
    window = glfw.create_window(400, 300, "My OpenGL window", None, None)
    if not window:
        glfw.terminate()
        sys.exit()
    # set window's position
    glfw.set_window_pos(window, 100, 100)
    # set the callback function for window resize
    glfw.set_window_size_callback(window, window_resize)
    # make the context current
    glfw.make_context_current(window)

    glClearColor(0, 0.1, 0.1, 1)
    glEnable(GL_DEPTH_TEST)
    glEnable(GL_BLEND)
    glBlendFunc(GL_SRC_ALPHA, GL_ONE_MINUS_SRC_ALPHA)

    scale1 = pyrr.matrix44.create_from_scale(pyrr.Vector3([1, 1, 1]))
    cube1 = pyrr.matrix44.create_from_translation(pyrr.Vector3([-0.2, 0, 0]))
    board= [None]*6     #创建对象数组
    for i in range(6):
        board[i]=SixPointedStar(0.2,0.5,-1*i)
    # the main application loop
    while not glfw.window_should_close(window):
        width, height = glfw.get_framebuffer_size(window)
        ratio = width / float(height)
        currentFrame =  1.0*glfw.get_time()
        glfw.poll_events()
        gl.glViewport(0, 0, width, height)
        gl.glClear(gl.GL_COLOR_BUFFER_BIT | gl.GL_DEPTH_BUFFER_BIT)
        gl.glMatrixMode(gl.GL_PROJECTION)
        gl.glLoadIdentity()
        gl.glOrtho(-ratio, ratio, -1, 1, 1, -1)
        gl.glMatrixMode(gl.GL_MODELVIEW)
        gl.glLoadIdentity()
        gl.glClearColor(0.0,0.0,4.0,0.0)
        pMatrix = pyrr.matrix44.create_perspective_projection_from_bounds(-ratio*0.4, ratio*0.4,  -0.4, 0.4,1,50,None)
        # modelview matrix
        mvMatrix = pyrr.matrix44.create_look_at(cameraPos, cameraFront, cameraUp,None)
        for i in range(6):
            model1 = pyrr.matrix44.multiply(scale1, cube1)
            model2 = pyrr.matrix44.multiply(pMatrix,model1)
            model3 = pyrr.matrix44.multiply(mvMatrix,model2)
            board[i].render( model3)

        glfw.swap_buffers(window)

    # terminate glfw, free up allocated resources
    glfw.terminate()
五、参考资料
1、大龙10的简书:https://www.jianshu.com/p/49dec482a291
2、吴亚峰《OpenGL ES 3.x游戏开发》(上卷)