1.获取hping的源码:
https://github.com/antirez/hping/archive/master.zip
unzip master
cd hping-master
yum install libpcap-devel
./configure
make
make install
报错:
build byteorder.c...
./configure: line 19: cc: command not found
解决办法:
yum install -y gcc gcc-c++
hping依赖libpcap-devel,所以需要先进行安装,make过程中还可能出现以下两个问题:
出现问题:
libpcap_stuff.c:19:21: error: net/bpf.h: No such file or directory
make: *** [libpcap_stuff.o] Error 1
解决办法:ln -sf /usr/include/pcap-bpf.h /usr/include/net/bpf.h
出现问题:
al/lib -lpcap -ltcl -lm -lpthread
/usr/bin/ld: cannot find -ltcl
collect2: ld returned 1 exit status
make: *** [hping3] Error 1
解决办法:yum -y install tcl tcl-devel
make报错:
main.o: In function `main':
/root/hping-master/main.c:190: undefined reference to `hping_script'
collect2: ld returned 1 exit status
make: *** [hping3] Error 1
解决办法:
make clean,重新./configure
然后输入:
make strip
make install
验证是否安装正确
# hping3 -v
hping version 3.0.0-alpha-1 ($Id: release.h,v 1.4 2004/04/09 23:38:56 antirez Exp $)
This binary is TCL scripting capable
如果防火墙或运营商屏蔽ICMP的话,hping可以对指定目标端口发起TCP探测,常用的参数:
-p 端口号
-S 发送TCP的SYN包
-A 发送TCP的ACK包
-a 伪造源IP
--flood 尽可能快的发送,慎用
输入示例:
hping 192.168.3.13 -p 80 -S
hping 192.168.3.13 -p 80 -A
hping 192.168.3.13 -p 80 -S -a 192.168.3.13
# hping3 -c 100000 -d 120 -S -w 64 -p 80 --flood --rand-source 192.168.3.13
该命令中使用的语法:
1. hping3 = 应用程序二进制代码的名称。
2. -c 100000 = 发送的数据包的数量。
3. -d 120 = 发送到目标机器的每个数据包的大小。
4. -S = 只发送SYN数据包。
5. -w 64 = TCP窗口大小。
6. -p 80 = 目的地端口(80是WEB端口)。你在这里可以使用任何端口。
7. --flood = 尽可能快地发送数据包,不需要考虑显示入站回复。洪水攻击模式。
8. --rand-source = 使用随机性的源头IP地址。你还可以使用-a或–spoof来隐藏主机名。详见文章末尾的参考手册页。
9. 192.168.3.13 = 目的地IP地址或目标机器的IP地址。你在这里还可以使用网站名称。在本文中解析至127.0.0.1(已在/etc/hosts文件中输入)。
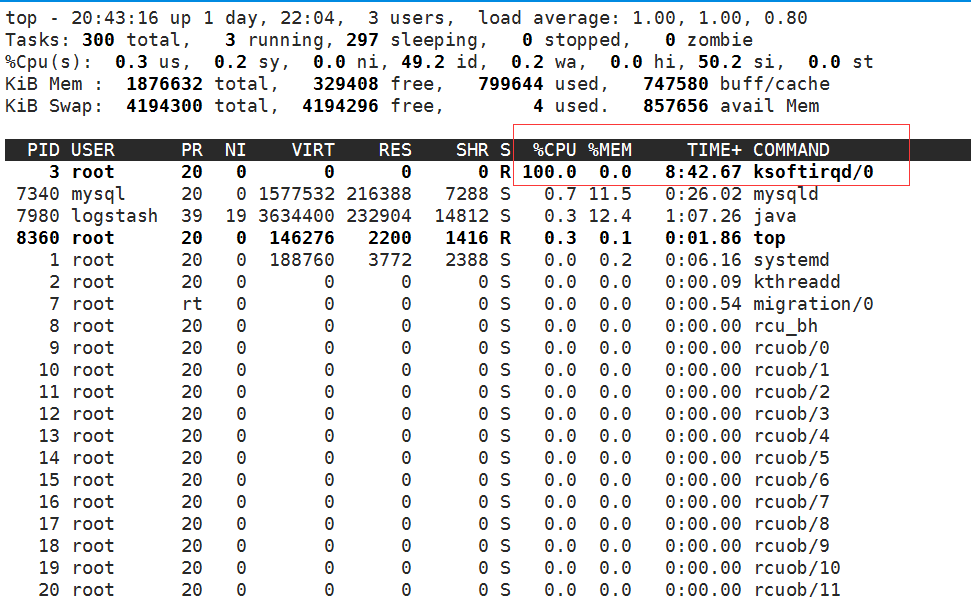
被测试的机器效果:
