【老脸教你做游戏】动画类
本文不允许任何形式的转载!
强行安利:关注我的公众号,并输入“源代码2”,即可获得本文涉及到的示例代码。
![]()
阅读提示
本系列文章不适合以下人群阅读,如果你无意点开此文,请对号入座,以免浪费你宝贵的时间。
- 想要学习利用游戏引擎开发游戏的朋友。本文不会涉及任何第三方游戏引擎。
- 不具备面向对象编程经验的朋友。本文的语言主要是Javascript(ECMA 2016),如果你不具备JS编程经验倒也无妨,但没有面向对象程序语言经验就不好办了。
上期作业
没什么特别的,只是用封装一下drawImage而已:
import Figure from "./Figure.js";

export default class FigureImage extends Figure {
    constructor(p) {
        p = p || {};
        super(p);
        this.img = p['image'];
        this.srcLeft = p['srcLeft'] || 0;
        this.srcTop = p['srcTop'] || 0;
        this.srcWidth = p['srcWidth'];
        this.srcHeight = p['srcHeight'];
    }

    drawSelf(ctx) {
        if (!this.img) return; // 如果没有设置Image就不绘制
        if (this.srcWidth == undefined || this.srcHeight == undefined) {
            // 如果没有设置源图片剪切大小和位置,就默认绘制整张图片
            ctx.drawImage(this.img, 0, 0, this.width, this.height);
        } else {
            ctx.drawImage(this.img,
                this.srcLeft, this.srcTop, this.srcWidth, this.srcHeight,
                0, 0, this.width, this.height);
        }
    }
}
什么是动画,JS里怎么实现动画
本文中的代码承接上一篇文章,如果没看过的请先阅读
人眼有一种“视觉暂留”的特点,就是说我们看到的的景象会在大脑里停溜很短一段时间,所谓动画就是将一张张静态的图片逐一展示在我们眼前,利用人眼的这个特性,只要这些图片替换得够快,那我们会误以为整个景象是连续流畅的,这就是动画。
专家指出,如果一秒钟内能够展示60张图片,人眼的感觉就是流畅的,而低于这个值,就会感觉“卡”。换成专业术语,我们称这每一张图片为“帧”,英文单词是Frame,而每秒展示帧的数量翻译成英文就是:Frame Per Second,取第一个大写字母得到缩写:FPS,对咯,就是我们说的FPS值,一旦FPS=60就说明这个动画已经足够流畅了,换算一下,每帧的间隔时间不能够超过 1000/60 毫秒,即16毫秒。
那JS里怎么实现动画效果呢。首先我们认为canvas就是一个荧幕,我们要不断替换这个荧幕上的图片且间隔时间不能超过16毫秒来达到动画效果,换句话说就是不停的清空canvas然后再进行绘制:
import Graph from "./example/Graph";

let graph = new Graph(wx.createCanvas());

while(true){
    pause16MS(); // 暂停16毫秒
    doSomething(); // 做一些操作,比如更改坐标啊,颜色什么的
    graph.refresh(); // 重新刷新
}
上面这种代码写法是不可取的!JS提供有两个方法,专门用于定时循环:
- setInterval(repeatFunctionHandler,timeout)
- setTimeout(repeatFunctionHandler,timeout)
两个方法差不多,我们就用setInterval来实现动画:
import Graph from "./example/Graph";

let graph = new Graph(wx.createCanvas());

// 这是一个循环方法,每个16毫秒执行一次
function repeat(){
    // 在刷新绘制前做一些操作
    graph.refresh(); // 重新刷新
}

setInterval(repeat,16); // 每个16毫秒执行一次repeat方法
第一篇文章已经告诉大家如何将绘制对象化,这里我们继续使用之前代码。我给一个case,实现一个动画:让一个矩形从(0,0)向右移动到canvas版边,接触到版边后向左移动,接触到canvas的左侧版边后又向右移动。
那我们就可以在repeat方法里不停的更改矩形的坐标,这样就可以实现动画效果了:
import Graph from "./example/Graph";
import Rectangle from "./example/Rectangle";

let graph = new Graph(wx.createCanvas());
let rect = new Rectangle({
    left: 0, top: 0, width: 100, height: 100, color: 'red'
});
graph.addChild(rect);
let deltaX = 1;

// 这是一个循环方法,每隔16毫秒执行一次
function repeat() {
    // 接触到版边就反向移动
    if (rect.left < 0 || (rect.left + rect.width) > graph.width) {
        deltaX *= -1;
    }
    rect.left += deltaX;
    graph.refresh(); // 重新刷新
}

setInterval(repeat, 16); // 每隔16毫秒执行一次repeat方法
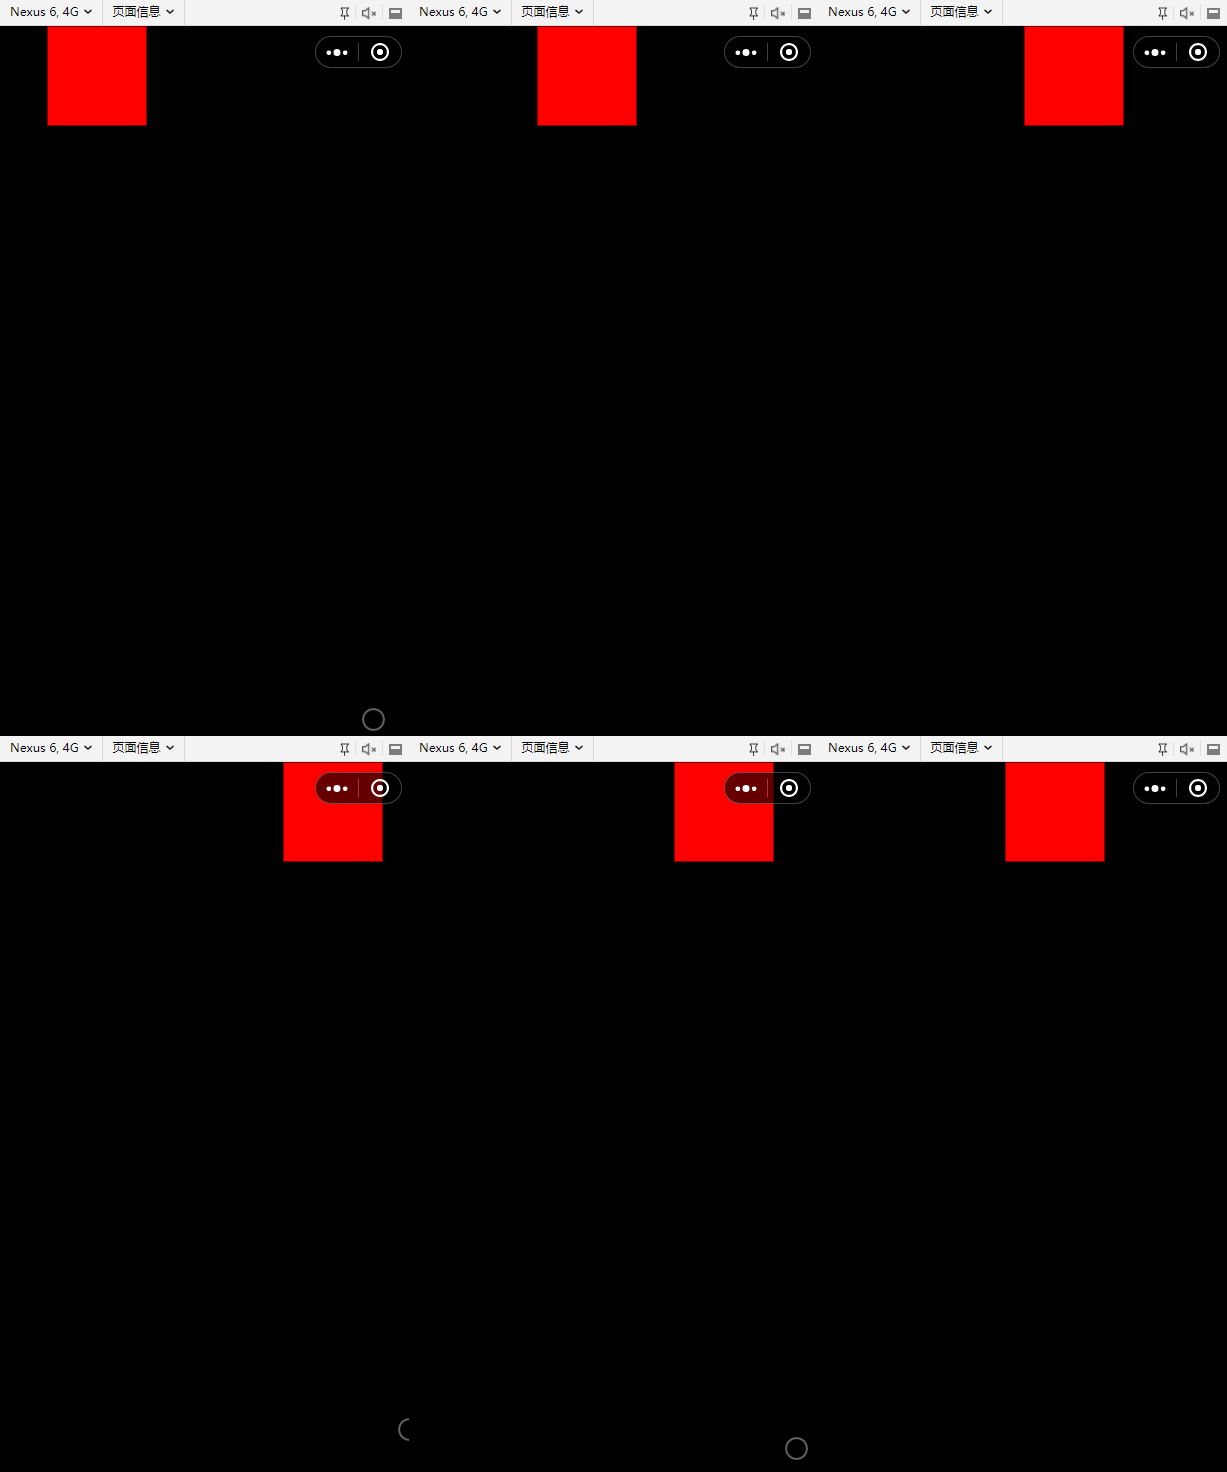
这是输出结果:(gif图片帧数不够,看上去不流畅)

感觉还不错,如果你真的用上面代码运行在客户端,特别是移动设备上,你会发现其实不是想象中那么流畅,这里有人会疑惑为什么,已经保证16毫秒绘制一次了还会卡吗。
setInterval方法是早期JS上做动画会使用的方法,虽然间隔时间保证了FPS为60,但是这个方法和我们设备的真实刷新时间是不一致的,就是说界面在第t时间点开始刷新,而我的代码却没在t时间点绘制。另外,如果我的界面被隐藏,setInterval还会继续工作。
所以发展都后来,JS提供了一个叫做requestAnimationFrame的方法,这个方法的参数是一个方法句柄,其用意是说:注册一个方法,而这个方法会在device刷新到来的时候执行,但是,requestAnimationFrame每次执行完注册的方法后就会将这个方法从注册的方法列表中剔除,即下一次设备刷新到来的时候就不会再执行这个方法了。
既然可以注册一个方法,那也可以取消这个注册方法。requestAnimationFrame会返回一个ID,我们可以调用cancelAnimationFrame方法并传入这个ID,告诉它撤销这个ID对应的方法。
这里有个问题。我在做Facebook Instant Game的时候,发现FB SDK包装了requestAnimationFrame方法,且这个包装过后的方法是不会返回ID的,所以也就无法调用cancelAnimationFrame,问过一些人这个问题,都说不知道不关心,因为他们一旦进入这个循环后就不会停下来,所以我也学着不再使用cancelAnimationFrame了。
如果我们用setInterval来模拟一下这个requestAnimationFrame和canelAnimationFrame,代码应该类似这样的:
let handlerArray = []; // 记录注册方法的数组
let handlerId = 0; // 自增长的id

setInterval(onDeviceRefresh, 16); // 模拟没16毫秒设备刷新一次

// 设备刷新的时候就将注册方法都执行一边并清空数组
function onDeviceRefresh() {
    for (let i = 0; i < handlerArray.length; i++) {
        handlerArray[i].handler(); // 执行注册方法
    }
    handlerArray.length = 0;// 清空
    handlerId = 0; // 还原id
}

function requestAnimationFrame(handler) {
    let id = handler++; // id 自增长
    handlerArray.push({id: id, handler: handler});
    return id;
}

function cancelAnimationFrame(id) {
    for (let i = 0; i < handlerArray.length; i++) {
        let handlerEntry = handlerArray[i];
        if(handlerEntry.id == id){
            handlerArray.splice(i,1);
            return;
        }
    }
}
我们把刚才的代码改为用requesAnimationRequest来实现动画:
import Graph from "./example/Graph";
import Rectangle from "./example/Rectangle";

let graph = new Graph(wx.createCanvas());
// 添加一个矩形
let rect = new Rectangle({
    left: 0, top: 0, width: 100, height: 100, color: 'red'
});
graph.addChild(rect);
let deltaX = 1; // 这是x坐标移动的增量大小

// 这是一个循环方法,每隔16毫秒执行一次
function repeat() {
    // 基础到版边就反向移动
    if (rect.left < 0 || (rect.left + rect.width) > graph.width) {
        deltaX *= -1;
    }
    rect.left += deltaX; // 增加或者减少x的坐标值
    graph.refresh(); // 重新刷新
    requestAnimationFrame(repeat); // 一旦刷新即将到来就执行repeat方法,且这是一个递归调用会不行执行repeat方法
}
repeat();
看一下repeat方法:
在执行graph.refresh之后我们调用了requestAnimationFrame将repeat方法注册了进去,那一旦刷新到来,就会执行repeat,这样就形成了 :
执行repeat -> 调用requestAnimationFrame将repeat注册到刷新到来时执行的方法列表中 -> 刷新到来 -> 执行repeat
这么一个递归过程。
对象化requestAnimationFrame
还是那句老话“万物皆可对象”。
我们知道了如果使用reqeustAnimationFrame来实现定时循环,但每次这么写实在是麻烦,所以我决定用一个类来封装它,而这个类会具有启动、停止等方法,便于调用。
那我们这么设计它,命名为AnimationFrame(这个命名有问题,但仅是个例子不要在意太多细节)。这个类对外应该具有start 开始执行,和stop 停止执行的方法。
并且我们应该要在它停止后允许执行回调代码,所以我们还要设计一个属性,叫做stopCallback,当我们stop后这个stopCallback会被执行:
export default class AnimationFrame {
    constructor(p) {
        p = p || {};
        this.repeat = p['repeat']; // 需要执行的循环方法句柄
        this.stopCallback = p['stopCallback']; // 需要执行的回调方法句柄
        this.running = false; // 属性,查看该对象是否在运行
        this.requestStop = false; // 实际上是一个flag,循环执行方法中如果发现该属性为true,就停止执行
        this.repeatCount = 0; // 循环执行的次数。不要小看它,这个可以让对象模拟出状态
    }

    _run(source) {
        if (source.requestStop) return;
        if (source.repeat) {
            requestAnimationFrame(function () {
                source._run(source);
            });
            source.repeat(source.repeatCount++);
        }
    }

    start() {
        this.repeatCount = 0;
        this.running = true;
        this.requestStop = false;
        this._run(this);
    }

    stop() {
        this.requestStop = true;
        this.running = false;
        if (this.stopCallback) {
            this.stopCallback();
        }
    }
}
简单易懂,我就不啰嗦了。注意,循环执行方法在执行的时候给出了一个参数repeatCount进去,这个在后面会有用。
那我们把一开始那个左右弹的矩形动画改一改,让这个矩形碰撞到最右侧版边的时候就停止:
import Graph from "./example/Graph";
import Rectangle from "./example/Rectangle";
import AnimationFrame from "./example/AnimationFrame";

let graph = new Graph(wx.createCanvas());
// 添加一个矩形
let rect = new Rectangle({
    left: 0, top: 0, width: 100, height: 100, color: 'red'
});
graph.addChild(rect);
let deltaX = 1; // 这是x坐标移动的增量大小

let animationFrame = new AnimationFrame();
animationFrame.repeat = function (refreshCount) {
    if((rect.left + rect.width) > graph.width){
        animationFrame.stop(); // 超过右侧版边就停止
    }

    if (rect.left < 0) {
        deltaX *= -1;
    }
    rect.left += deltaX; // 增加或者减少x的坐标值
    graph.refresh(); // 重新刷新
};

animationFrame.start();
输出结果如下:
Animation类
我们已经知道了如果利用requestAnimationFrame来实现一个动画效果,而且还写了一个AnimationFrame的类来封装reqeustAnimationFrame方法。
可是注意看上面的代码,都是需要我们自己来设置图形的改变,虽然也是动画,但是还是比较繁琐的。我们需要的是一个真正的Animation类,只需要告诉它我们要让哪个图形做动画,动画怎么做,整个动画多长时间,好比这样:
let animation = new Animation(rect,400);
animation.moveTo(x,y);
animation.start();
只要animation一运行,rect对象就会在规定时间内移动到(x,y),而我们也就不需要自己编码去改变rect对象的坐标。
我们就以上面给出的伪代码接口,直接实现这个Animation(测试驱动编程?):
import AnimationFrame from "./AnimationFrame";


const PRE_FRAME_TIME_FLOAT = 1000/60; // 每帧间隔时间。不取整
export default class Animation {
    constructor(figure, totalTime, p) {
        p = p || {};
        this.figure = figure;
        // 利用AnimationFrame来实现定时循环
        this.animationFrame = new AnimationFrame();
        // 计算一下totalTime如果间隔16毫秒刷新一次的话,一共需要animationFrame刷新多少次:
        // 这个刷新次数要取整
        this.totalRefreshCount = Math.floor(totalTime/PRE_FRAME_TIME_FLOAT);
        // 这两个变量将会记录figure所要移动到的最终位置坐标
        this.finalX = 0;
        this.finalY = 0;
        // 这是记录figure起始的坐标位置
        this.startX = figure.left;
        this.startY = figure.top;
    }

    moveTo(x, y) {
        // 记录figure要移动到的最终位置坐标以及figure的起始位置
        this.finalX = x;
        this.finalY = y;
        this.startX = this.figure.left;
        this.startY = this.figure.top;
    }

    start() {
        // 要在总的刷新次数totalRefreshCount内移动到(x,y) ,那就需要计算每次刷新需要移动的距离:
        let deltaX = this.finalX - this.startX;
        let deltaY = this.finalY - this.startY;
        let perRefreshDeltaX = deltaX/this.totalRefreshCount;
        let perRefreshDeltaY = deltaY/this.totalRefreshCount;

        let that = this; // 便于匿名方法内能访问到this
        this.animationFrame.repeat = function(refreshCount){
            // 如果AnimationFrame刷新次数超过了动画规定的最大次数
            // 说明动画已经结束了
            if(refreshCount >= that.totalRefreshCount){
                // 动画结束,figure的最终坐标直接设置:
                that.animationFrame.stop();
                that.figure.left = that.finalX;
                that.figure.top = that.finalY;
            }else{
                // 如果动画在运行,每次刷新坐标均匀增加:
                that.figure.left += perRefreshDeltaX;
                that.figure.top += perRefreshDeltaY;
            }
            // 刷新界面
            that.figure.getGraph().refresh();
        }
    }
}
然后我们测试一下这个类:
import Graph from "./example/Graph";
import Rectangle from "./example/Rectangle";
import AnimationFrame from "./example/AnimationFrame";
import Animation from "./example/Animation";

let graph = new Graph(wx.createCanvas());
// 添加一个矩形
let rect = new Rectangle({
    left: 0, top: 0, width: 100, height: 100, color: 'red'
});
graph.addChild(rect);
let animation = new Animation(rect,400);
animation.moveTo(300,300);
animation.start();
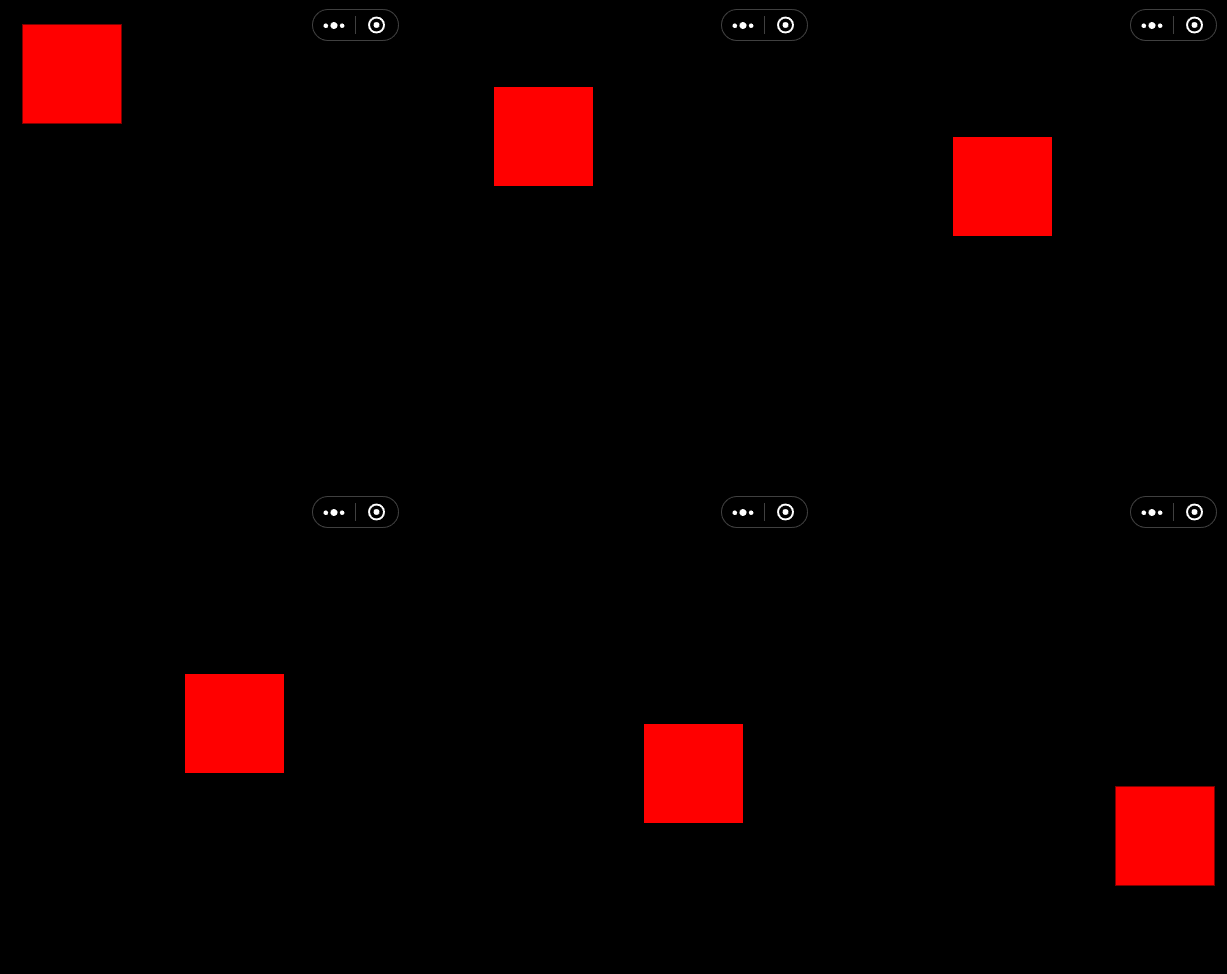
这是输出结果(因为gif是循环播放的,实际上动画到最后就停住了):

Animation的第一次迭代
上面给的Animation只能是移动坐标而已,如果我现在想要旋转怎么办?
如果根据上面的代码来看,我们还需要设置这几个属性:startRotate :Figure起始旋转度数,finalRotate: Figure的最终旋转度数。 然后还要在start方法中更改一下,让figure的rotate属性每帧都发生变化。如下:
 start() {
        // 要在总的刷新次数totalRefreshCount内移动到(x,y) ,那就需要计算每次刷新需要移动的距离:
        let deltaX = this.finalX - this.startX;
        let deltaY = this.finalY - this.startY;
        let perRefreshDeltaX = deltaX/this.totalRefreshCount;
        let perRefreshDeltaY = deltaY/this.totalRefreshCount;
        let deltaRotate = this.finalRotate - this.startRotate;
        let perRotate = deltaRotate/this.totalRefreshCount;

        let that = this; // 便于匿名方法内能访问到this

        // 设置AnimationFrame的循环方法
        this.animationFrame.repeat = function(refreshCount){
            // 如果AnimationFrame刷新次数超过了动画规定的最大次数
            // 说明动画已经结束了
            if(refreshCount >= that.totalRefreshCount){
                // 动画结束
                that.animationFrame.stop();
            }else{
                // 如果动画在运行,每次刷新坐标均匀增加:
                that.figure.left += perRefreshDeltaX;
                that.figure.top += perRefreshDeltaY;
                that.figure.rotate += perRotate;
            }
            // 刷新界面
            that.figure.getGraph().refresh();
        };
        // 设置AnimationFrame的结束回调方法
        this.animationFrame.stopCallback = function(){
            // 一旦动画结束就直接设置figure的最终坐标:
            that.figure.left = that.finalX;
            that.figure.top = that.finalY;
            that.figure.rotate = that.finalRotate;
        }

        // 开始启动AnimationFrame:
        this.animationFrame.start();
    }
傻比才会这么写!那下次我要拉伸Figure怎么办,也跟刚才那样继续加吗,肯定不是的。
我们归纳一下,Animation到底在做什么。
Animation一直在做的工作就是在不停更改Figure的属性值,然后刷新界面。
所以我们认为,Animation其实就是一个在给定时间内均匀或者不均匀地改变对象属性值的类。
那么就不需要可以去记录什么坐标啊旋转角度了这些特定的值,统一起来,就是“某个属性值”,让我们彻底改掉刚才的Animation类:
import AnimationFrame from "./AnimationFrame";


const PRE_FRAME_TIME_FLOAT = 1000 / 60; // 每帧间隔时间。不取整
export default class Animation {
    constructor(figure, totalTime, p) {
        p = p || {};
        this.figure = figure;
        // 利用AnimationFrame来实现定时循环
        this.animationFrame = new AnimationFrame();
        // 计算一下totalTime如果间隔16毫秒刷新一次的话,一共需要animationFrame刷新多少次:
        // 这个刷新次数要取整
        this.totalRefreshCount = Math.floor(totalTime / PRE_FRAME_TIME_FLOAT);
        // 这是存放属性初始值和结束值的列表,数据结构是:{ 属性名 : { start:初始值, end:结束值}}
        this.propertyValueTable = {};

    }

    /**
     * 记录属性值改变
     */
    propertyChange(propertyName, startValue, endValue) {
        // 如果没记录过属性值就新建一个
        if (!this.propertyValueTable[propertyName]) {
            this.propertyValueTable[propertyName] = {start: startValue, end: endValue};
        } else {
            this.propertyValueTable[propertyName].start = startValue;
            this.propertyValueTable[propertyName].end = endValue;
        }
    }

    /**
     * 根据当前刷新次数要设置对象当前属性值
     */
    applyPropertiesChange(refreshCount) {
        for (let property in this.propertyValueTable) {
            this.figure[property] += this.calculateDeltaValue(property, refreshCount);
        }
    }

    /**
     * 直接设置结束值给Figure
     */
    applyEndValue(){
        for (let property in this.propertyValueTable) {
            this.figure[property] =  this.propertyValueTable[property].end;
        }
    }

    /**
     * 根据刷新次数来计算该属性此时的增量
     */
    calculateDeltaValue(property, refreshCount) {
        let start = this.propertyValueTable[property].start;
        let end = this.propertyValueTable[property].end;
        // 因为我们是均匀变化的,所以直接算出平均值即可:
        return (end - start) / this.totalRefreshCount;
    }

    start() {
        let that = this; // 便于匿名方法内能访问到this
        // 设置AnimationFrame的循环方法
        this.animationFrame.repeat = function (refreshCount) {
            // 如果AnimationFrame刷新次数超过了动画规定的最大次数
            // 说明动画已经结束了
            if (refreshCount >= that.totalRefreshCount) {
                // 动画结束
                that.animationFrame.stop();
            } else {
                // 如果动画在运行,计算每次属性增量:
                that.applyPropertiesChange(refreshCount);
            }
            // 刷新界面
            that.figure.getGraph().refresh();
        };
        // 设置AnimationFrame的结束回调方法
        this.animationFrame.stopCallback = function () {
            that.applyEndValue();
            // 清空我们的记录的属性值表:
            for(let p in that.propertyValueTable){
                delete that.propertyValueTable[p];
            }
        };

        // 开始启动AnimationFrame:
        this.animationFrame.start();
    }
}
几个关键的方法我逐一讲一下:
start方法就不多说了,运行AnimationFrame,每次刷新的时候更改对象的属性值并刷新界面。
propertyChange :
这个方法是用来记录Figure对象希望在Animation中更改的属性以及这个属性的初始值、结束值,我们把这些数据都存放到Animation的一个propertyValueTable中,这个Table的数据结构如下:
{ 属性名 :
    {
        start :初始值,
        end :结束值
    }
}
如果没有调用过该方法去记录对象的属性值,那Animation是不会更改它的属性值的,当然也不知道怎么去改。
同时注意,如果propertyChange方法多次调用设置同一个属性的话,以最后一次为准,因为之前的全部都被最后一次调用覆盖了。
这样一来,那我们之前的moveTo(x,y)的方法其实就可以利用propertyChange来封装:
    moveTo(x, y) {
        this.propertyChange('left',this.figure.left,x);
        this.propertyChange('top',this.figure.top,y);
    }
applyPropertiesChange
遍历我们记录的属性值列表,然后逐一将属性值进行更改。
而属性需要叠加的值是用另外一个方法calculateDeltaValue计算得出的。
calculateDeltaValue
计算出当前刷新次数(即当前时间点),需要增加的值。
我们的这个方法好像并没有用到refreshCount(刷新次数),直接给出了一个平均变化值。下面就要讲讲这个refreshCount到底有什么用。
Animation的第二次迭代
在第一次迭代的时候我们说,Animation是在均匀或者不均匀地改变着对象的属性值,而我们第一次迭代的时候只是给的一个均匀变化值。
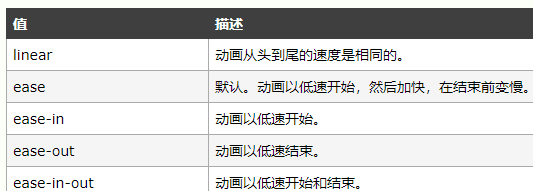
如果你做过CSS3的动画,你就知道它的动画可以设置一个时间曲线方程,animation-timing-function,这个属性可以设置一组值:

那我们第一次迭代的代码中,动画从头到尾都是速度相同的,因为我们每次计算出来的delta值都是固定的。
怎么能做到让动画慢慢变快呢
我们设属性值为y,时间(也就是我们的refreshCount)为x,我们的开始值为m,结束值为n,那么f(x) = y,y的范围是(m,n)。这个就是表示我们属性值变化的方程。
所以calculateDeltaValue方法其实是在计算y吗?不是的,是在计算△y,即计算f(x + △x) - f(x)的值。
第一次迭代是均匀变化的,其实就是说f(x)是一个直线方程,f(x) = ax+b,那么我们的△y就应该是:ax + a△x - ax = a*△x = a (我们每次刷新间隔为1,即△x=1)
这个a就是直线方程的斜率,因为我们知道整个动画的刷新次数,以及y的起始值和结束值,带入到方程 y = a*x+b中,可以求出 a = (n -m)/ (totalRefreshCount - 0) ,所以我们看到calculateDeltaValue的方法就是这个样子:
    calculateDeltaValue(property, refreshCount) {
        let start = this.propertyValueTable[property].start;
        let end = this.propertyValueTable[property].end;
        // 因为我们是均匀变化的,所以直接算出平均值即可:
        return (end - start) / this.totalRefreshCount;
    }
只要你还记得抛物线方程,那很快就能想到,要想让动画慢慢变快,就可以利用二次方程来解决这个问题,则我们刚才的f(x) = ax^2+b。
那么△y = 2ax + a(希望我没算错) 。将我们的起始值和结束值,以及totalRereshCount带入到这个二次方程中来计算a的值:(n-m)/ totalRefreshCount^2,那么我的calculateDeltaValue就是这样的了:
    calculateDeltaValue(property, refreshCount) {
        let start = this.propertyValueTable[property].start;
        let end = this.propertyValueTable[property].end;
        switch(this.type){
            case Linear :
                return (end - start) / (this.totalRefreshCount);
            case Ease_In:
                let a = (end - start) / (this.totalRefreshCount*this.totalRefreshCount);
                return 2*refreshCount * a + a;
        }
    }
我在Animation类里加入了一个type属性,默认是Linear(值是1),calculateDeltaValue就可以根据不同类型来计算当前时间的属性值增量了。
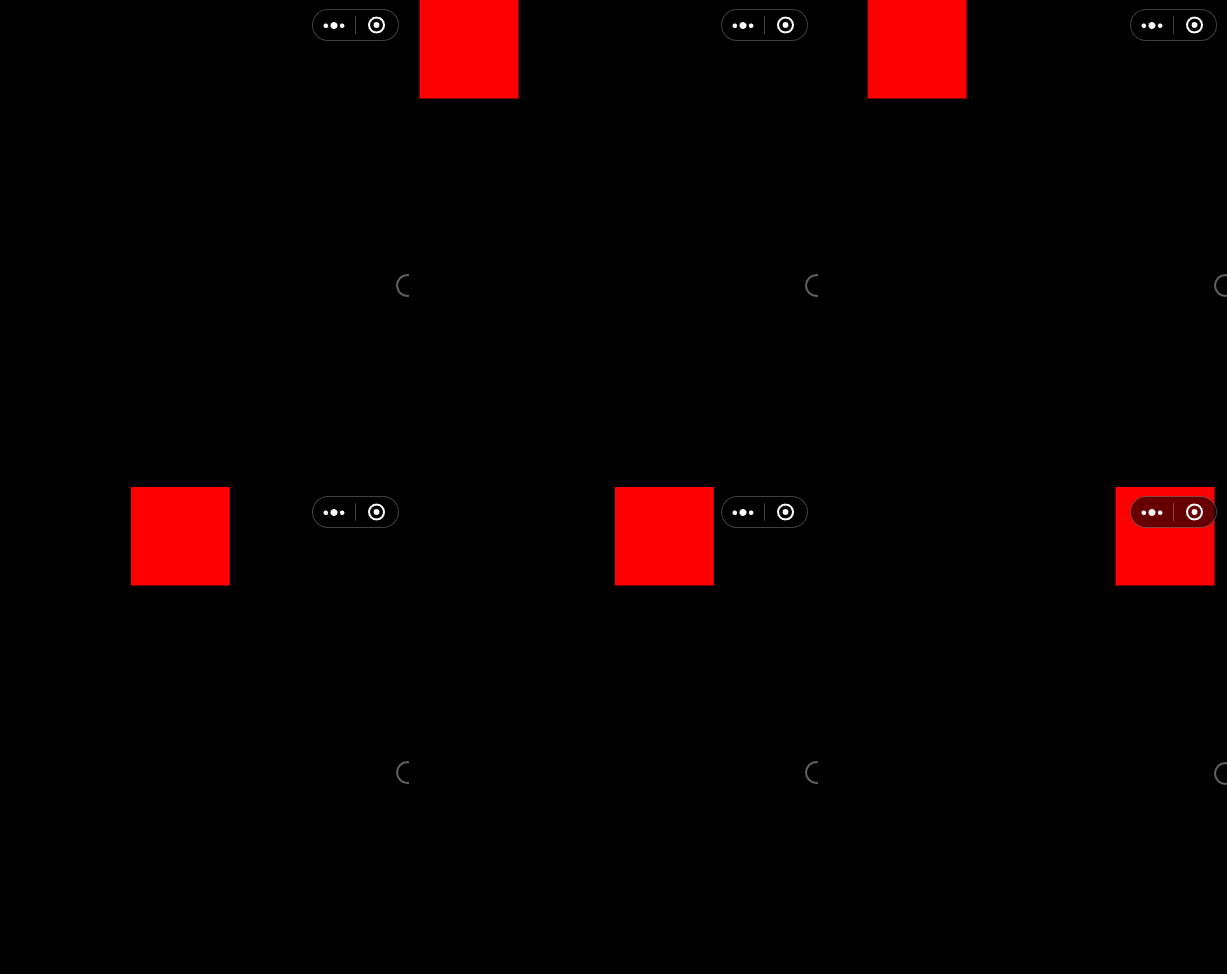
测试Ease_In结果如下:

而其他的例如Ease啊,Ease_out等,都可以通过更改calculateDeltaValue方法代码来实现,自行脑补。
Animation第三次迭代
首先我们把moveTo,rotateTo等方法先通过propertyChange实现了再说:
    moveTo(x, y) {
        this.propertyChange('left', this.figure.left, x);
        this.propertyChange('top', this.figure.top, y);
    }

    rotateTo(angle){
        this.propertyChange('rotate', this.figure.rotate, angle);
    }
给一个case:一个矩形在1秒内很像移动100个像素点,并且旋转一周。
那我们的代码可以这样写:
import Graph from "./example/Graph";
import Rectangle from "./example/Rectangle";
import AnimationFrame from "./example/AnimationFrame";
import Animation from "./example/Animation";

let graph = new Graph(wx.createCanvas());
// 添加一个矩形
let rect = new Rectangle({
    left: 0, top: 0, width: 100, height: 100, color: 'red'
});
graph.addChild(rect);
let animation = new Animation(rect,1000); // 整个动画时长为1秒
animation.moveTo(rect.left+300,rect.top);
animation.rotateTo(360);
animation.start();
输出结果:

有一种动画类编码习惯,即使调用完一次动画动作后,接着调用第二次动作:
let animation = new Animation(rect,1000); // 整个动画时长为1秒
animation.moveTo(rect.left+300,rect.top).rotateTo(360).start();
实现这个简单,在moveTo和rotateTo方法的返回this指针就好了。
这种代码看上去好像更能读懂:moveTo的同时进行rotateTo并且开始。
(可我老认为是:moveTo后再rotateTo,开始执行。)
先看看这个case:如果我现在想要让这个figure在当前动画结束后再次运行一次动画:纵向移动到canvas的末尾,总时长为500毫秒。怎么办?
以目前的Animation代码来看是无法实现的,我们先写一段伪代码:
import Graph from "./example/Graph";
import Rectangle from "./example/Rectangle";
import AnimationFrame from "./example/AnimationFrame";
import Animation from "./example/Animation";

let graph = new Graph(wx.createCanvas());
// 添加一个矩形
let rect = new Rectangle({
    left: 0, top: 100, width: 100, height: 100, color: 'red'
});
graph.addChild(rect);
let animation = new Animation(rect,1000); // 整个动画时长为1秒
animation.moveTo(rect.left+300,rect.top).rotateTo(360)
    .then(500).moveTo(rect.left+300,graph.height).start();
注意,多了一个then方法!
这个then方法是告诉Animation,在结束moveTo和roateTo后再执行一个新的动画,动画总时长是500,而动画的动作是moveTo到某个位置。
实际上这个就是一个动画链。
我们目前的Animation就是一个单独独立的动画对象,如果要实现上面的代码,就必须在Animation中加入一个nextAnimation属性以及preAnimation,意为:下一个动画和上一个动画(是的,这是一个双向链表)。
每当我们动画开始的时候,先查看是否具有preAnimation,如果有上一个动画,那就先执行它;如果没有就执行自己;当动画结束后,如果有nextAnimation,先将nextAnimation的preAnimation属性设置为空(避免形成一个死循环),然后执行nextAnimation。这样一来就形成了一个动画链的执行。
根据上面描述我们来写一下新的Aniamtion类:
import AnimationFrame from "./AnimationFrame";


const PRE_FRAME_TIME_FLOAT = 1000 / 60; // 每帧间隔时间。不取整
const Linear = 1;
const Ease_In = 2;
export default class Animation {
    constructor(figure, totalTime, type) {
        this.type = type || Linear;
        this.figure = figure;
        // 利用AnimationFrame来实现定时循环
        this.animationFrame = new AnimationFrame();
        // 计算一下totalTime如果间隔16毫秒刷新一次的话,一共需要animationFrame刷新多少次:
        // 这个刷新次数要取整
        this.totalRefreshCount = Math.floor(totalTime / PRE_FRAME_TIME_FLOAT);
        // 这是存放属性初始值和结束值的列表,数据结构是:{ 属性名 : { start:初始值, end:结束值}}
        this.propertyValueTable = {};
        this.nextAnimation = undefined; //下一个动画
        this.preAnimation = undefined; // 上一个动画
    }

    then(totalTime) {
        // 调用then方法后新建一个Animation,并把它和自身关联起来
        this.nextAnimation = new Animation(this.figure, totalTime);
        this.nextAnimation.preAnimation = this;
        return this.nextAnimation;
    }

    /**
     * 记录属性值改变
     */
    propertyChange(propertyName, startValue, endValue) {
        if (!this.propertyValueTable[propertyName]) {
            this.propertyValueTable[propertyName] = {start: startValue, end: endValue};
        } else {
            this.propertyValueTable[propertyName].start = startValue;
            this.propertyValueTable[propertyName].end = endValue;
        }
    }

    propertyChangeTo(propertyName,endValue){
        if(this.preAnimation) {
            // 如果有前一个动画,那就要看它是不是也要改变了这个property的值,如果是,则开始值应该是
            // 上一个动画的结束值; 否则还是记录figure的属性原始值
            let preEndValue = this.preAnimation.propertyValueTable[propertyName].end;
            if(preEndValue != undefined){
                this.propertyChange(propertyName,preEndValue,endValue);
            }else{
                this.propertyChange(propertyName,this.figure[propertyName],endValue);
            }
        }else{
            this.propertyChange(propertyName,this.figure[propertyName],endValue);
        }
    }

    /**
     * 根据当前刷新次数要设置对象当前属性值
     */
    applyPropertiesChange(refreshCount) {
        for (let property in this.propertyValueTable) {
            this.figure[property] += this.calculateDeltaValue(property, refreshCount);
        }
    }

    /**
     * 直接设置结束值给Figure
     */
    applyEndValue() {
        for (let property in this.propertyValueTable) {
            this.figure[property] = this.propertyValueTable[property].end;
        }
    }

    /**
     * 根据刷新次数来计算该属性此时的增量
     */
    calculateDeltaValue(property, refreshCount) {
        let start = this.propertyValueTable[property].start;
        let end = this.propertyValueTable[property].end;
        switch (this.type) {
            case Linear :
                return (end - start) / (this.totalRefreshCount);
            case Ease_In:
                let a = (end - start) / (this.totalRefreshCount * this.totalRefreshCount);
                return 2 * refreshCount * a + a;
        }
    }

    start() {
        if (this.preAnimation) {
            // 如果有上一个动画就先执行它:
            this.preAnimation.start();
            return;
        }
        let that = this; // 便于匿名方法内能访问到this
        // 设置AnimationFrame的循环方法
        this.animationFrame.repeat = function (refreshCount) {
            // 如果AnimationFrame刷新次数超过了动画规定的最大次数
            // 说明动画已经结束了
            if (refreshCount >= that.totalRefreshCount) {
                // 动画结束
                that.animationFrame.stop();
            } else {
                // 如果动画在运行,计算每次属性增量:
                that.applyPropertiesChange(refreshCount);
            }
            // 刷新界面
            that.figure.getGraph().refresh();
        };
        // 设置AnimationFrame的结束回调方法
        this.animationFrame.stopCallback = function () {
            that.applyEndValue();
            // 清空我们的记录的属性值表:
            for (let p in that.propertyValueTable) {
                delete that.propertyValueTable[p];
            }
            if (that.nextAnimation) {
                that.nextAnimation.preAnimation = undefined; // 避免形成死循环
                that.nextAnimation.start();
            }
        };

        // 开始启动AnimationFrame:
        this.animationFrame.start();
    }

    moveTo(x, y) {
        this.propertyChangeTo('left', x);
        this.propertyChangeTo('top', y);
        return this;
    }

    rotateTo(angle) {
        this.propertyChangeTo('rotate', angle);
        return this;
    }
}
这里我增加了一个then方法,新生成一个Animation对象,并且将这个新的Animation和当前的Animation对象关联了起来。
增加了一个propertyChangeTo的方法,注意看我们的case代码:
let animation = new Animation(rect,1000); // 整个动画时长为1秒
animation.moveTo(rect.left+300,rect.top).rotateTo(360)
    .then(500).moveTo(rect.left+300,graph.height).start();
我们在调用了then后获得的是一个不同于当前Animation的对象,一旦调用moveTo等记录属性值修改的方法就会出现一个问题:如果上一个动画更改过这个属性值,那么当前动画对象就必须找到上一个动画记录的结束值,以该值作为属性在新动画中的起始值。
这个还是好理解吧。
所以我增加了propertyChangeTo方法,用于判断是否需要找到前一个动画的结束值作为该动画的起始值。
另外就是moveTo和rotateTo不再直接调用propertyChange方法,而是改成调用propertyChangeTo方法了。
小结
动画是做游戏的基础,我们已经知道了怎么用JS实现动画,这离我们能做出游戏已经很近了。不过Animation类还缺很多东西,比如动画停止回调函数,动画完成回调函数,动画暂停,循环执行动画等等,这些就留给聪明的你自己来写吧。
对于今天的文章你怎么看呢?欢迎到其他UP的文章或视频下方留言。
作业就不留了,下一期我们就要开始做一个简单游戏了。

