Android Notification 你应该知道的事
1. 介绍
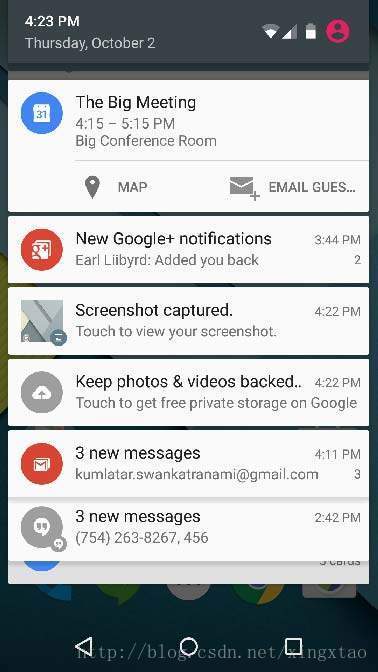
Notification :通知是可以显示到你的应用程序的正常UI的用户之外的消息。当您告诉系统发出通知时,它首先会在通知区域显示为一个图标。要查看通知的详细信息,用户打开通知抽屉。通知区域和通知抽屉都是用户可以随时查看的系统控制区域。
2. 创建步骤
(1) 创建通知生成器:使用 NotificationCompat.Builder.build()
NotificationCompat.Builder mBuilder = new NotificationCompat.Builder(this);(2) 设置通知属性(以下属性必须设置)
- 一个小图标,由setSmallIcon()设置
- 标题,由setContentTitle()设置
- 细节文本,由setContentText()设置
mBuilder.setSmallIcon(R.drawable.notification_icon);
mBuilder.setContentTitle("Notification Alert, Click Me!");
mBuilder.setContentText("Hi, This is Android Notification Detail!");
(3) 设置点击意图:通过PendingIntent 进行设置
(4) 显示通知
NotificationManager mNotificationManager = (NotificationManager)getSystemService(Context.NOTIFICATION_SERVICE);

// notificationID allows you to update the notification later on.
mNotificationManager.notify(notificationID, mBuilder.build());
3. 兼容性
- Android 3.0 以下版本:
NotificationManager notificationManager = (NotificationManager)context.getSystemService(Context.NOTIFICATION_SERVICE);
PendingIntent pendingIntent = PendingIntent.getActivity(context,0,new Intent(this,ResultActivity.class),0);
Notification notification = new Notification(icon,tickerText,when);
notification.setLatestEventInfo(this, title, content, pendingIntent);
notificationManager.notify(id,notification);- Android 3.0 以上版本:
NotificationManager notificationManager =(NotificationManager) context.getSystemService(
                Context.NOTIFICATION_SERVICE);
PendingIntent contentIntent = PendingIntent.getActivity(
        this, 0, new Intent(this, ResultActivity.class), 0);
Notification notification = new Notification.Builder(this)
        .setSmallIcon(R.drawable.notification_icon)
        .setContentTitle("My notification")
        .setContentText("Hello World!")
        .setContentIntent(contentIntent)
        .build();
notificationManager.notify(NOTIFICATIONS_ID, notification);- support v4 兼容版本(墙裂推荐使用该方式创建):
NotificationManager notificationManager =(NotificationManager) context.getSystemService(
                Context.NOTIFICATION_SERVICE);
PendingIntent contentIntent = PendingIntent.getActivity(
        this, 0, new Intent(this, ResultActivity.class), 0);
Notification notification =  new NotificationCompat.Builder(context)
        .setSmallIcon(R.drawable.notification_icon)
        .setContentTitle("My notification")
        .setContentText("Hello World!")
        .setContentIntent(contentIntent)
        .build();
notificationManager.notify(NOTIFICATIONS_ID, notification);
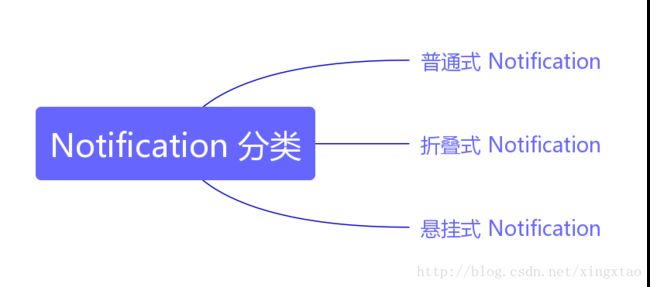
4. Notification 分类
- 普通式 Notification:
/**
    * 兼容 3.0 之前版本
    *
    * @param context
    */
    public static void showNotificationCompat(Context context) {
        NotificationManager notificationManager = (NotificationManager) context.getSystemService(Context.NOTIFICATION_SERVICE);
        Intent intent = new Intent(context, WebViewActivity.class);
        intent.putExtra("url", "http://www.sina.com");
        PendingIntent pendingIntent = PendingIntent.getActivity(context, 1, intent, PendingIntent.FLAG_UPDATE_CURRENT);
        Notification notification = new NotificationCompat.Builder(context)
                .setSmallIcon(R.drawable.ic_launcher)
                .setContentTitle("title")
                .setContentText("content")
                .setAutoCancel(true)
                .setContentIntent(pendingIntent)
                .build();
        notificationManager.notify(1, notification);
}- 折叠式 Notification:
折叠式 Notification 是一种自定义视图的 Notification,用来显示自定义布局。主要使用 RemoteViews 来创建自定义视图。他有两种状态:第一次下滑为普通状态,普通状态下显示结果与普通式 Notification 显示的结果是一样的;再次下滑为展开状态,展开状态下才会显示自定义视图。
//用RemoteViews来创建自定义Notification视图
RemoteViews remoteViews = new RemoteViews(getPackageName(), R.layout.view_fold);
\res\layout\layout_notification.xml
<LinearLayout xmlns:android="http://schemas.android.com/apk/res/android"
    android:layout_width="match_parent"
    android:layout_height="60dp"
    android:gravity="center_vertical"
    android:orientation="vertical">

    <ImageView
        android:id="@+id/iv_icon"
        android:layout_width="40dp"
        android:layout_height="40dp" />

    <TextView
        android:id="@+id/tv_text"
        android:layout_gravity="center_vertical"
        android:layout_width="wrap_content"
        android:layout_height="wrap_content" />

LinearLayout>
/**
* 折叠式 notification
* (1) 第一次下滑为普通状态,这种状态下和普通通知是一样的
* (2) 再次下滑变为展开状态,这种状态下才显示出自定义试图
*/
public static void showFoldNotification(Context context) {
NotificationManager notificationManager = (NotificationManager) context.getSystemService(Context.NOTIFICATION_SERVICE);
RemoteViews remoteViews = new RemoteViews(context.getPackageName(), R.layout.layout_notification);
Intent intent = new Intent(context, WebViewActivity.class);
intent.putExtra("url", "http://www.sina.com");
PendingIntent pendingIntent = PendingIntent.getActivity(context, 1, intent, PendingIntent.FLAG_UPDATE_CURRENT);
Notification notification = new NotificationCompat.Builder(context)
.setSmallIcon(R.drawable.ic_launcher)
.setContentTitle("折叠式通知")
.setContentText("折叠式通知内容")
.setContentIntent(pendingIntent)
.setAutoCancel(true)
.setCustomBigContentView(remoteViews)
.build();
notificationManager.notify(1, notification);
}- 悬挂式 Notification:
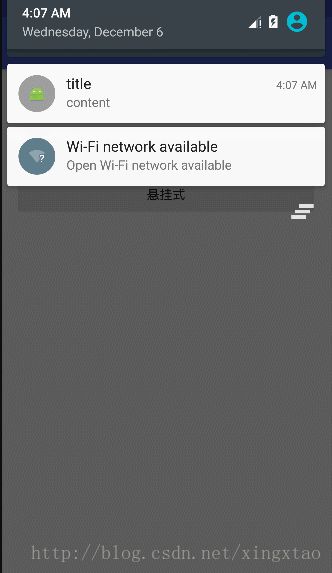
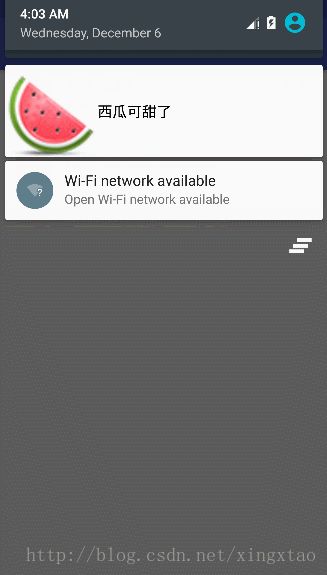
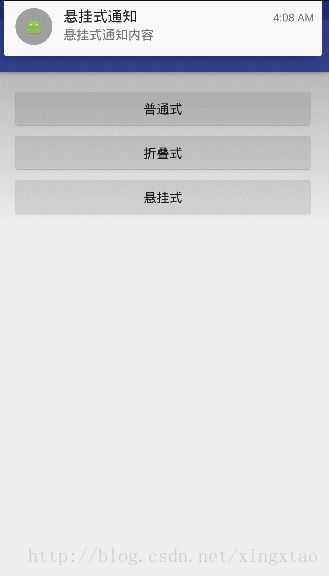
悬挂式 Notification 是 Android5.0 新增加的方式,悬挂式Notification不需要下拉通知栏就直接显示出来悬挂在屏幕上方并且焦点不变仍在用户操作的界面因此不会打断用户的操作,过几秒就会自动消失。
他需要调用setFullScreenIntent来将Notification变为悬挂式Notification
public static void showHangingNotification(Context context) {
        NotificationManager notificationManager = (NotificationManager) context.getSystemService(Context.NOTIFICATION_SERVICE);
        Intent intent = new Intent(context, WebViewActivity.class);
        intent.putExtra("url", "http://www.baidu.com");
        PendingIntent pendingIntent = PendingIntent.getActivity(context, 1, intent, PendingIntent.FLAG_UPDATE_CURRENT);
        Intent hangIntent = new Intent(context, MainActivity.class);
        PendingIntent hangingPendingIntent = PendingIntent.getActivity(context, 11, hangIntent, PendingIntent.FLAG_CANCEL_CURRENT);
        Notification notification = new NotificationCompat.Builder(context)
                .setSmallIcon(R.drawable.ic_launcher)
                .setContentTitle("悬挂式通知")
                .setContentText("悬挂式通知内容")
                .setContentIntent(pendingIntent)
                .setAutoCancel(true)
                .setFullScreenIntent(hangingPendingIntent, true)
                .build();

        notificationManager.notify(1, notification);

    }
5. 实际需求应用场景
当收到通知时,点击通知,根据通知携带内容携带的 URL 跳转到详情页,在详情页点击返回时,返回到主界面 MainActivity,而不是退出 App。本案例不使用多次跳转,而是使用 PendingIntent.getActivities() 方法进行解决。
- 首先将主界面 MainActivity 启动模式设置为 SingleTask.
- Notification的setContentIntent()中的pendingIntent是通过PendingIntent.getActivities(Context,int,Intent[],int) 获取的。
public static void showHandleNotification(Context context) {
        NotificationManager notificationManager = (NotificationManager) context.getSystemService(Context.NOTIFICATION_SERVICE);
        Intent[] intents = new Intent[2];
        Intent mainIntent = new Intent(context, MainActivity.class);
        mainIntent.putExtra("index", "22");
        Intent webIntent = new Intent(context, WebViewActivity.class);
        webIntent.putExtra("url", "http://www.baidu.com");
        intents[0] = mainIntent;
        intents[1] = webIntent;
        PendingIntent pendingIntent = PendingIntent.getActivities(context, 11, intents, PendingIntent.FLAG_UPDATE_CURRENT);
        Notification notification = new NotificationCompat.Builder(context)
                .setAutoCancel(true)
                .setSmallIcon(R.mipmap.ic_launcher)
                .setContentTitle("Notification")
                .setContentIntent(pendingIntent)
                .setContentText("content")
                .build();
        notificationManager.notify(11, notification);
    }
注意:
(1) 点击 back 键,退出 App,收到 Notification 后,点击 Notification 跳转到 WebViewActivity 加载网页,点击 back 键,返回到 MainActivity,此时 MainActivity 生命周期如下(kill 掉进程,相同结果):

(2) 点击 home 键,收到 Notification,点击 Notification 跳转到 WebViewActivity 加载网页,点击 back 键,返回到 MainActivity,此时 MainActivity 生命周期如下:

代码片段:
activity_main.xml
<LinearLayout
    xmlns:android="http://schemas.android.com/apk/res/android"
    xmlns:tools="http://schemas.android.com/tools"
    android:layout_width="match_parent"
    android:layout_height="match_parent"
    android:orientation="vertical"
    android:paddingBottom="@dimen/activity_vertical_margin"
    android:paddingLeft="@dimen/activity_horizontal_margin"
    android:paddingRight="@dimen/activity_horizontal_margin"
    android:paddingTop="@dimen/activity_vertical_margin"
    tools:context="com.flaginfo.notificationdemo.MainActivity">

    <Button
        android:id="@+id/btn_normal"
        android:layout_width="match_parent"
        android:layout_height="wrap_content"
        android:onClick="click"
        android:text="普通式"/>

    <Button
        android:id="@+id/btn_folding"
        android:layout_width="match_parent"
        android:layout_height="wrap_content"
        android:onClick="click"
        android:text="折叠式"/>

    <Button
        android:id="@+id/btn_hanging"
        android:layout_width="match_parent"
        android:layout_height="wrap_content"
        android:onClick="click"
        android:text="悬挂式"/>

    <Button
        android:id="@+id/btn_handle"
        android:layout_width="match_parent"
        android:layout_height="wrap_content"
        android:onClick="click"
        android:text="Notification 跳转"/>

LinearLayout>
MainActivity.java
public class MainActivity extends AppCompatActivity {

    private static final String TAG = "MainActivityMain";

    @Override
    protected void onCreate(Bundle savedInstanceState) {
        super.onCreate(savedInstanceState);
        Log.d(TAG, "onCreate: ");
        setContentView(R.layout.activity_main);
        Intent intent = getIntent();
        if (intent != null) {
            String index = intent.getStringExtra("index");
            Log.d(TAG, "onCreate: index = " + index);
        }
    }

    @Override
    protected void onStart() {
        super.onStart();
        Log.d(TAG, "onStart: ");
    }

    @Override
    protected void onResume() {
        super.onResume();
        Log.d(TAG, "onResume: ");
    }

    @Override
    protected void onPause() {
        super.onPause();
        Log.d(TAG, "onPause: ");
    }

    @Override
    protected void onStop() {
        super.onStop();
        Log.d(TAG, "onStop: ");
    }

    @Override
    protected void onDestroy() {
        super.onDestroy();
        Log.d(TAG, "onDestroy: ");
    }

    public void click(View view) {
        switch (view.getId()) {
            case R.id.btn_normal:  // 普通式
                NotificationHelper.showNotificationCompat(this);
                break;
            case R.id.btn_folding: // 折叠式
                NotificationHelper.showFoldNotification(this);
                break;
            case R.id.btn_hanging: // 悬挂式
                NotificationHelper.showHangingNotification(this);
                break;
            case R.id.btn_handle:
                NotificationHelper.showHandleNotification(this);
                break;
            default:
                break;
        }
    }

    @Override
    protected void onNewIntent(Intent intent) {
        super.onNewIntent(intent);
        Log.d(TAG, "onNewIntent: ");
        if (intent != null) {
            String index = intent.getStringExtra("index");
            Log.d(TAG, "onNewIntent: index = " + index);
        }
    }
}
WeViewActivity.java
public class WebViewActivity extends AppCompatActivity {

    private static final String TAG = "WebViewActivity";

    @Override
    protected void onCreate(Bundle savedInstanceState) {
        super.onCreate(savedInstanceState);
        setContentView(R.layout.activity_web_view);
        WebView webView = (WebView) findViewById(R.id.webview);
        webView.getSettings().setJavaScriptEnabled(true);
        webView.setWebViewClient(new WebViewClient() {
            @Override
            public boolean shouldOverrideUrlLoading(WebView view, String url) {
                view.loadUrl(url);
                return true;
            }

            @Override
            public void onReceivedHttpError(WebView view, WebResourceRequest request, WebResourceResponse errorResponse) {

            }

            @Override
            public void onReceivedSslError(WebView view, SslErrorHandler handler, SslError error) {
                handler.proceed();
            }
        });
        webView.setWebChromeClient(new WebChromeClient() {

        });
        Intent intent = getIntent();
        if (intent != null) {
            String url = intent.getStringExtra("url");
            webView.loadUrl(url);
        }
    }

    @Override
    public boolean onKeyDown(int keyCode, KeyEvent event) {
        if (keyCode == KeyEvent.KEYCODE_BACK) {
            Log.d(TAG, "onKeyDown: ");
            Intent intent  = new Intent();
            intent.putExtra("index","1");
            setResult(11,intent);

        }
        return super.onKeyDown(keyCode, event);
    }
}