opencv-python 图片去水印或文字打马赛克
opencv-python 图片去水印或文字及打马赛克
没有用基于像素的反色中和的方法
1. 基于选块的去除
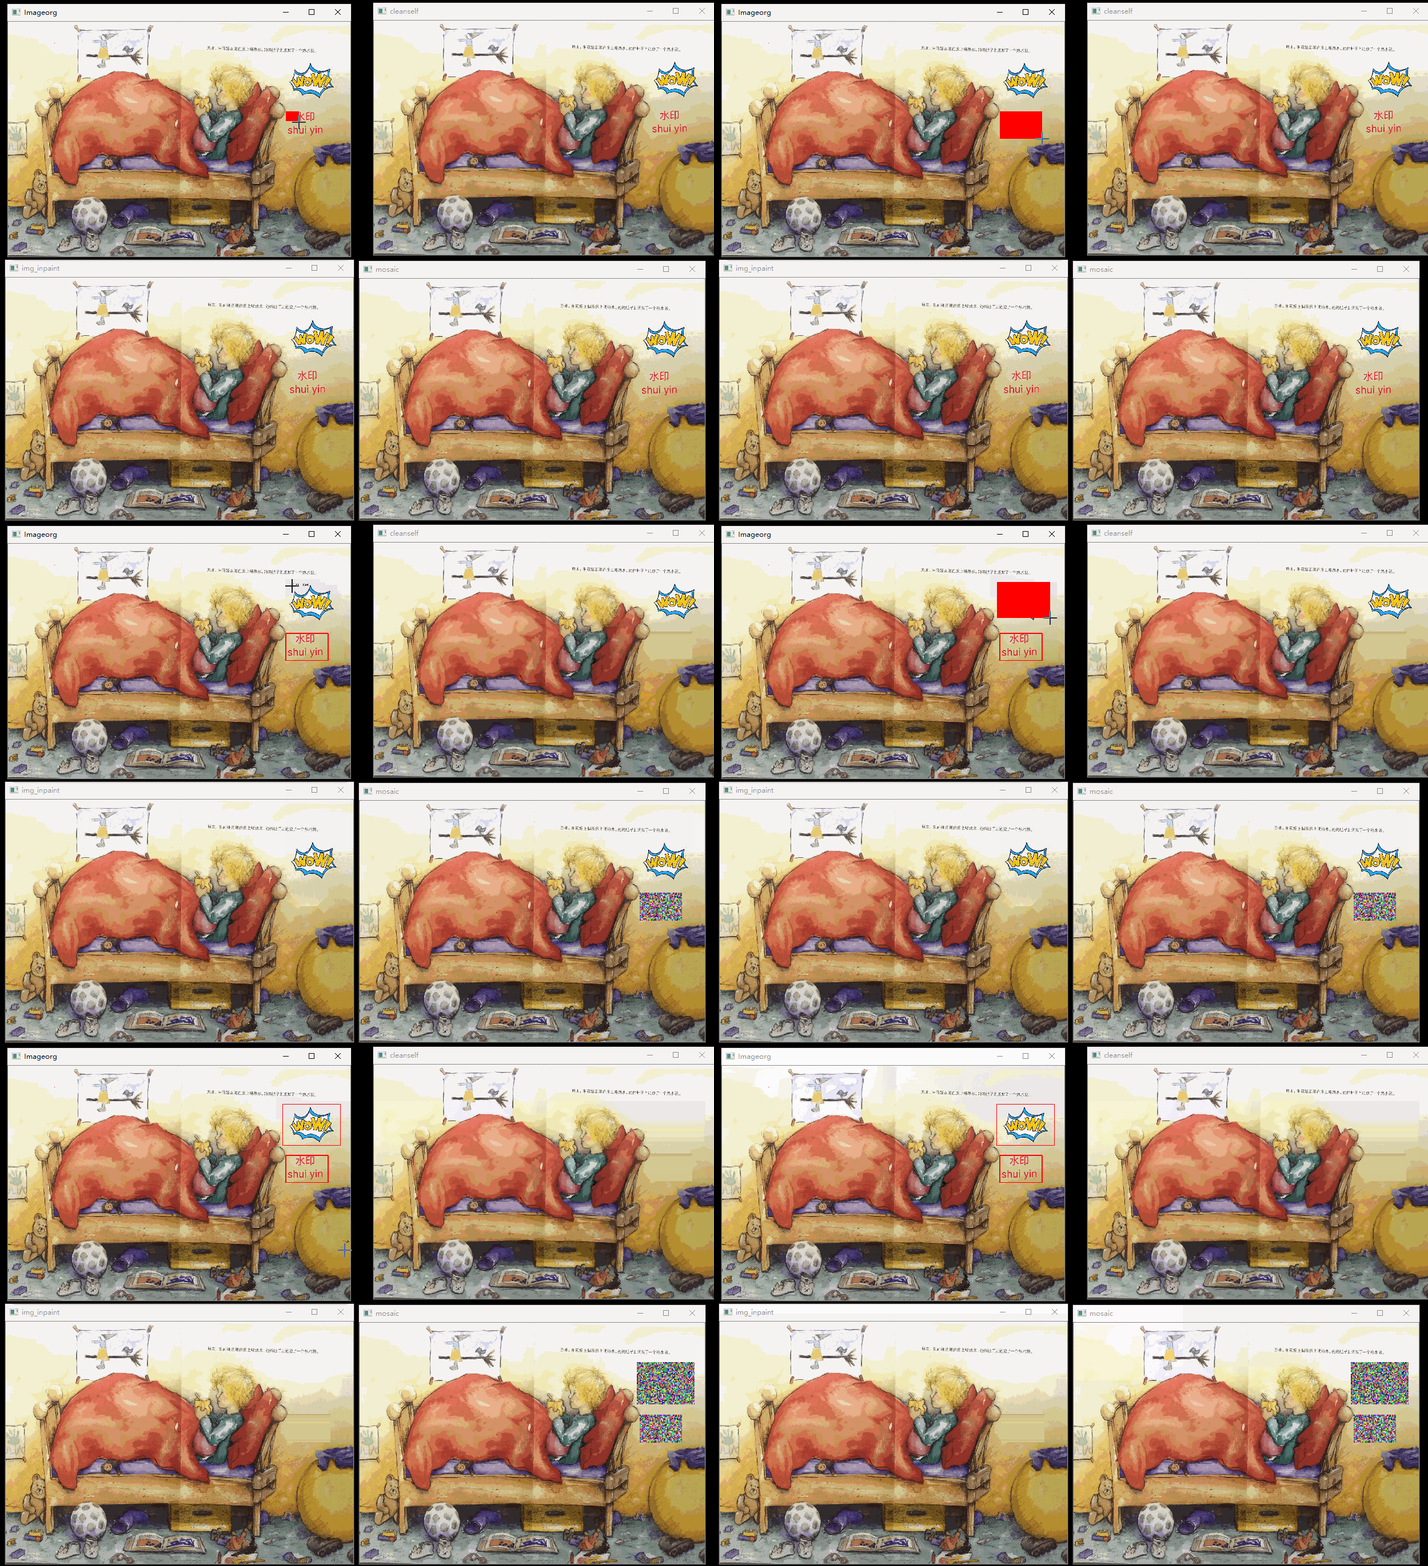
通过鼠标选择图片中需要去除的水印,文字或…先看下效果不算完美,研究学习inpaint函数,及对图像的像素操作。
- 使用了opencv中inpaint方法去除水印或文字
- 平移像素填充 方法去除水印或文字
import cv2
import numpy as np

def onmouse(event, x, y, flags, param):  # 鼠标事件的回调函数
    global ix, iy, drawing, mode
    if event == cv2.EVENT_LBUTTONDOWN:  # 按下左键
        ix, iy = x, y  # 赋予按下时的鼠标,获取选中区域矩形左上角坐标
    elif event == cv2.EVENT_MOUSEMOVE and flags == cv2.EVENT_FLAG_LBUTTON:  # 当按下左键拖拽鼠标时
         tmp1=img.copy()
         cv2.rectangle(tmp1, (ix, iy), (x, y), (0, 0, 255), -2)
         cv2.imshow('Imageorg', tmp1)
    elif event == cv2.EVENT_LBUTTONUP:  # 当鼠标左键松开
            tmp1=img.copy()
            cv2.rectangle(img, (ix, iy), (x, y), (0, 0, 255), 2)
            mosaic(img,ix, iy, x, y)#马赛克处理
            img_inpaint(img,ix, iy, x, y)# cv2.inpaint调用
            cleanself(img,ix, iy, x, y)#平移像素处理
    elif event == cv2.EVENT_MOUSEMOVE  and   flags != cv2.EVENT_FLAG_LBUTTON:#左键没有按下的情况下,鼠标移动 标出坐标
          temp=str(x)+','+str(y)
          tmp1=img.copy()
          cv2.putText(tmp1, temp, (x, y), cv2.FONT_HERSHEY_COMPLEX, 0.5, (0, 0, 0), 1)
          cv2.imshow("Imageorg", tmp1)
def img_inpaint(img,ix, iy, x, y):
    height, width = org.shape[0:2]
    mask = np.zeros((height, width), np.uint8)
    cv2.rectangle(mask,(ix, iy), (x, y), (255, 255, 255), -1)
    img = cv2.inpaint(org, mask, 1.5, cv2.INPAINT_TELEA) #蒙版
    cv2.namedWindow("img_inpaint", 0)
    cv2.resizeWindow("img_inpaint", int(width / 2), int(height / 2))
    cv2.imshow('img_inpaint', img)

def cleanself(img,ix, iy, x, y,nsize=1):
    height, width = org.shape[0:2]
    selected_image=org[iy:y,ix:x]
    dist = selected_image.copy()
    for i in range(iy,y):
      for j in range(ix,x):
        org[i,j][0]=org[i,j-nsize][0]
        org[i,j][1]=org[i,j-nsize][1]
        org[i,j][2]=org[i,j-nsize][2]
    selected_image=org[iy:y,ix:x]
    selected_image = cv2.GaussianBlur(selected_image,(15,15), 0,0)
    img = cv2.bilateralFilter(org,15, 30, 9)
    cv2.namedWindow("cleanself", 0)
    cv2.resizeWindow("cleanself", int(width / 2), int(height / 2))
    cv2.imshow('cleanself', img)


def mosaic(img,ix, iy, x, y,nsize=5):
    height, width = mosaictmp.shape[0:2]
    roi=mosaictmp[iy:y,ix:x]
    rowsroi,colsroi= roi.shape[:2]
    dist = roi.copy()# 根据nsize划分马赛克方块 填充随机颜色
    for i in range(0,rowsroi,nsize):
      for j in range(0,colsroi,nsize):
        dist[i:i+nsize,j:j+nsize] = (np.random.randint(0,255),(np.random.randint(0,255)),np.random.randint(0,255))
    mosaictmp[iy:y,ix:x]=dist#替换roi区域为马赛克
    cv2.namedWindow("mosaic", 0)
    cv2.resizeWindow("mosaic", int(width / 2), int(height / 2))
    cv2.imshow('mosaic', mosaictmp)

ix, iy = -1, -1
if __name__ == '__main__':
    f_img = './data/q1.jpg'
    org = cv2.imread(f_img)
    height, width = org.shape[0:2]
    img = org.copy()
    tmp = org.copy()
    mosaictmp=org.copy()
    cv2.namedWindow("Imageorg", 0)
    cv2.resizeWindow("Imageorg", int(width / 2), int(height / 2))
    cv2.imshow("Imageorg", img)
    cv2.setMouseCallback("Imageorg", onmouse)
    cv2.waitKey(0)
    cv2.destroyAllWindows()
2. 基于选块后HSV选色的局部水印去除
- 选中ROI区域 红色框标识
- 选择水印文字调节滑块hsv ,看mask是否显示
- 使用cv2.inpaint
重点代码
def clean_byhsv(ix, iy, iix, iiy): # ix, iy, iix, iiy 为选择框的坐标
    thresh =setHsvvalue(0)#返回滑块选择的cv2.inRange后的mask
    kernel = np.ones((3, 3), np.uint8)
    hi_mask = cv2.dilate(thresh, kernel, iterations=1)
    roi=watercleantmp[iy:iiy,ix:iix] #roi区域定位
    dist = roi.copy()
    cv2.imshow('ImagROI', roi)
    dist = cv2.inpaint(watercleantmp[iy:iiy,ix:iix], hi_mask[iy:iiy,ix:iix], 5, flags=cv2.INPAINT_TELEA)
    watercleantmp[iy:iiy,ix:iix]=dist#替换原图像中的水印部分
    cv2.namedWindow("dist", 0)
    cv2.imshow('dist', watercleantmp)
