Angular学习笔记40:响应式表单:一个简单的表单并修改表单的值
响应式表单
在前端开发中,经常要将页面上用户填写的数据传输给后端,这些表单的数据怎样收集呢?在这里,推荐使用Angular中的响应式表单。
1. 使用响应式表单的前期准
响应式表单是属于模块:ReactiveFormsModule,所以在组件中使用响应式表单就要在模块中,先引入这个ReactiveFormsModule模块。
修改App.module文件;
import {BrowserModule} from '@angular/platform-browser';
import {NgModule} from '@angular/core';

import {AppRoutingModule} from './app-routing.module';
import {AppComponent} from './app.component';
import {NgZorroAntdModule, NZ_I18N, zh_CN} from 'ng-zorro-antd';
import {FormsModule, ReactiveFormsModule} from '@angular/forms';
import {HttpClientModule} from '@angular/common/http';
import {BrowserAnimationsModule} from '@angular/platform-browser/animations';
import {registerLocaleData} from '@angular/common';
import zh from '@angular/common/locales/zh';
import {ParentComComponent} from './parent-com/parent-com.component';
import {ChildComComponent} from './child-com/child-com.component';
import {AnimationDemoComponent} from './animation-demo/animation-demo.component';
import {ComplexAnimationsComponent} from './complex-animations/complex-animations.component';

registerLocaleData(zh);

@NgModule({
  declarations: [
    AppComponent,
    ParentComComponent,
    ChildComComponent,
    AnimationDemoComponent,
    ComplexAnimationsComponent
  ],
  imports: [
    BrowserModule,
    AppRoutingModule,
    NgZorroAntdModule,
    FormsModule,
    ReactiveFormsModule,
    HttpClientModule,
    BrowserAnimationsModule
  ],
  providers: [{provide: NZ_I18N, useValue: zh_CN}],
  bootstrap: [AppComponent]
})
export class AppModule {
}
在imports数组中添加ReactiveFormsModule。
这样就引入了ReactiveFormsModule这个模块。
2.创建一个组件来创建一个简单的响应式表单。
创建一个用户信息的组件;
ng generate component userInfo
对于一个用户,他可以有一下这些字段来形成一个表单;
name:名字;
age:年龄;
emial:邮箱地址;
address:地址;
地址可以分为:area:地区;street:街道;houseId:门牌号;
最简单的试炼
最简单的试炼,现将userInfo的name这个属性先使用响应式表单控制起来;
修改userInfo的模板文件:
<nz-divider [nzText]="'响应式表单'"></nz-divider>
<nz-content>
  <nz-form-item>
    <nz-form-label nzSpan="3" nz-col>
      姓名
    </nz-form-label>
    <nz-form-control nzSpan="6" nz-col>
      <input nz-input type="text" placeholder="请输入姓名~" [formControl]="nameFormControl">
    </nz-form-control>
  </nz-form-item>
</nz-content>

<nz-content>
  <nz-row>
    展示表单的值
  </nz-row>
  <nz-row>
    {{nameFormControl.value | json }}
  </nz-row>
</nz-content>
在类文件中,增加nameFormControl这个属性;
修改userInfo的类文件:
import {Component, OnInit} from '@angular/core';
import {FormControl} from '@angular/forms';

@Component({
  selector: 'app-user-info',
  templateUrl: './user-info.component.html',
  styleUrls: ['./user-info.component.less']
})
export class UserInfoComponent implements OnInit {
  nameFormControl = new FormControl(null);

  constructor() {
  }

  ngOnInit() {
  }

}
在这里设置的初始值为null;
将这个页面显示出来:
修改APP.component.html;
<!--<router-outlet></router-outlet>-->
<!--<app-animation-demo></app-animation-demo>-->
<!--<app-complex-animations></app-complex-animations>-->

<app-user-info></app-user-info>
保存运行出现的页面:

然后输入姓名;就会发现在下面的显示表单值得区域会显示输入的值;如图所示:

在这里,用到的是FormControl,FormControl是最基本的表单构造块,经常用于最小的表单控件中。
小试牛刀-创建多个
创建userInfo的name、age、email。
userInfo的name、age、email这三个属性都是输入型的属性,所以,编写三个input控件。
修改userInfo模板文件:
      姓名


      年龄


      Email


      展示表单的值


      {{nameFormControl.value | json }}
      {{ageFormControl.value | json }}
      {{emailFormControl.value | json }}
修改类文件,增加两个关于年龄(age)和Email 的FormControl属性;并将这两个绑定到对应的控件中:
import {Component, OnInit} from '@angular/core';
import {AsyncValidator, FormControl, Validators} from '@angular/forms';

@Component({
  selector: 'app-user-info',
  templateUrl: './user-info.component.html',
  styleUrls: ['./user-info.component.less']
})
export class UserInfoComponent implements OnInit {
  nameFormControl = new FormControl(null, [Validators.required]);
  ageFormControl = new FormControl(null, [Validators.required]);
  emailFormControl = new FormControl(null, [Validators.required]);

  constructor() {
  }

  ngOnInit() {
  }

}
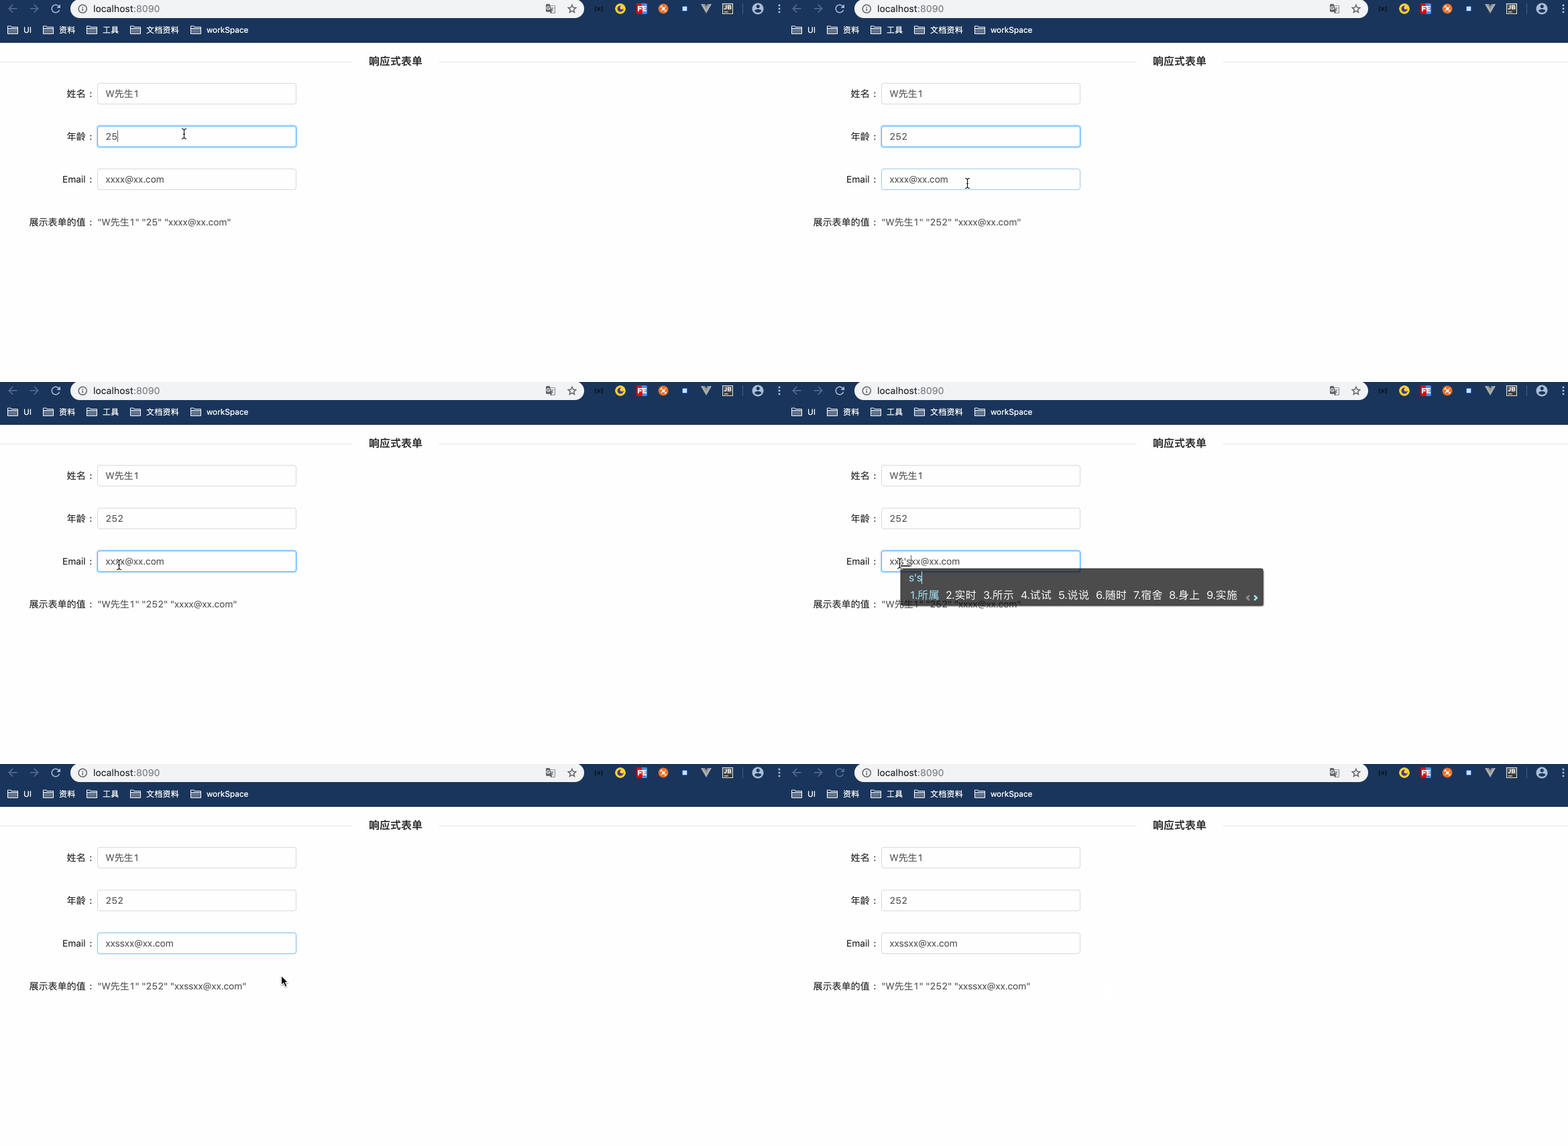
保存以后,运行,输入对应的值就会出现以下画面:

就会发现,在控件的输入的值会随着输入自动改变,这样,我们也就捕获了用户输入的值。
但是这个并不能算真正意义上的表单。
管理控件的值
有时,我们会遇到要将一些控件显示成一些初始的值,比如:将这里的name的初始值设置为"W先生",年龄设置为"25",邮箱设置为"[email protected]";
此时只需要修改类文件就可以了,如下所示:
import {Component, OnInit} from '@angular/core';
import {AsyncValidator, FormControl, Validators} from '@angular/forms';

@Component({
  selector: 'app-user-info',
  templateUrl: './user-info.component.html',
  styleUrls: ['./user-info.component.less']
})
export class UserInfoComponent implements OnInit {
  nameFormControl = new FormControl('W先生', [Validators.required]);
  ageFormControl = new FormControl('25', [Validators.required]);
  emailFormControl = new FormControl('[email protected]', [Validators.required]);

  constructor() {
  }

  ngOnInit() {
  }

}
当用户输入错误的时候,需要有一个按钮,将这些控件的值恢复到初始值得状态。
在模板文件中增加一个按钮,并对这个按钮增加一个点击事件。
<nz-divider [nzText]="'响应式表单'">nz-divider>
<nz-content>
  <nz-form-item>
    <nz-form-label nzSpan="3" nz-col>
      姓名
    nz-form-label>
    <nz-form-control nzSpan="6" nz-col>
      <input nz-input type="text" placeholder="请输入姓名~" [formControl]="nameFormControl">
    nz-form-control>
  nz-form-item>

  <nz-form-item>
    <nz-form-label nzSpan="3" nz-col>
      年龄
    nz-form-label>
    <nz-form-control nzSpan="6" nz-col>
      <input nz-input type="text" placeholder="请输入年龄~" [formControl]="ageFormControl">
    nz-form-control>
  nz-form-item>

  <nz-form-item>
    <nz-form-label nzSpan="3" nz-col>
      Email
    nz-form-label>
    <nz-form-control nzSpan="6" nz-col>
      <input nz-input type="text" placeholder="请输入Email~" [formControl]="emailFormControl">
    nz-form-control>
  nz-form-item>

nz-content>

<nz-content>
  <nz-form-item>
    <nz-form-label nzSpan="3" nz-col>
      展示表单的值
    nz-form-label>
    <nz-form-control nzSpan="6" nz-col>
      {{nameFormControl.value | json }}
      {{ageFormControl.value | json }}
      {{emailFormControl.value | json }}
    nz-form-control>
  nz-form-item>
  <nz-form-item>
    <nz-form-control nzOffset="3" nzSpan="6">
      <button nz-button (click)="handleInitForm()">重置button>
    nz-form-control>
  nz-form-item>
nz-content>
在类文件中定义这个点击事件
public handleInitForm(): void {
    this.nameFormControl.setValue('W先生');
    this.ageFormControl.setValue('25');
    this.emailFormControl.setValue('[email protected]');
  }
在这里使用了formControl中定义的setValue()这个方法,通过这个方法可以将对应的控件的值进行修改。在这个方法中,当用户输入失误,点击按钮就可以恢复都初始值。