使用opencv-python 4.4.0.40调用YOLOv4模型
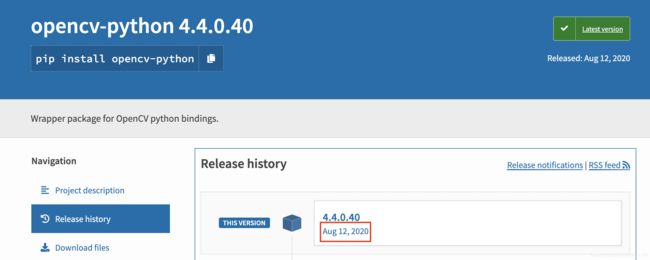
终于等到python版本的opencv4.4版本了,不用麻烦的编译opencv4.4,就可以调用yolov4模型了。昨天更新的版本!

在opencv4.4出来之前,通过编译darknet来推理yolov4训练出来的模型,精度还行,但是速度太慢(cpu),只能在GPU下加速才能有不错的FPS值。话不多说,我们来对比一下使用darknet原生推理速度和使用opencv-python 4.4.0.40加速之后的速度。
首先,我们使用darknet原生框架进行推理:
./darknet detector test yolo_data/person.data yolo_data/person_yolov4.cfg yolo_data/person_yolov4.weights images/test3.jpg
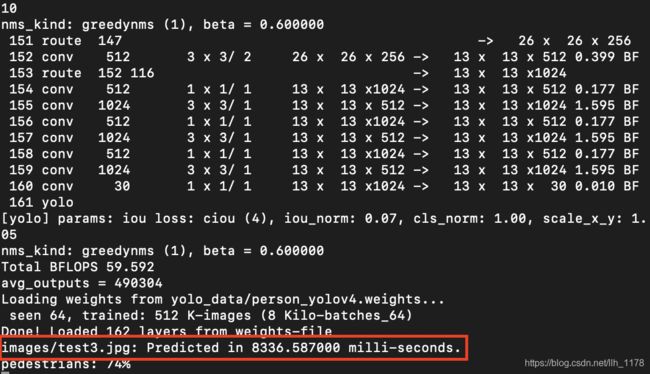
推理结果为:

我们可以看出它的推理时间为8000多ms,也就是8s时间。
然后,我们使用一个python脚本来调用yolov4,这里并没有使用opencv,而是借住darknet框架中的darknet.py和编译生成的libdarknet.so来进行调用模型,具体的代码如下:
import os
import cv2
import time
import numpy as np
import random
import darknet

netMain = None
metaMain = None
altNames = None

configPath = "yolo_data/person_yolov4.cfg"
weightPath = "yolo_data/person_yolov4.weights"
metaPath = "yolo_data/person.data"

if not os.path.exists(configPath):
    raise ValueError("Invalid config path `" + os.path.abspath(configPath)+"`")
if not os.path.exists(weightPath):
    raise ValueError("Invalid weight path `" + os.path.abspath(weightPath)+"`")
if not os.path.exists(metaPath):
    raise ValueError("Invalid data file path `" + os.path.abspath(metaPath)+"`")

if netMain is None:
    netMain = darknet.load_net_custom(configPath.encode("ascii"), weightPath.encode("ascii"), 0, 1)  # batch size = 1
if metaMain is None:
    metaMain = darknet.load_meta(metaPath.encode("ascii"))
if altNames is None:
    try:
        with open(metaPath) as metaFH:
            metaContents = metaFH.read()
            import re
            match = re.search("names *= *(.*)$", metaContents, re.IGNORECASE | re.MULTILINE)
            if match:
                result = match.group(1)
            else:
                result = None
            try:
                if os.path.exists(result):
                    with open(result) as namesFH:
                        namesList = namesFH.read().strip().split("\n")
                        altNames = [x.strip() for x in namesList]
            except TypeError:
                pass
    except Exception:
        pass


# convert xywh to xyxy
def convert_back(x, y, w, h):
    xmin = int(round(x - (w / 2)))
    xmax = int(round(x + (w / 2)))
    ymin = int(round(y - (h / 2)))
    ymax = int(round(y + (h / 2)))
    return xmin, ymin, xmax, ymax


# Plotting functions
def plot_one_box(x, img, color=None, label=None, line_thickness=None):
    # Plots one bounding box on image img
    tl = line_thickness or round(0.001 * max(img.shape[0:2])) + 1  # line thickness
    color = color or [random.randint(0, 255) for _ in range(3)]
    c1, c2 = (int(x[0]), int(x[1])), (int(x[2]), int(x[3]))
    cv2.rectangle(img, c1, c2, color, thickness=tl)
    if label:
        tf = max(tl - 1, 1)  # font thickness
        t_size = cv2.getTextSize(label, 0, fontScale=tl / 3, thickness=tf)[0]
        c2 = c1[0] + t_size[0], c1[1] - t_size[1] - 3
        cv2.rectangle(img, c1, c2, color, -1)  # filled
        cv2.putText(img, label, (c1[0], c1[1] - 2), 0, tl / 3, [225, 255, 255], thickness=tf, lineType=cv2.LINE_AA)


image_name = 'images/test4.jpg'

# image_name = os.path.join(imgpath,imgna)
src_img = cv2.imread(image_name)
bgr_img = src_img[:, :, ::-1]
height, width = bgr_img.shape[:2]
rsz_img = cv2.resize(bgr_img, (darknet.network_width(netMain), darknet.network_height(netMain)),
                   interpolation=cv2.INTER_LINEAR)
darknet_image, _ = darknet.array_to_image(rsz_img)
startTime = time.time()
detections = darknet.detect_image(netMain, metaMain, darknet_image, thresh=0.25)
endTime = time.time()
print("Time: {}s".format(endTime-startTime))
random.seed(1)
colors = [[random.randint(0, 255) for _ in range(3)] for _ in range(metaMain.classes)]
for detection in detections:
   x, y, w, h = detection[2][0], \
               detection[2][1], \
               detection[2][2], \
               detection[2][3]
   conf = detection[1]
   x *= width / darknet.network_width(netMain)
   w *= width / darknet.network_width(netMain)
   y *= height / darknet.network_height(netMain)
   h *= height / darknet.network_height(netMain)
   xyxy = np.array([x - w / 2, y - h / 2, x + w / 2, y + h / 2])
   label = detection[0].decode()
   index = altNames.index(label)
   label = '{} {:.2f}'.format(label,conf)
   plot_one_box(xyxy, src_img, label=label, color=colors[index % metaMain.classes])
# cv2.imwrite('result.jpg', src_img)
src_img = cv2.resize(src_img,(int(width*0.8),int(height*0.8)))
cv2.imshow('result.jpg',src_img)
cv2.waitKey(0)
cv2.destroyAllWindows()
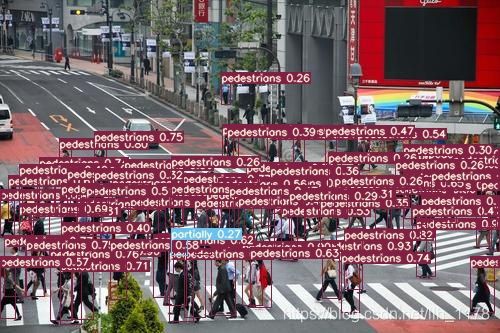
推理的结果为:

时间还是在8s左右,如果是FPS可能只有几。
最后,我们使用opencv4.4调用yolov4模型,直接上代码:
import cv2 as cv
import time

net = cv.dnn_DetectionModel('yolo_data/person_yolov4.cfg', 'yolo_data/person_yolov4.weights')
net.setInputSize(608, 608)
net.setInputScale(1.0 / 255)
net.setInputSwapRB(True)

frame = cv.imread('images/test4.jpg')

with open('yolo_data/person.names', 'rt') as f:
	names = f.read().rstrip('\n').split('\n')
print(names)
startTime = time.time()
classes, confidences, boxes = net.detect(frame, confThreshold=0.1, nmsThreshold=0.4)
endTime = time.time()
print("Time: {}s".format(endTime-startTime))
for classId, confidence, box in zip(classes.flatten(), confidences.flatten(), boxes):
	label = '%.2f' % confidence
	label = '%s: %s' % (names[classId], label)
	labelSize, baseLine = cv.getTextSize(label, cv.FONT_HERSHEY_SIMPLEX, 0.5, 1)
	left, top, width, height = box
	top = max(top, labelSize[1])
	cv.rectangle(frame, box, color=(0, 255, 0), thickness=3)
	cv.rectangle(frame, (left, top - labelSize[1]), (left + labelSize[0], top + baseLine), (255, 255, 255), cv.FILLED)
	cv.putText(frame, label, (left, top), cv.FONT_HERSHEY_SIMPLEX, 0.5, (0, 0, 0))

cv.imshow('out', frame)
cv.waitKey(0)
推理的结果为:


时间只有1.7s,比用原生的darknet推理更快,而且不需要依赖什么包也不用编译,只需安装opencv即可。如果使用GPU进行推理更快!当然也有使用python作为部署语言的原因,效率降低了很。
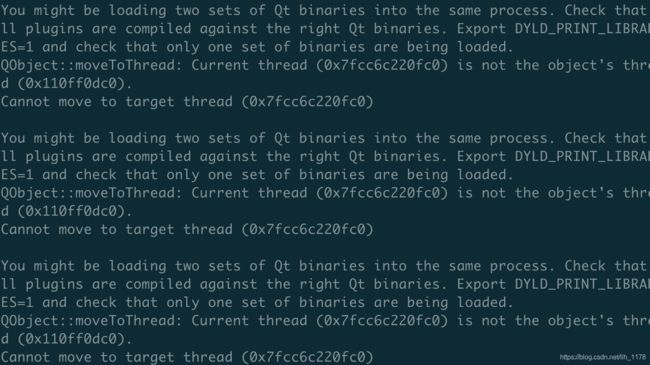
需要注意的是:如有仅安装opencv4.4.0.40进行推理会遇到以下问题:
You might be loading two sets of Qt binaries into the same process. Check that all plugins are compiled against the right Qt binaries. Export DYLD_PRINT_LIBRARIES=1 and check that only one set of binaries are being loaded.

这时候需要安装opencv-python-headless==4.4.0.40。
pip install opencv-python-headless==4.4.0.40 -i https://pypi.douban.com/simple
最后,说明一下:本模型是使用widerperson数据集训练的人群监测模型,测试的环境是MacOS 10.15.6 i5的处理器 内存8G。