树莓派配置
软件准备
- SD烧录软件
- 树莓派系统
- Putty
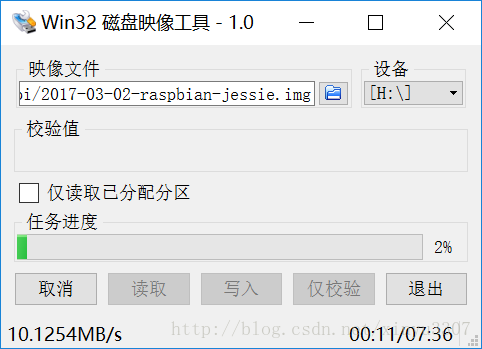
安装
配置
- 打开Putty ,树莓派接路由器网线,查看192.168.1.1的IP地址分配
树莓派最新的raspberry系统(2016.11.25日更新的系统)默认是关闭ssh功能的,如果可以连接屏幕,进入系统开启即可。

如果只能连ssh,先将sd卡取出,插入电脑,在boot分区新建个ssh文件夹即可- 账号是pi,密码是raspberry
sudo raspi-config
把整个系统的可用空间扩展到储存卡的大小,改密码,使能各种接口。- 修改更新源
/etc/apt/sources.list
deb http://mirrors.zju.edu.cn/raspbian/raspbian/ jessie main contrib non-free rpi
deb-src http://mirrors.zju.edu.cn/raspbian/raspbian/ jessie main contrib non-free rpi- 然后更新
sudo apt-get update - 装vnc服务
sudo apt-get install tightvncserver - 开机自启动VNC
输入vncpasswd,设置密码
新建文件sudo nano /etc/init.d/tightvncserver
#!/bin/sh
### BEGIN INIT INFO
# Provides:          tightvncserver
# Required-Start:    $local_fs
# Required-Stop:     $local_fs
# Default-Start:     2 3 4 5
# Default-Stop:      0 1 6
# Short-Description: Start/stop tightvncserver
### END INIT INFO

# More details see:
# http://www.penguintutor.com/linux/tightvnc

### Customize this entry
# Set the USER variable to the name of the user to start tightvncserver under
export USER='pi'
### End customization required

eval cd ~$USER

case "$1" in
  start)
    # 启动命令行。此处自定义分辨率、控制台号码或其它参数。
    su $USER -c '/usr/bin/tightvncserver -depth 16 -geometry 800x600 :1'
    echo "Starting TightVNC server for $USER "
    ;;
  stop)
    # 终止命令行。此处控制台号码与启动一致。
    su $USER -c '/usr/bin/tightvncserver -kill :1'
    echo "Tightvncserver stopped"
    ;;
  *)
    echo "Usage: /etc/init.d/tightvncserver {start|stop}"
    exit 1
    ;;
esac
exit 0
保存,配置服务
sudo chmod 755 /etc/init.d/tightvncserver
sudo update-rc.d tightvncserver defaults- 自动连接wifi
修改/etc/wpa_supplicant/wpa_supplicant.conf

ctrl_interface=/var/run/wpa_supplicant
#ap_scan=1
network={
        ssid="wo_shi_yige_wifi_ssid"
        scan_ssid=1
        psk="wo_shi_mi_ma"
        priority=5
 }
 network={
        ssid="pi"
        psk="onlyforpi"
        priority=1
 }

修改/etc/network/interfaces,最后倒数两行替换成
iface wlan0 inet dhcp
wpa_conf /etc/wpa_supplicant/wpa_supplicant.conf

输入sudo ifup wlan0 链接wifi- 安装Python-OpenCV
sudo apt-get update
sudo apt-get upgrade
sudo apt-get install libopencv-dev
sudo apt-get install python-opencv- 测试摄像头
sudo apt-get install xawtv
xawtv /dev/video0- 测试OpenCV
# import the necessary packages
from picamera.array import PiRGBArray
from picamera import PiCamera
import time
import cv2

# initialize the camera and grab a reference to the raw camera capture
camera = PiCamera()
camera.resolution = (640, 480)
camera.framerate = 32
rawCapture = PiRGBArray(camera, size=(640, 480))

# allow the camera to warmup
time.sleep(0.1)

# capture frames from the camera
for frame in camera.capture_continuous(rawCapture, format="bgr", use_video_port=True):
    # grab the raw NumPy array representing the image, then initialize the timestamp
    # and occupied/unoccupied text
    image = frame.array

    # show the frame
    cv2.imshow("Frame", image)
    key = cv2.waitKey(1) & 0xFF

    # clear the stream in preparation for the next frame
    rawCapture.truncate(0)

    # if the `q` key was pressed, break from the loop
    if key == ord("q"):
break- OpenCV2无法imshow()
报错如下
Xlib:  extension "RANDR" missing on display ":1".

(image:14611): GdkGLExt-WARNING **: Window system doesn't support OpenGL.
RealVNC不支持OpenGL,所以无法调用cv2模块里的imshow()函数显示图像,改成了使用matplotlib库中的函数显示(单幅图像)
- wiringPi安装
sudo apt-get install wiringPi
#测试是否安装成功
gpio -v
gpio readall- Python 程序开机自启动
sudo nano etc/rc.local
#在最后一行添加
python home/pi/XXX/XXX.py- Python 程序开机自启动2
在/home/pi/.config下创建一个文件夹,名称为autostart,并在该文件夹下创建一个xxx.desktop文件,文件内容如下:
[Desktop Entry]
Name=testname   #程序的名字
Comment=My Python Program
Exec=python /home/pi/ScanTest/Scan.py #程序的路径
Icon=/home/pi/ScanTest/Scan.png #
Terminal=false
MultipleArgs=false
Type=Application
Categories=Application;Development;
StartupNotify=true