spring-8-实验五-十 自定义数据类型的绑定进行日期类型转换。
实验五
1、在实体类UserInfo.java中添加一个日期型属性regDate,并添加该属性的get和set方法。
com.springmvc.entity.UserInfo.java文件中:
    private Date regDate;
    public Date getRegDate(){
        return regDate;
    }

    public void setRegDate(Date regDate){
        this.regDate = regDate;
}2、在SpringMVCHandler类中添加方法initBinder方法,并用@InitBinder注解标注,将从表单获取的字符串类型的日期转换成Date类型。如下所示。
com.springmvc.controller.SpringMVCHandler.java文件中:
@InitBinder
    public void initBinder(WebDataBinder binder){
        SimpleDateFormat dateFormat = new SimpleDateFormat("yyyy-MM-dd");
        binder.registerCustomEditor(Date.class, new CustomDateEditor(dateFormat, true));
}3、在SpringMVCHandler类中添加方法testInitBinder,用于测试日期类型转换。如下所示。
com.springmvc.controller.SpringMVCHandler.java文件中:
    @RequestMapping("/testInitBinder")
    public String testInitBinder(UserInfo ui){
        System.out.println(ui.getRegDate());
        return "success";
}4、在index.jsp页面中创建一个表单,如下所示。
index.jsp文件中:
5、浏览页面index.jsp,在表单中输入字符串类型日期“2016-1-2”,单击“提交”按钮,控制台输出实体对象ui中的regDate属性值,如下所示:Sat Jan 02 00:00:00 CST 2016
浏览器:
控制台:
实验六
1、将SpringMVCHandler类中使用@InitBinder注解标识的InitBinder方法注释掉。在实体类UserInfo的regDate属性上标识@DateTimeFormat注解,如图所示。
com.springmvc.controller.SpringMVCHandler.java文件:
//    @InitBinder
//    public void initBinder(WebDataBinder binder){
//        SimpleDateFormat dateFormat = new SimpleDateFormat("yyyy-MM-dd");
//        binder.registerCustomEditor(Date.class, new CustomDateEditor(dateFormat, true));
//    }
com.springmvc.entity.UserInfo.java文件中:
    @DateTimeFormat(pattern = "yyyy-MM-dd")
    private Date regDate;
2、浏览页面index.jsp,在表单中输入字符串类型日期“2016-1-2”,单击“提交”按钮,控制台依然成功输出实体对象ui中的regDate属性值。
实验七
1、在实体类UserInfo.java中,添加age和email这两个属性及其get和set方法,再使用JSR-303验证框架注解为userName、email和age这三个属性指定验证信息。如图所示。
com.springmvc.entity.UserInfo.java文件中:
    @NotNull
    @Size(min = 6, max = 20)
    private String userName;
    @Email
    @NotNull
    private String email;
    @Range(min = 18, max = 45)
    @NotNull
    private Integer age;
2、在SpringMVCHandler类中添加方法testValidate,测试表单数据校验。如下所示。
com.springmvc.controller.SpringMVCHandler文件中:
    @RequestMapping("testValidate")
    public String testValidate(@Valid UserInfo ui, BindingResult result){
        if(result.getErrorCount()>0){
            for (FieldError error:result.getFieldErrors()){
                System.out.println(error.getField()+":"+error.getDefaultMessage());
            }
        }
        return "success";
    }
3、在index.jsp页面中创建一个表单,如下所示。
bug1:HV000030: No validator could be found for constraint 'javax.validation.constraints.NotEmpty' validating type 'java.lang.String'. Check configuration for 'userName'] with root cause
solution:将成员变量之前的约束@NotEmpty改为@NotNull。@NotNull 可以用于 任意类型。
bug2:HV000030: No validator could be found for constraint 'javax.validation.constraints.Email' validating type 'java.lang.String'. Check configuration for 'email'
solution:
实验八:Spring MVC返回Json数据
(1)添加jar包
将jackson-annotations-2.6.0.jar、jackson-core-2.6.0.jar和jackson-databind-2.6.0.jar这3个jar包复制到项目spring-8的WebRoot\WEB-INF\lib目录下。
      com.fasterxml.jackson.core
      jackson-annotations
      2.6.5


      com.fasterxml.jackson.core
      jackson-core
      2.6.5


      com.fasterxml.jackson.core
      jackson-databind
      2.6.5
(2)引入jQuery资源文件
在项目WebRoot目录下创建一个文件夹scripts,将jQuery资源文件jquery.min.js复制其中。
(3)处理静态资源文件jquery.min.js
在springmvc.xml配置文件中添加
(4)在SpringMVCHandler类中添加方法returnJson,返回JSON格式数据。 如下所示。
com.springmvc.controller.SpringMVCHandler文件中:
    @ResponseBody
    @RequestMapping("returnJson")
    public Collection returnJson(){
        Map uis = new HashMap();
        uis.put(1, new UserInfo("zhangsan", "123456", "swimming", new Address("jiangsu", "NanJing")));
        uis.put(2, new UserInfo("lisi", "123456", "running", new Address("jiangsu", "YangZhou")));
        uis.put(3, new UserInfo("wangwu", "123456", "reading", new Address("jiangsu", "SuZhou")));
        return uis.values();
    }
(5)
在index.jsp页面的
标签中引入资源文件jquery.min.js,如下所示:在index.jsp页面中添加一个“Test Json”超链接,如下所示:
Test Json(6)单击“Test Json”链接,将执行一个javascript脚本函数getUserInfoJson()。在index.jsp页面的标签中,创建函数getUserInfoJson()。如下所示:
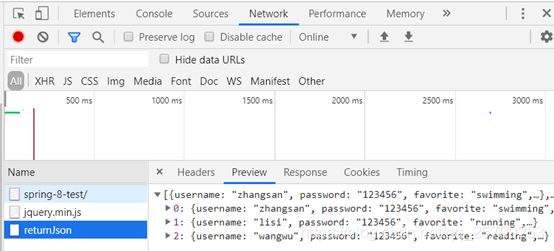
(7)使用浏览器浏览页面index.jsp,单击“Test Json”链接,通过其中配置的Firebug可以更方便查看参数data的内容,如图所示。
bug1:无法使用@Email约束,总是报这个的错。
solution: import错了,使用intellij idea的自动补全的时候才解决问题。
原为:
import javax.validation.constraints.Email;改为:
import org.hibernate.validator.constraints.Email;像@NotEmpty、@Range用不了也可以这样改。
实验九:使用CommonsMultipartResolver实现文件的上传功能。
(1)添加jar包
将commons-fileupload-1.2.jar和commons-io-1.3.2.jar这2个jar包复制到项目spring-8的WebRoot\WEB-INF\lib目录下。
我用的是maven的包依赖管理:
      commons-fileupload
      commons-fileupload
      1.4


      org.apache.commons
      commons-io
      1.3.2
(2)在Spring MVC配置文件中配置CommonsMultipartResolver类,如下所示:
springmvc.xml文件中:
(3)在index.jsp页面中创建一个表单,用于上传文件。如图所示。
index.jsp文件中:
(4)在SpringMVCHandler类中添加方法upload,处理文件上传。如下所示:
com.springmvc.controller.SpringMVCHandler.java文件中:
    @RequestMapping("/upload")
    public String upload(
            @RequestParam(value = "file", required = false) MultipartFile file,
            HttpServletRequest request, ModelMap model) {
            //获取服务器端upload文件夹的物理路径
            String path = request.getSession().getServletContext().getRealPath("upload");
            //获取文件名
            String fileName = file.getOriginalFilename();
            //实例化一个对象,表示目标文件,含物理路径
            File targetFile = new File(path, fileName);
            if (!targetFile.exists()) {
                targetFile.mkdir();
            }
            try {
                //将上传文件写到服务器指定的文件
                file.transferTo(targetFile);
            } catch (Exception e) {
                e.printStackTrace();
            }
            model.put("fileUrl", request.getContextPath() + "/upload" + fileName);
            return "success";
        }
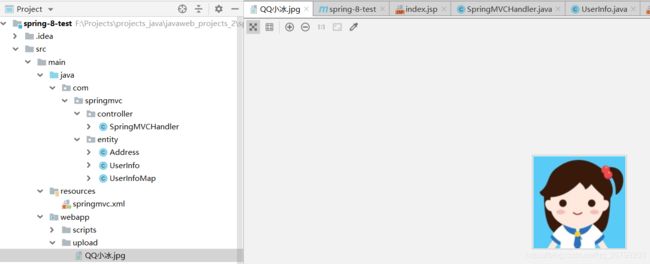
(5)浏览index.jsp页面,在文件上传表单中先通过“浏览”按钮选择一个文件,然后单击“上传”按钮。文件成功上传后,在Tomcat的根路径\webapps\spring-8\upload目录下就能看到上传的文件。
bug1:
Caused by: org.apache.catalina.LifecycleException: Failed to start component [StandardEngine[Tomcat].StandardHost[localhost].StandardContext[/spring-8-test]]
at org.apache.catalina.util.LifecycleBase.start(LifecycleBase.java:154)
      javax.servlet
      javax.servlet-api
      3.1.0
改为:
      javax.servlet
      javax.servlet-api
      3.1.0
      provided
tomcat里的servlet.jar与maven的servlet.jar冲突,这里依赖项不写servlet又代码编译不通过,所以添加
实验十:使用ResourceBundleMessageSource实现国际化资源(失败)
(1)
在项目spring-8的Spring MVC配置文件springmvc.xml中,首先配置 资源文件绑定器ResourceBundleMessageSource,如下所示:
然后配置SessionLocaleResolver,用于将Locale对象存储于Session中供后续使用。如下所示:
最后配置LocaleChangeInterceptor,用于获取请求中的locale信息,将其转为Locale对象,获取LocaleResolver对象。如图所示。
(2)在项目的src目录下创建国际化资源属性文件mess_en_US.properties和mess_zh_CN.properties。
mess_en_US.properties资源属性文件内容如下所示:
username=userName
password=Password
mess_zh_CN.properties资源属性文件内容如下所示:
username=用户名
password=密码
(3)在SpringMVCHandler类中添加方法localeChange处理国际化,并注入ResourceBundleMessageSource的Bean实例。如下所示:
@Autowired
        private ResourceBundleMessageSource messageSource;
        @RequestMapping("/localeChange")
        public String localeChange(Locale locale){
            String userName = messageSource.getMessage("userName", null, locale);
            System.out.println("userName:" + userName);
            String password = messageSource.getMessage("password", null, locale);
            System.out.println("password:" + password);
            return "login";
        }
(4)创建页面login.jsp
在页面头部使用taglib指令引入JSTL的fmt标签,如下所示:
<%@ taglib prefix="fmt" uri="http://java.sun.com/jsp/jstl/fmt" %>在
部分添加用于语言切换的超链接,并通过
    中文 |
    英文
(5)中英文转换展示
浏览页面login.jsp,依次点击“中文”和“英文”链接,可以看到
bug1:
Servlet.service() for servlet [dispatcherServlet] in context with path [/spring-8-test] threw exception [Request processing failed; nested exception is org.springframework.context.NoSuchMessageException: No message found under code 'userName' for locale 'en_US'.] with root cause
org.springframework.context.NoSuchMessageException: No message found under code 'userName' for locale 'en_US'.


