微软云 IOT android设备与Azure IOTHub
Microsoft Azure IoTHub Serials 1 - 使用Android设备与Azure IoTHub进行交互
Azure IoTHub的目标是为物联网的应用场景提供方便的设备接入,完成消息的发送和接收(C2D和D2C)。经过持续不断的努力,目前Azure IoTHub已经支持多种操作系统设备的接入,包括Android、Linux、mbed、TI RTOS、Windows等等,通过微软官方认证的设备更是多达上百种,大家可以通过网站(https://catalog.azureiotsuite.com/)查找设备。
目前,Andorid设备的占据了移动设备市场头把交椅。微软也为Android设备接入Azure IoTHub提供了SDK。本篇文章讲述如何利用Android接入Azure IoTHub,完成消息的发送和接收。
1. 开发环境和工具需求
开发环境和Android的开发环境一致,目前的标准配置就是JDK+Android Studio。
需要使用的工具是Device Explore,可以去(https://github.com/Azure/azure-iot-sdks/releases)下载,用于Azure IoTHub设备的创建和消息的发送接收监控。
2. 利用Device Explore创建设备
设备接入Azure IoTHub需要提供认证,该步骤可以通过Device Explore完成,具体方法如下:
- 首先,参考文档(https://docs.microsoft.com/zh-cn/azure/iot-hub/iot-hub-create-through-portal)完成Azure IoTHub的创建。
- 其次,打开Device Explore,在Configuration页面,配置Connect String,然后点击Update进行更新。
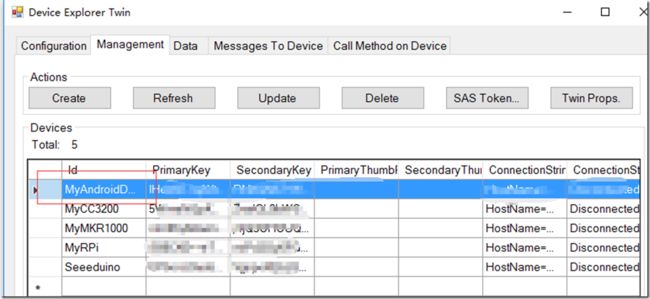
- 最后,在管理(Management)页面,通过Create创建新的设备,输入名称(以MyAndroidDevice为例),点击创建,如下图所示。
3. 创建Android工程
创建Andorid工程,在build.gradle文件中,加入对“iot-device-client:1.1.25”的依赖,如下:
    dependencies {
        // Remote binary dependency
        compile 'com.microsoft.azure.sdk.iot:iot-device-client:1.1.25'
    }
4. 编写xml界面文件
为Activity_main.xml文件加入按钮控件和信息显示控件,如下图所示。
5. 编写后台java文件
首先,在默认生成的代码基础上,引入如下几个需要用的包:
   import android.widget.Button;
   import android.widget.TextView;
   import com.microsoft.azure.sdk.iot.device.*;
   import android.os.Handler;
其次,在MainActivity类中申明全局的变量如下:
   String connString = "此处需要填写Device Explore生成的连接字符串";
   String deviceId = "MyAndroidDevice";
   double temperature;
   double humidity;
   TextView info;
   static String rxinfo;
其中,connString是步骤2中生成的Android设备的连接字符串,可以通过右键“Copy ConnectString”进行拷贝,复制到这里来。设备名称是MyAndroidDevice,后面申明了两个全局的变量,用于存放模拟的温度和湿度;rxinfo用于存放接收的Azure IotHub的数据。
接着,为发送消息Send Message按钮添加监听事件,在用户点击时,完成模拟温湿度消息的发送,其代码如下:
   public void btnSendOnClick(View v) throws URISyntaxException, IOException {
    Button button = (Button) v;

    IotHubClientProtocol protocol = IotHubClientProtocol.MQTT;

    DeviceClient client = new DeviceClient(connString, protocol);

    try {
        client.open();
    }
    catch(IOException e1)
    {
        System.out.println("Exception while opening IoTHub connection: " + e1.toString());
    }
    catch(Exception e2)
    {
        System.out.println("Exception while opening IoTHub connection: " + e2.toString());
    }

    temperature = 20.0 + Math.random() * 10;
    humidity = 30.0 + Math.random() * 20;

    String msgStr = "{\"deviceId\":\"" + deviceId  + ",\"temperature\":"+ temperature +",\"humidity\":"+ humidity +"}";
    try
    {
        Message msg = new Message(msgStr);
        msg.setProperty("temperatureAlert", temperature > 28 ? "true" : "false");
        msg.setMessageId(java.util.UUID.randomUUID().toString());
        System.out.println(msgStr);
        EventCallback eventCallback = new EventCallback();
        client.sendEventAsync(msg, eventCallback,null);
    }
    catch (Exception e)
    {
    }

    client.close();
   }
然后,为接收数据Receive Message添加监听事件,在用户点击时,接收Azure IoTHub的数据,其代码如下:
  public void btnReceiveOnClick(View v) throws URISyntaxException, IOException {
    Button button = (Button) v;


    IotHubClientProtocol protocol = IotHubClientProtocol.MQTT;

    DeviceClient client = new DeviceClient(connString, protocol);

    if (protocol == IotHubClientProtocol.MQTT)
    {
        MessageCallbackMqtt callback = new MessageCallbackMqtt();
        Counter counter = new Counter(0);
        client.setMessageCallback(callback, counter);
    }
    else
    {
        MessageCallback callback = new MessageCallback();
        Counter counter = new Counter(0);
        client.setMessageCallback(callback, counter);
    }

    try {
        client.open();
    }
    catch(IOException e1)
    {
        System.out.println("Exception while opening IoTHub connection: " + e1.toString());
    }
    catch(Exception e2)
    {
        System.out.println("Exception while opening IoTHub connection: " + e2.toString());
    }

    try {
        Thread.sleep(2000);
    } catch (InterruptedException e) {
        e.printStackTrace();
    }

    client.close();
  }
之后,在接收消息的回调函数中,进行数据的接收,并赋给全局的rxinfo,其代码如下:
protected static class MessageCallbackMqtt implements com.microsoft.azure.sdk.iot.device.MessageCallback
  {
    public IotHubMessageResult execute(Message msg, Object context)
    {
        Counter counter = (Counter) context;
        rxinfo= "Received message " + counter.toString() + " with content: " + new String(msg.getBytes(), Message.DEFAULT_IOTHUB_MESSAGE_CHARSET);
        counter.increment();

        return IotHubMessageResult.COMPLETE;
    }
  }
另外,为了接收的数据能够更新到界面的textview控件,需要在MainActivity类中设置一个Handle,其代码如下:
   Handler mTimeHandler = new Handler() {
    public void handleMessage(android.os.Message msg) {
        if (msg.what == 0) {
            info.setText(rxinfo);
            sendEmptyMessageDelayed(0, 1000);
        }
    }
   };
最后,在MainActivity的onCreate生命周期事件中启动它,代码如下:
   protected void onCreate(Bundle savedInstanceState) {
    super.onCreate(savedInstanceState);
    setContentView(R.layout.activity_main);

    info=(TextView)findViewById(R.id.info);
    rxinfo="no rx message";
    mTimeHandler.sendEmptyMessageDelayed(0, 1000);
   }
6. 调试结果
本应用程序在模拟器和Nexus 5设备上调试通过,应用程序启动以后,点击Send Message按键,发送一次消息给Azure IoTHub,可以在Device Explore的Data中进行监视,如下图所示。
同样,为了演示Android设备接收Azure IoTHub的消息,可以在Device Explore的Message to Device中,发送一个hello world的消息,然后在Android应用程序中点击Receive Message进行数据的接收,显示在TextView控件上,如下图所示。

源代码下载:链接