Spring Cloud系列教程(七):服务注册与发现ZooKeeper(Finchley版本)
一、前言
在前面的几篇文章中,分别讲了如何使用时SpringCloud整合Eureka和SpringCloud整合Consul作为注册中心实现服务的注册与发现,Eureka在闭源后,注册中心可替代的有Consul、Zookeeper,这篇文章就来学习一下SpringCloud整合Zookeeper作为微服务的注册中心,实现服务的注册与发现,然后通过服务提供者提供服务和服务消费者消费服务为例,基于Feign+Zookeeper+Ribbon组合实现RPC远程调用、本地负载均衡功能。
二、了解Zookeeper
Zookeeper是一个高性能,分布式的,开源分布式应用协调服务,使用Java语言开发。是一个分布式协调工具,可以实现服务注册与发现、注册中心、消息中间件、分布式配置中心、负载均衡、统一命名服务、集群管理、Leader选举、分布式锁、分布式队列等。
- Zookeeper默认支持Ribbon负载均衡
三、安装Zookeeper前你需要知道的版本问题
最开始搭建这套环境的时候,我所使用的环境是:
JDK版本是JDK1.8SpringBoot版本是2.0.3SpringCloud版本是Finchley版本Zookeeper安装包使用的是zookeeper-3.3.6
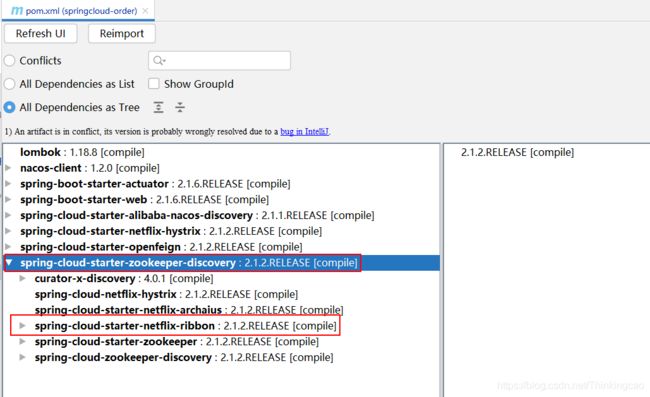
在环境搭建完了之后,启动服务提供者和消费者,启动失败,然后将Zookeeper版本换成3.4,启动提供者和消费者工程后,启动成功,无论如何服务无法注册到Zookeeper上去,老是注册Zookeeper节点不成功,通过查看引入的spring-cloud-starter-zookeeper-discovery依赖,发现curator是curator4.0的版本:

然后查看Zookeeper官网说明: curator4.0要求zookeeper3.5
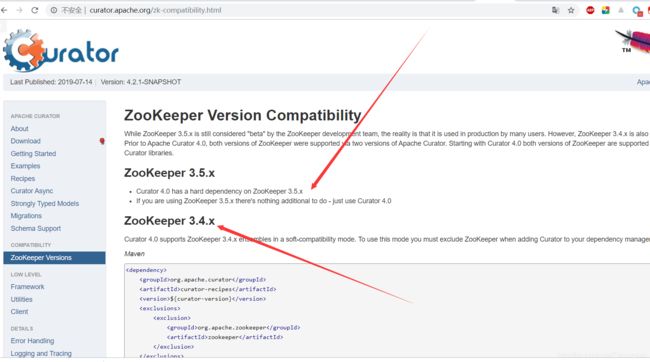
结论:SpringBoot2.0以上版本需要Zookeeper3.5版本
四、安装使用Zookeeper
Zookeeper是Java语言开发的,所以也需要下载、安装、启动,这里以Windows安装使用为例,注意,从官网下载完Zookeeper后需要编译一下才可以使用,度娘上也有编译好的,下载即可使用,另外我的文章末尾贴源码里也有对应编译好的Zookeeper安装包,是我自己学习时使用的,版本对应关系都OK,大家直接解压启动便可以直接使用,所以无需另外下载,下面贴出3种下载安装包途径;
- 文章末尾源码有: 可以直接使用文章末尾贴的源码里的安装包
- CSDN(已编译好)下载: https://download.csdn.net/download/Thinkingcao/12187726
- 官网下载地址为: https://archive.apache.org/dist/zookeeper/zookeeper-3.5.5/
1.下载解压后如图所示:
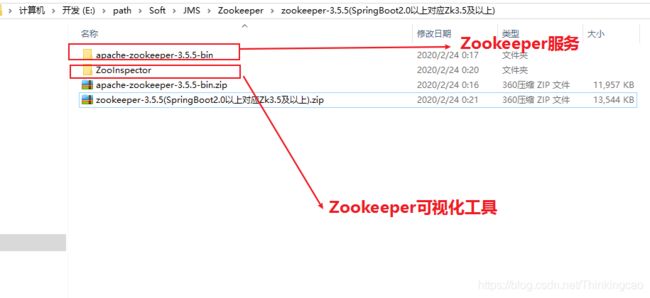
2. 启动zookeeper服务
双击zkServer.cmd即可启动zookeeper服务;

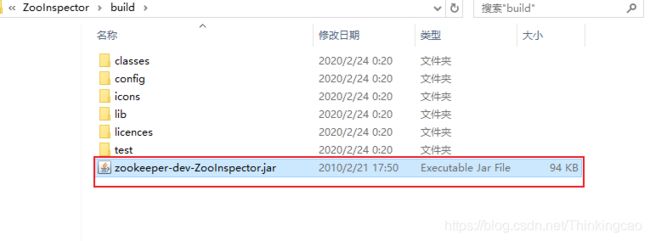
3. 打开ZooInspector可视化工具
双击zookeeper-dev-ZooInspector.jar即可启动
五、实现思路
- 第一步: 创建服务提供者工程
springcloud-zookeeper-provider端口为8005 - 第二步: 创建服务消费者工程
springcloud-feign-consumer端口为8001 - 第三步: 然后配置提供者注册服务到
zookeeper节点, - 第四步: 服务消费者注册服务到
zookeeper节点 - 第五步: 然后基于
Feign+Ribbon+Zookeeper实现RPC远程调用、负载均衡。
注意: 注册到
zookeeper上的服务节点都是临时节点,其服务节点伴随着服务的声明周期结束而消失,消失的时候会有稍微一点延迟(也就是程序关闭后zookeeper上的服务节点消失)
贴一下项目完整截图:

六、搭建服务提供者
1. 引入依赖
 <!--SpringBoot依赖版本-->
    <parent>
        <groupId>org.springframework.boot</groupId>
        <artifactId>spring-boot-starter-parent</artifactId>
        <version>2.0.3.RELEASE</version>
        <relativePath/>
    </parent>

    <!--项目编码、jdk版本、SpringCloud版本定义-->
    <properties>
        <project.build.sourceEncoding>UTF-8</project.build.sourceEncoding>
        <project.reporting.outputEncoding>UTF-8</project.reporting.outputEncoding>
        <java.version>1.8</java.version>
        <spring-cloud.version>Finchley.RELEASE</spring-cloud.version>
    </properties>

    <!--声明管理SpringCloud版本依赖信息-->
    <dependencyManagement>
        <dependencies>
            <dependency>
                <groupId>org.springframework.cloud</groupId>
                <artifactId>spring-cloud-dependencies</artifactId>
                <version>${spring-cloud.version}</version>
                <type>pom</type>
                <scope>import</scope>
            </dependency>
        </dependencies>
    </dependencyManagement>

    <dependencies>
        <!-- SpringBootWeb组件 -->
        <dependency>
            <groupId>org.springframework.boot</groupId>
            <artifactId>spring-boot-starter-web</artifactId>
        </dependency>

        <!--springcloud整合consul组件-->
        <dependency>
            <groupId>org.springframework.cloud</groupId>
            <artifactId>spring-cloud-starter-zookeeper-discovery</artifactId>
        </dependency>

    </dependencies>

    <!--maven插件-->
    <build>
        <plugins>
            <plugin>
                <groupId>org.springframework.boot</groupId>
                <artifactId>spring-boot-maven-plugin</artifactId>
            </plugin>
        </plugins>
    </build>
2. 启动类加@EnableDiscoveryClient注解
启动类上加@EnableDiscoveryClient注解表示启用发现注册中心,向Zooeeper注册服务节点
package com.thinkingcao.api;

import org.springframework.boot.SpringApplication;
import org.springframework.boot.autoconfigure.SpringBootApplication;
import org.springframework.cloud.client.discovery.EnableDiscoveryClient;

@SpringBootApplication
@EnableDiscoveryClient
public class AppZookeeperProvider {

    public static void main(String[] args) {
        SpringApplication.run(AppZookeeperProvider.class, args);
    }

}
3. 编辑application.yml
##=========服务生产者-会员服务配置========
server:
  port: 8005
###服务别名----服务注册到注册中心名称
spring:
  ##应用服务名称,
  application:
    name: zk-member-provider
  cloud:
    zookeeper:
      ##连接zookeeper的地址
      connect-string: 127.0.0.1:2181
      discovery:
        #开启服务注册
        register: true
        enabled: true
4. 创建服务提供者接口
package com.thinkingcao.api.controller;

import org.springframework.beans.factory.annotation.Value;
import org.springframework.web.bind.annotation.RequestMapping;
import org.springframework.web.bind.annotation.RequestMethod;
import org.springframework.web.bind.annotation.RequestParam;
import org.springframework.web.bind.annotation.RestController;

/**
 * @desc:  服务生产者(会员服务)
 * @author: cao_wencao
 * @date: 2020-02-22 23:44
 */
@RestController
public class ApiZklMemberController {

    @Value("${server.port}")
    private String serverPort;

    @RequestMapping(value="/getMember", method = RequestMethod.GET)
    private String getMember(@RequestParam("userName") String userName){
        return "我是会员服务,订单服务调用会员服务成功啦, 姓名为: " + userName + ", 端口为: " + serverPort;
    }
}
七、搭建服务消费者
1. 引入依赖
  <!--SpringBoot依赖版本-->
    <parent>
        <groupId>org.springframework.boot</groupId>
        <artifactId>spring-boot-starter-parent</artifactId>
        <version>2.0.3.RELEASE</version>
        <relativePath/>
    </parent>

    <!--项目编码、jdk版本、SpringCloud版本定义-->
    <properties>
        <project.build.sourceEncoding>UTF-8</project.build.sourceEncoding>
        <project.reporting.outputEncoding>UTF-8</project.reporting.outputEncoding>
        <java.version>1.8</java.version>
        <spring-cloud.version>Finchley.RELEASE</spring-cloud.version>
    </properties>

    <!--声明管理SpringCloud版本依赖信息-->
    <dependencyManagement>
        <dependencies>
            <dependency>
                <groupId>org.springframework.cloud</groupId>
                <artifactId>spring-cloud-dependencies</artifactId>
                <version>${spring-cloud.version}</version>
                <type>pom</type>
                <scope>import</scope>
            </dependency>
        </dependencies>
    </dependencyManagement>

    <dependencies>
        <!-- SpringBootWeb组件 -->
        <dependency>
            <groupId>org.springframework.boot</groupId>
            <artifactId>spring-boot-starter-web</artifactId>
        </dependency>

        <!--springcloud整合consul组件-->
        <dependency>
            <groupId>org.springframework.cloud</groupId>
            <artifactId>spring-cloud-starter-zookeeper-discovery</artifactId>
        </dependency>

        <!-- SpringCloud整合Feign组件-->
        <dependency>
            <groupId>org.springframework.cloud</groupId>
            <artifactId>spring-cloud-starter-openfeign</artifactId>
        </dependency>

    </dependencies>

    <!--maven插件-->
    <build>
        <plugins>
            <plugin>
                <groupId>org.springframework.boot</groupId>
                <artifactId>spring-boot-maven-plugin</artifactId>
            </plugin>
        </plugins>
    </build>
2. 修改启动类
启动类上加@EnableDiscoveryClient注解表示启用发现注册中心
启动类上加@EnableFeignClients注解表示启动Feign
package com.thinkingcao.api;

import org.springframework.boot.SpringApplication;
import org.springframework.boot.autoconfigure.SpringBootApplication;
import org.springframework.cloud.client.discovery.EnableDiscoveryClient;
import org.springframework.cloud.openfeign.EnableFeignClients;

@SpringBootApplication
@EnableDiscoveryClient
@EnableFeignClients
public class AppFeignConsumer {
    public static void main(String[] args) {
        SpringApplication.run(AppFeignConsumer.class, args);
    }
}
3. 编辑application.yml
##=========服务消费者-订单服务配置========
server:
  port: 8001
###服务别名----服务注册到注册中心名称
spring:
  ##应用服务名称,
  application:
    name: zk-order-cosumer
  cloud:
    zookeeper:
       ##连接zookeeper的地址
      connect-string: 127.0.0.1:2181
      discovery:
        register: true
        enabled: true
4. 创建Feign接口
- IFeignOrderService
package com.thinkingcao.api.feign;

import org.springframework.cloud.openfeign.FeignClient;
import org.springframework.web.bind.annotation.RequestMapping;
import org.springframework.web.bind.annotation.RequestMethod;
import org.springframework.web.bind.annotation.RequestParam;

/**
 * @desc:  服务消费者通过Feign HTTP客户端调用工具调用服务提供者提供的服务
 * @author: cao_wencao
 * @date: 2020-02-24 12:24
 */
@FeignClient("zk-member-provider")
public interface IFeignOrderService {

    //本地RPC调用会员接口
    @RequestMapping(value = "/getMember", method = RequestMethod.GET)
    public String getMember(@RequestParam("userName") String userName);

}
5. Controller调用Feign接口消费服务
- ApiFeignOrderController
package com.thinkingcao.api.controller;

import com.thinkingcao.api.feign.IFeignOrderService;
import org.springframework.beans.factory.annotation.Autowired;
import org.springframework.web.bind.annotation.RequestMapping;
import org.springframework.web.bind.annotation.RequestMethod;
import org.springframework.web.bind.annotation.RequestParam;
import org.springframework.web.bind.annotation.RestController;

/**
 * @desc:
 * @author: cao_wencao
 * @date: 2020-02-24 12:27
 */
@RestController
public class ApiFeignOrderController {

    @Autowired(required = false)
    private IFeignOrderService feignOrderService;

    @RequestMapping(value ="/getMemberInfo",method = RequestMethod.GET)
    public String getMemberInfo(@RequestParam("userName") String userName) {
        String memberInfo = feignOrderService.getMember(userName);
        return memberInfo;
    }
}
八、测试
-
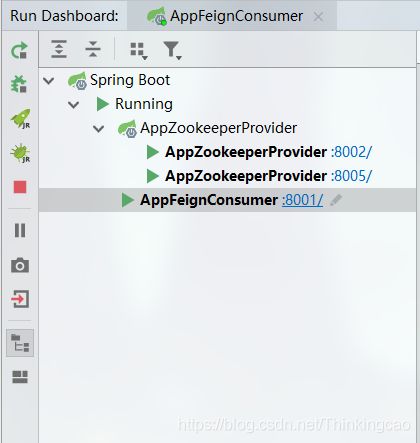
启动
springcloud-zookeeper-provider服务两次,端口分别为:8002、8005 -
启动
springcloud-feign-consumer服务一次,端口为:8001
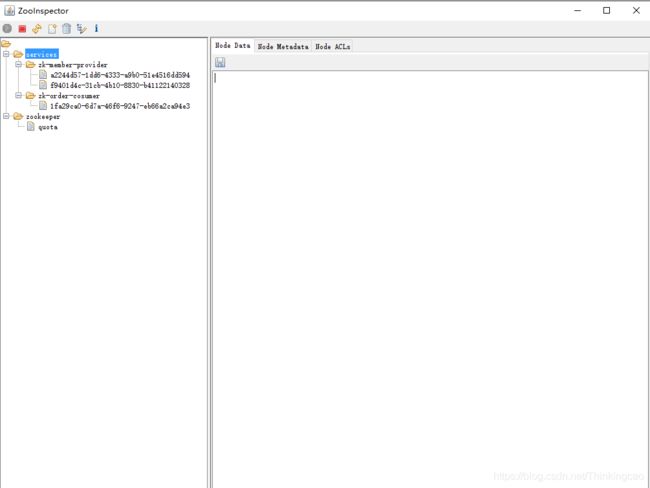
-
查看
ZooInspector工具,3个服务节点注册上去了
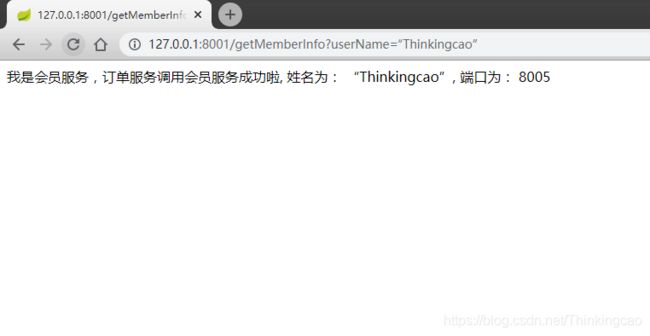
-
访问URL: http://127.0.0.1:8001/getMemberInfo?userName=“Thinkingcao”,浏览器交替显示结果:
我是会员服务,订单服务调用会员服务成功啦, 姓名为: “Thinkingcao”, 端口为: 8005
我是会员服务,订单服务调用会员服务成功啦, 姓名为: “Thinkingcao”, 端口为: 8002

九、源码
1. 项目源码: https://github.com/Thinkingcao/SpringCloudLearning/tree/master/springcloud-zookeeper
十、SpringCloud系列教程
1.Spring Cloud系列教程(八): Spring Cloud系列教程(八):服务保护断路器Hystrix(Finchley版本)