语音波形,截断的频域输出以及语谱图制作
语音可视化
- 参考链接1
- 参考链接2
- 参考链接3
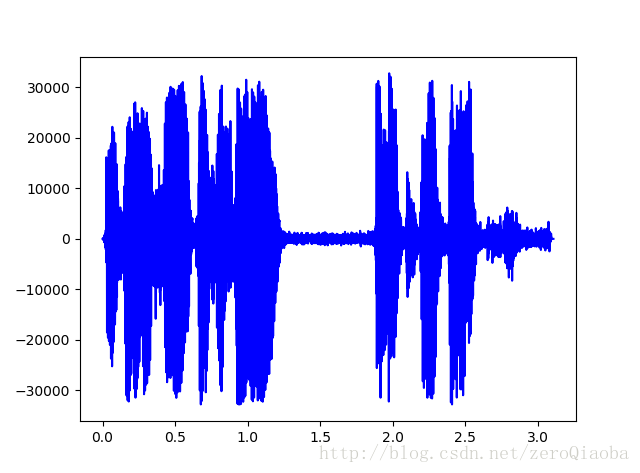
今天我想复现一下,文中语谱图提取部分的代码 
由于输入的语音有单通道和双通道之分,处理方式是单通道不变,双通道只取一个通道的信息。附上代码:
import wave as we
import numpy as np
import matplotlib.pyplot as plt

def wavread(path):
    wavfile =  we.open(path,"rb")
    params = wavfile.getparams()
    nchannels,samplewidth,framerate,nframes=params[:4]
    datawav = wavfile.readframes(nframes)
    wavfile.close()
    wave_data = np.fromstring(datawav,dtype = np.short)

    if nchannels==1: wave_data.shape=-1,1
    if nchannels==2: wave_data.shape=-1,2

    wave_data = wave_data.T
    time = np.arange(0, nframes) * (1.0/framerate)
    return wave_data[0],time


path = "1.wav"
wavdata,wavtime = wavread(path)
plt.plot(wavtime, wavdata,color = 'blue')
plt.show()
- 1
- 2
- 3
- 4
- 5
- 6
- 7
- 8
- 9
- 10
- 11
- 12
- 13
- 14
- 15
- 16
- 17
- 18
- 19
- 20
- 21
- 22
- 23
- 24
- 25
- 26
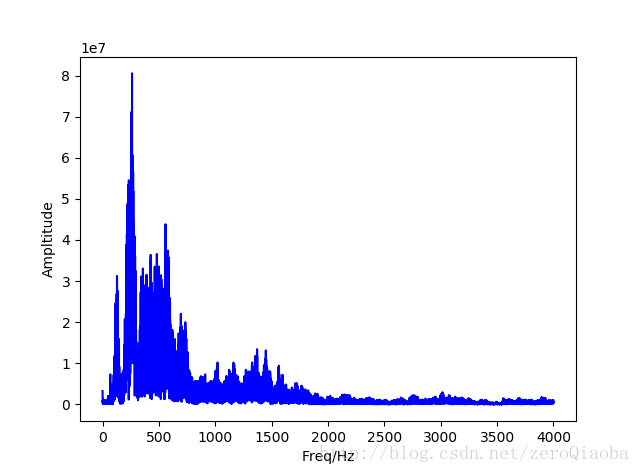
然后对原始语音信号处理,得到4k范围内的频率信号。为了理解操作过程,对fft变换的结果进行了总结: 
def fft_4K(path):
    # gain wav data
    wavfile =  we.open(path,"rb")
    params = wavfile.getparams()
    nchannels,samplewidth,framerate,nframes=params[:4]
    datawav = wavfile.readframes(nframes)
    wavfile.close()
    wave_data = np.fromstring(datawav,dtype = np.short)

    if nchannels==1: wave_data.shape=-1,1
    if nchannels==2: wave_data.shape=-1,2

    wave_data = wave_data.T

    # gain fft
    df=framerate/(float)(nframes-1)
    freq=[df*n for n in range(0,nframes)]
    transformed=np.fft.fft(wave_data[0])
    d=int(len(transformed)/2)
    while freq[d]>4000:
        d-=10
    freq=freq[:d]
    transformed=transformed[:d]
    for i,data in enumerate(transformed):
        transformed[i]=abs(data)

return freq, transformed- 1
- 2
- 3
- 4
- 5
- 6
- 7
- 8
- 9
- 10
- 11
- 12
- 13
- 14
- 15
- 16
- 17
- 18
- 19
- 20
- 21
- 22
- 23
- 24
- 25
- 26
- 27
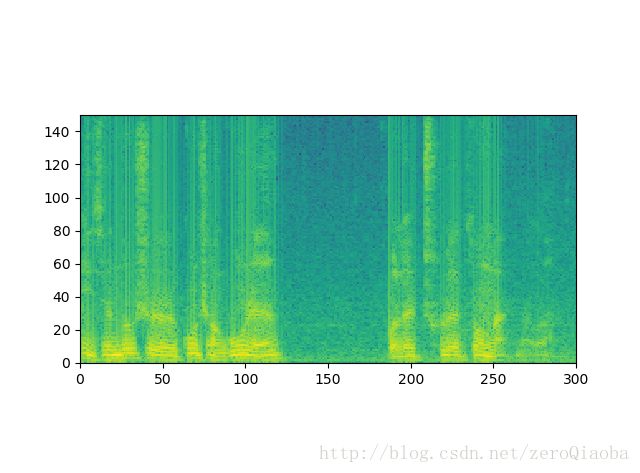
之后,为了进一步得到语谱图结果,采用如下代码,帧长为20ms,帧移为10ms。测试语音只保留3s内的信息,显示的频率范围是【0,7.5KHz】,之后的频率范围内的特征值被舍弃。
import numpy, wave
import numpy, matplotlib.pyplot as plt

# target: gain spec from framename
# input: filename, wav file path, string
#        window_length_ms(/ms),window length(/ms), int
#        window_shift_times(),rate of shit length, float
def getSpectrum(filename, window_length_ms, window_shift_times):

    # read data
    wav_file = wave.open(filename, 'r')
    params = wav_file.getparams()
    # nchannels, channel number (like, 2 channel wav)
    # sampwidth, sample percision rate (like, 2)
    # framerate, sample rate, (like, 44100)
    # wav_length, how much points after sampled, (int)
    nchannels, sampwidth, framerate, wav_length = params[:4]
    str_data = wav_file.readframes(wav_length)
    wave_data = numpy.fromstring(str_data, dtype=numpy.short)
    wav_file.close()

    # gain log spectrogram
    window_length = framerate * window_length_ms / 1000 # change time to points number
    window_shift = int(window_length * window_shift_times) # change time to points number
    nframe = (wav_length - (window_length - window_shift)) / window_shift # gain frame number
    spec = numpy.zeros((window_length/2, nframe)) # store spectrogram [only half part]
    for i in xrange(nframe):
        start = i * window_shift
        end = start + window_length
        spec[:, i] = numpy.log(numpy.abs(numpy.fft.fft(wave_data[start:end])))[:window_length/2]
    return spec


# main process
speech_spectrum = getSpectrum('1.wav', 20, 0.5)
plt.imshow(speech_spectrum[:,:])
plt.xlim(0, 300)
plt.ylim(0, 150)
plt.show()- 1
- 2
- 3
- 4
- 5
- 6
- 7
- 8
- 9
- 10
- 11
- 12
- 13
- 14
- 15
- 16
- 17
- 18
- 19
- 20
- 21
- 22
- 23
- 24
- 25
- 26
- 27
- 28
- 29
- 30
- 31
- 32
- 33
- 34
- 35
- 36
- 37
- 38
- 39
个人分类: 各种toolkit使用总结


