redux、react-redux、中间件基础知识记录
redux,react-redux等知识也比较老了,网上也有很多的例子和讲解,我这里只是自己动手去实际操作了下redux等内容,给自己记录下
- cra快速创建项目
npx create-react-app 项目名称
- 安装redux
npm install redux -S
- redux三大原则
单一数据源:整个应用的 state 被储存在一棵 object tree 中,并且这个 object tree 只存在于唯一一个 store 中。
State 是只读的:唯一改变 state 的方法就是触发 action,action 是一个用于描述已发生事件的普通对象。
使用纯函数来执行修改:Reducer 只是一些纯函数,它接收先前的 state 和 action,并返回新的 state。 - redux下的store
- 创建一个store
import { createStore } from 'redux'
const store = createStore(这里需要传入reducer)

// createStore(reducer, [preloadedState], enhancer)
- 创建一个reducer
我们在src下新建一个reducer目录,下面创建countReducer.js
// countReducer.js
const initialState = {
  count:'我是count-reducer里面的初始值state'
}

const countReducer = (state = initialState, { type, payload }) => {
  switch (type) {
  case 'CHANGESTATE':
    return { ...state, count:'我改变了state值'}
  default:
    return state
  }
}

export default countReducer

reducer接收2个参数,一个是初始化的state,一个是action,
这个地方只是结构赋值了action,它里面有一个type和一个payload也就是传给reducer的参数
- 引入reducer,使用getState()
import { createStore } from 'redux'
import countReducer from './reducer/countReducer'
const store = createStore(countReducer)
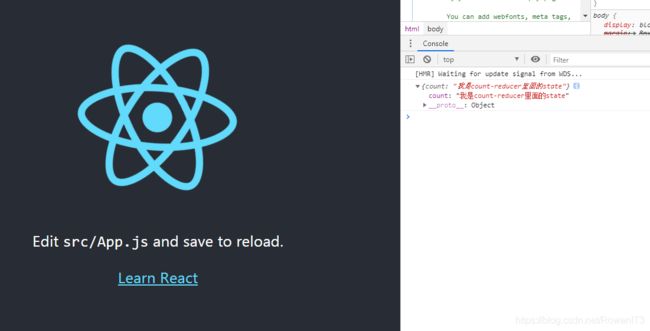
console.log(store.getState())
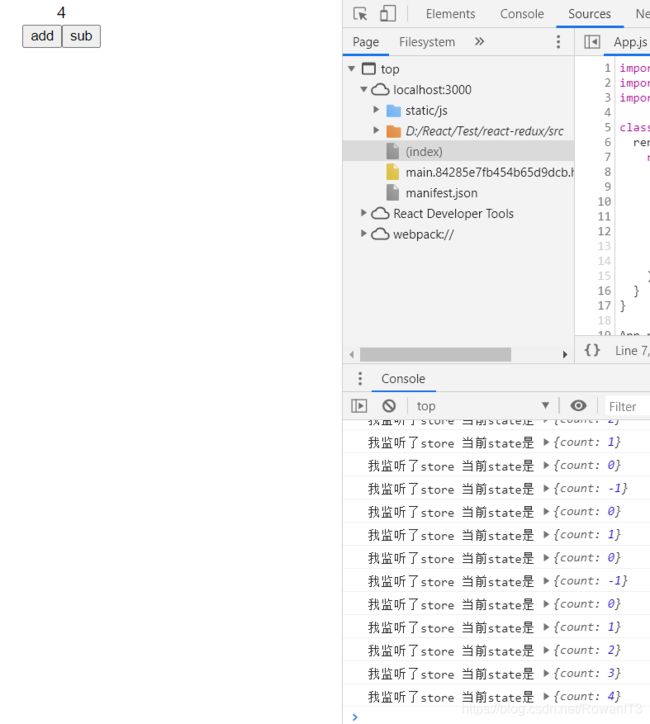
当每次dispatch action到reducer时 会被监听
const unSubscribe = store.subscribe(()=> console.log("我监听了store 当前state是",store.getState()))
// unSubscribe() 注销监听

store.dispatch({type:'CHANGESTATE'})

5. 这里借用官网例子计数器
新建constants文件夹下面新建index.js,这个文件主要就是声明我们的action中的type类型,就类似于vuex里面的mutation的types一样为常量
// constants/index.js
export const ADD = 'ADD'
export const SUB = 'SUB'
再在action里面引入
import { ADD, SUB } from '../constant';
export const addAction = payload => ({
  type: ADD,
  payload,
});
export const subAction = payload => ({
  type: SUB,
  payload,
});
修改下reducer
const initialState = {
  count: 0,
};
export default (state = initialState, { type, payload }) => {
  switch (type) {
    case 'ADD':
      return { ...state, count: state.count + 1 };
    case 'SUB':
      return { ...state, count: state.count - 1 };
    default:
      return state;
  }
};
修改下index.js
这里我们通过props把store,onAdd,onSub方法传递给App组件内部,当我们修改state时,需要借用subscribe来监听每次state改变,此时需要让它执行render的渲染这样视图才会变化
src/index.js
// 引入redux createStore
import { createStore } from 'redux';
// 引入reducer
import { countReducer } from './reducer/countReducer';
// 引入action
import { addAction, subAction } from './action/countAction';

const store = createStore(countReducer);

function render() {
  ReactDOM.render(
    <React.StrictMode>
      <App store={store} onAdd={() => store.dispatch(addAction())} onSub={() => store.dispatch(subAction())} />
    </React.StrictMode>,
    document.getElementById('root')
  );
}

render();

store.subscribe(() => {
  render();
  console.log('我监听了store 当前state是', store.getState());
});
App.js
import React, { Component } from 'react';
import './App.css';
import PropTypes from 'prop-types';

class App extends Component {
  render() {
    return (
      <div className="App">
        <div>{this.props.store.getState().count}</div>
        <div>
          <button onClick={() => this.props.onAdd()}>add</button>
          <button onClick={() => this.props.onSub()}>sub</button>
        </div>
      </div>
    );
  }
}

App.propTypes = {
  store: PropTypes.object.isRequired,
  onAdd: PropTypes.func.isRequired,
  onSub: PropTypes.func.isRequired,
};

export default App;
- react-redux
npm install react-redux -S
react-redux是专门提供给react配合使用的,在上面的例子中我们是把所有的操作通过props传递到了子组件,这样以后组件越来越多了,那不是每层组件我们都会去操作,所以react-redux提供了connect方法使用。在使用connect能使用的基础上是react-redux提供的Provider提供了我们的顶层store同context一样挂载在组件树的顶层,所以子组件才可以通过connect与store进行通信联系。
- connect参数
connect是一个高阶函数,它接收我们传递的state,dispatch组合然后再接收一个组件,最后返回一个被挂载了store的组件,所以内部可以使用。
connect方法有四个参数,具体参考react-redux connect
第一个参数:mapStateToProps(state,[ownProps]),我理解的就是将state映射到props上面方便我们后面通过props获取,它也有两个参数,一个是state,一个是当前组件的props,我们在使用connect的时候需要给出mapStateToProps函数,这样当我们的state变化时会调用该函数也就映射了最新的state,这样我们的视图也会改变,传了第二参数,当组件自身的props变化了它也会触发该函数,一般情况下我们只需要第一个参数,具体看业务
import React, { Component } from 'react';
import './App.css';
import PropTypes from 'prop-types';
import { connect } from 'react-redux';
import { addAction, subAction } from './action/countAction';

// 映射state 常规写法
// const mapStateToProps = state => ({
//   appCount:state.count
// })
// 解构赋值写法
const mapStateToProps = ({count}) => {
  return {
    count
  }
}

class App extends Component {
  render() {

    return (
      <div className="App">
        <div>{this.props.count}</div>
        <div>
          <button>add</button>
          <button>sub</button>
        </div>
      </div>
    );
  }
}
App.propTypes = {
  count: PropTypes.number.isRequired,
  add: PropTypes.func.isRequired,
  sub: PropTypes.func.isRequired,
};
export default connect(mapStateToProps)(App);
第二个参数:mapDispatchToProps : object | (dispatch,[ownProps]),它可以时一个对象object也可以是一个包含两个参数的函数;我理解的就是将store.dispatch映射到props上面方便我们后面通过props获取,它也有两个参数,一个是dispatch,一个是当前组件的props。
import React, { Component } from 'react';
import './App.css';
import PropTypes from 'prop-types';
import { connect } from 'react-redux';
import { addAction, subAction } from './action/countAction';

映射state
// const mapStateToProps = state => ({
//   appCount:state.count
// })

const mapStateToProps = ({ count }) => {
  return {
    count,
  };
};

 映射store.dispatch 函数模式
// const mapDispatchToProps = dispatch => {
//   return {
//     add: () => dispatch(addAction()),
//     sub: () => dispatch(subAction()),
//   };
// };

对象模式 这里调用bindActionCreators会自动的给我们绑定dispatch
bindActionCreators(mapDispatchToProps, dispatch)
const mapDispatchToProps = {
  add: addAction,
  sub: subAction,
};

class App extends Component {
  static propsType = {
    count: PropTypes.number.isRequired,
    add: PropTypes.func.isRequired,
    sub: PropTypes.func.isRequired,
  };
  render() {
    // state
    const { count } = this.props;
    // dispatch
    const { add, sub } = this.props;
    return (
      <div className="App">
        <div>{count}</div>
        <div>
          <button onClick={() => add()}>add</button>
          <button onClick={() => sub()}>sub</button>
        </div>
      </div>
    );
  }
}
export default connect(mapStateToProps, mapDispatchToProps)(App);
第三参数第四参数参考官网说明。
- connect装饰器
connect装饰器只是一个语法糖,实际大体上跟使用函数差不多,我们只需将
connect(mapStateToProps, mapDispatchToProps)(App)改成原来的App
然后在class前面头部添加@connect(mapStateToProps,mapDispatchToProps)
- redux中间件
我理解的中间件就是在我们操作dispatch action的时候可以拦截我们的action直至操作完state,它内部有个next方法,会一个一个执行下一个action。
比如redux-thunk,redux-saga,redux-log,在前面的createStore函数中接收3个参数,第一个是reducer,第二个是预备state,第三个参数我们就可以放置中间件,但是还需要redux提供的applyMiddleware方法。
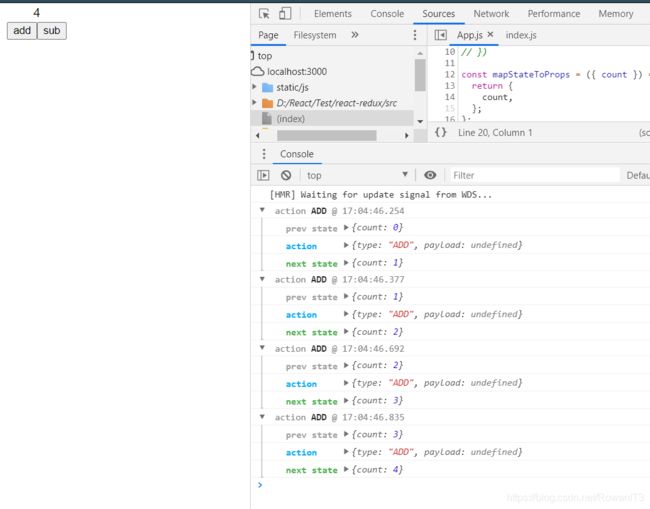
- redux-logger
npm i redux-logger redux-thunk -S

src/index.js
import {createStore,addMiddleware} from 'redux'
import reduxLogger from 'redux-logger'
import countReduceer from './reducer/countReducer'
const store = createStore(countReducer,addMiddleware(reduxLogger))
这样我们在每次操作dispatch的时候都会打印出操作日志

2. redux-thunk
import reduxThunk from 'redux-thunk'
const store = createStore(countReducer,addMiddleware(reduxThunk))
接下来reducer下面再创建一个asyncReducer.js
const initialState = {
  text: '我没执行异步',
};

export default (state = initialState, { type, text }) => {
  console.log(text);

  switch (type) {
    case 'ASYNCSTART':
      return { ...state, text };
    case 'ASYNCEND':
      return { ...state, text };
    case 'ASYNCERROR':
      return { ...state, text };
    default:
      return state;
  }
};
此时我们有了两个reducer,但是createStore只接收一个reducer,这个时候需要用到redux提供的combineReducers
reducer文件下新建index.js
import { combineReducers } from 'redux';
import countReducer from './countReducer';
import asyncReducer from './asyncReducer';
const rootReducer = combineReducers({
  countReducer,
  asyncReducer,
});
export default rootReducer;
action文件下新建asyncAction.js
import { ASYNCSTART, ASYNCEND, ASYNCERROR } from '../constants';

export const getInfo = payload => (dispatch, state) => {
  dispatch(fetch_start('异步请求开始啦'));
  fetch('https://randomuser.me/api/')
    .then(res => {
      dispatch(fetch_end('异步请求结束啦'));
      console.log(res);
    })
    .catch(err => {
      console.log(err);
      dispatch(fetch_error('异步请求出错啦'));
    });
};

const fetch_start = text => {
  return {
    type: ASYNCSTART,
    text,
  };
};

const fetch_end = text => {
  return {
    type: ASYNCEND,
    text,
  };
};

const fetch_error = text => {
  return {
    type: ASYNCERROR,
    text,
  };
};
constants文件夹的index.js里面新建命名
export const ASYNCSTART = 'ASYNCSTART'
export const ASYNCEND = 'ASYNCEND'
export const ASYNCERROR = 'ASYNCERROR'
同样的在我们App组件里面需要更改地方注意就是,在获取state哪里,现在我们合并了两个reducer所以
const mapStateToProps = ({ countReducer, asyncReducer }) => {
  return {
    count: countReducer.count,
    text: asyncReducer.text,
  };
};
整个App.js
import React, { Component } from 'react';
import './App.css';
import PropTypes from 'prop-types';
import { connect } from 'react-redux';
import { addAction, subAction } from './action/countAction';
import { getInfo } from './action/getInfoAction';

// 映射state
// const mapStateToProps = state => ({
//   appCount:state.count
// })

const mapStateToProps = ({ countReducer, asyncReducer }) => {
  return {
    count: countReducer.count,
    text: asyncReducer.text,
  };
};

// 映射store.dispatch 函数模式
// const mapDispatchToProps = dispatch => {
//   return {
//     add: () => dispatch(addAction()),
//     sub: () => dispatch(subAction()),
//   };
// };

// 对象模式 这里调用bindActionCreators会自动的给我们绑定dispatch
// bindActionCreators(mapDispatchToProps, dispatch)
const mapDispatchToProps = {
  add: addAction,
  sub: subAction,
  getInfo,
};

class App extends Component {
  static propsType = {
    count: PropTypes.number.isRequired,
    add: PropTypes.func.isRequired,
    sub: PropTypes.func.isRequired,
  };
  render() {
    // state
    const { count, text } = this.props;
    // dispatch
    const { add, sub, getInfo } = this.props;
    return (
      <div className="App">
        <div>{count}</div>
        <div>
          <button onClick={() => add()}>add</button>
          <button onClick={() => sub()}>sub</button>
        </div>
        <hr />
        <div>{text}</div>
        <div>
          <button onClick={() => getInfo()}>点我执行异步操作</button>
        </div>
      </div>
    );
  }
}
// App.propTypes = {
//   count: PropTypes.number.isRequired,
//   add: PropTypes.func.isRequired,
//   sub: PropTypes.func.isRequired,
// };
export default connect(mapStateToProps, mapDispatchToProps)(App);


