- 机器学习与深度学习间关系与区别
ℒℴѵℯ心·动ꦿ໊ོ꫞
人工智能学习深度学习python
一、机器学习概述定义机器学习(MachineLearning,ML)是一种通过数据驱动的方法,利用统计学和计算算法来训练模型,使计算机能够从数据中学习并自动进行预测或决策。机器学习通过分析大量数据样本,识别其中的模式和规律,从而对新的数据进行判断。其核心在于通过训练过程,让模型不断优化和提升其预测准确性。主要类型1.监督学习(SupervisedLearning)监督学习是指在训练数据集中包含输入
- C语言如何定义宏函数?
小九格物
c语言
在C语言中,宏函数是通过预处理器定义的,它在编译之前替换代码中的宏调用。宏函数可以模拟函数的行为,但它们不是真正的函数,因为它们在编译时不会进行类型检查,也不会分配存储空间。宏函数的定义通常使用#define指令,后面跟着宏的名称和参数列表,以及宏展开后的代码。宏函数的定义方式:1.基本宏函数:这是最简单的宏函数形式,它直接定义一个表达式。#defineSQUARE(x)((x)*(x))2.带参
- 【一起学Rust | 设计模式】习惯语法——使用借用类型作为参数、格式化拼接字符串、构造函数
广龙宇
一起学Rust#Rust设计模式rust设计模式开发语言
提示:文章写完后,目录可以自动生成,如何生成可参考右边的帮助文档文章目录前言一、使用借用类型作为参数二、格式化拼接字符串三、使用构造函数总结前言Rust不是传统的面向对象编程语言,它的所有特性,使其独一无二。因此,学习特定于Rust的设计模式是必要的。本系列文章为作者学习《Rust设计模式》的学习笔记以及自己的见解。因此,本系列文章的结构也与此书的结构相同(后续可能会调成结构),基本上分为三个部分
- Python数据分析与可视化实战指南
William数据分析
pythonpython数据
在数据驱动的时代,Python因其简洁的语法、强大的库生态系统以及活跃的社区,成为了数据分析与可视化的首选语言。本文将通过一个详细的案例,带领大家学习如何使用Python进行数据分析,并通过可视化来直观呈现分析结果。一、环境准备1.1安装必要库在开始数据分析和可视化之前,我们需要安装一些常用的库。主要包括pandas、numpy、matplotlib和seaborn等。这些库分别用于数据处理、数学
- 网易严选官方旗舰店,优质商品,卓越服务
高省_飞智666600
网易严选官方旗舰店是网易旗下的一家电商平台,以提供优质商品和卓越服务而闻名。作为一名SEO优化师,我将为您详细介绍网易严选官方旗舰店,并重点强调其特点和优势。大家好!我是高省APP最大团队&联合创始人飞智导师。相较于其他返利app,高省APP的佣金更高,模式更好,最重要的是,终端用户不会流失!高省APP佣金更高,模式更好,终端用户不流失。【高省】是一个自用省钱佣金高,分享推广赚钱多的平台,百度有几
- Pyecharts数据可视化大屏:打造沉浸式数据分析体验
我的运维人生
信息可视化数据分析数据挖掘运维开发技术共享
Pyecharts数据可视化大屏:打造沉浸式数据分析体验在当今这个数据驱动的时代,如何将海量数据以直观、生动的方式展现出来,成为了数据分析师和企业决策者关注的焦点。Pyecharts,作为一款基于Python的开源数据可视化库,凭借其丰富的图表类型、灵活的配置选项以及高度的定制化能力,成为了构建数据可视化大屏的理想选择。本文将深入探讨如何利用Pyecharts打造数据可视化大屏,并通过实际代码案例
- 怎么起诉借钱不还的人?怎样起诉欠款不还的人?
影子爱学习
怎么起诉借钱不还的人?怎样起诉欠款不还的人?如果遇到难以解决的法律问题,我们可以匹配专业律师。例如:婚姻家庭(离婚纠纷)、刑事辩护、合同纠纷、债权债务、房产(继承)纠纷、交通事故、劳动争议、人身损害、公司相关法律事务(法律顾问)等咨询推荐手机/微信:15633770876【全国案件皆可】借钱不还起诉对方需要哪些资料起诉欠钱不还的,一般需要的材料包括以下这些:借据、收据、欠条、付款凭证等证据,以及向
- PHP环境搭建详细教程
好看资源平台
前端php
PHP是一个流行的服务器端脚本语言,广泛用于Web开发。为了使PHP能够在本地或服务器上运行,我们需要搭建一个合适的PHP环境。本教程将结合最新资料,介绍在不同操作系统上搭建PHP开发环境的多种方法,包括Windows、macOS和Linux系统的安装步骤,以及本地和Docker环境的配置。1.PHP环境搭建概述PHP环境的搭建主要分为以下几类:集成开发环境:例如XAMPP、WAMP、MAMP,这
- 基于社交网络算法优化的二维最大熵图像分割
智能算法研学社(Jack旭)
智能优化算法应用图像分割算法php开发语言
智能优化算法应用:基于社交网络优化的二维最大熵图像阈值分割-附代码文章目录智能优化算法应用:基于社交网络优化的二维最大熵图像阈值分割-附代码1.前言2.二维最大熵阈值分割原理3.基于社交网络优化的多阈值分割4.算法结果:5.参考文献:6.Matlab代码摘要:本文介绍基于最大熵的图像分割,并且应用社交网络算法进行阈值寻优。1.前言阅读此文章前,请阅读《图像分割:直方图区域划分及信息统计介绍》htt
- 18-115 一切思考不能有效转化为行动,都TM是扯淡!
成长时间线
7月25号写了一篇关于为什么会断更如此严重的反思,然而,之后日更仅仅维持了一周,又出现了这次更严重的现象。从8月2号到昨天8月6号,5天!又是5天没有更文!虽然这次断更时间和上次一样,那为什么说这次更严重?因为上次之后就分析了问题的原因,以及应该如何解决,按理说应该会好转,然而,没过几天严重断更的现象再次出现,想想,经过反思,问题依然没有解决与改变,这让我有些担忧。到底是哪里出了问题,难道我就真的
- 直返最高等级与直返APP:无需邀请码的返利新体验
古楼
随着互联网的普及和电商的兴起,直返模式逐渐成为一种流行的商业模式。在这种模式下,消费者通过购买产品或服务,获得一定的返利,并可以分享给更多的人。其中,直返最高等级和直返APP是直返模式中的重要概念和工具。本文将详细介绍直返最高等级的概念、直返APP的使用以及与邀请码的关系。【高省】APP(高佣金领导者)是一个自用省钱佣金高,分享推广赚钱多的平台,百度有几百万篇报道,运行三年,稳定可靠。高省APP,
- 【加密社】Solidity 中的事件机制及其应用
加密社
闲侃区块链智能合约区块链
加密社引言在Solidity合约开发过程中,事件(Events)是一种非常重要的机制。它们不仅能够让开发者记录智能合约的重要状态变更,还能够让外部系统(如前端应用)监听这些状态的变化。本文将详细介绍Solidity中的事件机制以及如何利用不同的手段来触发、监听和获取这些事件。事件存储的地方当我们在Solidity合约中使用emit关键字触发事件时,该事件会被记录在区块链的交易收据中。具体而言,事件
- 【目标检测数据集】卡车数据集1073张VOC+YOLO格式
熬夜写代码的平头哥∰
目标检测YOLO人工智能
数据集格式:PascalVOC格式+YOLO格式(不包含分割路径的txt文件,仅仅包含jpg图片以及对应的VOC格式xml文件和yolo格式txt文件)图片数量(jpg文件个数):1073标注数量(xml文件个数):1073标注数量(txt文件个数):1073标注类别数:1标注类别名称:["truck"]每个类别标注的框数:truck框数=1120总框数:1120使用标注工具:labelImg标注
- 走向以教育叙事为载体的教育叙事研究
666小飞鱼
今天我读了吴松超老师的《给教师的68条建写作建议》中的第23条《如何通过教育叙事走向研究》,吴老师在文中与我们分享了一个德育案例,这是一个反面的案例,意在告知我们在处理问题时,不能就考虑的点太窄,思考要全面。走向教育叙事研究,教师要有敏锐的“感知力”,这个感知力来自于背后专业知识的支撑,思维能力以及广阔的视野和见识等。所以对于同一件事处理方法不同,这个就是教师背后“敏锐力”的不同造成的,也就是说是
- 钢筋长度超限检测检数据集VOC+YOLO格式215张1类别
futureflsl
数据集YOLO深度学习机器学习
数据集格式:PascalVOC格式+YOLO格式(不包含分割路径的txt文件,仅仅包含jpg图片以及对应的VOC格式xml文件和yolo格式txt文件)图片数量(jpg文件个数):215标注数量(xml文件个数):215标注数量(txt文件个数):215标注类别数:1标注类别名称:["iron"]每个类别标注的框数:iron框数=215总框数:215使用标注工具:labelImg标注规则:对类别进
- 【华为OD技术面试真题 - 技术面】- python八股文真题题库(4)
算法大师
华为od面试python
华为OD面试真题精选专栏:华为OD面试真题精选目录:2024华为OD面试手撕代码真题目录以及八股文真题目录文章目录华为OD面试真题精选**1.Python中的`with`**用途和功能自动资源管理示例:文件操作上下文管理协议示例代码工作流程解析优点2.\_\_new\_\_和**\_\_init\_\_**区别__new____init__区别总结3.**切片(Slicing)操作**基本切片语法
- 【华为OD技术面试真题 - 技术面】-测试八股文真题题库(1)
算法大师
华为od面试python算法前端
华为OD面试真题精选专栏:华为OD面试真题精选目录:2024华为OD面试手撕代码真题目录以及八股文真题目录文章目录华为OD面试真题精选1.黑盒测试和白盒测试的区别2.假设我们公司现在开发一个类似于微信的软件1.0版本,现在要你测试这个功能:打开聊天窗口,输入文本,限制字数在200字以内。问你怎么提取测试点。功能测试性能测试安全性测试可用性测试跨平台兼容性测试网络环境测试3.接口测试的工具你了解哪些
- Low Power概念介绍-Voltage Area
飞奔的大虎
随着智能手机,以及物联网的普及,芯片功耗的问题最近几年得到了越来越多的重视。为了实现集成电路的低功耗设计目标,我们需要在系统设计阶段就采用低功耗设计的方案。而且,随着设计流程的逐步推进,到了芯片后端设计阶段,降低芯片功耗的方法已经很少了,节省的功耗百分比也不断下降。芯片的功耗主要由静态功耗(staticleakagepower)和动态功耗(dynamicpower)构成。静态功耗主要是指电路处于等
- Rust基础知识
GRKF15
rust开发语言后端
1.Rust语言简介1.1基础语法变量声明:let关键字用于声明变量,可以指定或不指定类型,如leta=10;和letmutc=30i32;。函数定义:使用fn关键字定义函数,并指定参数类型及返回类型,如fnadd(i:i32,j:i32)->i32{i+j}。控制流:包括if、else等,控制语句后需要使用;来结束语句。1.2数据类型整数类型:i8、i16、i32、i64、i128,以及无符号的
- Faiss:高效相似性搜索与聚类的利器
网络·魚
大数据faiss
Faiss是一个针对大规模向量集合的相似性搜索库,由FacebookAIResearch开发。它提供了一系列高效的算法和数据结构,用于加速向量之间的相似性搜索,特别是在大规模数据集上。本文将介绍Faiss的原理、核心功能以及如何在实际项目中使用它。Faiss原理:近似最近邻搜索:Faiss的核心功能之一是近似最近邻搜索,它能够高效地在大规模数据集中找到与给定查询向量最相似的向量。这种搜索是近似的,
- 18、架构-可观测性之聚合度量
大树~~
架构javapython后端架构
聚合度量聚合度量是指对系统运行时产生的各种指标数据进行收集、聚合和分析,以了解系统的健康状况和性能表现。聚合度量是可观测性的关键组成部分,通过对度量数据的分析,可以及时发现系统中的异常和瓶颈。以下是对聚合度量各个方面的详细解析,并结合具体的数据案例和技术支撑。指标收集收集系统运行时产生的各种指标数据是聚合度量的基础。常见的指标包括CPU使用率、内存使用率、请求处理时间、请求数、错误率等。以下是指标
- 【华为OD技术面试真题 - 技术面】- python八股文真题题库(1)
算法大师
华为od面试python
华为OD面试真题精选专栏:华为OD面试真题精选目录:2024华为OD面试手撕代码真题目录以及八股文真题目录文章目录华为OD面试真题精选1.数据预处理流程数据预处理的主要步骤工具和库2.介绍线性回归、逻辑回归模型线性回归(LinearRegression)模型形式:关键点:逻辑回归(LogisticRegression)模型形式:关键点:参数估计与评估:3.python浅拷贝及深拷贝浅拷贝(Shal
- 如何选择最适合你的项目研发管理软件?TAPD卓越版全面解析
北京云巴巴信息技术有限公司
产品经理需求分析
在当今快速发展的科技时代,项目研发管理软件已成为企业不可或缺的重要工具。面对市场上琳琅满目的产品,如何选择一款适合自己团队的项目研发管理软件呢?本文将围绕项目研发管理软件的选择标准,重点介绍TAPD卓越版的特点、优势以及使用体验,让你更好地理解和选择适合自己的项目研发管理软件。项目研发管理软件的选择标准在选择项目研发管理软件时,我们需要考虑以下几个方面的因素:功能全面性:软件是否覆盖了从需求管理、
- 舜公郑金锋书辛丑自剪扇面书法作品(四O六)
舜公郑金锋
辛丑小阳春,新自剪扇面400品,大多为各色撒金、撒银、描金、描银、水印、彩绘、荧光等亚粉、色宣纸,以及域外包装填充纸等;王一品长锋羊毫秃笔;一得阁云头艳墨、宿墨、水等。书体有甲骨文,金文(商周金文、春秋战国金文、中山王厝器金文、汉金文……),楚简帛书,侯马盟书,温县盟书,小篆,果蝙书等,隶书(秦简、汉简帛书、汉碑……),草书(章草、小草、大草……),行书(行楷、行草),楷书(魏碑及北朝墓志、隋朝墓
- 4招写出高价值文章
zhiliner
文章写得泛泛是因为思考得不够深,思考得越深文章会越有价值。拿到一个主题一定要去深入挖掘事件背后的东西,比如人物困境以及趋势性的东西。写作过程中有几个深度思考的方法一、解剖,让旧素材焕发新意作为一个写作者,我们能够做的最大贡献,就是给出自己看世界的角度。解剖其实就是把这个话题相关的信息都列出来,详细的列出来,看清楚它的内部。我们看到一个老话题或者一段旧素材的时候,不要只看这个素材或者话题本身,一定要
- 一比一复刻手表哪里可以买到?推荐三个可靠渠道
腕表世界
在我国,提及一比一复刻手表,人们总是充满好奇与争议。这种高度仿真的复刻手表,凭借其精湛的工艺、时尚的设计,以及与正品相差无几的质感,深受一部分消费者的喜爱。但与此同时,其背后的侵权争议也一直不断。那么,究竟哪里可以买到这些令人心动的一比一复刻手表呢?腕表咨询微信:10428850一、何为一比一复刻手表?一比一复刻手表,指的是严格按照正版手表的设计、尺寸和工艺制作的仿制品。这些手表在材质、外观、功能
- 【六】阿伟开始搭建Kafka学习环境
能源恒观
中间件学习kafkaspring
阿伟开始搭建Kafka学习环境概述上一篇文章阿伟学习了Kafka的核心概念,并且把市面上流行的消息中间件特性进行了梳理和对比,方便大家在学习过程中进行对比学习,最后梳理了一些Kafka使用中经常遇到的Kafka难题以及解决思路,经过上一篇的学习我相信大家对Kafka有了初步的认识,本篇将继续学习Kafka。一、安装和配置学习一项技术首先要搭建一套服务,而Kafka的运行主要需要部署jdk、zook
- ios GCD
_Waiting_
1.GCD任务和队列学习GCD之前,先来了解GCD中两个核心概念:任务和队列。任务:就是执行操作的意思,换句话说就是你在线程中执行的那段代码。在GCD中是放在block中的。执行任务有两种方式:同步执行(sync)和异步执行(async)。两者的主要区别是:是否等待队列的任务执行结束,以及是否具备开启新线程的能力。同步执行(sync):同步添加任务到指定的队列中,在添加的任务执行结束之前,会一直等
- 关于Mysql 中 Row size too large (> 8126) 错误的解决和理解
秋刀prince
mysqlmysql数据库
提示:啰嗦一嘴,数据库的任何操作和验证前,一定要记得先备份!!!不会有错;文章目录问题发现一、问题导致的可能原因1、页大小2、行格式2.1compact格式2.2Redundant格式2.3Dynamic格式2.4Compressed格式3、BLOB和TEXT列二、解决办法1、修改页大小(不推荐)2、修改行格式3、修改数据类型为BLOB和TEXT列4、其他优化方式(可以参考使用)4.1合理设置数据
- 红手套节 马小媛为中国城市环卫者公益发声:今天我手红
疏狂君
#红手套节#公益活动,线头公益以及同多方资源的共同努力我们邀请到了线头公益大使马小媛马小媛,1993年5月3日出生于江苏省南京市,中国内地新生代女演员。2015年马小媛参演网剧《余罪》,饰演警校校花安嘉璐的闺蜜。2016年马小媛主演系列电影《丽人保镖》中女一号林欢馨,正式出道。此后,马小媛陆续接演了电视剧《警花与警犬2》,在网剧《你美丽李美丽》中担任女主角李美丽。拂晓,当你还在睡梦中时,这座城跟你
- Algorithm
香水浓
javaAlgorithm
冒泡排序
public static void sort(Integer[] param) {
for (int i = param.length - 1; i > 0; i--) {
for (int j = 0; j < i; j++) {
int current = param[j];
int next = param[j + 1];
- mongoDB 复杂查询表达式
开窍的石头
mongodb
1:count
Pg: db.user.find().count();
统计多少条数据
2:不等于$ne
Pg: db.user.find({_id:{$ne:3}},{name:1,sex:1,_id:0});
查询id不等于3的数据。
3:大于$gt $gte(大于等于)
&n
- Jboss Java heap space异常解决方法, jboss OutOfMemoryError : PermGen space
0624chenhong
jvmjboss
转自
http://blog.csdn.net/zou274/article/details/5552630
解决办法:
window->preferences->java->installed jres->edit jre
把default vm arguments 的参数设为-Xms64m -Xmx512m
----------------
- 文件上传 下载 解析 相对路径
不懂事的小屁孩
文件上传
有点坑吧,弄这么一个简单的东西弄了一天多,身边还有大神指导着,网上各种百度着。
下面总结一下遇到的问题:
文件上传,在页面上传的时候,不要想着去操作绝对路径,浏览器会对客户端的信息进行保护,避免用户信息收到攻击。
在上传图片,或者文件时,使用form表单来操作。
前台通过form表单传输一个流到后台,而不是ajax传递参数到后台,代码如下:
<form action=&
- 怎么实现qq空间批量点赞
换个号韩国红果果
qq
纯粹为了好玩!!
逻辑很简单
1 打开浏览器console;输入以下代码。
先上添加赞的代码
var tools={};
//添加所有赞
function init(){
document.body.scrollTop=10000;
setTimeout(function(){document.body.scrollTop=0;},2000);//加
- 判断是否为中文
灵静志远
中文
方法一:
public class Zhidao {
public static void main(String args[]) {
String s = "sdf灭礌 kjl d{';\fdsjlk是";
int n=0;
for(int i=0; i<s.length(); i++) {
n = (int)s.charAt(i);
if((
- 一个电话面试后总结
a-john
面试
今天,接了一个电话面试,对于还是初学者的我来说,紧张了半天。
面试的问题分了层次,对于一类问题,由简到难。自己觉得回答不好的地方作了一下总结:
在谈到集合类的时候,举几个常用的集合类,想都没想,直接说了list,map。
然后对list和map分别举几个类型:
list方面:ArrayList,LinkedList。在谈到他们的区别时,愣住了
- MSSQL中Escape转义的使用
aijuans
MSSQL
IF OBJECT_ID('tempdb..#ABC') is not null
drop table tempdb..#ABC
create table #ABC
(
PATHNAME NVARCHAR(50)
)
insert into #ABC
SELECT N'/ABCDEFGHI'
UNION ALL SELECT N'/ABCDGAFGASASSDFA'
UNION ALL
- 一个简单的存储过程
asialee
mysql存储过程构造数据批量插入
今天要批量的生成一批测试数据,其中中间有部分数据是变化的,本来想写个程序来生成的,后来想到存储过程就可以搞定,所以随手写了一个,记录在此:
DELIMITER $$
DROP PROCEDURE IF EXISTS inse
- annot convert from HomeFragment_1 to Fragment
百合不是茶
android导包错误
创建了几个类继承Fragment, 需要将创建的类存储在ArrayList<Fragment>中; 出现不能将new 出来的对象放到队列中,原因很简单;
创建类时引入包是:import android.app.Fragment;
创建队列和对象时使用的包是:import android.support.v4.ap
- Weblogic10两种修改端口的方法
bijian1013
weblogic端口号配置管理config.xml
一.进入控制台进行修改 1.进入控制台: http://127.0.0.1:7001/console 2.展开左边树菜单 域结构->环境->服务器-->点击AdminServer(管理) &
- mysql 操作指令
征客丶
mysql
一、连接mysql
进入 mysql 的安装目录;
$ bin/mysql -p [host IP 如果是登录本地的mysql 可以不写 -p 直接 -u] -u [userName] -p
输入密码,回车,接连;
二、权限操作[如果你很了解mysql数据库后,你可以直接去修改系统表,然后用 mysql> flush privileges; 指令让权限生效]
1、赋权
mys
- 【Hive一】Hive入门
bit1129
hive
Hive安装与配置
Hive的运行需要依赖于Hadoop,因此需要首先安装Hadoop2.5.2,并且Hive的启动前需要首先启动Hadoop。
Hive安装和配置的步骤
1. 从如下地址下载Hive0.14.0
http://mirror.bit.edu.cn/apache/hive/
2.解压hive,在系统变
- ajax 三种提交请求的方法
BlueSkator
Ajaxjqery
1、ajax 提交请求
$.ajax({
type:"post",
url : "${ctx}/front/Hotel/getAllHotelByAjax.do",
dataType : "json",
success : function(result) {
try {
for(v
- mongodb开发环境下的搭建入门
braveCS
运维
linux下安装mongodb
1)官网下载mongodb-linux-x86_64-rhel62-3.0.4.gz
2)linux 解压
gzip -d mongodb-linux-x86_64-rhel62-3.0.4.gz;
mv mongodb-linux-x86_64-rhel62-3.0.4 mongodb-linux-x86_64-rhel62-
- 编程之美-最短摘要的生成
bylijinnan
java数据结构算法编程之美
import java.util.HashMap;
import java.util.Map;
import java.util.Map.Entry;
public class ShortestAbstract {
/**
* 编程之美 最短摘要的生成
* 扫描过程始终保持一个[pBegin,pEnd]的range,初始化确保[pBegin,pEnd]的ran
- json数据解析及typeof
chengxuyuancsdn
jstypeofjson解析
// json格式
var people='{"authors": [{"firstName": "AAA","lastName": "BBB"},'
+' {"firstName": "CCC&
- 流程系统设计的层次和目标
comsci
设计模式数据结构sql框架脚本
流程系统设计的层次和目标
- RMAN List和report 命令
daizj
oraclelistreportrman
LIST 命令
使用RMAN LIST 命令显示有关资料档案库中记录的备份集、代理副本和映像副本的
信息。使用此命令可列出:
• RMAN 资料档案库中状态不是AVAILABLE 的备份和副本
• 可用的且可以用于还原操作的数据文件备份和副本
• 备份集和副本,其中包含指定数据文件列表或指定表空间的备份
• 包含指定名称或范围的所有归档日志备份的备份集和副本
• 由标记、完成时间、可
- 二叉树:红黑树
dieslrae
二叉树
红黑树是一种自平衡的二叉树,它的查找,插入,删除操作时间复杂度皆为O(logN),不会出现普通二叉搜索树在最差情况时时间复杂度会变为O(N)的问题.
红黑树必须遵循红黑规则,规则如下
1、每个节点不是红就是黑。 2、根总是黑的 &
- C语言homework3,7个小题目的代码
dcj3sjt126com
c
1、打印100以内的所有奇数。
# include <stdio.h>
int main(void)
{
int i;
for (i=1; i<=100; i++)
{
if (i%2 != 0)
printf("%d ", i);
}
return 0;
}
2、从键盘上输入10个整数,
- 自定义按钮, 图片在上, 文字在下, 居中显示
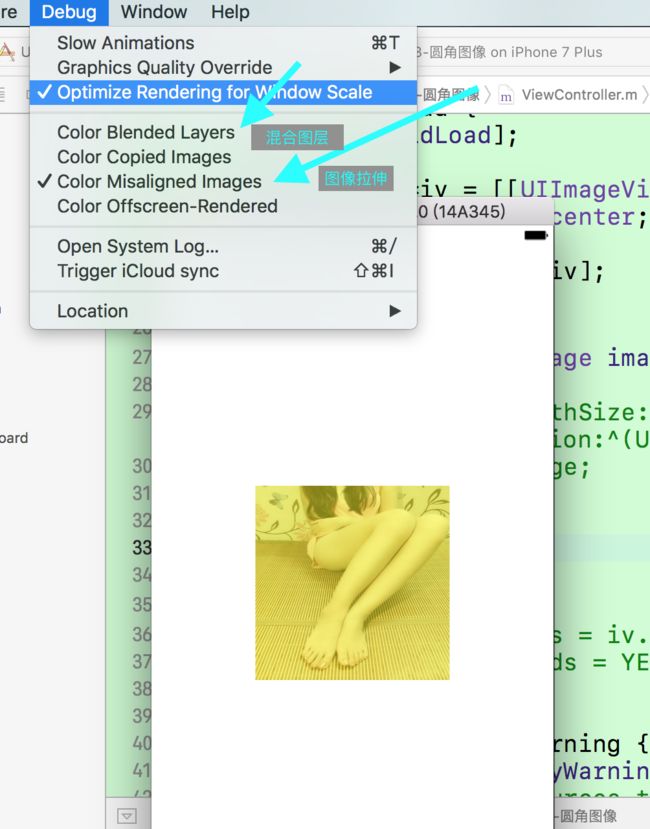
dcj3sjt126com
自定义
#import <UIKit/UIKit.h>
@interface MyButton : UIButton
-(void)setFrame:(CGRect)frame ImageName:(NSString*)imageName Target:(id)target Action:(SEL)action Title:(NSString*)title Font:(CGFloa
- MySQL查询语句练习题,测试足够用了
flyvszhb
sqlmysql
http://blog.sina.com.cn/s/blog_767d65530101861c.html
1.创建student和score表
CREATE TABLE student (
id INT(10) NOT NULL UNIQUE PRIMARY KEY ,
name VARCHAR
- 转:MyBatis Generator 详解
happyqing
mybatis
MyBatis Generator 详解
http://blog.csdn.net/isea533/article/details/42102297
MyBatis Generator详解
http://git.oschina.net/free/Mybatis_Utils/blob/master/MybatisGeneator/MybatisGeneator.
- 让程序员少走弯路的14个忠告
jingjing0907
工作计划学习
无论是谁,在刚进入某个领域之时,有再大的雄心壮志也敌不过眼前的迷茫:不知道应该怎么做,不知道应该做什么。下面是一名软件开发人员所学到的经验,希望能对大家有所帮助
1.不要害怕在工作中学习。
只要有电脑,就可以通过电子阅读器阅读报纸和大多数书籍。如果你只是做好自己的本职工作以及分配的任务,那是学不到很多东西的。如果你盲目地要求更多的工作,也是不可能提升自己的。放
- nginx和NetScaler区别
流浪鱼
nginx
NetScaler是一个完整的包含操作系统和应用交付功能的产品,Nginx并不包含操作系统,在处理连接方面,需要依赖于操作系统,所以在并发连接数方面和防DoS攻击方面,Nginx不具备优势。
2.易用性方面差别也比较大。Nginx对管理员的水平要求比较高,参数比较多,不确定性给运营带来隐患。在NetScaler常见的配置如健康检查,HA等,在Nginx上的配置的实现相对复杂。
3.策略灵活度方
- 第11章 动画效果(下)
onestopweb
动画
index.html
<!DOCTYPE html PUBLIC "-//W3C//DTD XHTML 1.0 Transitional//EN" "http://www.w3.org/TR/xhtml1/DTD/xhtml1-transitional.dtd">
<html xmlns="http://www.w3.org/
- FAQ - SAP BW BO roadmap
blueoxygen
BOBW
http://www.sdn.sap.com/irj/boc/business-objects-for-sap-faq
Besides, I care that how to integrate tightly.
By the way, for BW consultants, please just focus on Query Designer which i
- 关于java堆内存溢出的几种情况
tomcat_oracle
javajvmjdkthread
【情况一】:
java.lang.OutOfMemoryError: Java heap space:这种是java堆内存不够,一个原因是真不够,另一个原因是程序中有死循环; 如果是java堆内存不够的话,可以通过调整JVM下面的配置来解决: <jvm-arg>-Xms3062m</jvm-arg> <jvm-arg>-Xmx
- Manifest.permission_group权限组
阿尔萨斯
Permission
结构
继承关系
public static final class Manifest.permission_group extends Object
java.lang.Object
android. Manifest.permission_group 常量
ACCOUNTS 直接通过统计管理器访问管理的统计
COST_MONEY可以用来让用户花钱但不需要通过与他们直接牵涉的权限
D