eclipse使用maven创建springmvc项目
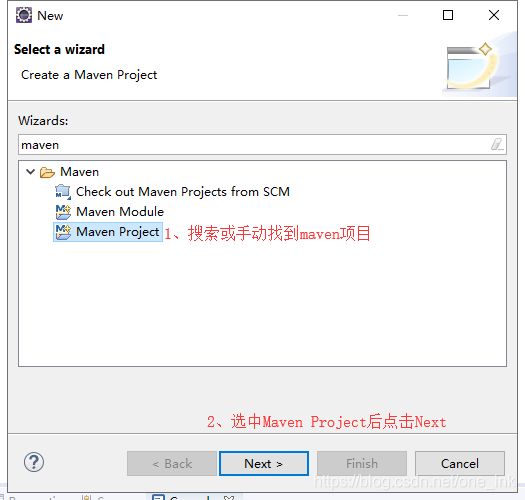
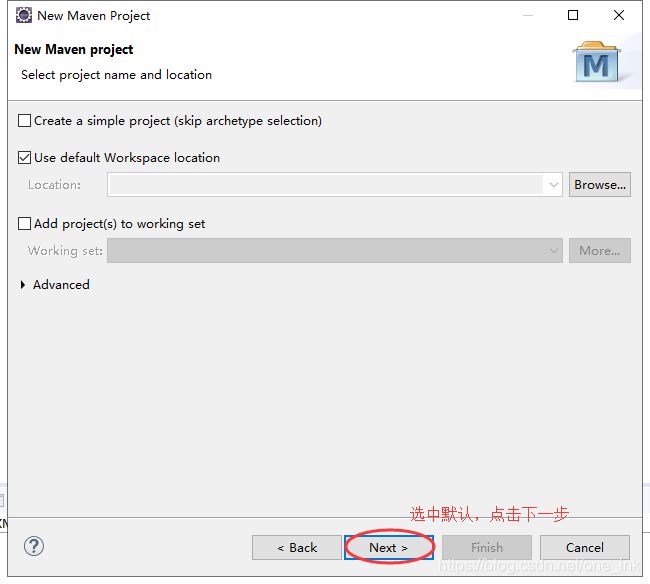
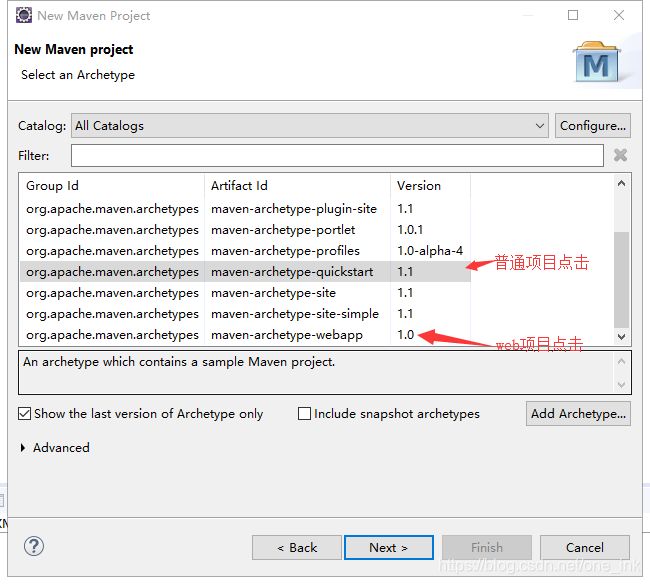
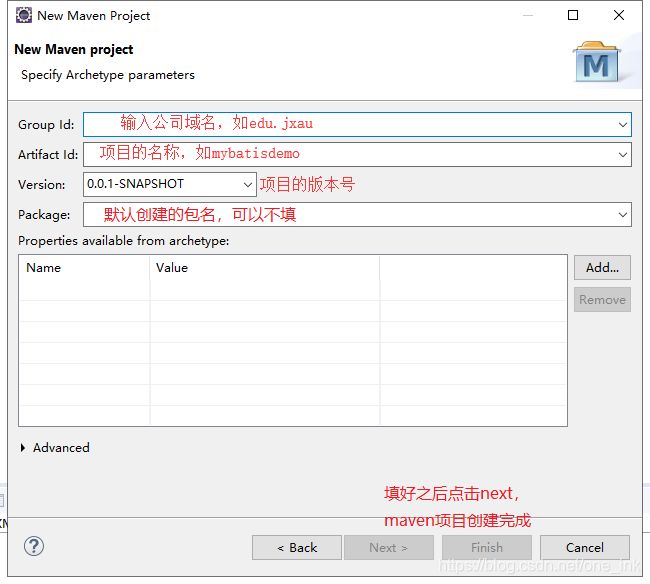
一、创建maven的web应用
eclipse->file->new->other
二、在web.xml配置DispatcherServlet
在web.xml中添加如下代码:
<servlet>
    <servlet-name>springDispatcherServletservlet-name>
    <servlet-class> org.springframework.web.servlet.DispatcherServletservlet-class>

    <init-param>
        <param-name>contextConfigLocationparam-name>
        <param-value>classpath:springmvc.xmlparam-value>
    init-param>

    <load-on-startup>1load-on-startup>
servlet>
<servlet-mapping>
    <servlet-name>springDispatcherServletservlet-name>

    <url-pattern>/url-pattern>
servlet-mapping>
contextConfigLocation参数用来指定springmvc的配置文件路径
默认的配置文件路径为:/WEB-INF/[servlet-name]-servlet.xml
比如我配置的DispatcherServlet的默认配置文件路径就是:/WEB-INF/springDispatcherServlet-servlet.xml
关于contextConfigLocation的spring的原文注释如下
* <p>Passes a "contextConfigLocation" servlet init-param to the context instance,
 * parsing it into potentially multiple file paths which can be separated by any
 * number of commas and spaces, like "test-servlet.xml, myServlet.xml".
 * If not explicitly specified, the context implementation is supposed to build a
 * default location from the namespace of the servlet.
 *
 * <p>Note: In case of multiple config locations, later bean definitions will
 * override ones defined in earlier loaded files, at least when using Spring's
 * default ApplicationContext implementation. This can be leveraged to
 * deliberately override certain bean definitions via an extra XML file.
 *
 * <p>The default namespace is "'servlet-name'-servlet", e.g. "test-servlet" for a
 * servlet-name "test" (leading to a "/WEB-INF/test-servlet.xml" default location
 * with XmlWebApplicationContext). The namespace can also be set explicitly via
 * the "namespace" servlet init-param.
三、编写springMvc配置文件
注意:springMvc的配置文件要和DispatcherServlet中的contextConfigLocation对应上
- 创建spring的配置文件,并添加上aop、beans、context、mvc这四个命名空间
- 在spring配置文件中加入如下代码
<context:component-scan base-package="${被扫描的包路径}">context:component-scan>


<bean class="org.springframework.web.servlet.view.InternalResourceViewResolver">

    <property name="prefix" value="/WEB-INF/views/">property>

    <property name="suffix" value=".jsp">property>
bean>
视图解析器会根据配置的返回路径的前缀和后缀生成返回的URL
四、编写控制器
注意:如果该控制器来所在的包没有在配置文件配置的自定义扫描的包里面,该控制器将失去控制器的功能
示例代码:
@Controller
public class Hello {
	@RequestMapping("/hello")
	public String sayHello() {
		System.out.println("hello world");
		return "hello";
	}
}
@Controller:声明该类是一个控制器
@RequestMapping:该方法的映射路径
五、编写返回的界面
示例代码(/WEB-INF/views/hello.jsp):
<%@ page language="java" contentType="text/html; charset=utf-8"
	pageEncoding="utf-8"%>

<html>
<head>
<meta charset="utf-8">
<title>hellotitle>
head>
<body>
	<h2>世界你好h2>
body>
html>
html>
hello


