SpringBoot-RabbitMQ03-交换器【direct】介绍
交换器介绍
RabbitMQ中有三种主要的交互器分别如下
| 交换器 | 说明 |
|---|---|
| direct | 发布与订阅 完全匹配 |
| fanout | 广播 |
| topic | 主体,规则匹配 |
direct案例
DirectExchange 路由策略是将消息队列绑定到 DirectExchange 上,当 一条消息到达DirectExchange 时会被转发到与该条消息 routing key 相同的 Queue 上,例如消息队列名为“hello-queue ”,则 routingkey 为“hello-queue ”的消息会被该消息队列接收。

1.创建消费者
创建一个SpringBoot项目作为消费者项目具体如下
1.1创建项目并添加依赖

<dependencies>
     <dependency>
         <groupId>org.springframework.bootgroupId>
         <artifactId>spring-boot-starter-webartifactId>
     dependency>

     <dependency>
         <groupId>org.springframework.bootgroupId>
         <artifactId>spring-boot-starter-testartifactId>
         <scope>testscope>
     dependency>
     <dependency>
         <groupId>org.springframework.bootgroupId>
         <artifactId>spring-boot-starter-amqpartifactId>
     dependency>
 dependencies>
1.2参数设置
在application.properties中添加如下配置信息
spring.application.name=springcloud-mq
spring.rabbitmq.host=192.168.88.150
spring.rabbitmq.port=5672
spring.rabbitmq.username=dpb
spring.rabbitmq.password=123

#设置交换器的名称
mq.config.exchange=log.direct

#info 队列名称
mq.config.queue.info=log.info
#info 路由键
mq.config.queue.info.routing.key=log.info.routing.key

#error 队列名称
mq.config.queue.error=log.error
#error 路由键
mq.config.queue.error.routing.key=log.error.routing.key
1.3创建消费者工具类型
info信息的消费者
/**
 * @program: rabbitmq-direct-consumer
 * @description: 消息接收者
 * @author: 波波烤鸭
 * @create: 2019-05-22 13:59
 * @RabbitListener bindings:绑定队列
 * @QueueBinding value:绑定队列的名称
 * exchange:配置交换器
 *
 *  @Queue value:配置队列名称
 *  autoDelete:是否是一个可删除的临时队列
 *
 *  @Exchange value:为交换器起个名称
 *  type:指定具体的交换器类型
 */
@Component
@RabbitListener(
        bindings=@QueueBinding(
                value=@Queue(value="${mq.config.queue.info}",autoDelete="true"),
                        exchange=@Exchange(value="${mq.config.exchange}",type= ExchangeTypes.DIRECT),
                        key="${mq.config.queue.info.routing.key}"
                )
        )
public class InfoReceiver {

    /**
     * 接收消息的方法。采用消息队列监听机制
     * @param msg
     */
    @RabbitHandler
    public void process(String msg){
        System.out.println("Info........receiver: "+msg);
    }
}
error信息的消费者
/**
 *
 * @program: rabbitmq-direct-consumer
 * @description: 消息接收者
 * @author: 波波烤鸭
 * @create: 2019-05-22 13:59
 *
 *
 * @RabbitListener bindings:绑定队列
 * @QueueBinding value:绑定队列的名称
 * exchange:配置交换器
 *
 *  @Queue value:配置队列名称
 *  autoDelete:是否是一个可删除的临时队列
 *
 *  @Exchange value:为交换器起个名称
 *  type:指定具体的交换器类型
 */
@Component
@RabbitListener(
        bindings=@QueueBinding(
                value=@Queue(value="${mq.config.queue.error}",autoDelete="true"),
                        exchange=@Exchange(value="${mq.config.exchange}",type= ExchangeTypes.DIRECT),
                        key="${mq.config.queue.error.routing.key}"
                )
        )
public class ErrorReceiver {

    /**
     * 接收消息的方法。采用消息队列监听机制
     * @param msg
     */
    @RabbitHandler
    public void process(String msg){
        System.out.println("Error........receiver: "+msg);
    }
}
1.4启动
创建启动类,然后启动服务接收消息
@SpringBootApplication
public class RabbitmqDirectConsumerApplication {

    public static void main(String[] args) {
        SpringApplication.run(RabbitmqDirectConsumerApplication.class, args);
    }

}
2.创建服务提供者
2.1 创建项目
创建一个SpringBoot项目作为服务提供者。
<dependencies>
     <dependency>
         <groupId>org.springframework.bootgroupId>
         <artifactId>spring-boot-starter-webartifactId>
     dependency>

     <dependency>
         <groupId>org.springframework.bootgroupId>
         <artifactId>spring-boot-starter-testartifactId>
         <scope>testscope>
     dependency>
     <dependency>
         <groupId>org.springframework.bootgroupId>
         <artifactId>spring-boot-starter-amqpartifactId>
     dependency>
 dependencies>
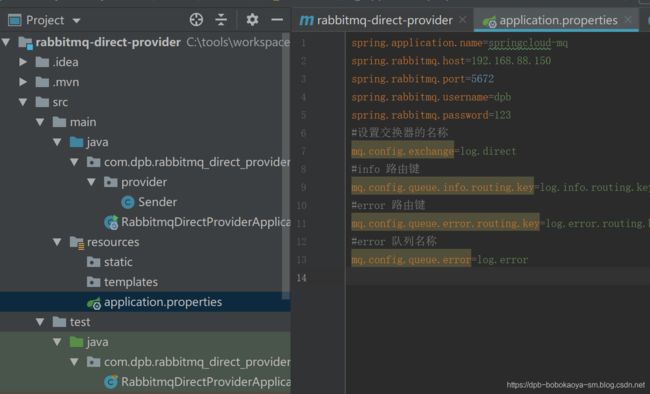
2.2 添加配置
spring.application.name=springcloud-mq
spring.rabbitmq.host=192.168.88.150
spring.rabbitmq.port=5672
spring.rabbitmq.username=dpb
spring.rabbitmq.password=123
#设置交换器的名称
mq.config.exchange=log.direct
#info 路由键
mq.config.queue.info.routing.key=log.info.routing.key
#error 路由键
mq.config.queue.error.routing.key=log.error.routing.key
2.3 创建发送消息的工具类
/**
 * @program: rabbitmq-direct-provider
 * @description: 消息发送者
 * @author: 波波烤鸭
 * @create: 2019-05-22 14:06
 */
@Component
public class Sender {

    @Autowired
    private AmqpTemplate rabbitAmqpTemplate;

    @Value("${mq.config.exchange}")
    private String exchange;

    @Value("${mq.config.queue.info.routing.key}")
    private String routingKey;

    public void send(String msg){
        // 发送消息
        this.rabbitAmqpTemplate.convertAndSend(exchange,routingKey,msg);
    }

}
2.4 单元测试
@RunWith(SpringRunner.class)
@SpringBootTest(classes = RabbitmqDirectProviderApplication.class)
public class RabbitmqDirectProviderApplicationTests {

    @Autowired
    private Sender sender;

    @Test
    public void contextLoads() throws Exception{
        while(true){
            Thread.sleep(1000);
            sender.send("direct:你好啊 "+new Date());
        }
    }
}

改变发送的 routing-key

搞定~