Restful API自动化测试:python+requests+pytest+pytest-html(超详细)
引言
最近刚学完python,想着怎么练一下手,就选择了写api自动化测试。写api自动化测试前需要考虑的内容有一下几点:
- 使用什么编程语言
- 使用什么api测试框架/工具
- testRunner用什么
- 测试用例是否可以灵活组织、运行
- 测试结果如何展示
文章目录
- 引言
- 工具介绍
- Requests
- Pytest
- Pytest-html
- 前期准备
- 安装python
- mock api
- 测试用例编写
- 第一个简单的接口测试
- 安装requests&pytest
- 编写测试
- 运行测试
- 带有Query参数的接口测试&data driven
- 带有path parameter参数的接口测试
- Post接口&Basic auth&文件读写
- 划分测试集
- 测试报告
- 安装pytest-html
- 生成报告
工具介绍
鉴于以上几点考虑,选择了Python+Requests+Pytest+Pytest-html,先介绍一下这些工具,python就不用介绍了。
Requests
requests是python的一个第三方库,用于发送和处理http请求,其语法和操作都十分简单,官方文档也很详细,生态也比较完整,很多问题在网上都可以搜索到解决办法。
Pytest
Pytest是python的一个第三方库,需要单独下载安装。那么有人肯定会或为什么不直接用python内置的unittest库呢?可以参考unittest和pytest的区别。
Pytest-html
Pytest-html是一个专门用于pytest生成html测试报告的插件,该插件很轻量级,报告展示也清晰易懂。
前期准备
安装python
python官网写得很详细,就不赘述了。
mock api
为了方便测试各种类型的接口,这里使用wiremock写了一些mock api,之后的例子全都基于这些mock api。可以直接下载源码使用:https://github.com/qycai/wireMock.git。下载之后直接运行App.java即启动了mockServer,可以使用postman测试一下,如下图:
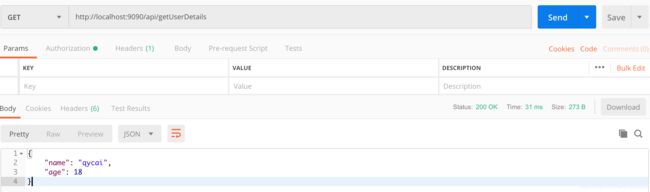
接口返回200说明mockServer启动成功。
测试用例编写
第一个简单的接口测试
安装requests&pytest
pip install requests
pip install pytest
编写测试
新建python文件test_get_user_details.py, 内容实现如下:
import requests

base_url = "http://localhost:9090"

#class名需要以Test开头
class TestGetUserDetails:
    #测试名需要以test开头
    def test_get_user_details(self):
        api_path = "/api/getUserDetails"
        res = requests.get(url=base_url + api_path)
        response = res.json()
        status_code = res.status_code

        assert status_code == 200
        assert response["name"] == "qycai"
        assert response["age"] == 18
运行测试
这里我们使用pytest运行测试,所以需要安装pytest,并且python文件名&测试类名&测试方法名要以test开头。
pytest test_get_user_details.py
带有Query参数的接口测试&data driven
# data driven,以元组的形式写测试数据
    name_age = [("connie", 11), ("qycai", 18)]

    # 解析测试数据
    @pytest.mark.parametrize("username, age", name_age)
    def test_get_user_details_by_name_and_age(self, username, age):
        api_path = "/api/getUserByNameAndAge"
        # params参数指定query parameters
        res = requests.get(url=base_url + api_path, params={"name": username, "age": age})
        print(res.text)
        response_body = res.text
        status_code = res.status_code

        assert status_code == 200
        assert response_body == "get user by name and age successfully"
这个测试用例不仅展示了怎么测试带query参数的接口,也使用了data driven的方式写测试用例,这里使用的是pytest自带的库pytest.mark.parametrize。
带有path parameter参数的接口测试
import requests
import pytest

base_url = "http://localhost:9090"
test_data = ["sanguo", "hongloumeng", "shuihu", "xiyouji"]


class TestGetBookDetails:
    @pytest.mark.parametrize("book_name", test_data)
    def test_get_book_details_by_path_para(self, book_name):
        api_path = f"/api/getBook/{book_name}"

        res = requests.get(url=base_url + api_path)
        status_code = res.status_code
        response_body = res.text

        assert status_code == 200
        assert response_body == "get book with url pattern successfully"
Post接口&Basic auth&文件读写
import requests
from requests.auth import HTTPBasicAuth

base_url = "http://localhost:9090"


class TestAddUser:
    # body体存放在json文件,读取文件内容
    @staticmethod
    def get_request_body_file():
        with open("../resources/body/addUserDetails.json") as add_user_body:
            request_body = add_user_body.read()
        print("-----request body is-----", request_body)
        return request_body

    def test_add_user(self):
        api_path = "/api/addUserDetails"
        cookies = {"session": "12345"}
        # basic auth
        auth = HTTPBasicAuth("qycai", "qycai123")
        headers = {"Content-Type": "application/json; charset=UTF-8"}
        res = requests.post(base_url + api_path, data=self.get_request_body_file(), cookies=cookies, auth=auth,
                            headers=headers)
        status_code = res.status_code
        assert status_code == 200
这里使用的addUserDetails.json文件内容如下:
{
  "name": {
    "fistName": "san",
    "lastName": "zhang"
  },
  "age": 123
}
划分测试集
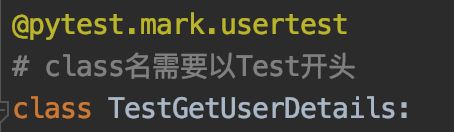
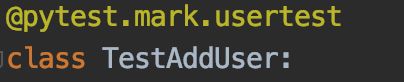
如果我们想要运行特定的某几个测试用例/class,就需要使用给测试用例划分测试集,方便在CI上的运行。这里使用@pytest.mark给测试用例/class加上标签,比如对测试user的class都加上@pytest.mark.usertest,给对book的测试加上@pytest.mark.booktest,如下图:

运行命令如下:
 pytest -v -m usertest
 pytest -v -m "not usertest"
测试报告
安装pytest-html
pip install pytest-html
生成报告
在运行的时候指定生成路径即可:
pytest --html=../report.html
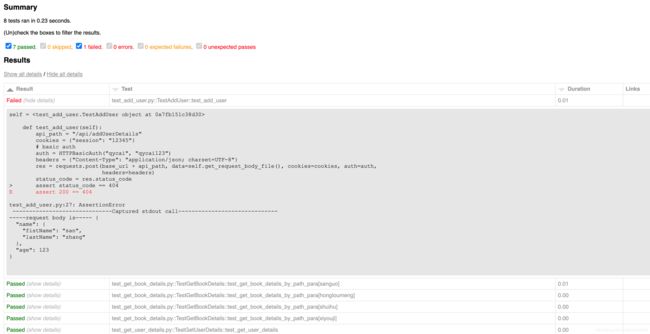
生成的报告可以展示运行环境信息以及测试用例失败的详细信息,如下图:

Demo源码:https://github.com/qycai/apiTestPython.git