Maven中Spring的spring-test的使用-自动注入JdbcTemplate完成数据查询
目录
一、文章前言
二、使用步骤
2.1 配置Maven依赖
2.2 配置实体类
2.3 配置Spring文件
2.4 配置测试类
2.5 注意事项
一、文章前言
1.很多使用我们不想使用ApplicationContext加载Spring的配置文件来完成测试,而是使用Junit测试工具,这样可以在一个类定义很多个测试方法,那么传统的Junit除非是通过创建Spring容器对象ApplicationContext获取JdbcTemplate完成操作,但是没有办法通过自动注入来完成创建JdbcTemplate的,所以需要使用到spring-text来完成自动注入
2.是本篇文章是在Idea中配置Maven的Spring环境,然后使用spring-test完成自动注入JdbcTemplate来进行数据的查询
3.采用的是Spring+oracle+dbcp2+spring-text+spring-jdbc架构模式,操作的数据表名是person
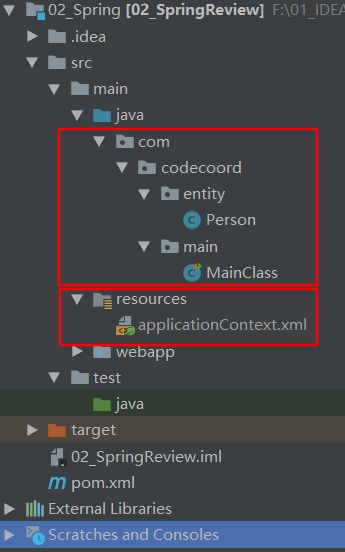
4.采用的目录结构如下
- 实体类:com.codecoord.entity.Person
- 测试类:com.codecoord.main.MainClass
- Spring配置文件:src/main/resources
二、使用步骤
2.1 配置Maven依赖
    4.0.0

    com.codecoord
    JavaEEFrameReview
    1.0-SNAPSHOT
    war

    JavaEEFrameReview Maven Webapp

    http://www.example.com


        UTF-8
        1.8
        1.8


            junit
            junit
            4.12


            org.springframework
            spring-webmvc
            5.0.9.RELEASE


            com.oracle
            ojdbc6
            11.2.0.3


            org.apache.commons
            commons-dbcp2
            2.5.0


            org.springframework
            spring-jdbc
            5.0.9.RELEASE


            org.springframework
            spring-test
            5.0.9.RELEASE
2.2 配置实体类
package com.codecoord.entity;

import java.io.Serializable;

// 实体类,对应数据表的person
public class Person implements Serializable {
    private int id;
    private String name;
    private int age;

    public Person() {
    }

    public Person(int id, String name, int age) {
        this.id = id;
        this.name = name;
        this.age = age;
    }

    public int getId() {
        return id;
    }

    public void setId(int id) {
        this.id = id;
    }

    public String getName() {
        return name;
    }

    public void setName(String name) {
        this.name = name;
    }

    public int getAge() {
        return age;
    }

    public void setAge(int age) {
        this.age = age;
    }

    @Override
    public String toString() {
        return "Person{" + "id=" + id + ", name=" + name + ", age=" + age + "}";
    }
}
2.3 配置Spring文件
- 开启组件扫描
- 配置数据库连接池
- 配置JdbcTemplate
2.4 配置测试类
- 核心就是在测试类中修改启动类和加载配置文件
- 修改启动类-使用注解@RunWith:@RunWith(SpringJUnit4ClassRunner.class)
- 加载配置文件-使用注解@ContextConfiguration: @ContextConfiguration(locations = {"classpath:applicationContext.xml"})
- 注意:如果不修改启动类将无法加载配置文件,也就无法自动注入
package com.codecoord.main;

import com.codecoord.entity.Person;
import org.junit.Test;
import org.junit.runner.RunWith;
import org.springframework.beans.factory.annotation.Autowired;
import org.springframework.jdbc.core.BeanPropertyRowMapper;
import org.springframework.jdbc.core.JdbcTemplate;
import org.springframework.jdbc.core.RowMapper;
import org.springframework.test.context.ContextConfiguration;
import org.springframework.test.context.junit4.SpringJUnit4ClassRunner;

import java.util.List;

// 修改启动类,使用Spring的测试启动类
@RunWith(SpringJUnit4ClassRunner.class)
// 加载配置文件,否则无法注入
@ContextConfiguration(locations = {"classpath:applicationContext.xml"})
public class MainClass {
    // 自动注入
    @Autowired
    private JdbcTemplate jdbcTemplate;

    @Test
    public void testConn() {
        String sql = "select * from person";
        // 自动映射同名参数
        RowMapper mapper = new BeanPropertyRowMapper<>(Person.class);
        // 获取结果
        List persons = jdbcTemplate.query(sql, mapper);
        System.out.println(persons);
    }
}
2.5 注意事项
1.注意JUnit依赖包不要配置
2.注意Junit一定是org.junit.Test,否则将出现Java.lang.Exception: No runnable methods