离线安装vs-code插件以及opencv环境配置
开始
1、进入vs-codo插件官网https://marketplace.visualstudio.com/
2、然后,选择相应的插件进行下载
3、powershell或者在bash里面调用指令:$ code --install-extension cpptools-win32.vsix
依赖包
1、公司内网安装后缺少相应的插件,然后下载相应的依赖包,如典型的cpp-tools,下载链接如下所示:
https://github.com/Microsoft/vscode-cpptools/releases,其他的博客我看都是要积分的。
环境配置
1、这里采用qt自带的mingw作为gcc、g++进行配置,具体环境变量自己查看,在qt安装路径下的tools/mingw730-32/64/bin文件夹下面,然后环境变量配置成这个
2、工程环境:Cmake、Vscode、opencv、mingw
编译过程链接如下:https://blog.csdn.net/zhaiax672/article/details/88971248
3、json配置:我发现跟链接一样反而不好用,这里是我配置好用的如下:
tasks.json
{
    "version": "2.0.0",
    "tasks": [
        {
            "type": "shell",
            "label": "opencv compile task",
            "command": "g++.exe",
            "args": [
                "-g",
                "${file}",
                "-o",
                "${workspaceFolder}\\${fileBasenameNoExtension}.exe",
                "-I",
                "D:\\Software\\Opencv349\\opencv\\build\\include",
                "-I",
                "D:\\Software\\Opencv349\\opencv\\build\\include\\opencv2",
                "-I",
                "D:\\Software\\Opencv349\\opencv\\build\\include\\opencv",
                "-L",
                "D:\\Software\\Opencv349\\opencv\\build\\x64\\mingw\\bin\\lib*"
            ],
            "options": {
                "cwd": "D:\\Software\\x86_64-8.1.0-release-posix-seh-rt_v6-rev0\\mingw64\\bin"
            },
            "problemMatcher": [
                "$gcc"
            ],
            "group": {
                "kind": "build",
                "isDefault": true
            }
        },
        {
            "type": "shell",
            "label": "C/C++: g++.exe build active file",
            "command": "D:\\Software\\x86_64-8.1.0-release-posix-seh-rt_v6-rev0\\mingw64\\bin\\g++.exe",
            "args": [
                "-g",
                "${file}",
                "-o",
                "${fileDirname}\\${fileBasenameNoExtension}.exe"
            ],
            "options": {
                "cwd": "${workspaceFolder}"
            },
            "problemMatcher": [
                "$gcc"
            ],
            "group": "build"
        }
    ]
}
c_cpp_properties.json
{
    "configurations": [
        {
            "name": "Win32",
            "includePath": [
                "${workspaceFolder}/**",
                "D:\\Software\\Opencv349\\opencv\\build\\include",
                "D:\\Software\\Opencv349\\opencv\\build\\include\\opencv",
                "D:\\Software\\Opencv349\\opencv\\build\\include\\opencv2"
            ],
            "defines": [
                "_DEBUG",
                "UNICODE",
                "_UNICODE"
            ],
            "compilerPath": "D:\\Software\\x86_64-8.1.0-release-posix-seh-rt_v6-rev0\\mingw64\\bin\\gcc.exe",
            "cStandard": "c11",
            "cppStandard": "c++17",
            "intelliSenseMode": "clang-x64"
        }
    ],
    "version": 4
}
lauch.json
{
    // 使用 IntelliSense 了解相关属性。
    // 悬停以查看现有属性的描述。
    // 欲了解更多信息,请访问: https://go.microsoft.com/fwlink/?linkid=830387
    "version": "0.2.0",
    "configurations": [
        {
            "name": "opencv debug",
            "type": "cppdbg",
            "request": "launch",
            "program": "${workspaceFolder}\\${fileBasenameNoExtension}.exe",
            "args": [],
            "stopAtEntry": true,
            "cwd": "${workspaceFolder}",
            "environment": [],
            "externalConsole": true,
            "MIMode": "gdb",
            "miDebuggerPath": "gdb.exe",
            "setupCommands": [
                {
                    "description": "为 gdb 启用整齐打印",
                    "text": "-enable-pretty-printing",
                    "ignoreFailures": false
                }
            ],
            "preLaunchTask": "opencv compile task"
        }
    ]
}
注意launch.json中的preLaunchTask和tasks.json里面要一致
测试
测试如下
#include 然后f5进行debug
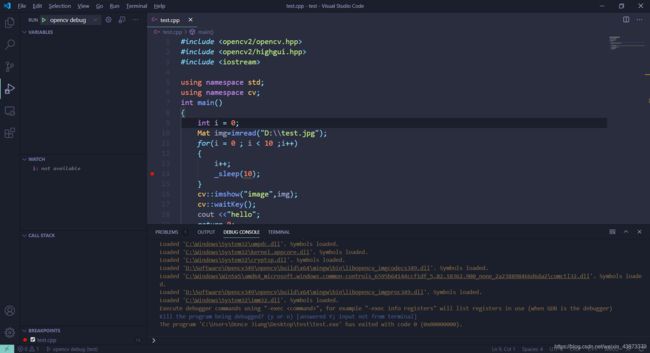
测试ok!